Bang & Olufsen BeoVision 12 (Floor Stand): Information
Information : Bang & Olufsen BeoVision 12 (Floor Stand)
Information
– for more information: www.bang-olufsen.com
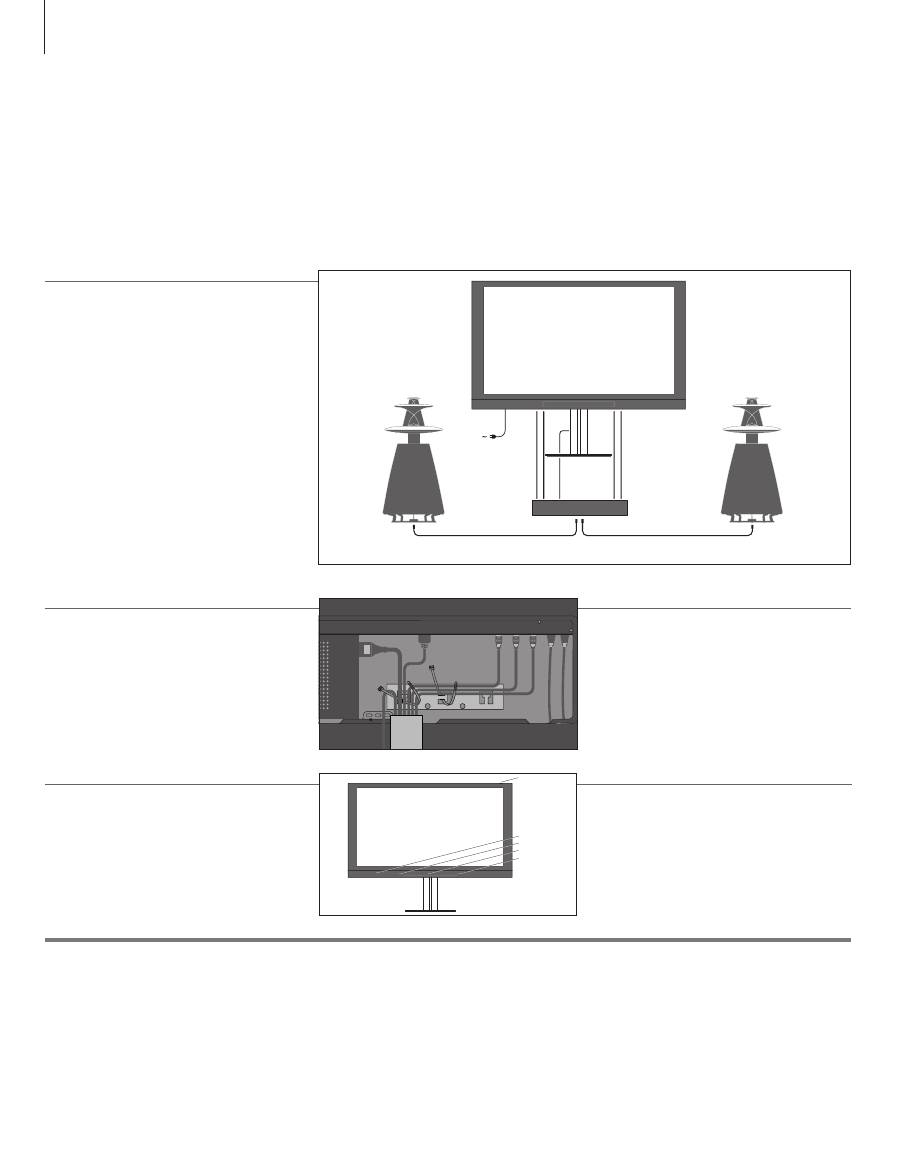
Sockets on the connection panel
Mains cord and plug
Turn the TV
The connection panel on the back of the TV contains the sockets for connection to the BeoSystem 4 and
connection to the mains supply.
The supplied plug and mains cord are specially designed for the product. Do not change the plug and if the
mains cord is damaged, you must buy a new one from your Bang & Olufsen retailer.
You can turn the motorised stand by means of the remote control. You can also tilt it by hand. For more
information, see the BeoSystem 4 guides, available on www.bang-olufsen.com/guides
Set up your television
This Guide contains information about the connection and setting-up of your TV with a Bang & Olufsen BeoSystem 4. For general information on daily operation, see the BeoSystem 4 guides, available on www.bang-olufsen.com/guides. We expect your retailer to deliver, install and set up your product.
Run cables
For safety reasons, secure the cables with cable
strips to the connection panel
(A)
.
Connections
Make the connections while both the TV and your
BeoSystem are disconnected from the mains.
Connect the TV using the appropriate type of
cables. When all connections are made, connect
your whole system to the mains supply. Your TV
has an integrated centre speaker. To enhance the
sound experience, you can connect additional
speakers.
Overview
1
Indicator light. When the TV is switched on or
off the indicator light lights up briefly. For more
information, see the BeoSystem 4 guides,
available on www.bang-olufsen.com/guides.
2
IR blasters sending 3D signals.
3
IR-receiver for receiving the remote control signals.
4
Sensor arm for Automatic Colour Management.
Also fasten the cables with cable strips to the
Floor stand. Make sure that there is enough slack
in the cables to allow the TV to turn to either side
before you fasten the cables with cable ties to
make a neat bundle.
1
2
2
3
4
POWER LINK
POWER LINK
HDMI IN
POWER LINK
IR OUT
HDMI OU
T
PL6
STAND
IR / AUTO
CONTRAST
CONTRO
L
MONITOR
CONTRO
L
BEOSYSTEM
BEOSYSTEM 4
A
8
Оглавление
- Cautions
- Information
- Maintenance
- Information
- Vedligeholdelse
- Information
- Underhåll
- Tietoja
- Huoltaminen
- Wichtiger Hinweis
- Pflege
- Informatie
- Onderhoud
- Information
- Entretien
- Información
- Mantenimiento
- Informazioni
- Manutenzione
- Informação
- Manutenção
- Πληροφορίες
- Συντήρηση
- Информация
- Обслуживание
- 중요
- 유지 관리
- 情報
- メンテナンス
- 資訊-
- 維修
- 信息
- 维护
- Important information
