Yamaha CDX-397: Adjusting the output level (CDX-497 only) Changing brightness of the display Automatic spacing
Adjusting the output level (CDX-497 only) Changing brightness of the display Automatic spacing: Yamaha CDX-397
Table of contents
- CAUTION: Read this before operating your unit.
- CONTENTS
- SUPPORTED DISC TYPES FEATURES
- UNPACKING NOTES ABOUT THE REMOTE CONTROL
- CONNECTIONS
- IDENTIFICATION OF COMPONENTS Front panel Display
- Remote control
- BASIC OPERATION
- To pause playback To turn off the power To play back the desired track To stop playback To search an folder/file on an MP3 or WMA disc (CDX-497 only)
- To advance or reverse playback rapidly (Manual search) To skip to the beginning of the desired track (Skip search)
- Changing display
- Adjusting the output level (CDX-497 only) Changing brightness of the display Automatic spacing
- RANDOM-SEQUENCE PLAY REPEAT PLAY Repeat a selected item
- Repeat A-B
- PROGRAM PLAY
- INDEX SEARCH
- TRACK PROGRAMMING FOR RECORDING TO TAPE Automatic tape-programming (for Audio CD)
- Notes
- Manual tape-programming (for Audio CD)
- Random sequential tape-programming (for Audio CD)
- Automatic searching for the peak level on a disc (for Audio CD)
- CD SYNCHRONIZED RECORDING
- Notes about handling compact discs Discs playable with this unit NOTES ABOUT DISCS
- SYMPTOM
- SPECIFICATIONS
English
11
En
Normal illumination
Slightly dim
Dim
Notes
●
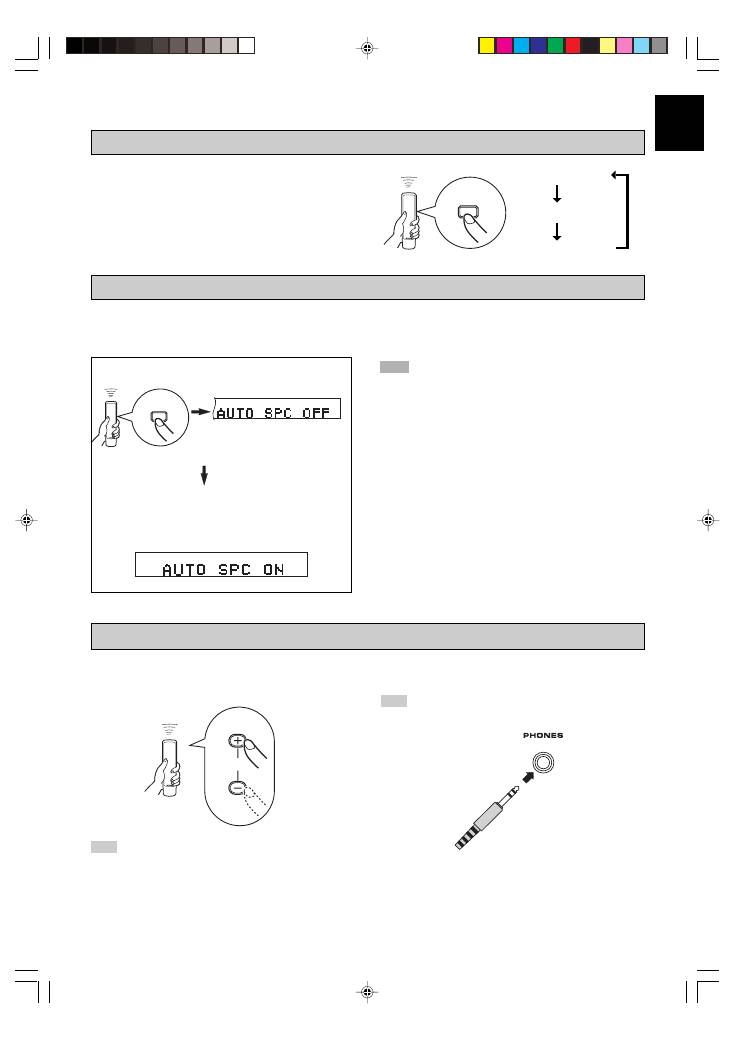
When the automatic spacing function is in effect, the display of
the total time and of the total remaining time includes each
interval of the 4 seconds between tracks.
●
When the automatic spacing function is in effect during the
playback, “AUTO SPC 4” (the remaining seconds of the
interval) appears and is counted down each time blinking at the
interval between the tracks.
When you listen with headphones, connect the headphones
to the
PHONES
jack.
You can change brightness of the display
in three degrees by pressing
DIMMER
.
Adjusting the output level (CDX-497 only)
You can adjust the level of signals output to the amplifier by
pressing
OUTPUT LEVEL +/–
.
If you record a disc onto tape with an insufficient time space between tracks, the tape deck will not be able to perform blank
search operations on the tape correctly. To enable a track search operation, use this function to add an interval of about 4
seconds between tracks.
Changing brightness of the display
DIMMER
SPACE
OUTPUT
LEVEL
Automatic spacing
Press
SPACE
to light up the current setting.
Light up about 3 seconds.
While the current setting is lit up, press
SPACE
to
change the setting between “AUTO SPACE ON” and
“AUTO SPACE OFF”.
Note
While playing back an MP3/WMA disc, the level of the audio
signal sent to the DIGITAL OUT (OPTICAL or COAXIAL)
terminal is fixed at maximum regardless of the displayed volume
level.
Note
When starting playback, be careful of the audio output level.
01_En_02_BOD_CDX-397_497_G.pm
11/1/06, 19:43
11
