Toshiba JournE Air1000: Step 6: Operate the unit
Step 6: Operate the unit: Toshiba JournE Air1000
Table of contents
- Table of Contents
- Regulatory information . . . . . . . . . . . . . . . . . . . . . . . . . . . . . 20
- Introduction Safety instructions
- Step 1: Check the package contents
- Step 2: Identify the parts Rear view Left view
- Remote control
- Step 3: Use the foot stand
- Step 4: Connect the AC power Step 5: Insert or remove a memory card
- Step 6: Operate the unit
- Step 7: Use the OSD menus Controls on the Photo menu
- Zooming the photo Controls on the Calendar menu
- Controls on the Music menu Controls on the Video menu
- Controls on the WiFi menu Using WiFi-enabled services
- To use the on-screen keypad: RSS
- Flickr / Picasa
- Radio
- Frequently asked questions
- TOSHIBA support Regulatory information
- Indication of restrictions of use Working environment
- Following information is only valid for EU-member states:
Air1000-QSG-EEMEA-V1-1208.book Page 11 Tuesday, November 18, 2008 11:54 PM
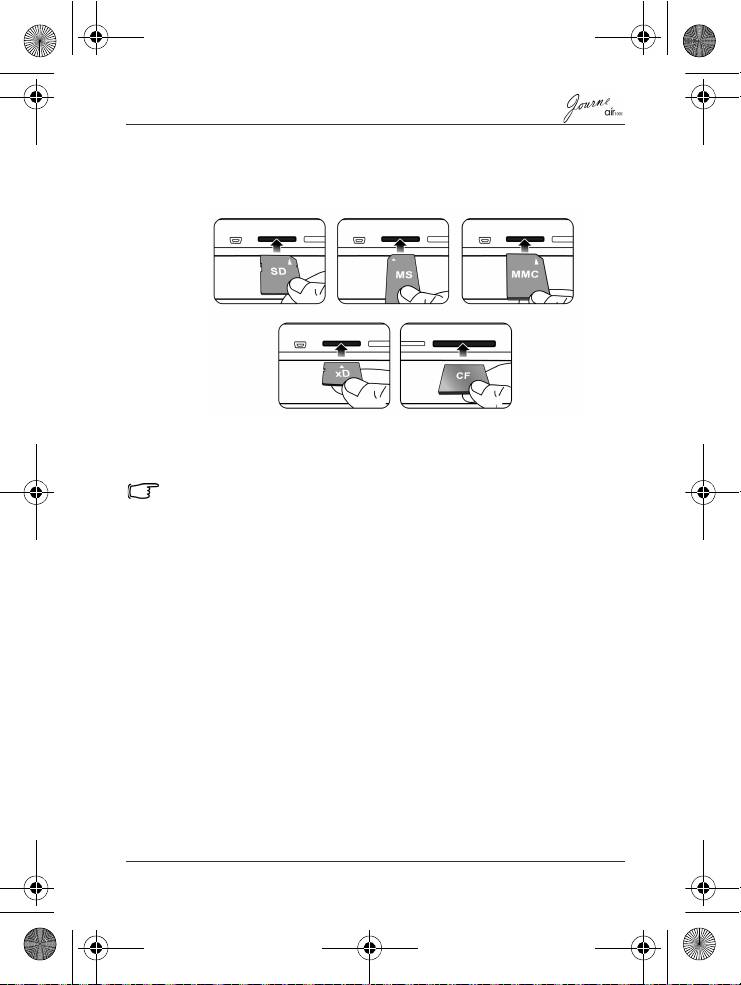
To insert the memory card:
Insert the memory card into the card slot following the direction
indicated on the card.
To remove the memory card:
Press on the memory card to release the card.
This unit can support a microSD or microSDHC card with capacity up
to 8GB.
Step 6: Operate the unit
To turn on the power, slide the power switch to the ON position.
After the unit is turned on, available functions (represented by
icons) show on the screen.
n Simply tap the corresponding icon below (if the unit is placed
horizontally) or beside (If the unit is placed vertically)
indicating the function you want to use.
Or
n Press the corresponding button on the remote control. If the
control panel is unused for a certain period of time, the LED
turns off automatically. To turn on the backlight again, tap
anywhere on the control panel.
To turn off the unit:
When the power is on, slide the power switch to the OFF position
to turn it off.
Quick Start Guide
EN-11
