Toshiba JournE Air1000: Step 1: Check the package contents
Step 1: Check the package contents: Toshiba JournE Air1000
Table of contents
- Table of Contents
- Regulatory information . . . . . . . . . . . . . . . . . . . . . . . . . . . . . 20
- Introduction Safety instructions
- Step 1: Check the package contents
- Step 2: Identify the parts Rear view Left view
- Remote control
- Step 3: Use the foot stand
- Step 4: Connect the AC power Step 5: Insert or remove a memory card
- Step 6: Operate the unit
- Step 7: Use the OSD menus Controls on the Photo menu
- Zooming the photo Controls on the Calendar menu
- Controls on the Music menu Controls on the Video menu
- Controls on the WiFi menu Using WiFi-enabled services
- To use the on-screen keypad: RSS
- Flickr / Picasa
- Radio
- Frequently asked questions
- TOSHIBA support Regulatory information
- Indication of restrictions of use Working environment
- Following information is only valid for EU-member states:
Air1000-QSG-EEMEA-V1-1208.book Page 6 Tuesday, November 18, 2008 11:54 PM
Follow the instructions below to set up and operate
this unit (digital photo frame).
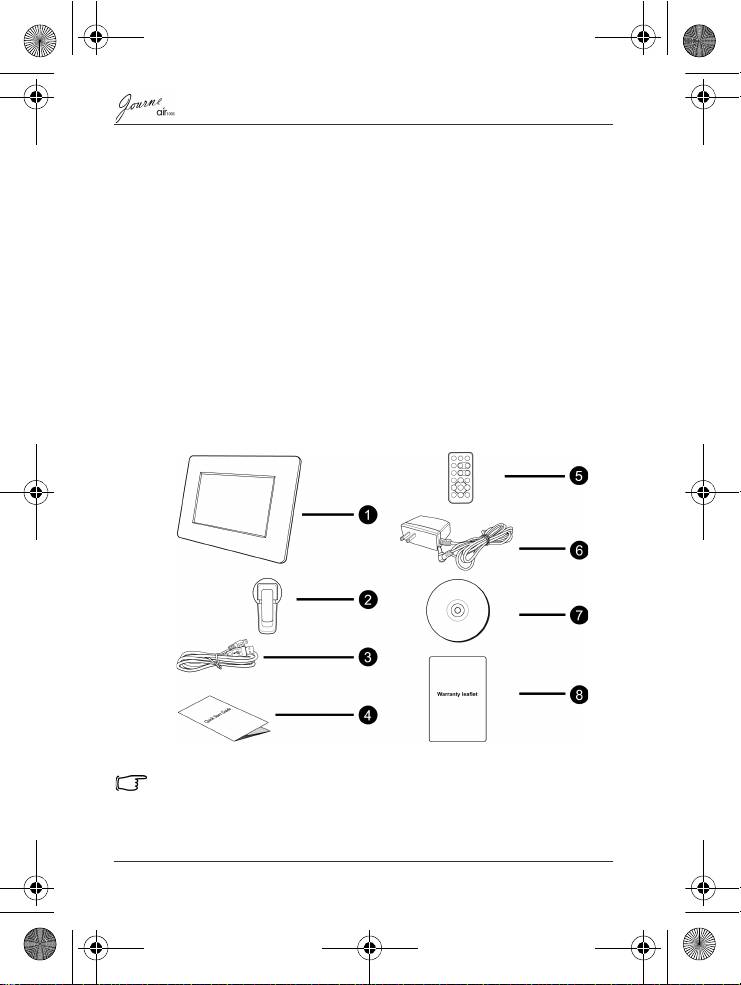
Step 1: Check the package contents
Carefully open the packing box and ensure that you have the
following items.
1. Journ
e
air1000 x 1
2. Foot stand x 1
3. USB cable x 1
4. Quick Start Guide x 1
5. Remote control (with the included battery) x 1
6. AC power adapter x 1
7. CD x 1 (including a video converter software)
8. Warranty leaflet x 1
Available accessories may vary depending on the area where you
purchased this unit.
EN-6
Quick Start Guide
Top 10 manuals
100.00
NZXT HALE90 1000W99.99
Samsung SM-R38099.97
AEG BSB 18C99.97
Dell 2700W99.97
Smeg KSEC70X99.96
Beurer HDE 4099.96
Pyramida KH 50 v.299.96
MSI CSM-H81M-P3299.96
AEG HR 562799.95
Melissa 640-048