Xiaomi Mi Robot Vacuum-Mop 2 Pro+: Care & Maintenance
Care & Maintenance: Xiaomi Mi Robot Vacuum-Mop 2 Pro+
Care & Maintenance
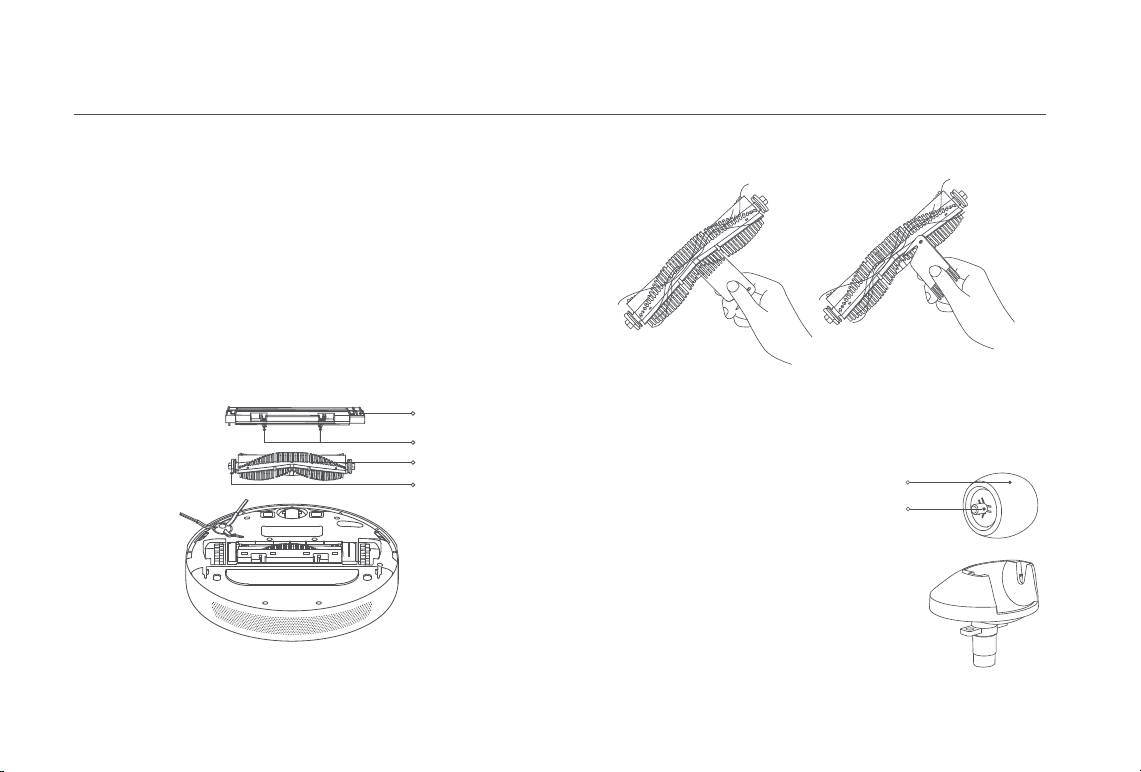
Brush Using the Brush Cleaning Tool
* Weekly cleaning is recommended.
1. Flip the vacuum-mop over and pinch the clips to remove the brush
cover.
2. Lift the brush out of the vacuum-mop, then clean the brush bearings.
3. Use the included brush cleaning tool to remove any hairs tangled on
the brush.
4. Reinsert the brush, then put the cover back on and press on it until the
clips lock into place.
Note: It is recommended to clean the brush weekly and replaced every 6 to 12 months.
Note: If too much hair is tangled in the brush, or if the hair is tightly tangled, do not
forcibly pull on it, as this could damage the brush.
Brush Cover
Omnidirectional Wheel
* Clean it as needed.
Clips
Brush
1. Flip the vacuum-mop over
Brush Bearings
and pull out the omnidirectional
Wheel
wheel.
Axle
2. Remove hair, dirt, and other
debris from the wheel and axle.
3. Reinsert the wheel and press it
firmly back into place.
Notes:
Holder
· A small screwdriver or other pry tool
can be used to gently pop out and
remove the wheel.
· The wheel can be cleaned with water
and reinstalled after drying.
15

Care & Maintenance
Side Brush Vacuum-Mop Sensors
* Monthly cleaning is recommended.
1. Flip the vacuum-mop over, then gently pull out the side brush as shown
Use a soft cloth to clean all sensors in the vacuum-mop, including:
in the diagram below to clean it.
1. The four cliff sensors on the bottom.
2. Reinstall the side brush.
2. The charging contacts on the bottom.
3. Optical sensor on the bottom of the vacuum-mop.
Note: It is recommended to clean the side brush monthly and replace every 3 to 6
months.
4. Infrared deceleration sensor and obstacle sensor on the front of the
vacuum-mop.
Cliff Sensor
Charging Contacts
Optical Sensor
Infrared Deceleration Sensor
Obstacle Sensor
16
Care & Maintenance
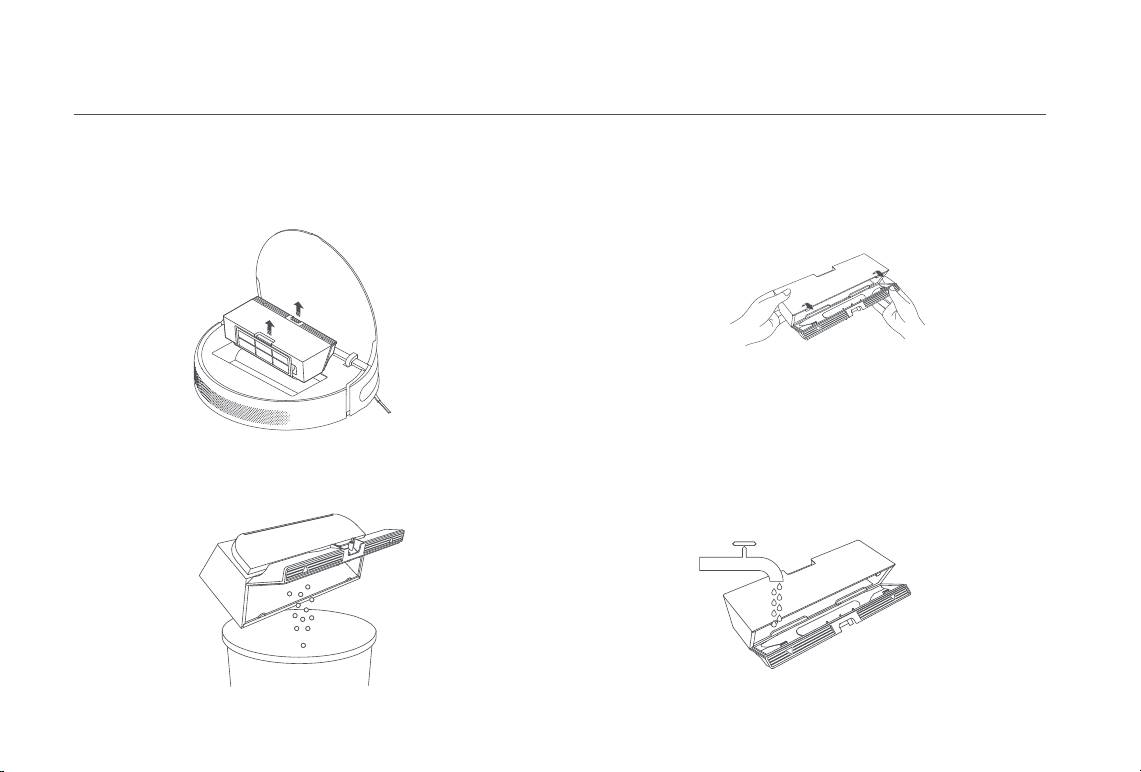
Dust Compartment and Filter Cleaning the Washable Filter
Note: Weekly cleaning is recommended. Note: Biweekly cleaning is recommended.
1. Open the vacuum-mop cover, then pinch the dust compartment clip to
1. Open the dust compartment cover at the positions marked with
remove the dust compartment.
arrows.
2. Add clean water to the dust compartment, and close the dust
2. Open the dust compartment cover as indicated by the diagram.
compartment cover, then shake the compartment back and forth, finally
Note: To prevent the filter from becoming clogged, lightly tap the dust compartment
pour out the water.
when emptying its contents.
Note: Only clean water should be used to clean the filter. Do not use detergent.
17
Care & Maintenance
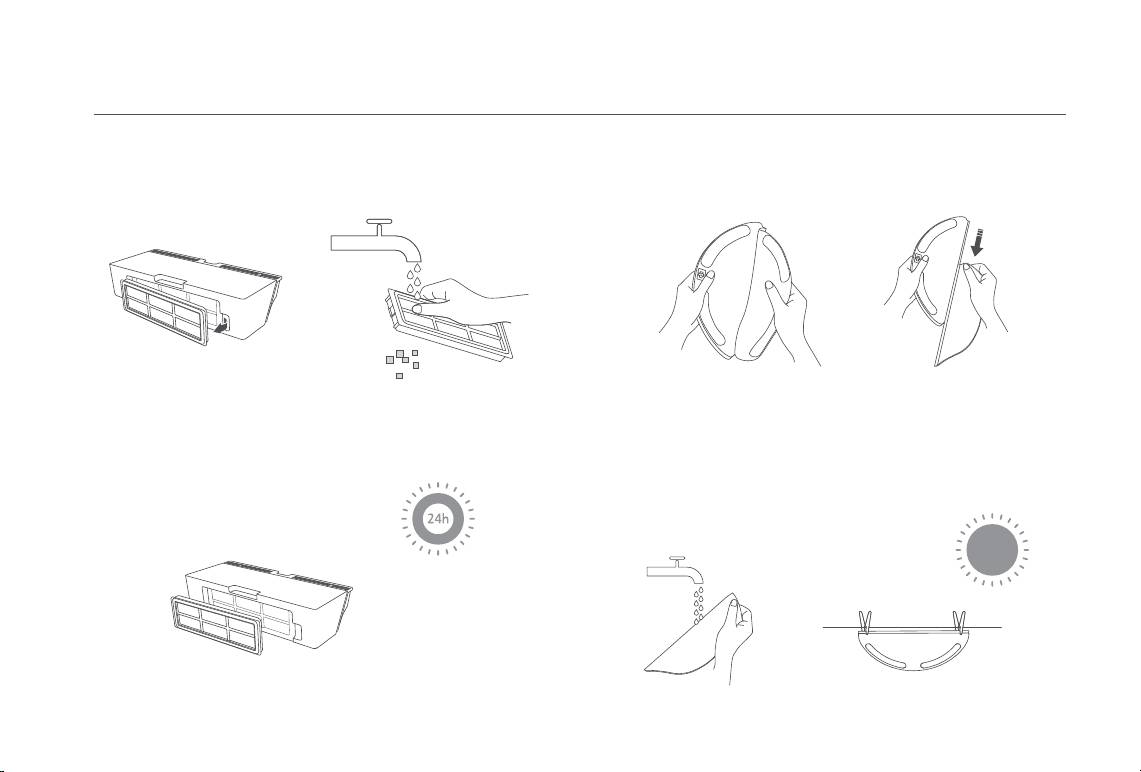
3. Remove the filter, as illustrated, then rinse it out and lightly tap on the
Mop Pad
* After-each-use cleaning is recommended.
edge of the filter to remove dust and debris.
Note: Do not attempt to clean the filter with a brush or finger.
1. Pull the mop pad off of the mopping assembly to remove it.
4. Place the dust compartment and filter aside to dry before reinstallation.
2. Clean and dry the mop pad.
Note: Filter must be fully dry before use (allow at least 24 hours).
Remove the pad from the mopping assembly before cleaning it, and
make sure dirty water does not flow back into the water outlet to avoid
clogging. Do not press too hard on the mop pad, as this can hinder its
performance. The mop pad should be cleaned before each use.
Note: It is recommended to change the mop pad every 3 to 6 months.
18
Care & Maintenance
Battery Restart the Vacuum-mop
The vacuum-mop contains a high-performance lithium-ion battery pack.
If the vacuum-mop stops responding or cannot be turned off, press and
Please ensure that it remains well-charged during daily use to maintain
hold down the button for 6 seconds to forcefully turn it off. Then press
optimal battery performance.
and hold the button for 3 seconds to turn the vacuum-mop on.
Note: If the vacuum-mop is not used for an extended period, turn it off and put it away.
To prevent damage from over-discharging, the vacuum-mop should be recharged at
least once every three months.
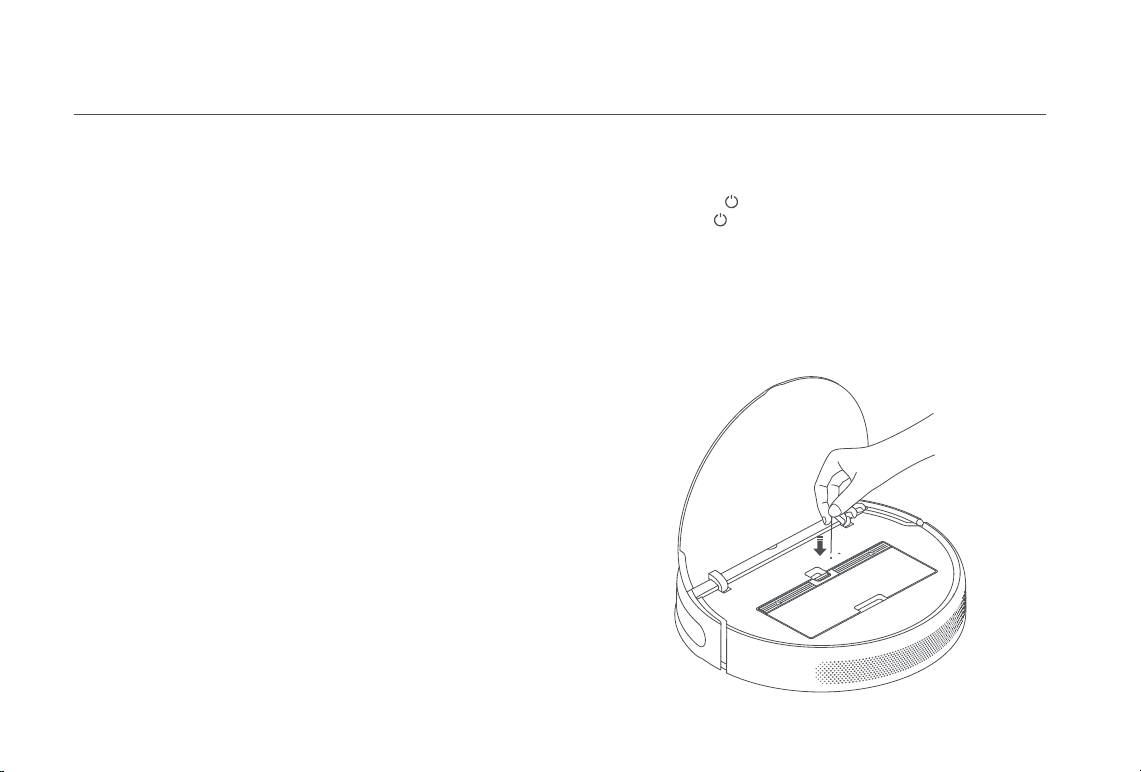
Restoring Factory Settings
If the vacuum-mop does not function properly after being restarted, use a
Charging Dock
pin to press the reset button until you hear a voice say "Restoring factory
settings". This will reset the vacuum-mop to its original factory settings.
Clean the contacts of the charging dock with a soft cloth.
Updating the Firmware
You can update the firmware via the app. Before updating, make sure the
vacuum-mop is on the charging dock and has at least 15% battery left.
19
Оглавление
- Welcome
- Safety Information
- Product Overview
- Before Use
- How to Use
- Care & Maintenance
- Troubleshooting
- FAQ
- Specifications
- Bienvenido/a
- Información de seguridad
- Descripción General del Producto
- Antes de usar
- Modo de uso
- Mantenimiento rutinario
- Resolución de problemas
- FAQ
- Especificaciones
- Bienvenue
- Informations sur la sécurité
- Présentation du produit
- Avant utilisation
- Mode d’utilisation
- Routine de maintenance
- Dépannage
- FAQ
- Spécifications
- Benvenuto
- Informazioni di sicurezza
- Panoramica prodotto
- Prima dell'uso
- Modalità d'utilizzo
- Manutenzione di routine
- Risoluzione del problemi
- FAQ
- Specifiche tecniche
- Добро пожаловать!
- Информация по технике безопасности
- Ограничения на эксплуатацию
- Обзор устройства
- Обзор устройства
- Перед использованием
- Инструкция
- Уход в эксплуатации
- Устранение неполадок
- FAQ
- Технические характеристики
- Witamy
- Informacje dotyczące bezpieczeństwa
- Przegląd produktu
- Przed użyciem
- Użytkowanie
- Rutynowa konserwacja
- Rozwiązywanie problemów
- Pytania i odpowiedzi
- Dane techniczne
- Willkommen
- Sicherheitsinformationen
- Sicherheitsinformationen
- Produktübersicht
- Vor der Verwendung
- Verwendung
- Regelmäßige Wartung
- Fehlerbehebung
- FAQ
- Spezifikationen
- Hoş geldiniz
- Güvenlik Bilgileri
- Ürüne Genel Bakış
- Kullanmadan Önce
- Kullanım
- Rutin Bakım
- Sorun Giderme
- SSS
- Belirtimler
-
-
-
-
-
-
-
-
-
-
-
