Eneo NXC-1404F03W: DE EN
DE EN: Eneo NXC-1404F03W
• Connecting to the RJ-45: Connect a standard RJ-45 cable to the net-
work port of the network camera. Generally a cross-over cable is used for
directly connection to PC, while a direct cable is used for connection to a
hub.
• Micro SD memory slot: Insert the SD memory card.
• Connecting the power supply: connect the supplied DC 5V power adap-
tor
DE
EN
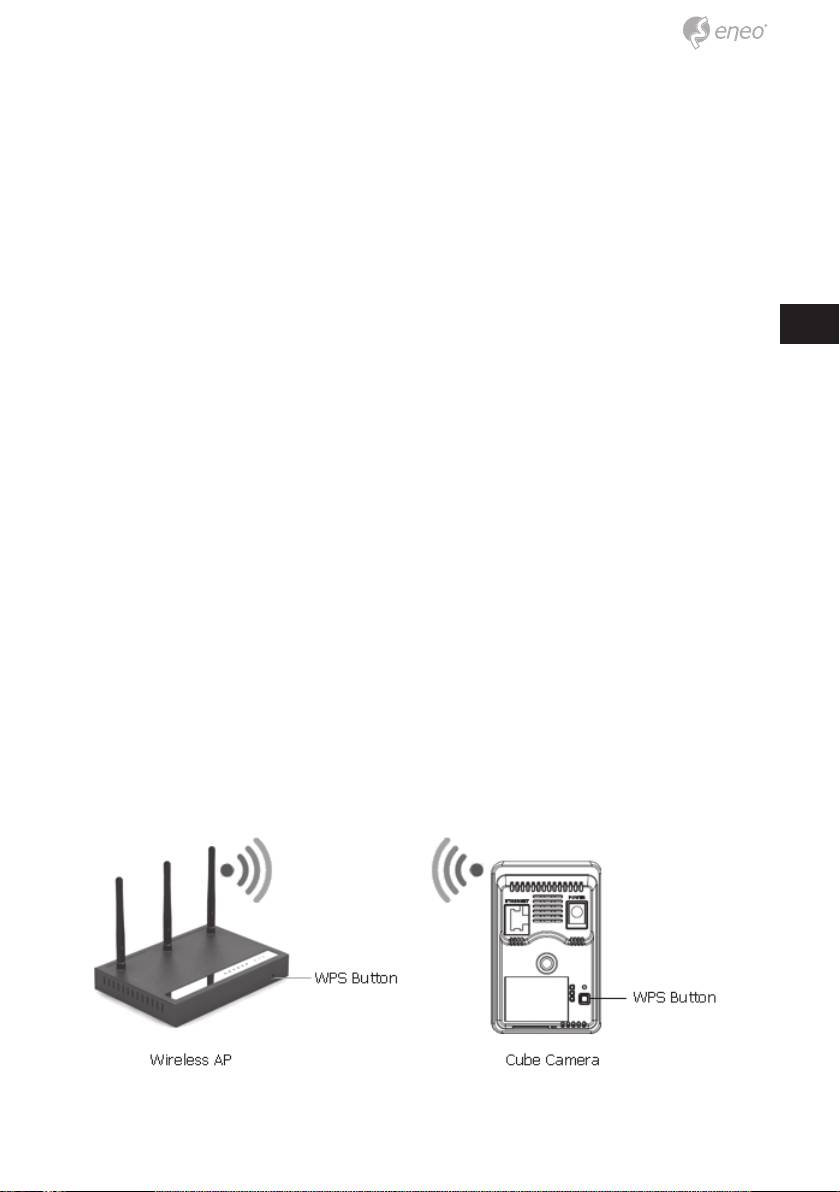
• Connecting the Wireless using WPS button (NXC-1404F03W)
The NXC-1404F03W supports the wireless function.
FR
Follow steps for a proper operation.
PL
1. Make sure your AP (Access Point) and Operating System support WPS
RU
(Wi-Fi Protected Setup) functions. WPS enables easy setup with compatible
APs.
2. Press the WPS button on the camera for more 2 seconds. You can then
see the Status LED is blinking.
3. Press and hold down the WPS button on your AP (some router/AP will
have a virtual button on their management software instead). Refer to your
AP‘s documentation for details using its WPS functions
When WPS configuration is done, wireless connectivity will be established
and the security encryption, such as WEP or WPA-PSK, will be synchro-
nized with the AP.
As for IP setting, the camera‘s use of DHCP or static IP is determined by
your configuration on the network camera via the web- based configuration
of firmware. The camera‘s default is DHCP for the NXC-1403F03 and NXC-
1404F03W.
19
Notes:
1. WPS may not work if your AP is configured with a „hidden“
SSID.
2. If any WPS-enabled AP is not detected, the camera will search APs for
60 seconds after pressing the WPS button, and if the camera still can not
detect an AP after 1 minute, the wireless setup will be cancelled.
3. If a camera is assigned with a fixed IP outside the AP‘s network seg-
ment, wireless setup will fail.
Network setup
The Network Camera supports the operation through the network. When
a camera is first connected to the network it has no IP address. So, it is
necessary to allocate an IP address to the device with the “Smart Manager”
utility on the CD. (Default IP 192.168.1.10)
1. Connect the Network Camera / device to the network and power up.
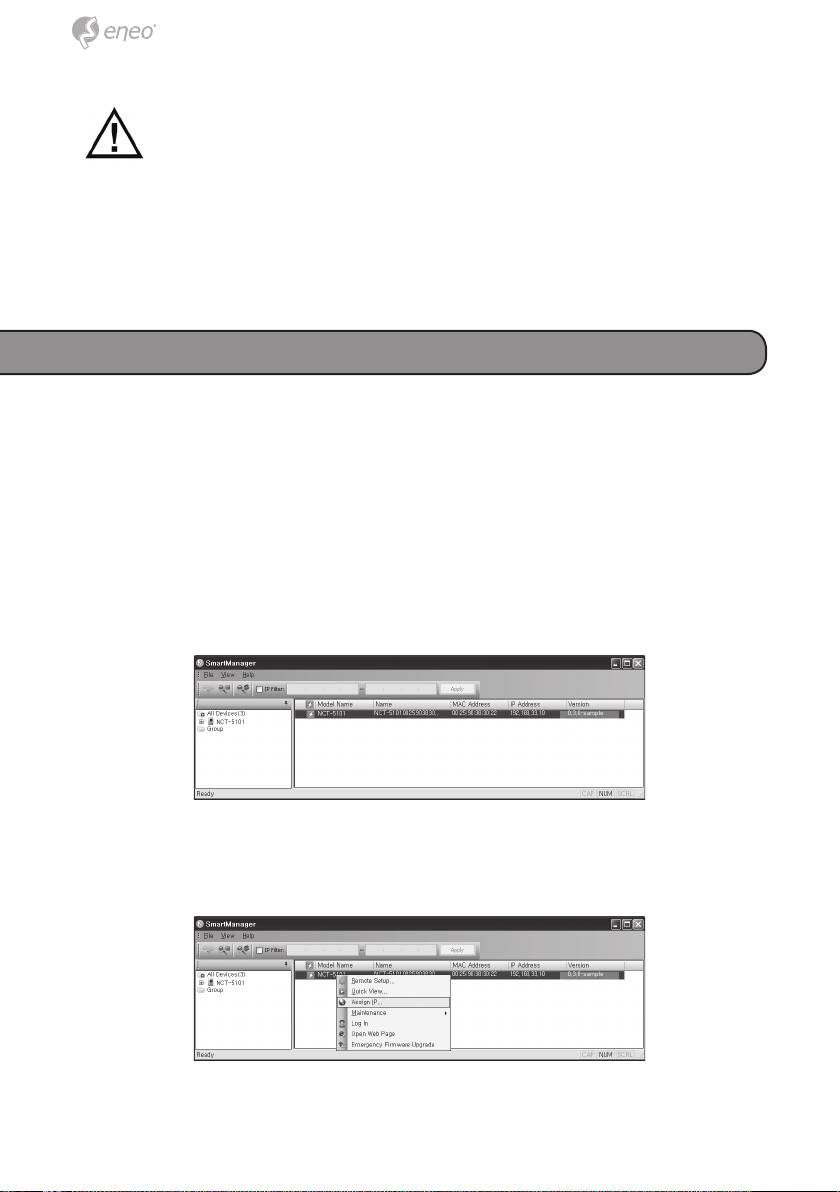
2. Start SmartManager utility (Start>All programs>SmartManager>SmartMa
nager), the main window will be displayed, after a short while any network
devices connected to the network will be displayed in the list.
3. Select the camera on the list and click right button of the mouse. You
can see the pop-up menu below.
20
Оглавление
- DE EN FR PL RU
- DE DE EN EN
- DE DE
- DE DE EN EN
- DE DE EN EN FR FR PL PL
- DE DE EN EN
- DE DE
- DE
- DE EN FR PL
- DE EN
- DE EN FR PL RU
- DE
- DE DE EN EN
- DE DE EN EN FR FR PL PL
- DE DE
- DE DE EN EN
- DE DE EN EN FR FR PL PL RU RU
- DE DE
- DE DE EN EN
- DE DE
- DE DE EN EN
- DE DE EN EN FR FR PL PL
- DE DE
- DE DE EN EN FR FR
- DE DE EN EN
- DE DE EN EN FR FR PL PL
- DE DE EN EN FR FR PL PL RU RU
- DE DE EN EN
- DE DE EN EN FR FR PL PL RU RU
- DE DE EN EN
- DE DE
- DE DE EN EN FR FR PL PL RU RU
