Eneo GXC-1710M: DE
DE: Eneo GXC-1710M

5. Scan IP Camera through “My Network Place”
Step 1: After your installation and starting services, the UPnP protocol will
take effect. You can scan all IP Cameras in My Network Place.
Step 2: Just double click the IP Camera icon, and the video live stream
will pop up automatically without assigning any IP address in Mi-
crosoft Internet Explorer.
DE
6. Change the IP Camera‘s control and operational settings
EN
Step 1: Type in the IP address in the IE Browser. You will now see the IP
FR
camera‘ images.
Step 2: Use the buttons below the images to enter any other operational
PL
settings pages.
Step 3: When you change any setting, please don‘t forget to click the
RU
„Submit” button in each page.
NOTE: Enable DHCP Function: This function can only work if the LAN,
which the unit is connected to, has a DHCP server. If the DHCP
server is working, the IP Camera will obtain an IP address auto-
matically from the DHCP server.
NOTE: When only one unit of the IP Camera is connected to a com-
puter or LAN, you can freely assign an IP address for the IP
Camera. For example, there is a range of IP Camera IP addres-
ses from 192.168.1.1 to 192.168.1.255. You can pick one for use
from the range of the IP. It’s not necessary to set MASK and
GATEWAY; leave the settings as default. When an IP Camera
is connected to a WAN, you must acquire a unique, permanent
IP address and correctly configure the MASK and GATEWAY
settings according to your network architecture. If you have any
questions regarding those settings, please consult a qualified
MIS professional or your ISP.
17
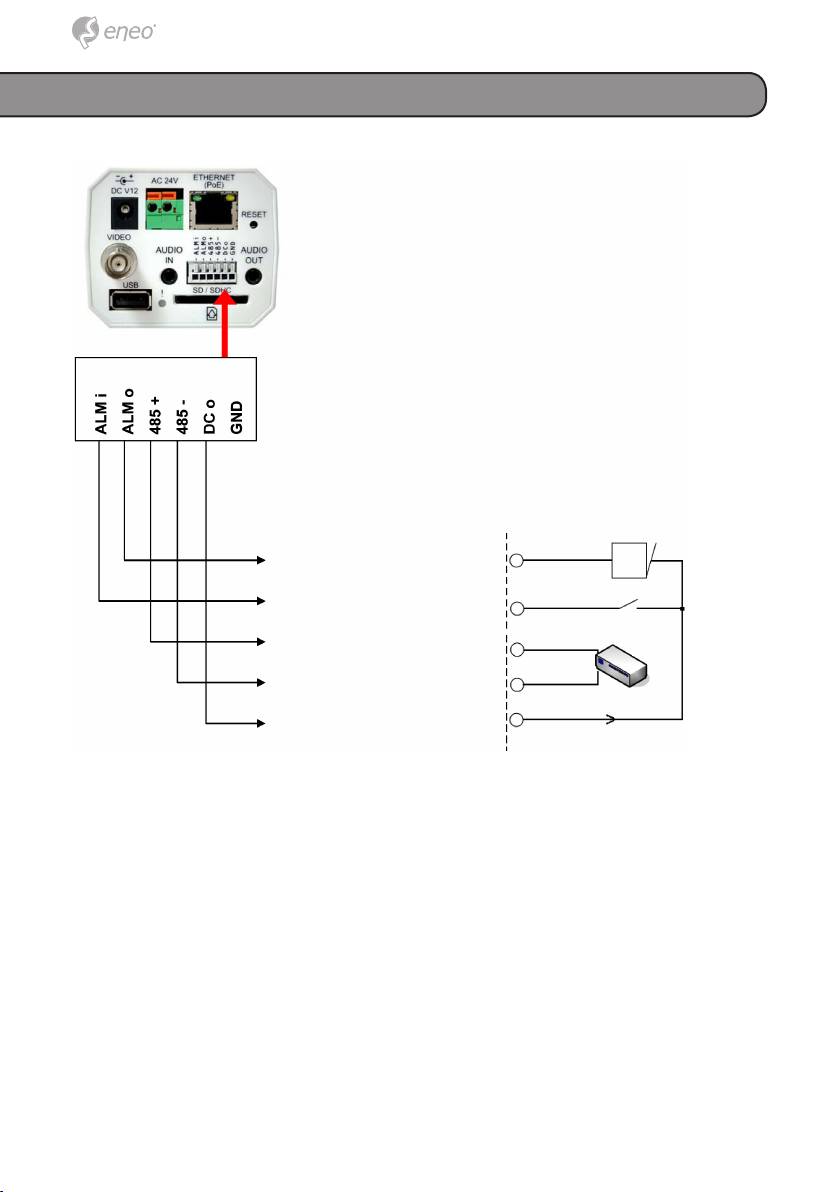
Alarm Wiring Diagram
+12V
Alarm output
ALARM
Alarm input
Reed switch
RS-485 D+
RS-485 D-
RS-485 device
+12V
DC out (GND)
+12V, 100mA
18
