Toshiba JournE F800-F801: Step 2: Install the adjustable foot stand.
Step 2: Install the adjustable foot stand.: Toshiba JournE F800-F801
Table of contents
- Safety Instructions
- Follow the instructions below to install and operate the unit. Step 1: Check the components
- Controls on the front Controls on the back
- Step 2: Install the adjustable foot stand.
- Step 3: Connect the AC power.
- Step 4: (Optional) Insert a memory card.
- Step 5: Turn on the unit. Step 6: Operate the unit.
- Using the Photo mode Using the Calendar mode
- Using the Music mode Using the Video mode
- Additional features (available on PA3702*-1ET2 only) Built-in battery
- Built-in tilt sensor Built-in light sensor
- Frequently asked questions
- TOSHIBA support Regulatory Information
- Working Environment Additional environments not related to EMC
- Following information is only valid for EU-member states Disposal of products Disposal of batteries and/or accumulators
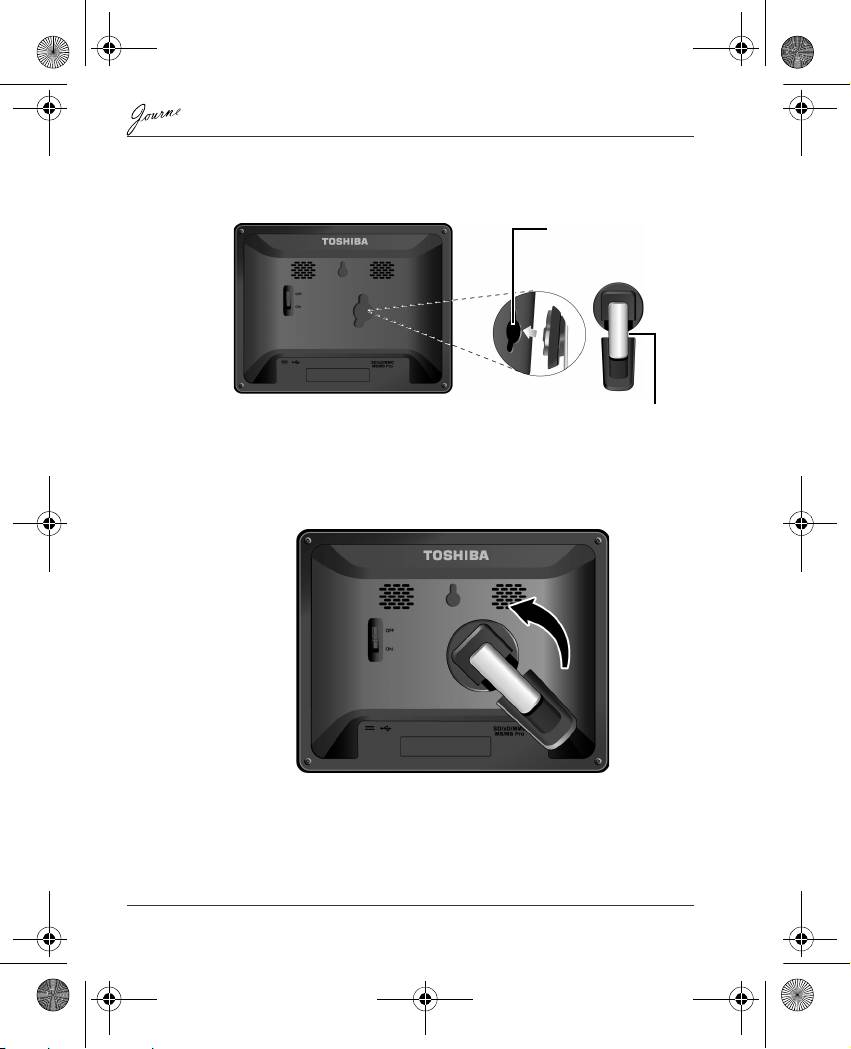
Step 2: Install the adjustable foot stand.
1. On the back of the unit, attach the foot stand to the lock slot.
2. To place the photo frame vertically, rotate the foot stand counter-
clockwise until it is secured to the photo frame.
EN-6 User’s Manual
Lock slot
Adjustable foot stand
GMH300056020.book Page 6 Tuesday, September 2, 2008 10:46 PM
Top 10 manuals
100.00
NZXT HALE90 1000W99.99
Samsung SM-R38099.97
AEG BSB 18C99.97
Dell 2700W99.97
Smeg KSEC70X99.96
Beurer HDE 4099.96
Pyramida KH 50 v.299.96
MSI CSM-H81M-P3299.96
AEG HR 562799.95
Melissa 640-048