Xoro HRT 7520 – страница 4
Инструкция к Ресиверу/Усилителю Xoro HRT 7520
Multimedia Player
Photos
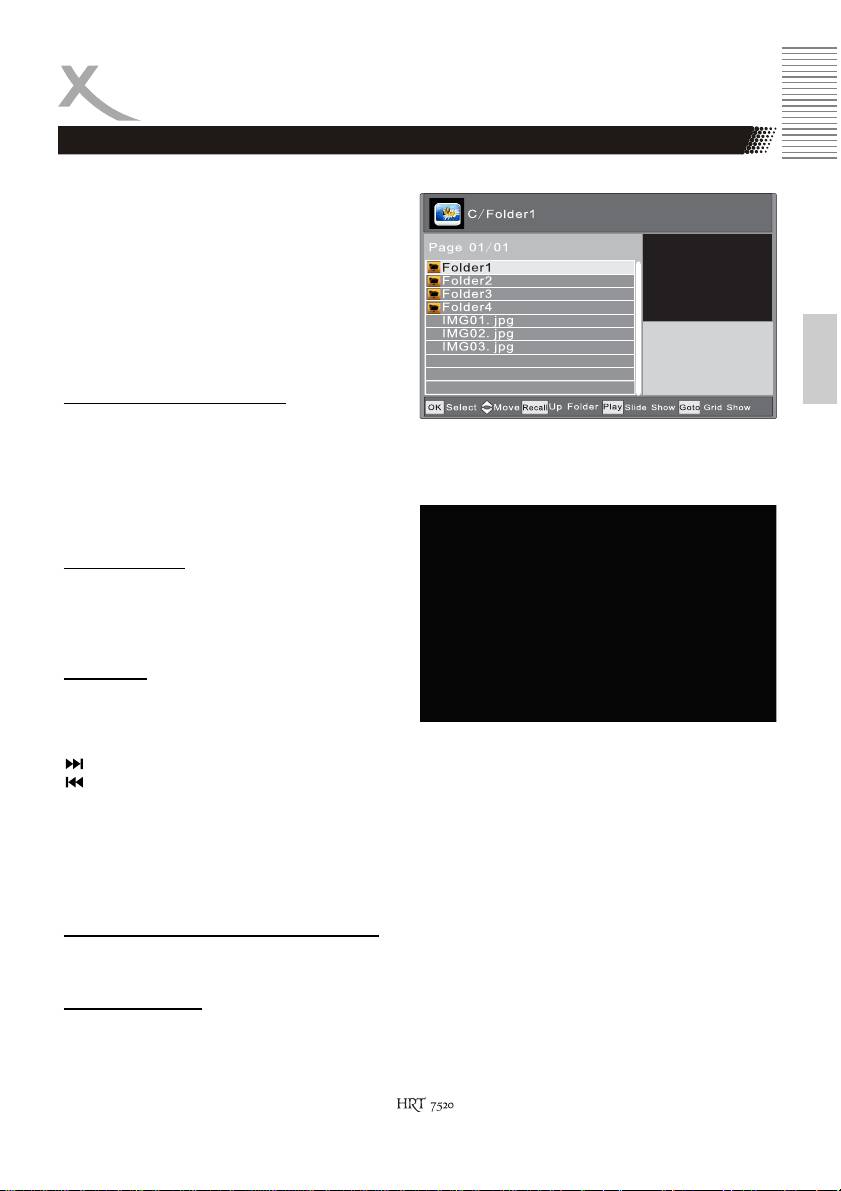
For viewing photos with the HRT 7520 connect the USB media and enter the menu item Photo.
After initialising the USB media the directory
structure is shown. Choose the directory with Ÿ/
ź and enter with OK.
If there are pictures in this directory they are
listed in the file browser and a preview is shown
on the right.
It is possible to play music while browsing in the
English
pictures. Choose a music file before you go to
the picture browser.
Navitaging in the file browser
OK Show picture in fullscreen
Play (>) Start slide show (all pictures in the directory)
GOTO Show pictures in small previews
Ÿ/ź Next/Previous picture
RECALL Previous directory
EXIT Exit to multimedia menu
Thumbnail View
Ÿ/ź Next/Previous picture
Ż/Ź Next/Previous picture
OK Show picture in fullscreen
Slide show
Start the slide show with PLAY or OK. The slide
show will proceed according to the settings in the
USB menu.
Next picture
Previous picture
RED Zomm picture (Normal -> x2 -> x4 -> x8 -> Normal -> x1/4 -> x1/2)
GREEN Rotate picture 90° in counterclockwise direction
YELLOW Rotate picture 90° in clockwise direction
INFO Show information of the picture like file name, resolution and file size
RECALL Exit to file browser
EXIT Exit to file browser
Playback Music during Picture Slideshow
It is possible to play music while browsing in the pictures. Choose a music file before you go to the
picture browser.
Supportet formats
The supported picture formats are JPEG, BMP and PNG.
12
Multimedia Player
Music
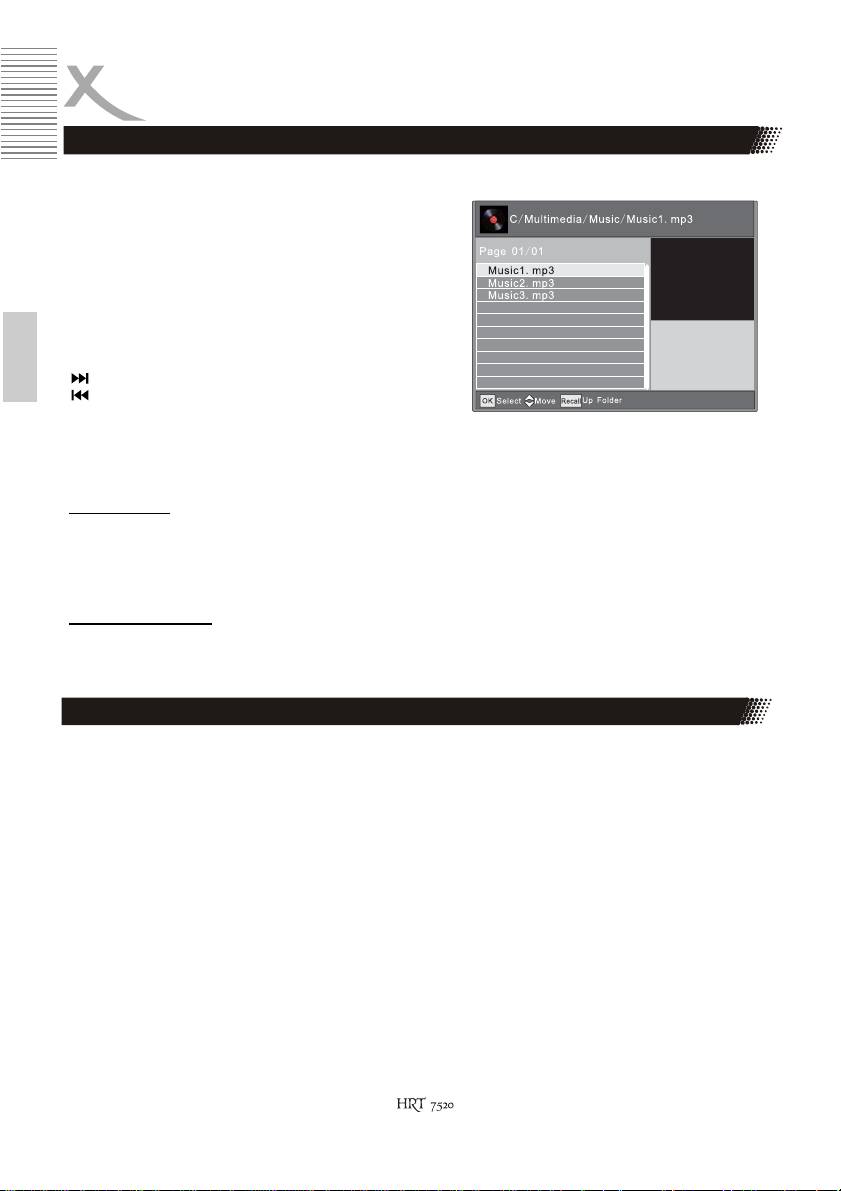
For listening music with the HRT 7520 connect the USB media and enter the menu item Music.
After initialising the USB media the directory
structure is shown. Choose the directory with Ÿ/
ź and enter with OK.
If there are music files in this directory they are
listed in the file browser. ID Tags are also
shown.
OK / PLAY Play
STOP Stop
Next track
English
Previous track
|| / PAUSE Pause
REPEAT Repeating modes (Single track, directory, random directory)
EXIT Exit to multimedia menu
Ż/Ź Increase / Decrease volume
Fast Forward
If you press while playing music the BLUE button, then you start the fast forward. Each press the
BLUE button increases the speed. Switch to normal speed with >> or << The zooms change as
follows:
x1 —> x2 —> x3 —> x4 —> x8 —> x16 —> x32 —> x1
Supported formats
Formats: MP3, WMA, AAC
Sampling frequencies: 8-48kHz (MP3) or 32 - 48kHz (WMA)
Bitrate: 8 - 320 kbps (MP3) or 32 - 192 kbps (WMA)
Movies
For playing movies with the HRT 7520 connect the USB media and enter the menu item Movies.
Please pay attention to following rules:
1. The resolution of the movies should be not exceeding 1920 x 1080
2. The file name should not be exceeding 15 letters
3. Supported containers: AVI, DIVX, MKV, MP4, MPG, VOB, MOV.
4. Supported codex: Should be created with established standards. MPEG-2: ISO/IEC13818,
MPEG-4 ISO/IEC 14496
5. Supported transport streams: MPG, TS, TRP
6. Supported subtitles: Subrip (SRT), Micro-DVD (SUB), Sami (SMI). Internal subtitles are not
supported
7. Supported audio formats are:
x MPEG-4 files: AC3, MP3, AAC (LC or HE)
x MPEG-2: MP2/MPA, AC3
Notes:
The variety of different video codes, audio codes, video container and PC programs, it is possible
that some video files are not supported. Although each part considered individually (e.g., H.264,
AC3, MP4) which can lead to a combination of non-playable files.
22
Multimedia Player
Movies
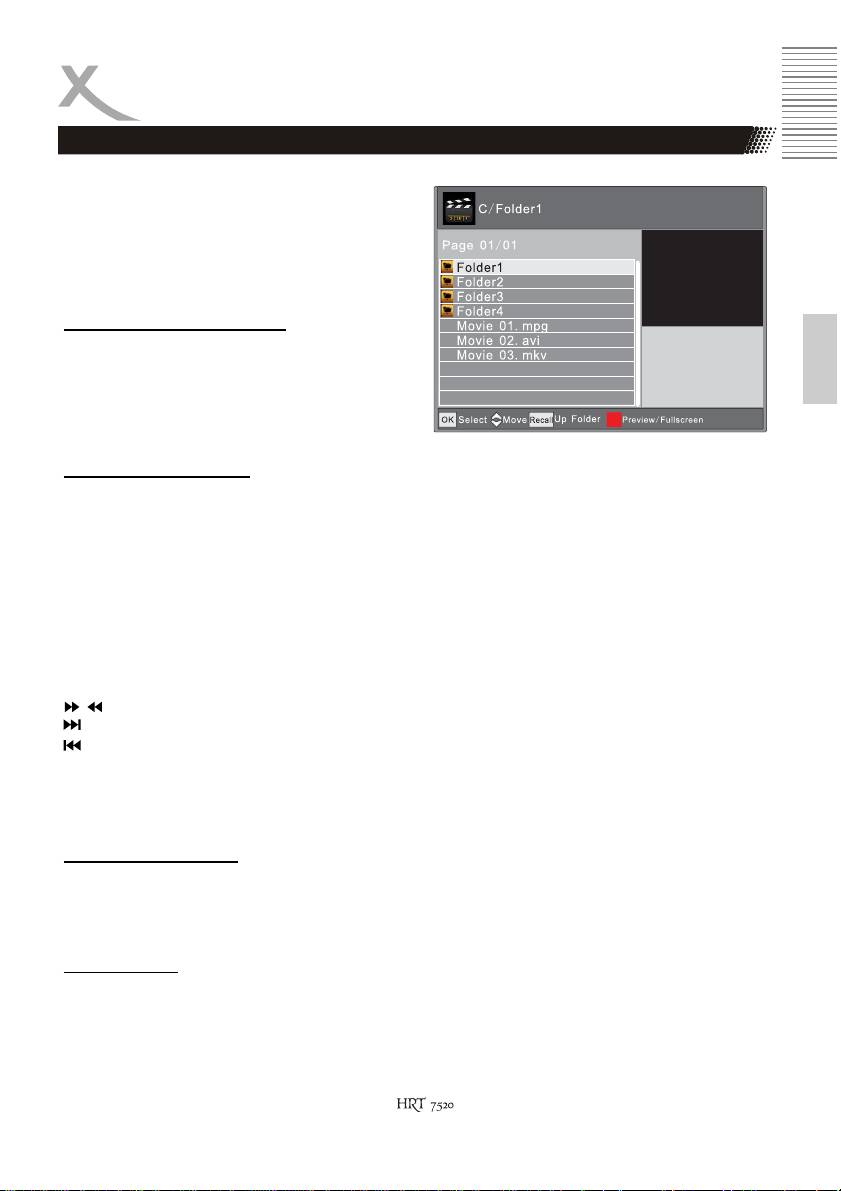
After initialising the USB media the directory
structure is shown. Choose the directory with Ÿ/
ź and enter with OK.
If there are movie files in this directory they are
listed in the file browser.
Navigating in the file browser
English
Ÿ/ź Next/Previous file
OK Play / Open directory
RECALL Previous directory
RED Preview / Full screen
EXIT Exit to multimedia menu
Navigating while playing
If you press OK the movie is shown in the preview window on the right. Switch to full screen with
RED.PressPLAY for playing directly in full screen .
OK Play in preview window
PLAY Play in full screen
RED Switch preview / full screen
INFO Show information like play time (current and over all) file name etc
LANG Switch audio track
SUB-T Switch (off) Subtitles
MENU Exit to file browser (the movie continues in preview window)
RECALL Exit to file browser (the movie continues in preview window)
GOTO Jump to a certain (self defined) time
/ Fast forward/backward
Previous movie
Next movie
|| Pause
STOP Stop
REPEAT Repeating modes (Single track, directory, random directory)
Fast forward/backward
It is possible to speed up and down the playback with >> or <<. The velocities change as follows
x1 —> x2 —> x4 —> x8 —> x16 —> x32 —> x1
GOTO function
Press GOTO to type a time of the movie and OK to jump to this time.
32
Settings
Press MENU for the main menu. The submenu are:
Program with Program Edit, EPG, Sort and LCN
Picture with Aspect Ratio, Resolution, TV Format and Video Output
Channel Search with Auto/Manual Search, Country and Antenna Power
Time with Time Offset, Country Region and Time Zone and Sleep
Option with OSD-, Subtitle-, Audio Language and Digital Audio
System with Parental Guidance, Password, Default Setting and Information
USB with Multimedia, Movie Settings and PVR Settings
English
If you are inside of one of the menus, so you can return with the EXIT button always in the parent
menu until you are finally back in the live image.
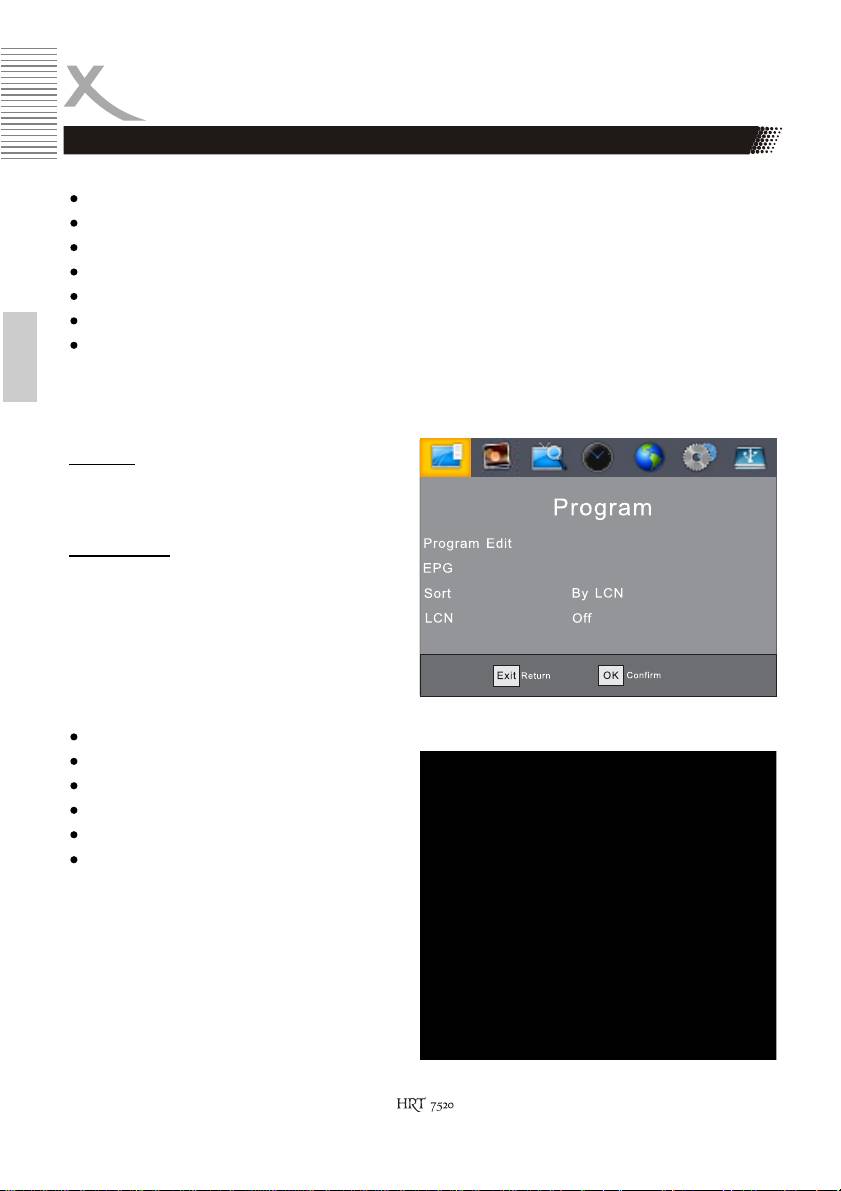
Program
The submenus are Program Edit, EPG, Sort and
LCN.
Program Edit
You have the possibility to sort / edit the
channels as you wish. You need a password for
access (8 8 8 8 8 8).
Following tools are available in Program Edit:
Move
Skip
Lock
Delete
Favourites
Rename
When you exit the program edit, then the
changes are saved.
24
Settings
Program
Move Channels
If
you wish to move a channel press RED. Now choose the channel you want to move with and
/
press RED. The chosen channel is marked with a arrow symbol. Move the channel to the new
position with and press OK. The channel is dropped on this position.
/
Skip Channels
If you wish skip a channel press GREEN. Now choose the channel you want to skip with and
/
press GREEN. The chosen channel is highlighted now with “SKIP”.
English
Notes:
This channel can not be chosen with /
You can only choose it by typing its channel number
Lock channels
If you wish to lock a channel press YELLOW. Now choose channel you want to move with
/ and
press YELLOW. The chosen channel is marked with a lock symbol now.
If you want to watch to a locked channel you have to ty
pe the password after choosing the channel
(0 0 0 0 0 0).
Delete Channels
If you wish to delete a channel press BLUE. Now choose the channel you want to delete with
/
and press BLUE. A security query appears if you really want to delete the channel or not. To confirm
press OK, to decline press EXIT. After confirming the channel is deleted instantly.
Favourites
If you wish to define a channel as favourite press FAVOURITE. Now choose the channel you want
to add to favourites with and press FAVOURITE and choose a category (Video, News, Sport,
/
Music). Press OK to add the channel to the chosen category. The channel is now highlighted with a
heart symbol.
Rename Channels
If you wish to rename a channel press
RECALL
. Now choose channel you want to rename with
/
and press RECALL
. Now type in the new name and navigate to the
OK
field and confirm with OK
.
Sort Channels
This option sorts the channels according to the specifications (Service name, Service ID, LCN, ONID).
LCN
With this option you can display the logical channel numbers. Using the / button to activate the
option on or off.
52
Settings
Picture
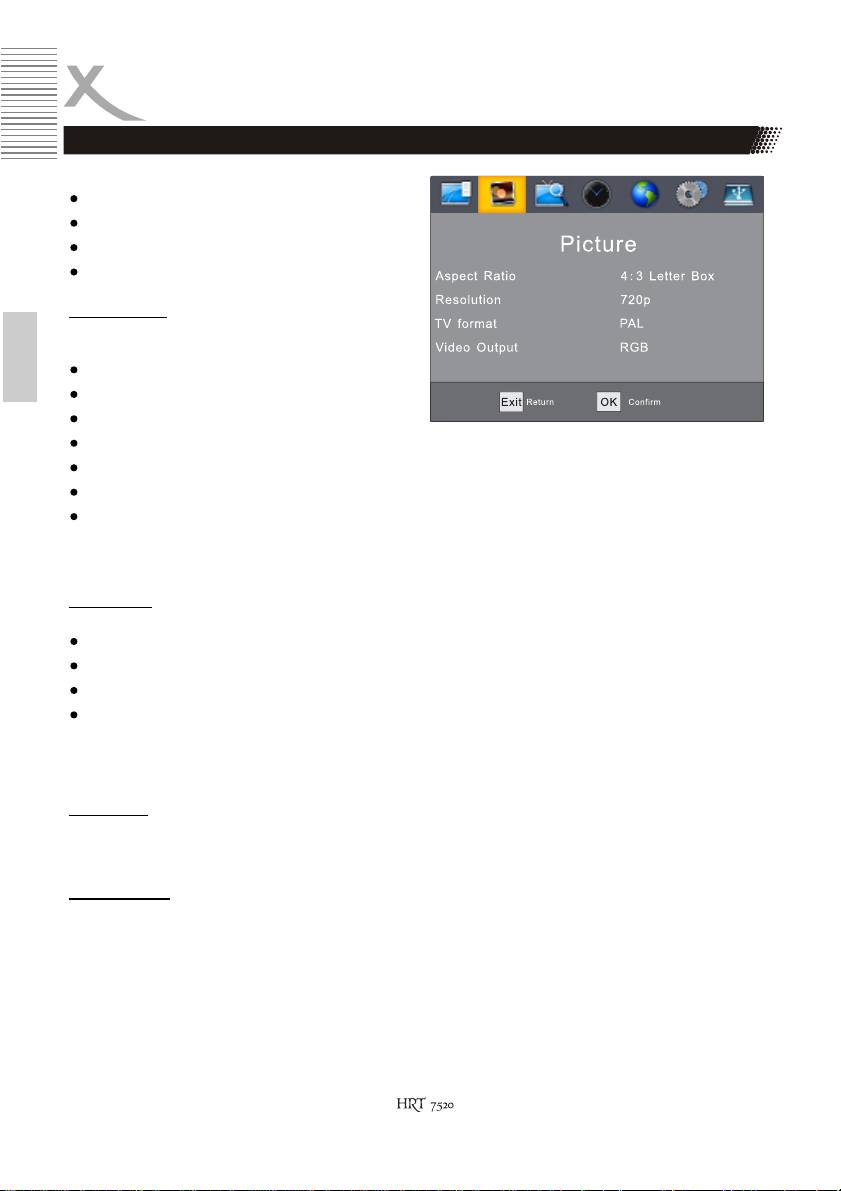
Following settings are available in Picture:
Aspect Ratio
Resolution
TV Format
Video Output
Aspect Ratio
With this menu you set the type of your TV.
Please mind your aspect ratio of your TV.
Auto
English
16:9 Pillar box
16:9 Pan & Scan
4:3 Letter box
4:3 Pan & Scan
4:3 Full
16:9 Wide screen
Note:
Usually AUTO affords the optimal effect.
Resolution
Define the HDMI output resolution
576i (PAL) / 480i (NTSC)
576p (PAL) / 480p (NTSC)
720p
1080i / 1080p
Note:
Please use the resolution of your TV e.g.: 720p for HD-Ready TVs or 1080i for Full-HD TVs.
TV Format
Choose between PAL, NTSC.
Video Output
Choose the type of SCART output. You can choose between RGB and FBAS (CVBS). If your TV
supports RGB you should choose RGB because it affords a better video quality than FBAS.
26
Settings
Channel Search
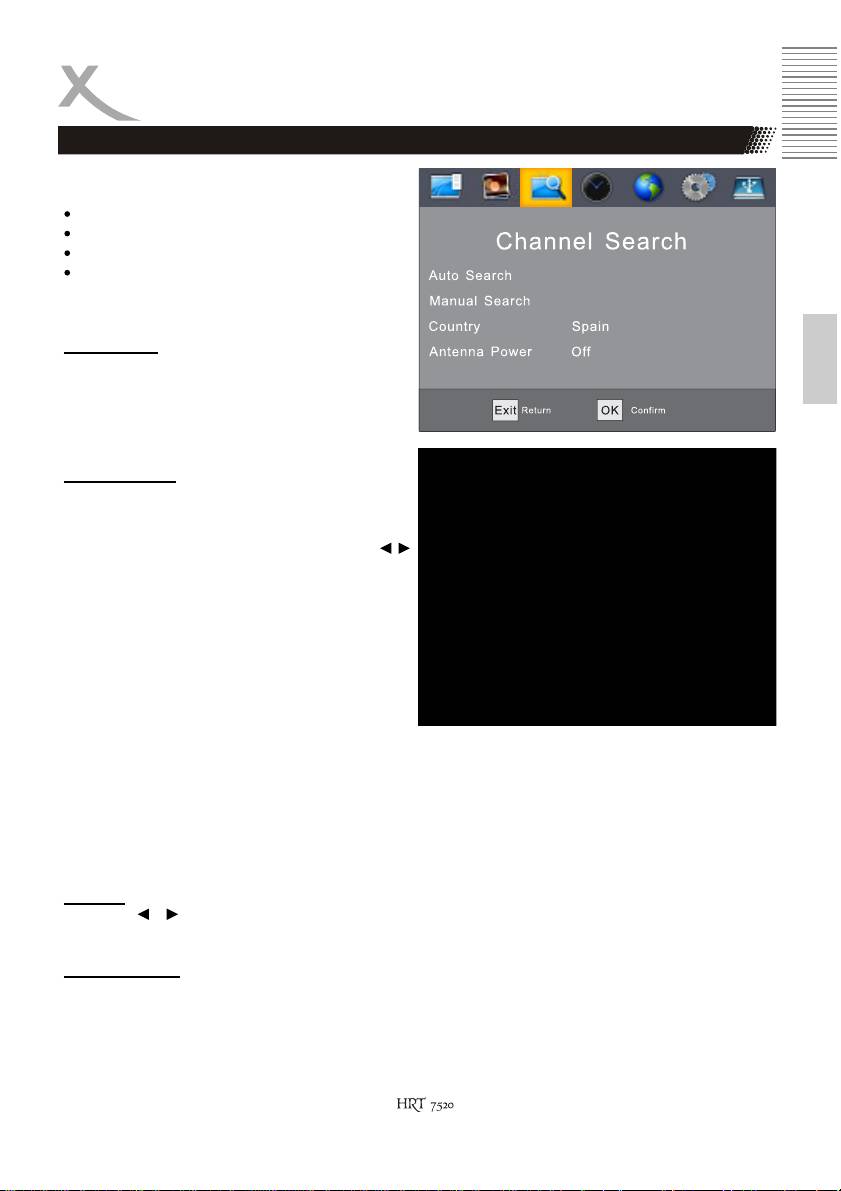
The setting Channel Search includes the options:
Auto Search
Manual Search
Country
Antenna Power
English
Auto Search
Enabling this option will start the automatic
search of itself, the language and country
parameters are taken from the default settings.
Please read from page 14 in this manual.
Manual Search
If one or more TV channels could not be found,
you have the possibility of staring a manual scan.
Input the Frequency channel with the buttons
/
on dialogue window of the manual search. The
Frequency and the Bandwidth will be automatically
adapted.
The quality scalar bar shows signal quality of the
chosen channel.
Press the OK button to start the manual search.
A searching window will be opened displaying
the searching results.
Country
Using the / keys to change the country.
Antenna Power
With this option you can activate voltage at the antenna output on or off.
72
Settings
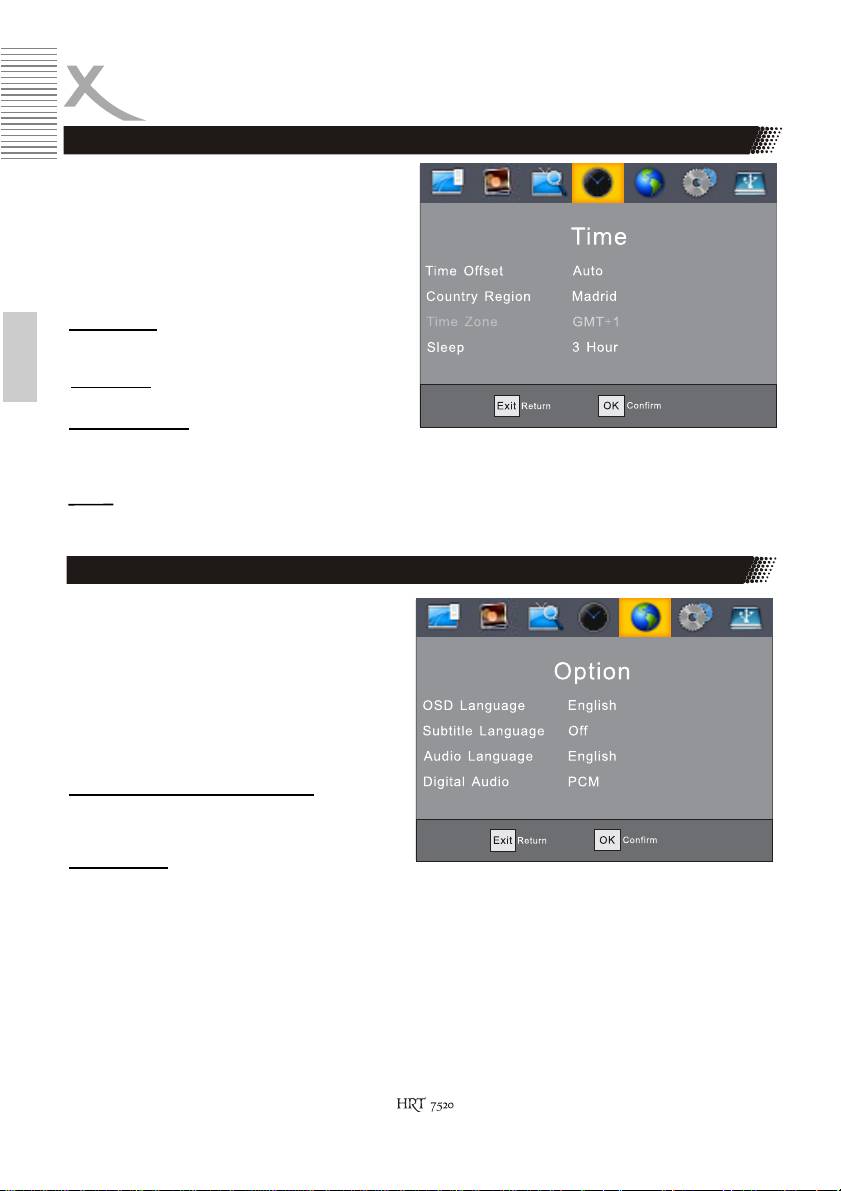
Time
Following settings are available in
Time:
x Time Offset
x Country Region
x Time Zone
x Sleep
Time Offset
If you enable this function the time is extracted
from the digital data constantly.
English
Time Zone
Define the time zone you are in.
Country Region
This parameter can be changed only if there is one country in different time zones. If you have
chosen Germany here, it will always have the attitude displayed here in Berlin. This can not be
changed.
Sleep
The unit will goto standby mode in desired time after the last user interaction.
Options
Following settings are available in
Option:
x OSD Language
x Subtitle Language
x Audio Language
x Digital Audio
OSD / Subtitle / Audio Language
Define the OSD / Audio / Subtitle language.
Digital Audio
Here you can switch on/off the digital audio output and choose the type of digital audio.
Off: Deactivate digital audio
PCM: Digital audio output (PCM format)
RAW: All types digital audio
28
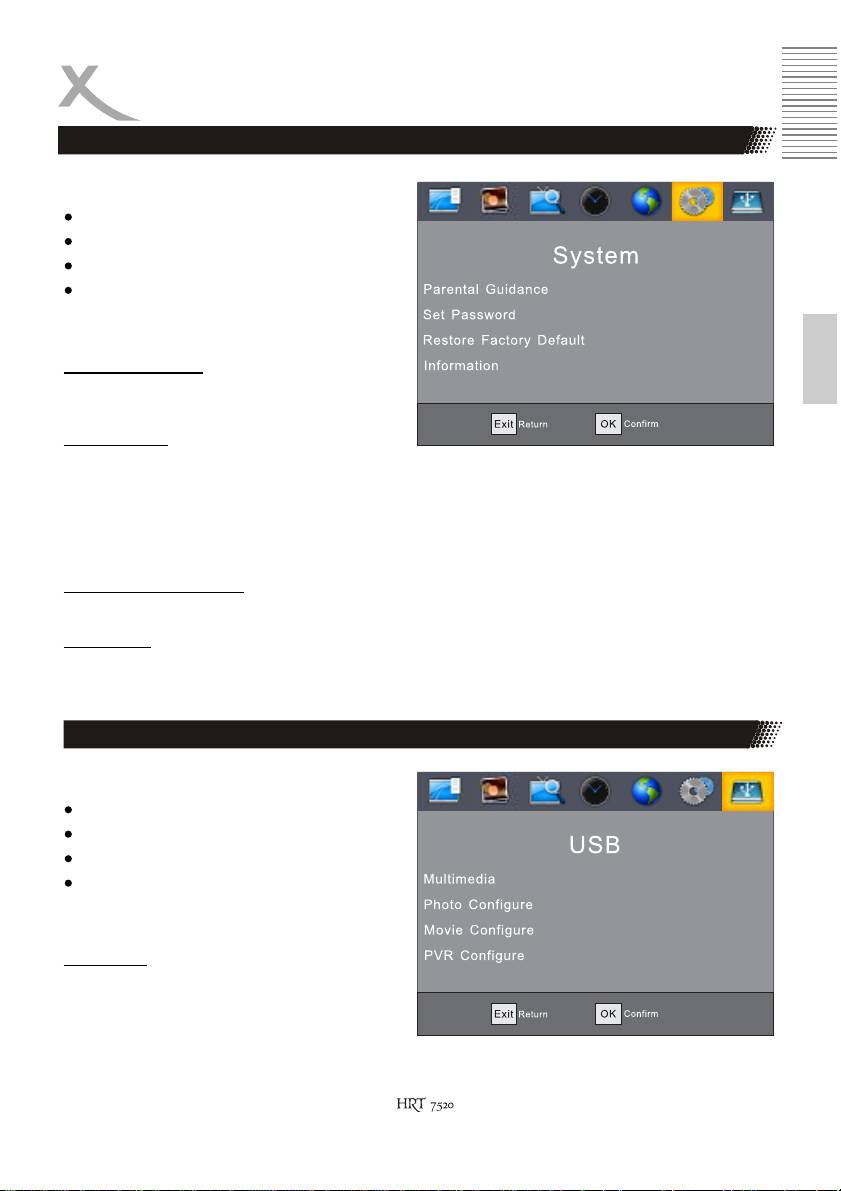
Settings
System
Following settings are available in System:
Parental Guidance
Set Password
Restore Factory Default
Information
English
Parental Guidance
You can selecte the suitability of a program for
children or adults.
Set Password
Change your password. At first you have to
confirm the old password
(standard 8 8 8 8 8 8). After confirming the old
password type in the new password and repeat
it. If all data was correct the new password is
active.
Restore Factory Default
Restore factory defaults by all settings. All changes in the settings will be lost.
Information
Shows information about soft– and hardware.
USB
Following settings are available in USB:
Multimedia
Photo Configure
Movie Configure
PVR Configure
Multimedia
Opens the multimedia Player (Page 20)
92
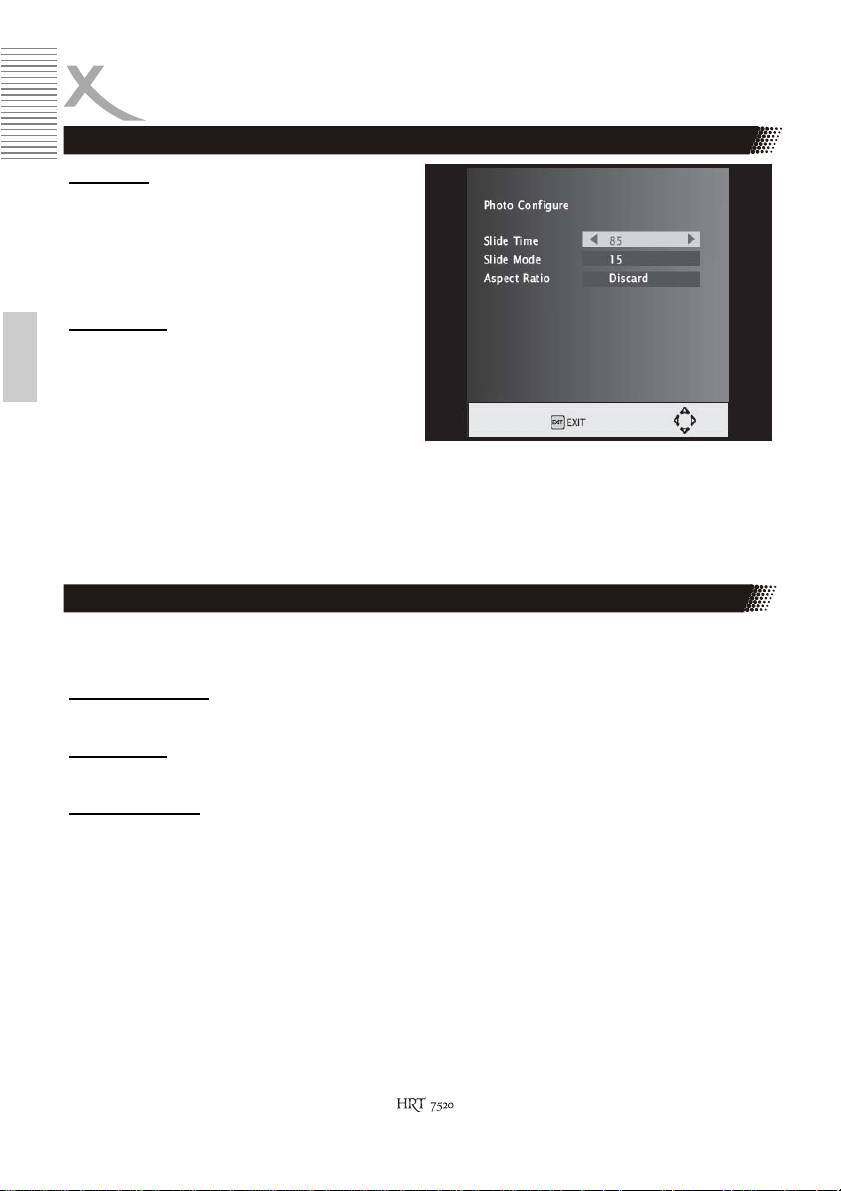
Settings
Photo Configure
Slide Time
Define the duration for every picture in the slide
mode (1-8sek)
Slide Mode
There are 59 different types of slide effects.
Random is also
possible.
Aspect Ratio
Choose wether the aspect ratio of your pictures
should be original or changed to fullscreen
(DISCARD). DISCARD can cause deformations
English
of the pictures.
Notes:
We recommend following settings:
Slide Time: 8second
Slide Mode: Random
Aspect Ratio: Keep
Movie Configure
These settings are only for external Subtitles.
Subtitle Specific
Define the size of subtitles
Subtitle BG
Choose between transparent and coloured background
Subtitle Letters
Define the colour of the subtitle letters
Please be sure that movie and subtitle are named equal e.g.: Movie.avi, Movie.srt
It is also possible to use 2 languages: Movie.avi, Movie.ger.srt, Movie.eng.srt
30
Settings
PVR Configure
Information about USB media is shown here. You can also format you USB media.
Recorde Device
On the sub menu Record Device you can define the Time shift size. Information on the Media
type, Disk Total Spare and Disk free space are displayed here.
Format
On the sub menu Format you can format your storage.
English
Important Note:
Due to CE-policies it is only allowed to connect USB-Sticks (Flash drives) to the HRT 7520
13
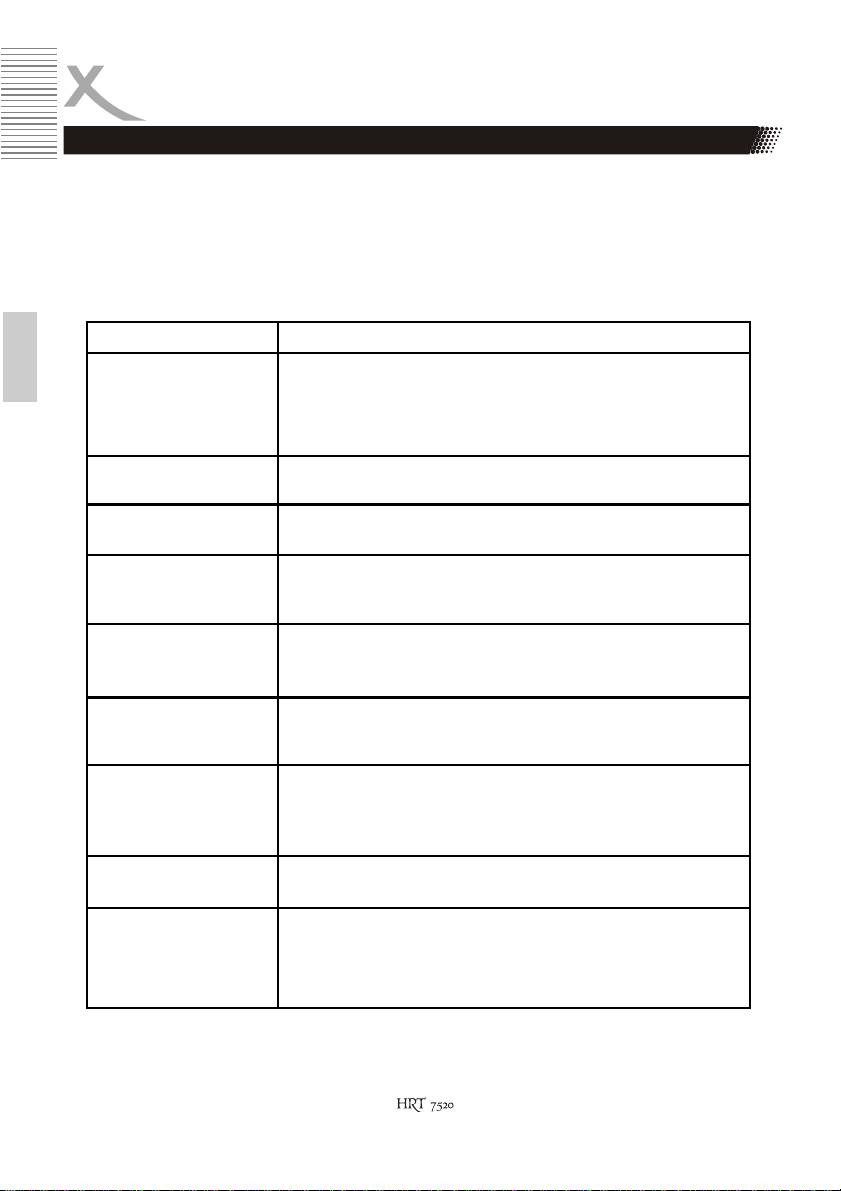
Troubleshooting
Check the following guide for the possible cause of a problem before contacting service.
Technical Support of Xoro/MAS:
x Tel.: +49 (40) 77 11 09 17
x Fax: +49 (40) 76 73 35 15
x Internet: www.xoro.de/support
Symptom Correction
No DVB-T reception /
x No DVB-T reception in your region.
English
serious distortion by
x Realign the antenna. Please pay attention to the
mosaics or artefacts/
direction of the antenna.
freeze pictures
x Please use a bigger antenna or an aerial antenna.
x Retry the Auto Scan.
No power
x Plug the power cord into the outlet tightly and turn on
the power.
Can not scan programs
x Adjust the dish
x Refer settings for searching
No picture / no
x Control the connection to the TV set.
coloured pictures
x Control the video output mode in the setup.
x TV channel or program is scrambled
Remote control does
x Change the batteries.
not work
x Operate within normal range (max. 5 meters, 30 °)
x The sensor is pointed to by bright light.
No sound
x Cancel Mute. Press MUTE button
x Increase volume. Press VOL+ button
x Pay attention to connection to TV set or amplifier.
Audio / Subtitle without
x Change audio track (press LANG button)
function or can no
x Change subtitle track (press SUB-T
b
utton)
choose
x Other audio track is not supported
x Subtitles are not supported by broadcaster
No Recording
x No USB is connected.
x No free space on the storage.
Recording has jerkings
x The connected storage is too slow. Please use only
or other mal functions
USB-Sticks with 8 GB or higher.
x Please control the reception quality of the antenna and
align them for getting better quality.
32
Specification
High Frequency Tuner
VHF: 174 — 230 MHz (Channel 5—12)
UHF: 470 — 862 MHz (Channel 21—69)
Bandwidth: 6 or 7 or 8MHz
Input Signal Level: -78 - -20 dBm
Impedance: 75 Ohm
Demodulation Mode
Waveform: COFDM˄Code Orthogonal Frequency Division Multiplexing˅
English
Demodulation: QPSK, QAM16, QAM64
Transmission Mode: 2K, 8K, FFT, SFN und MFN
Guard interval: 1/4, 1/8, 1/16, 1/32
Code rate: 1/2, 2/3, 3/4 ,5/6 ,7/8
Video, Audio Decoding
Video Standard: ISO/IEC13818-2 MPEG2 (MP@ML) und (MP@HL)
MPEG-4 (H.264) High Profile Level 4
Video Resolution: 480i, 480p, 576i, 576p, 720p, 1080i, 1080p
Aspect Ratio: 4:3 PS & LB, 16:9
Teletext: Support DVB-ETS300472
Audio Standard: ISO/IEC 11172 Layer I & II, MP3
Audio Sample rate: 32, 44.1, 48 KHz
Power
Input: AC 220—240 Volt, 50/60 Hz
Consumption: < 6 Watt
Consumption in Stand-By: < 1 Watt (without in waiting for recording)
Ambient condition
Temperature: 0—40° Celsius
Humidity: 90%
Connector
USB Port: USB 2.0 High Speed
Video: HDMI, SCART
Audio: Coaxial Cinch
Device
Weight: 0,5 kg (inclusive remote control)
Dimensions: 168 x 95 x 38 mm
Note:
Weight and dimensions are not absolutely exact values. Specifications are subject to change
33

Limited Warranty
In case the products delivered are not free from defects in
material or workmanship, MAS Elektronik AG has the right to
either repair or replace the defective product at its choice. MAS
Elektronik AG manufactures and repairs goods using components
which are new or equivalent to new in accordance with industry
standards and practice. The warranty for wearing parts (e.g. rechargeable batteries) is limited to 6
months.
In case the device is equipped with internal data storage (e.g. hard disc drive, Flash drive), the
customer is responsible to backup his data before sending the device. MAS Elektronik AG is not
liable for any data loss on returned devices. MAS Elektronik AG reserves the right to reset
returned devices to factory defaults. Please note your personal settings for this reason.
MAS Elektronik AG is not liable for any accessories not belonging to original package content
such as DVDs, hard disc drives, Flash storage devices, batteries, etc.
This limited warranty covers the warranty requirements set by authorities in your country.
This limited warranty only is valid in the coThis limited warranty does not cover finishes,
accessories or batteries, nor does it cover damage resulting from accident, misuse, abuse, dirt,
water, battery leakage, tampering, servicing performed or attempted by unauthorized service
agencies. This limited warranty does not cover damages resulting from firmware upgrades. Only
in case of firmware upgrades needed to add functions promised at time of purchase, such
damages are covered by this limited warranty. For a correct and frictionless completion of
warranty or repairs you need a RMA No. You may obtain a RMA on the internet at www.mas.de/
FAQ or by telephone.
Please send the device in its original packing material, all standard accessories and a copy of the
invoice, a description of defect and the RMA No. to following address. Please note the RMA
number clear and in large numbers on the outer package.
MAS Elektronik AG
Pollhornbogen 19
21107 Hamburg
Germany
Support
e-mail: support@ersservice.de
Hotline: +49 (0) 40 - 77 11 09 - 17
Fax: +49 (0) 40 - 76 73 35 - 15
untry the product was purchased.

HD DVB-T Receiver with USB, PVR Ready &
HD Media Player
HRT 7520
Manuel d’emploi

TABLE DES MATIERES
Consignes de sécurité 4
Recyclage 7
Accessoires 8
Caractéristiques 8
Réglages par défaut 8
Interfaces et Commandes
Face avant 9
Panneau arrière 9
Télécommande
Batteries 10
Commandes 11
Connectique
Téléviseur / Antenne 12
Chaîne HiFi 13
Première installation 14
Français
Touches et fonctions importantes 15
Liste / Sous-titres / Audio / Format de l’image 15
Information / Télétexte / Volume / Résolution 16
EPG / Favoris 17
Enregistrement
Minuterie / Enregistrement 18
Liste des enregistrements 19
Lecture multimédia
USB 20
Photos 21
Musique 22
Film 23
Configuration 24
Chaînes 24
Image 26
Recherche des chaînes 27
Heure 28
Options 28
Système 29
USB 30
Dépannage 32
Spécifications 33
GARANTIE LEGALE 34
HRT 7 5 2 0 3
CONSIGNES DE SÉCURITÉ IMPORTANTES
Ce symbole indique la présence d'un courant électrique dans cet
appareil, qui présente un risque de décharge électrique et
d'accident.
Ce symbole indique que des instructions importantes
accompagnent cet appareil et qu'il est important de consulter le
mode d'emploi et d'entretien.
Manuel d’utilisation
1. Toutes les instructions d’utilisation et les consignes de sécurité devraient
être lues avant l’utilisation de cet appareil.
2. Les instructions d’utilisation et les consignes de sécurité devraient être
conservées pour une utilisation future.
3. Tous les avertissements sur le produit et dans ce manuel devraient être
pris en compte.
4. Toutes les instructions d’utilisation devraient être suivies.
Français
Alimentation
1. Ne jamais toucher la prise avec les mains mouillées
2. Si vous voulez débrancher la prise, toujours tirer directement sur la fiche et
jamais sur le câble, qui pourrait être endommagé.
3. Vérifier que le câble électrique n’est pas plié, coincé ou en contact avec
une source de chaleur.
4. Vérifier que le câble électrique n’est pas enroulé autour de l’appareil
lorsque celui-ci est allumé.
5. Ne jamais placer l’appareil en fonctionnement sur le câble électrique.
6. Toujours utiliser des rallonges électriques conçues pour le niveau de
consommation électrique de l’appareil.
7. Mettre l’appareil à l’abri de la pluie et de l’humidité.
8. Utiliser l’appareil seulement si le voltage de votre habitation correspond à
celui spécifié sur l’étiquette de l’appareil. Un mauvais voltage pourrait
endommager sérieusement l’appareil.
9. Ne jamais poser de vases ou autre contenant sur l’appareil; de l’eau
pourrait s’infiltrer dedans.
10. Ne jamais ouvrir l’appareil.
11. Toujours débrancher toutes les prises de l’appareil si celui-ci n’est pas
utiliser pendant une longue période.
12. Faire attention à ce que personne ne puisse tomber à cause des câbles.
4 HRT 7 5 2 0

CONSIGNES DE SÉCURITÉ IMPORTANTES
Fonctionnement
1. Réception de la télévision numérique terrestre (TNT)
2. Enregistrement de la TNT sur support externe via USB
3. Lecture des des enregistrements depuis le support externe via USB
4. Lecture des fichiers photos, audio et vidéo depuis un support externe via
USB
Fonctionnement et emplacement
1. Ne pas connecter les accessoires non recommandés par le fabricant sur
l’appareil.
2. Ne pas poser ce produit sur roulette, trépieds, socle, support ou table
instable. Le produit peut tomber causant une blessure sérieuse à un enfant
ou un adulte et être endommagé. Utiliser le produit avec roulette, trépieds,
socle, support ou table recommandé par le fabricant ou vendu avec le
produit. Toute fixation du produit doit suivre les instructions du fabricant en
utilisant un accessoire de fixation recommandé par le fabricant.
3. Le produit utilisé avec une roulette doit être manipulé avec précaution. Un
arrêt brusque, une force excessive ou une surface accidentée peut
provoquer le renversement du produit.
Français
4. L’appareil peut afficher une image fixe sur l’écran du téléviseur ou du
moniteur durant un temps illimité. Ceci peut endommager l’écran. En
conséquence, il est conseillé d’activer l’écran de veille ou d’éteindre
l’appareil, lorsque celui-ci n’est plus en utilisation.
5. Ne pas utiliser l’appareil en mode 4:3 en permanence. Ceci peut
endommager l’écran du téléviseur (bandes latérales noires).
6. Ne pas augmenter le volume alors que l’appareil lit une séquence à faible
volume sonore. Ceci peut endommager le haut-parleur si la séquence
suivante démarre avec un volume sonore très fort.
7. Eteindre l’appareil par le bouton Off/On situé à l’arrière s’il ne sera pas
utilisé pendant une longue période.
8. Débrancher la prise secteur pendant un orage.
9. Les huis et ouvertures sur le coffret de l’appareil sont pratiqués pour
l’aération de celui-ci et pour assurer son bon fonctionnement contre tout
emballement thermique. Ces huis et ouvertures ne doivent pas être
bouchés ou couverts.
10. Ces ouvertures ne doivent pas être bouchées en posant l’appareil sur un
matelas, un canapé, un tapis ou sur tout autre matière similaire.
11. Ce produit ne doit pas être encastré que ce soit dans un meuble ou dans
un rack à moins qu’une ventilation appropriée soit installée au préalable ou
que le fabricant indique que ceci est possible.
12. Protéger l’appareil contre toute exposition au changement climatique, à
l’humidité ou à une température excessive.
13. Ne pas verser du liquide de quelque nature que ce soit sur le produit.
HRT 7 5 2 0 5

CONSIGNES DE SÉCURITÉ IMPORTANTES
14. Ne pas exposer l’appareil ou la télécommande au soleil.
Port USB
Dans le cadre légal lié à la conformité aux normes CE, il est demandé au
consommateur de ne brancher sur le port USB que la clé USB.
Antenne
Cet appareil peut être utilisé avec une antenne.
1. Débrancher le câble d’alimentation de la prise murale avant de connecter
ou enlever la prise antenne, autrement les deux équipements peuvent être
endommagés.
2. Si une antenne extérieure ou un système de réception par câble est
connecté au produit, vérifier que cette antenne ou ce système par
câble est bien mis à la masse pour prévenir toute surtension ou charge
statistique.
Défaut
1. N'essayez pas de réparer cet appareil vous-même, en l'ouvrant et en
retirant le couvercle, vous vous exposez à un courant important. La
maintenance de votre lecteur est strictement réservée aux techniciens de
maintenance qualifiés.
2. Dommages nécessitant une réparation - Débranchez l'appareil de la prise
murale et référez-vous au personnel de maintenance qualifié sous
Français
certaines conditions :
a. Lorsque le cordon d'alimentation ou la prise électrique sont
endommagés
b. Si du liquide ou un objet est tombé dans l'appareil
c. Si l'appareil a été exposé à l'eau ou à la pluie
d. Si l'appareil ne fonctionne pas correctement en suivant les conseils
d'utilisation. Ajuster uniquement les commandes qui sont couvertes
par les conseils d'utilisation. Tout ajustement impropre des autres
commandes pourra entraîner des dommages et nécessitera un
travail supplémentaire de la part d'un technicien qualifié pour
réparer l'appareil.
e. Si l'appareil est tombé ou s'il a été endommagé de quelque façon
que se soit et que l'appareil montre une modification de ses
performances, ceci indique qu'une réparation ou un contrôle est
nécessaire.
3. Si votre lecteur montre un changement important de ses performances,
ceci indique qu’une réparation ou vérification est nécessaire.
4. Pièces de rechange Lorsque le remplacement de certaines pièces est
nécessaire, assurez-vous que le technicien de maintenance a utilisé des
pièces de rechange spécifiées par le constructeur ou des pièces qui ont
les mêmes caractéristiques que les pièces d’origine. Le remplacement par
des pièces non reconnues pouvant en traîner des risques d'incendie, de
6 HRT 7 5 2 0
