Eneo PNR-5304/1TB: DE
DE: Eneo PNR-5304/1TB
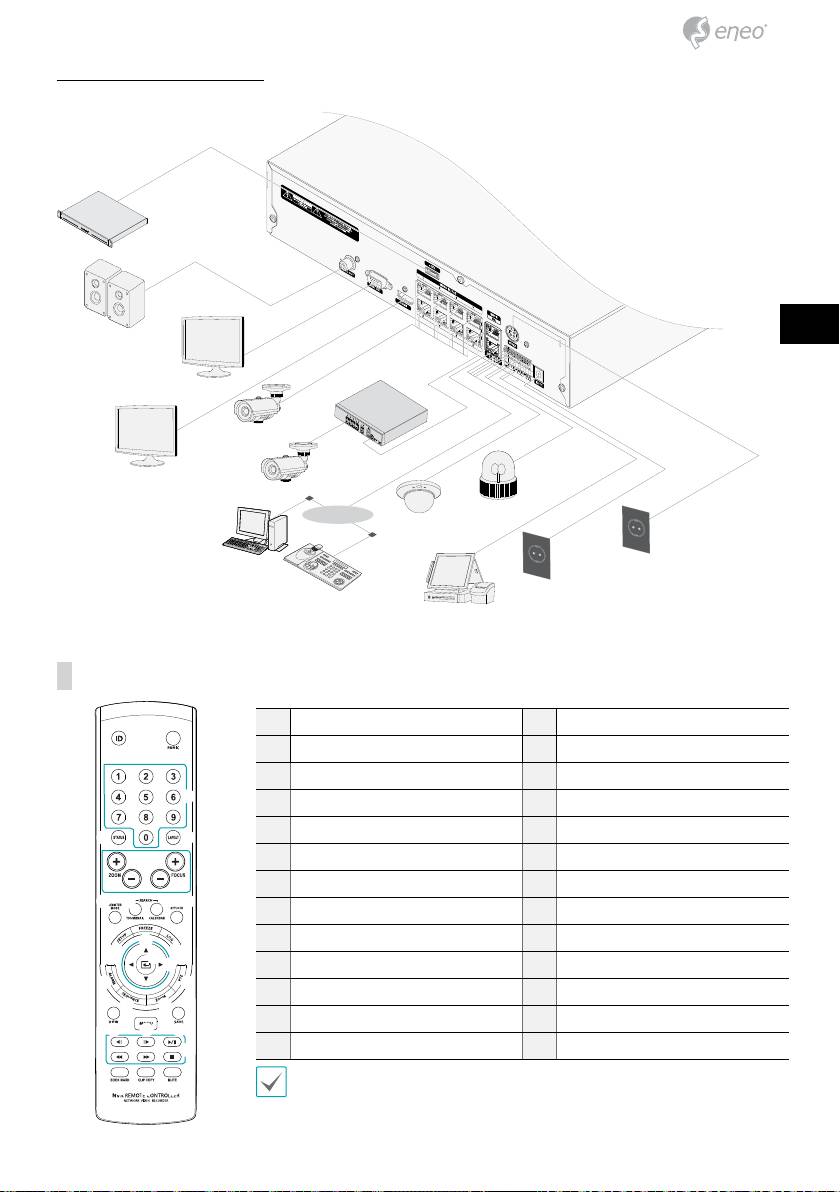
Connections on the Rear Panel
eSATA
Storage Device
DE
Speaker
EN
FR
VGA Monitor
DirectIP™ Switch
PL
Camera
RU
Gigabit
PoE Switch
HDMI Monitor
Camera
Network
Alarm
Sensor
iRAS
Power (48V)
Remote
Monitoring
Keyboard
Power (12V)
POS
Remote Control
1
ID Button
2
Panic Button
3
Camera Buttons
4
Status Button
1
2
5
Layout Button
6
PTZ Control Buttons
3
7
Register Mode Button
8
Thumbnail Button
9
Calendar Button
0
Keylock Button
4 5
!
Setup Button
@
Freeze Button
6
#
Log Button
$
Enter Button
7
8 9 0
%
Arrow Buttons
^
Alarm Button
@
&
Sequence Button
*
Zoom Button
!
#
$
%
(
PTZ Button
)
View Button
^ (
a
Save Button
b
Menu Button
&
*
c
Playback Buttons
d
Bookmark Button
) b a
c
e
Clip Copy Button
f
Mute Button
For more details on remote control buttons, refer to the operation manual.
d e f
19
Overview
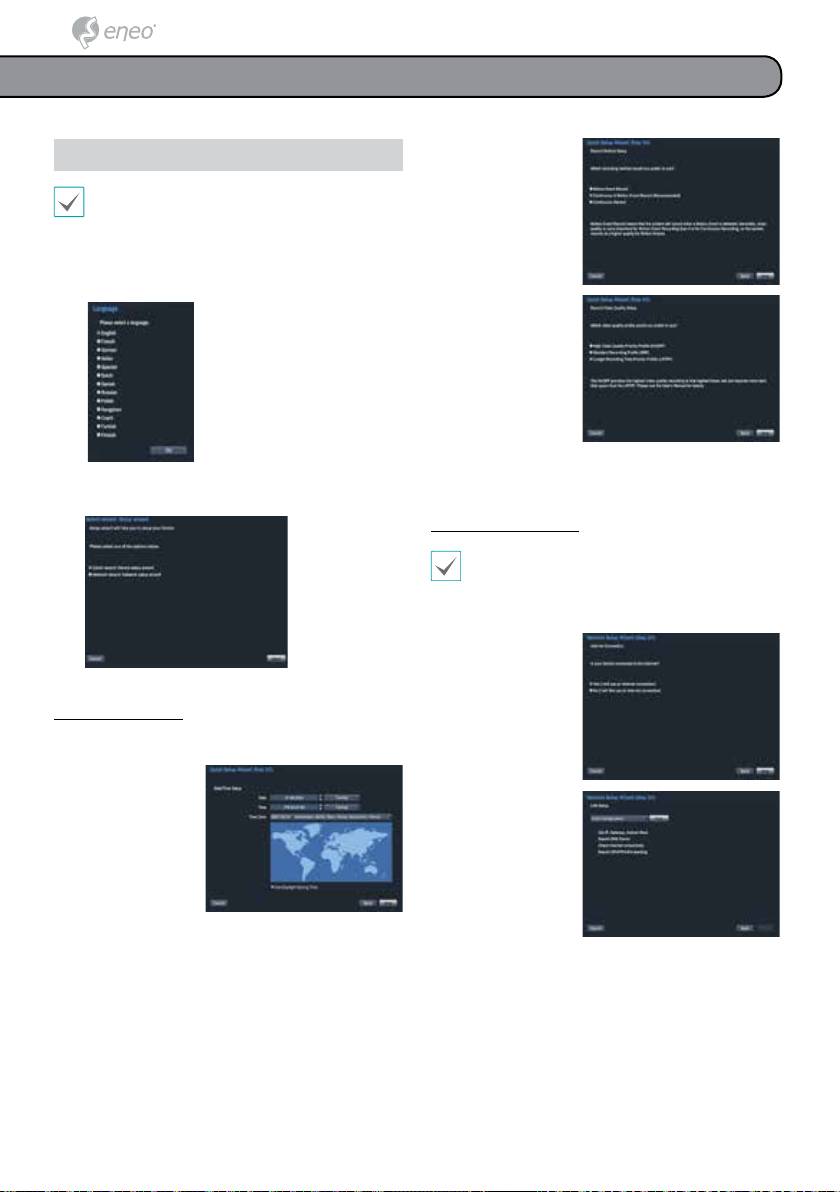
● Record Method
Setup Wizard
Setup
• Setup Wizard only appears during initial booting. To
use Wizard after initial booting, go to Live menu and
select Wizard.
• For more details on Setup Wizard, refer to the
operation manual.
1
Select a system language.
● Record Video
Quality Setup
Higher recording quality
uses up more disk space.
● Finish the Quick Setup Wizard
2
Select the desired Setup Wizard option and click Next.
(This does not appear during initial booting.)
Network Setup Wizard
After exiting from Quick Wizard, you can click Go to
Network Setup and set up the network with Network
Wizard.
● Start the Network Setup Wizard
● Internet
Connection
Quick Setup Wizard
● Start the Quick Setup Wizard
● Date/Time Setup
The new date and time
● LAN Setup
settings will only be
This test must be
applied after clicking
performed before
Next.
proceeding to the next
step.
20
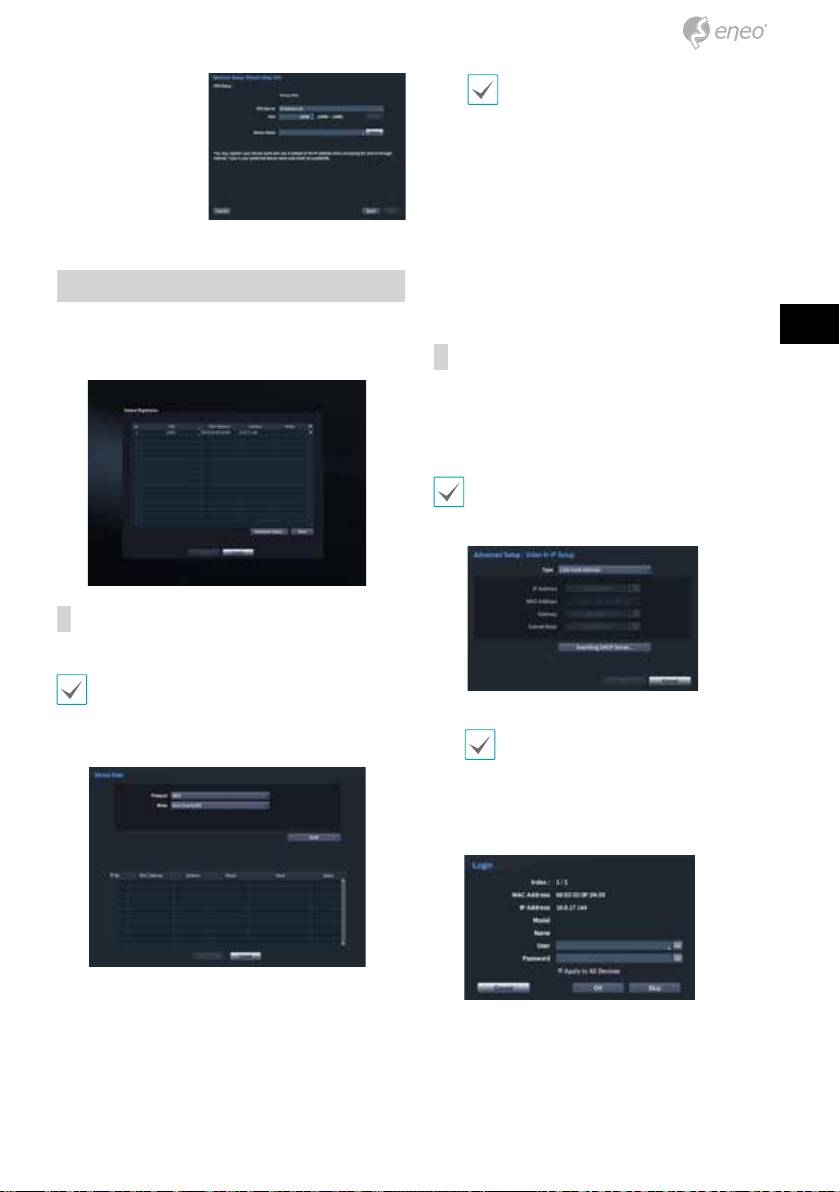
● FEN Setup
Even if the network device uses a protocol
supported by the NVR, the device itself may not
Enter the NVR name
be visible for scanning and registration by the
registered on the FEN
NVR. For more information about supported
server in the Device
network devices and models, contact your
Name eld, and click
retailer.
the Check to check its
availability.
● Mode: Select the scan mode.
1
Mac Address:
Displays the
last 6 digits of the camera’s
MAC address.
● Finish the Network Setup Wizard
2
Address
: Indicates the camera’s searched IP address.
3
Model
: Indicates the camera’s model.
4
Name
: Indicates the camera’s name.
DE
Camera Registration
5 Status
: Identies the camera’s registration status
“registered” or “not registered.”
Once Network Setup Wizard is complete, click the “Scan”
EN
button to scan for cameras connected to NVR. Also you can
delete and register cameras.
Advanced Setup: Video In IP Setup
FR
If the camera is networked but not scanned, use this setup.
This setup allows you to change the network setting
PL
of the NVR’s VIDEO IN port which is camera’s network
environment. Check the camera’s network setting rst
before you use this setup.
RU
Make sure that this setting does not conict
with the WAN setting. For more information on
the WAN setting, refer to the operation manual.
Device Scan
Click the “Scan” button and the Device Scan screen
Some functions may not be supported for
the third party cameras depending on their
Select Scan to commence scanning.
protocol and moel.
1
Only cameras that are connected to the NVR via
VIDEO IN ports can be scanned and registered.
2
Select a camera from the scan list and then select Add
Camera. The device login window will appear.
3
Enter a User ID and a Password for the selected
camera.
● Protocol: Select the protocol used by the camera (for video
encoder) you wish to search for.
-
Apply to All Devices
: Selects to apply the same user
and password to all selected devices if you selected more
than one device and the selected devices have the same
user ID and password.
21
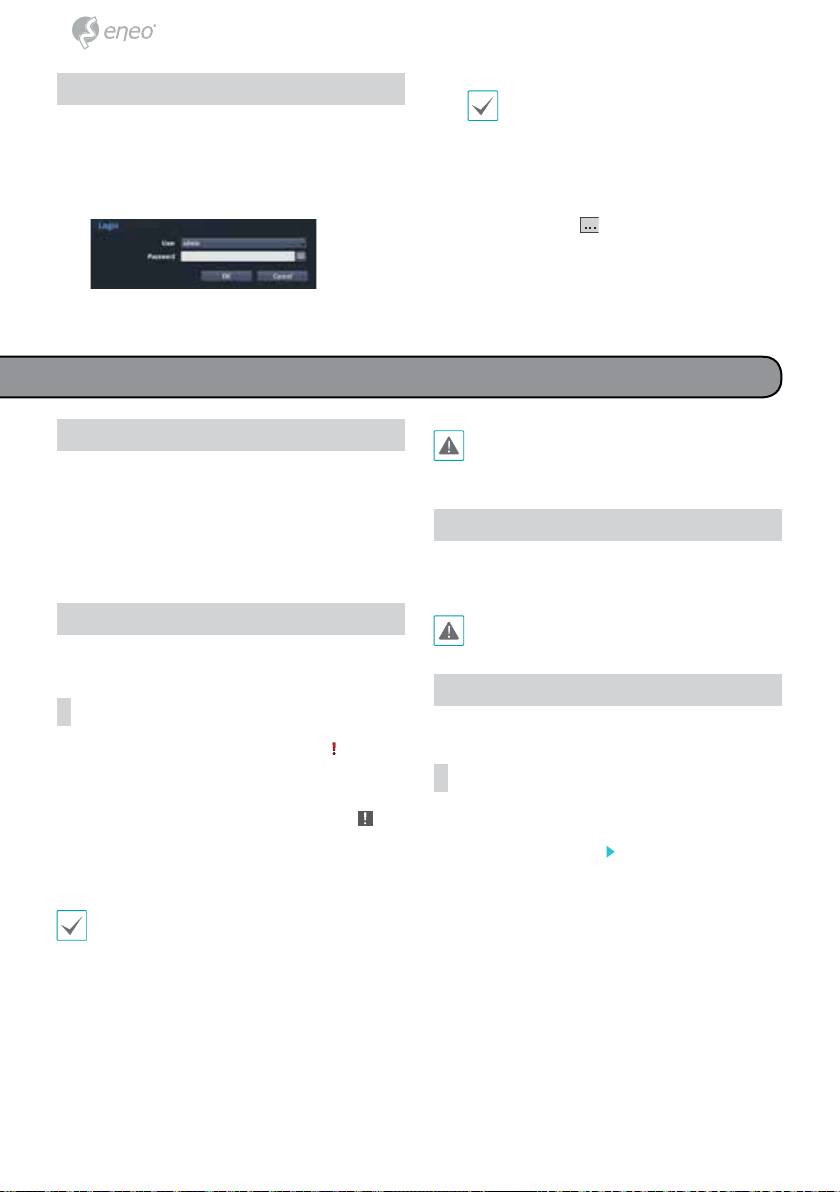
• There is no default password for the admin
Login
account. Select admin and then OK without
Conguring the NVR’s settings and accessing its searching
entering a password to log in.
and other functions require an authorized user login.
• Leaving the admin account unassigned with
a password poses a security risk. Please assign
1
While in Live mode, right-click on the mouse and
a password at your earliest convenience. A
select Login and either press the SETUP button on
warning message will continue to be displayed
the remote control.
until a password is assigned.
• Click on the
button next to the password
eld using the mouse. This will bring up a
virtual keyboard you can use to assign a
password.
3
To log out, right-click on the mouse and select
2
Select a user, enter the password, and then select OK.
Logout.
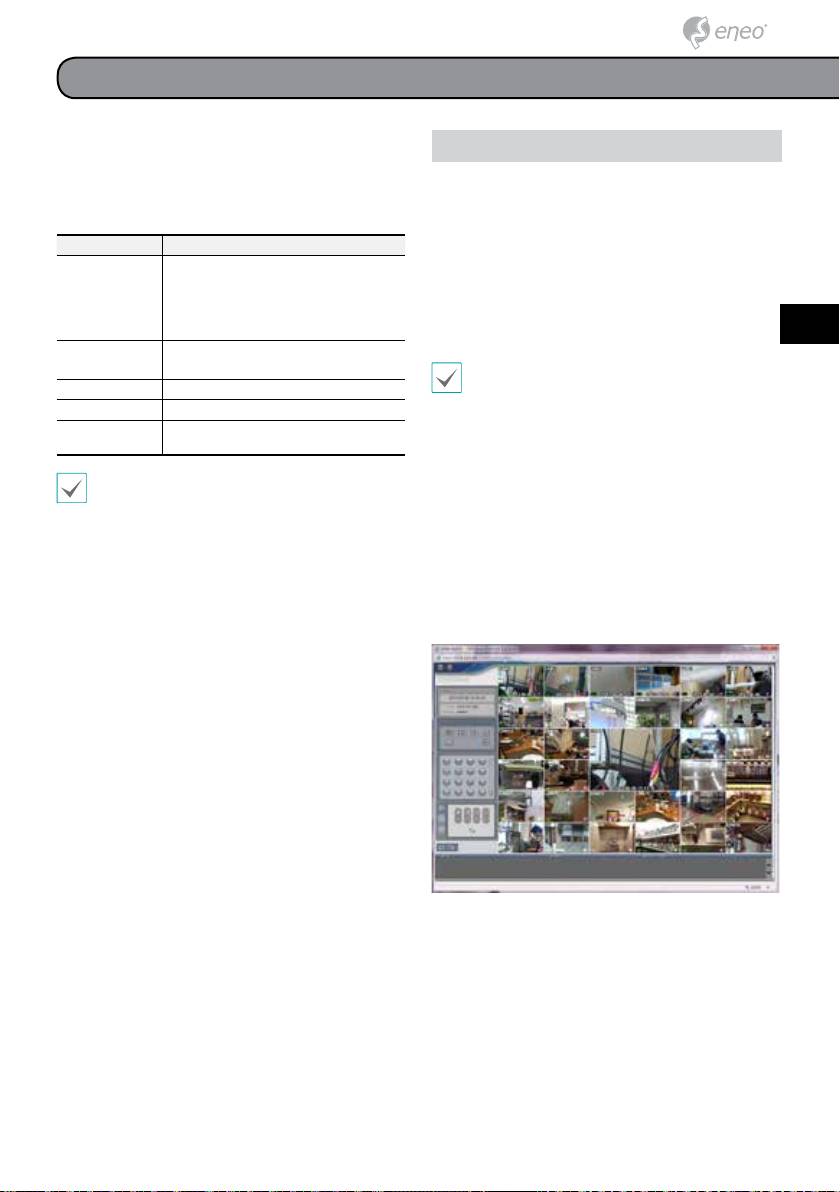
Basic Features
Live Mode
Panic Recording will not take place if recording mode
is not set to Recycle and the HDD has reached 100%
Once Camera Registration is complete, the system will enter
of its capacity.
Live Mode.
Press the MENU button on the NVR’s front panel while in
Live mode to bring up the Live menu on the right edge
Audio Recording
of the screen. Press MENU button once more to hide the
menu. Use the Arrow buttons on the remote control to
If the Record Audio option under Record Setup > General
select the menu options.
has been enabled, the camera will record audio along with
video.
Video Recording
Check your local laws and regulations on making
audio recordings.
Records the live video.
Refer to the Operation Manual for more information.
Video Recording Playback
Panic Recording
You can play back video recordings by using a mouse or
remote control.
Select Live or Search menu's Panic Recording icon or
press the Panic button on the front panel or the remote
control to commence panic recording on all registered
All Channel Playback
cameras.
Press the Menu button while in Live mode.
To stop Panic Recording, select the Panic Recording
icon
1
or press the Panic button again. If the Panic Recording
Duration option under Record Setup > General has been
2
Select the Search Mode icon and then select Time-
congured, Panic Recording will automatically terminate
Lapse Search or Event Log Search.
after the specied duration of time has elapsed.
3
The selected search mode will be initiated.
• Panic Recording takes place irrespective of any
recording schedule set up by the user.
• Panic Recording video prole from Record Setup –
General applies to all Panic Recording videos.
22
WebGuard
WebGuard is a program that allows you to view and search
Setup WebGuard
video from remote locations over the Internet and can
be accessed on a regular web browser such as Internet
1
Launch Internet Explorer and then enter the following
Explorer.
information in the address bar.
System requirements for running WebGuard are as follows:
– http://IP Address:Port Number (NVR system’s IP
Recommended
address and WebGuard port number congured
®
®
under Network > General (Default Value: 12088))
Microsoft
Windows
XP (Service Pack 3),
®
®
– Or http://FEN server address/FEN Name (FEN Name:
Microsoft
Windows
Vista (Service Pack 1),
DE
®
NVR name congured on the FEN server)
OS
Microsoft
Windows® 7 (Home Premium,
®
®
– Or http://www.dvronline.net (will be prompted to
Professional, Ultimate) or Microsoft
Windows
8 (Pro, Enterprise)
enter NVR’s IP address or FEN name registered to
EN
the FEN server upon login)
Intel Pentium IV 2.4GHz or above
CPU
(Core 2 Duo E4600 recommended)
Contact your network administrator for the IP
FR
address of the NVR you wish to connect to and the
RAM 1GB or more
WebGuard
port number.
VGA
128MB or more (1280x1024, 24bpp or above)
PL
Internet Explorer
Ver. 7.0 or above (32-Bit)
2
When prompted with the WebGuard login window,
select WEBWATCH or WEBSEARCH as the desired
RU
• WebGuard only works with Microsoft Internet
mode. Enter the ID and password and click LOGIN
Explorer and will NOT work with other browsers.
to sign in using the selected mode. If connecting by
®
®
entering http://www.dvronline.net, enter the NVR’s IP
• WebGuard does not work in Microsoft
Windows
address in the Device Address eld.
8 metro UI.
Selecting the Use DVRNS option on the login window
allows you to enter the NVR name registered to
the FEN server instead of its IP address. You will be
prompted to enter the FEN server’s address and port
number under Setup.
23
iRAS Program
System Requirements
NET Framework and Visual C++ Runtime
Libraries will be installed automatically, and
it may take a few minutes. If NET Framework
Recommended Minimum
and Visual C++ Runtime Libraries are already
®
®
Microsoft
Windows
7 x86
installed on the system, this step will be
(64bit) (Home Premium,
®
®
skipped automatically.
Microsoft
Windows
XP
OS
Professional, Ultimate)
Home SP3
®
®
When the Installation Completed window appears,
Microsoft
Windows
8 (pro,
6
click Close and nish the installation.
Enterprise)
Intel CoreTM i5-2550 3.30GHz
Intel CoreTM 2 Duo E7200
CPU
or better
2.53GHz or better
Start Program
RAM 2GB or more
1.5GB or more
ATI RadeonTM HD 3650 or
ATI RadeonTM HD 2400 or
When iRAS software is installed, iRAS and iRAS Run
NVIDIA GeForce 8400GS or
NVIDIA GeForce FX5500 or
as administrator shortcut icons will be created on the
VGA
better (1280x1024, 32bpp or
better (1024x768, 24bpp or
desktop. Run iRAS software by double-clicking on iRAS or
better), multiple monitors
better)
iRAS Run as administrator shortcut icon. If a removable
6GB or more of available
1GB or more of available
HDD
eSATA HDD or SD (SDHC) memory card are connected to
space
space
the iRAS system, you must double-click on iRAS Run as
10/100 Mbps Ethernet or
LAN Gigabit Ethernet or better
administrator.
better
• iRAS program runs on 32-bit OS.
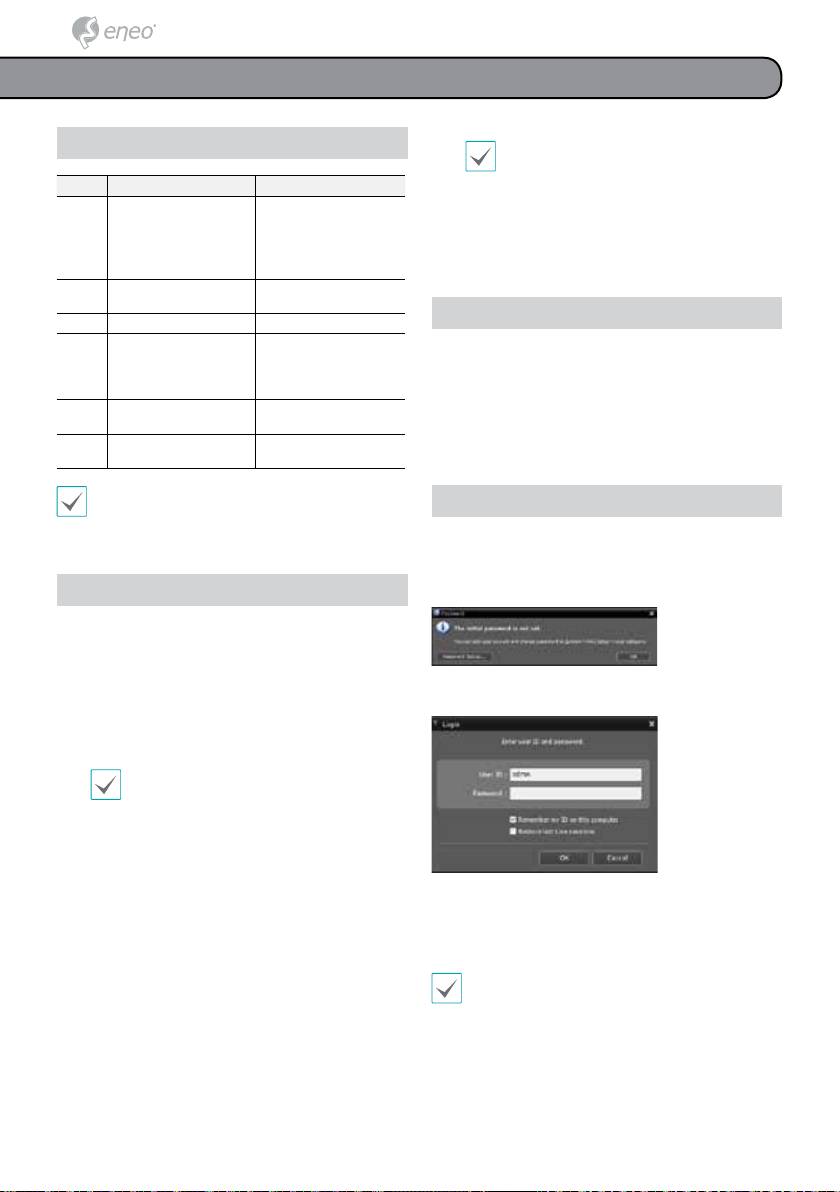
Login
®
®
• On 64-bit versions of Microsoft
Windows
Vista or
later, iRAS installs and runs in 32-bit compatibility
This program does not have a password set by default.
mode.
Leaving the admin account unassigned with a password
poses a security risk. Please assign a password at your
earliest convenience.
Installation
Prior to installing the software, click on to the Windows
Start menu, open Control Panel, click on Power
Management, and set options for Turn o monitor and
Turn o hard disks as Never.
Once the program is running, you must login.
Enter a User ID and Password.
1
Please enter the software installation CD into the PC.
2
Browse to the Setup folder in the CD and run setup.
exe.
®
®
On Microsoft
Windows
Vista or User
Account Control window may pop-up.
Click Allow and follow the instructions in
the installation window to proceed with the
installation.
3
When the installation window appears, click Next.
● Remember my ID on this computer: Remembers the ID
4
Select an installation path for the program, and click
used to login.
Next.
● Restore last Live sessions: Restores the previous Live
5
When the install conrmation window appears, click
session on the current Live panel.
Next.
• Default User ID is "admin" without a password.
• You can change User ID and Password in the User
menu.
24
