Eizo FlexScan S1932: инструкция
Раздел: Компьютерная техника, комплектующие, аксессуары
Тип: Монитор
Инструкция к Монитору Eizo FlexScan S1932
English Deutsch Français Español Italiano Svenska Greece Russia
Setup Manual
Important: PleasereadPRECAUTIONS,thisSetupManualandtheUser’sManual
storedontheCD-ROMcarefullytofamiliarizeyourselfwithsafeandeffective
usage.Pleaseretainthismanualforfuturereference.
Installationshandbuch
Wichtig: LesenSiedieVORSICHTSMASSNAHMEN,diesesHandbuchzur
EinrichtungunddasBenutzerhandbuch(aufderCD-ROM)aufmerksam
durch,umsichmitdersicherenundefzientenBedienungvertrautzu
machen.BewahrenSiediesesHandbuchzumspäterenNachschlagenauf.
Manuel d’installation
Important : VeuillezlireattentivementlesPRECAUTIONS,ceManueld’installationainsi
queleManueld’utilisationinclussurleCD-ROM,andevousfamiliariser
avecceproduitetdel’utiliserefcacementetentoutesécurité.Veuillez
conservercemanuelpourréférenceultérieure.
Manual de instalación
Importante: LeadetenidamenteelapartadoPRECAUCIONES,elManualdeinstalacióny
elManualdelusuarioqueencontraráenelCD-ROMparafamiliarizarsecon
lasnormasdeseguridadylosprocedimientosdeuso.Conserveestemanual
paraconsultasposteriores.
Manuale di installazione
Importante: leggereattentamentelasezionePRECAUZIONI,ilpresenteManualedi
installazioneeilManualedell’utentememorizzatisulCD-ROMperutilizzareil
prodottoinmodoefcaceesicuro.Conservareilmanualeperconsultazioni
future.
Installationshandboken
Viktigt: Läsförsiktighetsåtgärderna,denhärinstallationshandbokenoch
användarhandbokensomnnspåCD-skivannoggrantsåattdukännerdig
säkerochfåretteffektivtanvändandeavprodukten.Behållmanualenför
framtidabehov.
Εγχειρίδιο εγκατάστασης
Σημαντικό: ΔιαβάστεπροσεκτικάτιςΠΡΟΦΥΛΑΞΕΙΣ,τοΕγχειρίδιοεγκατάστασηςκαιτο
ΕγχειρίδιοχρήστηπουθαβρείτεστοCD-ROMπροκειμένουναεξοικειωθείτε
μετηνασφαλήκαιαποτελεσματικήχρήσητηςσυσκευής.Διατηρήστεαυτότο
εγχειρίδιογιαμελλοντικήχρήση.
Руководство по установке
Важно! ВнимательнопрочитайтеМЕРЫПРЕДОСТОРОЖНОСТИ,настоящее
РуководствопоустановкеиРуководствопользователянаCD-ROMдля
получениясведенийобезопаснойиэффективнойэксплуатации.
Сохранитеэторуководстводлясправки.
设定手册
重要事项: 请仔细阅读储存在光盘上的用户手册、本设定手册和预防措施、掌握如何安
全、有效地使用本产品。请保留本手册、以便今后参考。
中文
00_S1932_S_cover1-2.indd 1 2011/11/18 10:32:24
Compatible Resolutions/Frequencies Kompatibla upplösningar/frekvenser
Kompatible Auösungen/Bildwiederholfrequenzen
Συμβατές αναλύσεις/Συχνότητες
Résolutions/Fréquences compatibles
Поддерживаемые разрешения/частоты
Frecuencias y resoluciones compatibles
兼容的分辨率/频率
Risoluzioni/Frequenze compatibili:
The monitor supports the following resolutions. Skärmen stöder följande upplösningar.
Der Monitor unterstützt die nachfolgend aufgeführten Auösungen.
Η οθόνη υποστηρίζει τις παρακάτω αναλύσεις.
Le moniteur est compatible avec les résolutions suivantes. Монитор поддерживает следующие разрешения.
El monitor admite las siguientes resoluciones.
本显示器支持下列分辨率。
Il monitor supporta le seguenti risoluzioni.
Analog Input
Resolution Frequency Mode Dot Clock
640×400 56Hz NECPC-9801
640×400 70Hz NECPC-9821AP2
640×480 67Hz AppleMacintosh
640×480 ~75Hz VGA,VESA
720×400 70Hz VGATEXT
800×600 ~75Hz VESA
832×624 75Hz AppleMacintosh
135MHz(Max.)
1024×768 ~75Hz VESA
1152×864 75Hz VESA
1152×870 75Hz AppleMacintosh
1280×960 60Hz VESA
1280×960 75Hz AppleMacintosh
*
1280×1024 ~75Hz VESA
Digital Input
Resolution Frequency Mode Dot Clock
640×480 60Hz VGA
720×400 70Hz VGATEXT
800×600 60Hz VESA
108MHz(Max.)
1024×768 60Hz VESA
*
1280×1024 60Hz VESA
* Recommended resolution (Set this resolution)
* Empfohlene Auösung (diese Auösung festlegen)
* Résolution recommandée (Réglez votre appareil sur cette résolution)
* Resolución recomendada (ajuste esta resolución)
* Risoluzione consigliata (impostare questo valore di risoluzione)
* Rekommenderad upplösning (Ställ in den här upplösningen)
* Προτεινόμενη ανάλυση (Επιλέξτε αυτή την ανάλυση)
* Рекомендованное разрешение (Установите данное разрешение)
* 推荐的分辨率 (设定此分辨率)
TroubleshootingSetting/AdjustmentInstallationPrior to use
Color LCD Monitor
English
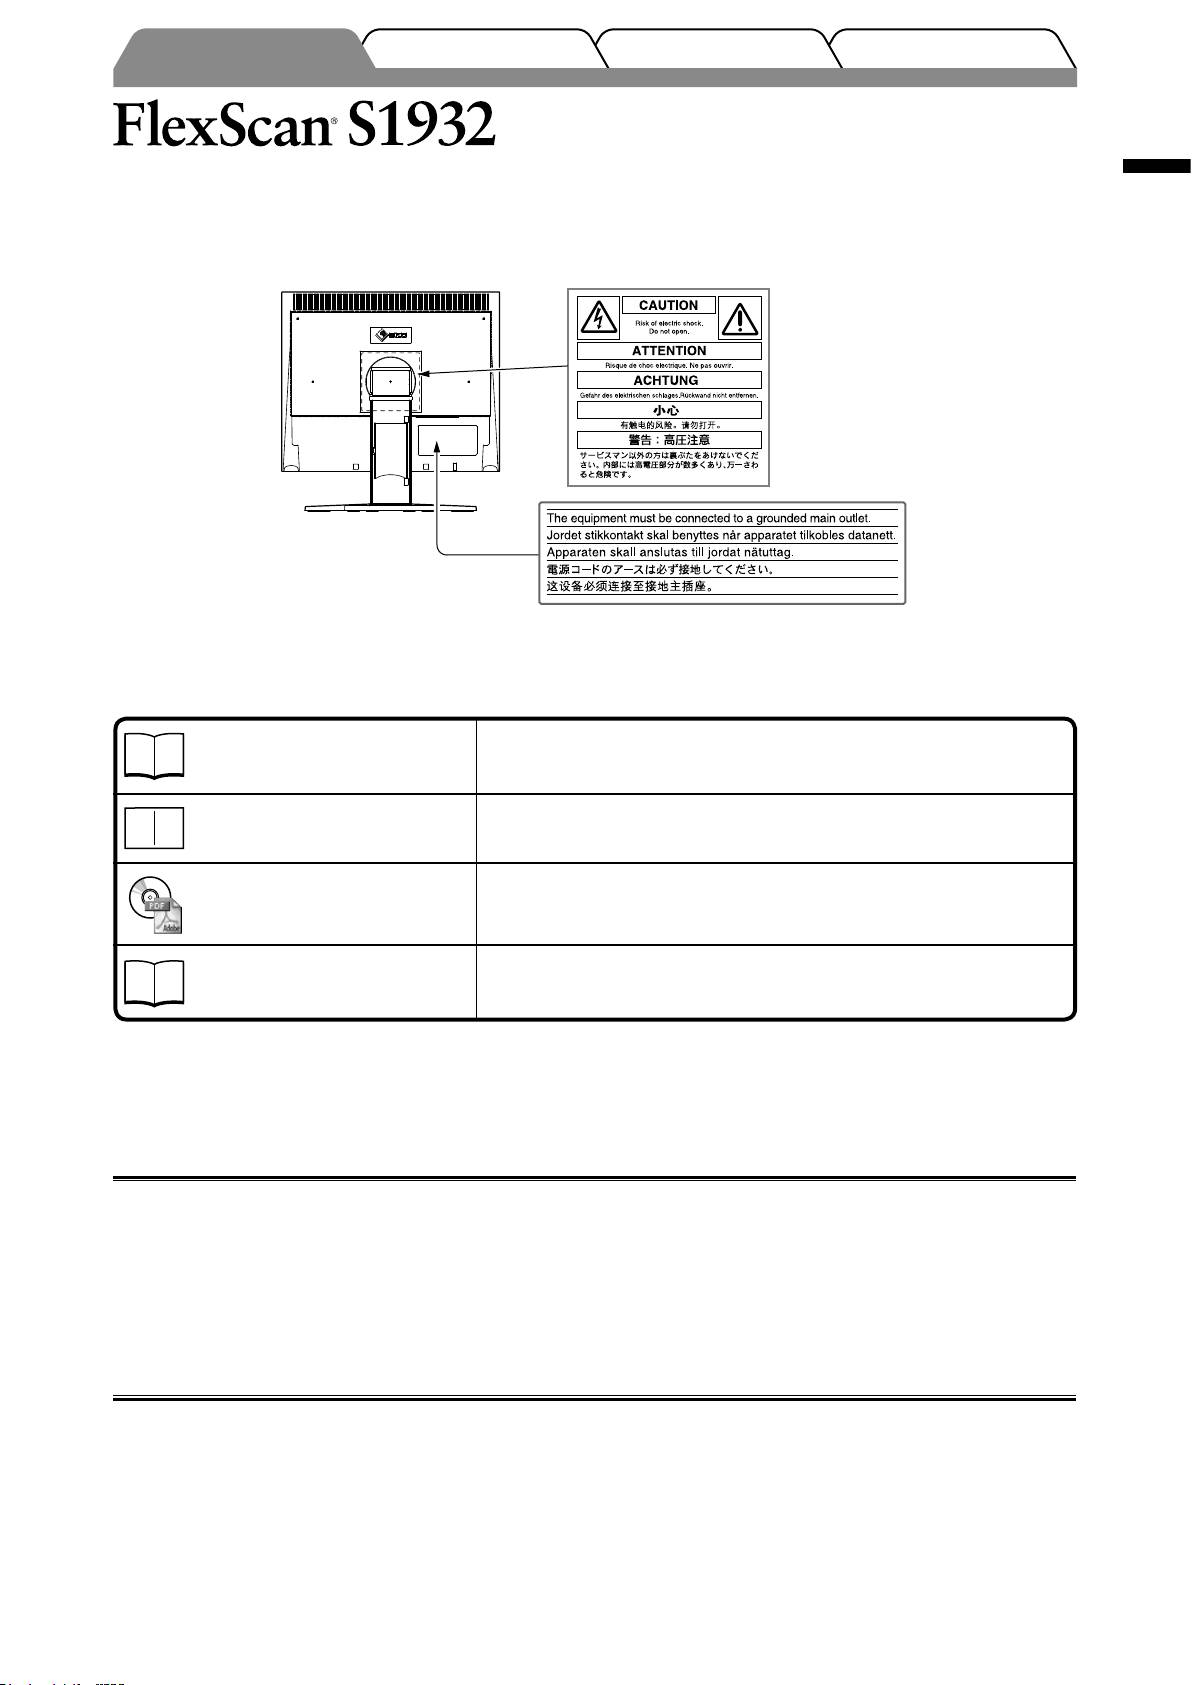
[Location of Caution Statement]
Example of height adjustable stand
About Setup Manual and User’s Manual
Setup Manual
Describes basic information ranging from connection of the monitor to a
(this manual)
PC to using the monitor.
Quick Reference
Describes the operation methods for the adjustment menu.
User’s Manual
Describes application information such as screen adjustments, settings,
(PDF le on the CD-ROM*)
and specications.
PRECAUTIONS
Describes how to use the monitor safely.
* Installation of Adobe Reader is required.
• Product specications vary with sales areas. Conrm that the manual is written in the language of the area of purchase.
Copyright© 2007-2011 EIZO NANAO CORPORATION All rights reserved.
No part of this manual may be reproduced, stored in a retrieval system, or transmitted, in any form or by any means,
electronic, mechanical, or otherwise, without the prior written permission of EIZO NANAO CORPORATION.
EIZO NANAO CORPORATION is under no obligation to hold any submitted material or information condential
unless prior arrangements are made pursuant to EIZO NANAO CORPORATION’s receipt of said information.
Although every effort has been made to ensure that this manual provides up-to-date information, please note that EIZO
monitor specications are subject to change without notice.
ENERGYSTARisaU.S.registeredmark.
AppleandMacintoshareregisteredtrademarksofAppleInc.
VGAisaregisteredtrademarkofInternationalBusinessMachinesCorporation.
DPMSandDDC/CIaretrademarksandVESAisaregisteredtrademarkofVideoElectronicsStandardsAssociation.
WindowsisaregisteredtrademarkofMicrosoftCorporation.
FlexScan,ScreenManager,i•SoundandEIZOareregisteredtrademarksofEIZONANAOCORPORATIONinJapanandother
countries.
1
TroubleshootingSetting/AdjustmentInstallationPrior to use
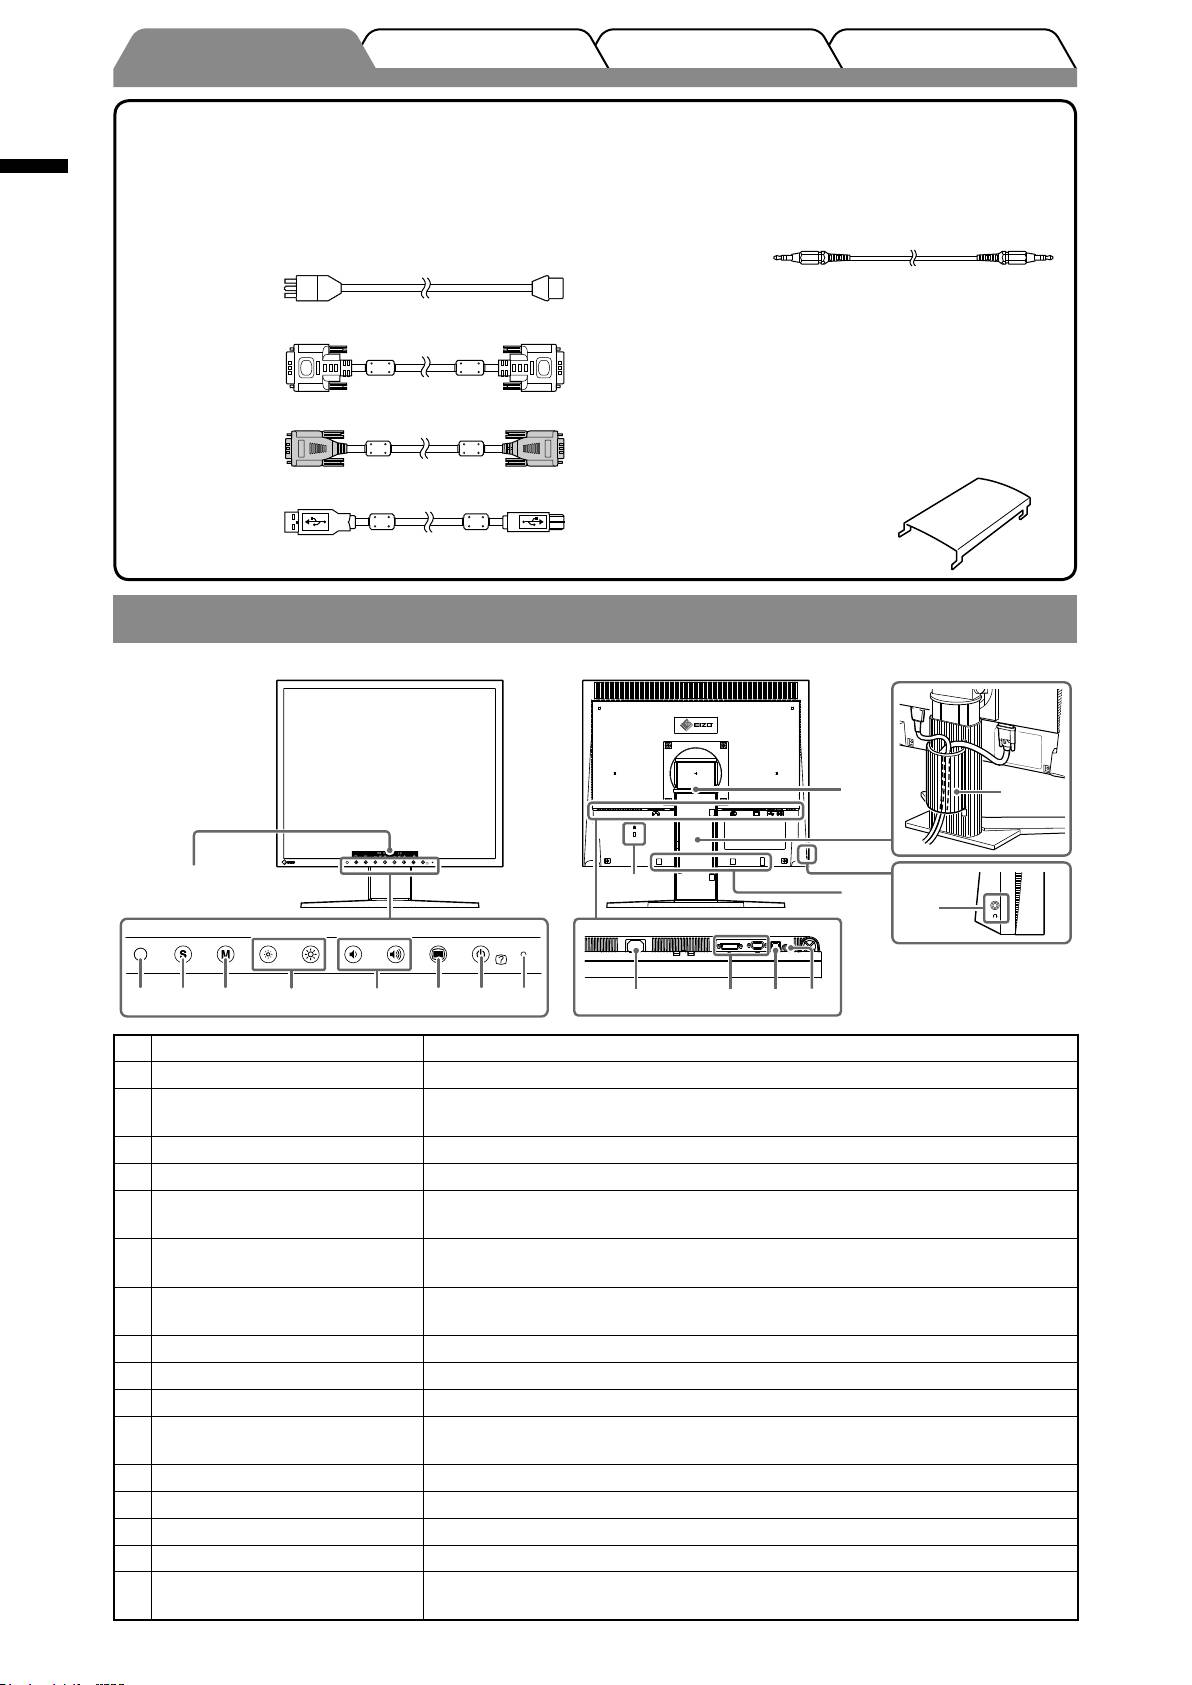
Package Contents
Check that all the following items are included in the packaging box. If any items are missing or damaged, contact your local dealer.
English
NOTE
• Pleasekeepthepackagingboxandmaterialsforfuturemovementortransportofthemonitor.
□Monitor
□Stereominijackcable
□Powercord
□EIZOLCDUtilityDisk(CD-ROM)
•User’sManual
□Digitalsignalcable:FD-C39
□SetupManual(thismanual)
□QuickReference
□PRECAUTIONS
□Analogsignalcable:MD-C87
□Limitedwarranty
□RecyclingInformation
□MountingScrews(M4x12mm,4pcs)
□Cableholder
□EIZOUSBcable:MD-C93
(forEZ-UPstand)
Controls and Functions
Example of height adjustable stand
14
15
Adjustmentmenu
9
17
16
1
2
3 4 5 6 7 8 10 11 12 13
1 Sensor Detectsambientbrightness.BrightRegulatorfunction(page6).
2 Input Signal Selection button SwitchesinputsignalsfordisplaywhentwoPCsareconnectedtothemonitor.
3 Mode button
Displaysthecoloradjustmentmenu.Pressingthemodebuttonrepeatedly
switchesthesettingofthenecontrastmode(page6).
4 Brightness control buttons
Adjuststhebrightness.
5 Volume control buttons Adjuststhevolume.
6 Menu button
Displaysthemainmenu.Bypressingthemenubuttonwhilethemenuis
displayed,youcanreturntothepreviousstatusofthemenu.
7 Power/Help button
Turnsthepoweronoroff.BypressingthePower/Helpbuttonwhilethemenuis
displayed,thefunctionnamesofeachiconaredisplayed.
8 Power indicator
Indicatesmonitor’soperationstatus.
Blue:Operating Orange:Powersaving Off:Poweroff
9 Security lock slot ComplieswithKensington’sMicroSaversecuritysystem.
10 Power connector Connectsthepowerconnector.
11 Input signal connectors DVI-DConnector/D-Submini15-pinconnector
12 USB port (Up)
ConnectstheUSBcabletousetheScreenManagerProforLCDsoftware(for
Windows).Forhowtouseit,refertotheUser’sManualontheCD-ROM.
13 Stereo mini jack Connectsthestereominijackcable.
14 Stand Seepage3,5.
15 Cable holder Coversthemonitorcables.
16 Headphone jack Connectstheheadphones.
17
Option speaker (i·Sound L3)
Usedtoattachtheoptionspeaker(i·SoundL3).(Maynotallowedtoattachthe
mounting holes
optionspeakerdependingonthestandtype.)
2
TroubleshootingSetting/AdjustmentPrior to use Installation
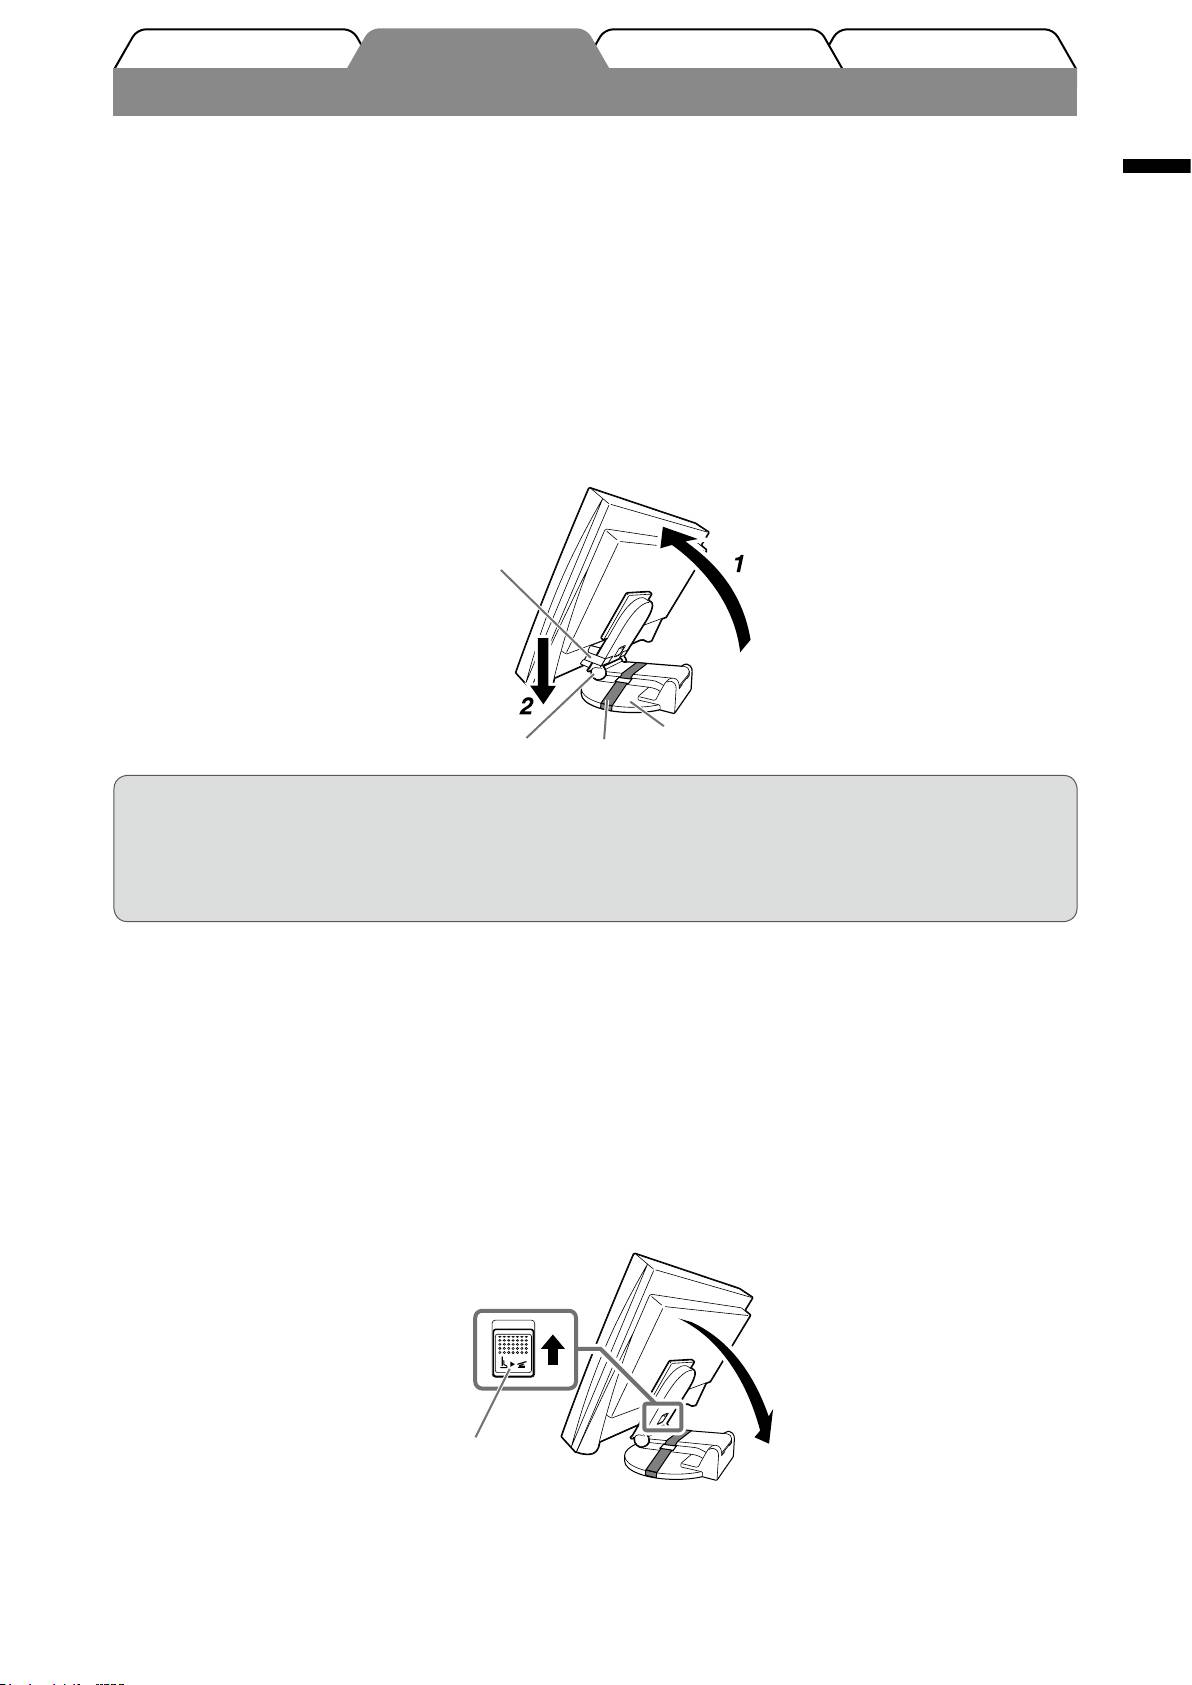
Installation/storage of the monitor with EZ-UP stand
If you have purchased the monitor with EZ-UP stand, please perform the following procedures when installing and
storing.
English
The stand of the monitor is fastened with a belt at the packing. Unfasten the belt after placing the monitor on the desk or
the stand may be unfolded suddenly. Keep the belt for future movement or transportation of the monitor.
Also, remove the cushion from the rear of the monitor at the installation.
Installing the monitor
Lift the monitor screen in the arrow direction.
1
Liftitbyholdingthepanelportionwithbothhands,untilyoumayhearthe“click”.Ifitclicks,themonitor
standlockissurelyfunctionedtousethemonitor.
Lower the monitor screen position, and unfasten the belt.
2
Cushion
StandBase
Hinge
Belt
Attention
•Unfasteningthebeltmaycausethestandtounfoldsuddenly.
•DonotusethemonitorwhentheEZ-UPstandisfolded.
•Afterreleasingthelock,takecarenottocatchyourngerswhenloweringthemonitor.Thismaycause
injuryordamagethemonitor.
Storage the monitor
Remove the cable holder.
1
Lower the monitor screen position until the hinge of the stand touches the stand
2
base, and fasten the stand with the belt.
Adjustthemonitoranglesoasthemonitorscreennottotouchthestandbase.
Fall the monitor screen backward with keeping slide-up the “Unlock” knob.
3
Whenmaximallytilting(25º)themonitorscreenbackward,the“Unlock”knobmaybehardtobeslid-up.
Then,slightlytiltupthemonitortoverticaldirectionandslide-upthe“Unlock”knob.
“Unlock”knob
3
Оглавление
- Controls and Functions
- Installation/storage of the monitor with EZ-UP stand
- Connecting Cables
- Covering the Monitor Cables
- Adjusting Speaker Volume
- No-Picture Problem
- Memo
- Bedienelemente und Funktionen
- Installation/Lagerung des Monitors mit EZ-UP-Standfuß
- Anschließen von Kabeln
- Abdecken der Monitorkabel
- Einstellen der Lautsprecherlautstärke
- Problem: Kein Bild
- Memo
- Commandes et fonctions
- Installation/rangement du moniteur avec le pied EZ-UP
- Connexion des câbles
- Protection des câbles du moniteur
- Réglage du volume du haut-parleur
- Problème de non-afchage d’images
- Memo
- Controles y funciones
- Instalación/almacenamiento del monitor con soporte EZ-UP
- Conexión de los cables
- Cubrimiento de los cables del monitor
- Ajuste del volumen del altavoz
- Problemas con la visualización de imágenes
- Memo
- Comandi e funzioni
- Installazione/conservazione del monitor con supporto EZ-UP
- Collegamento dei cavi
- Copertura dei cavi del monitor
- Regolazione del volume del diffusore
- Problema Nessuna immagine
- Memo
- Reglage och funktioner
- Installation/förvaring av bildskärm med EZ-UP-stativ
- Ansluta kablarna
- Täck skärmens kablar
- Justera högtalarvolymen
- Ingen bild visas
- Memo
- Χειριστήρια και λειτουργίες
- Εγκατάσταση/φύλαξη της οθόνης με βάση EZ-UP
- Σύνδεση καλωδίων
- Κάλυψη των καλωδίων της οθόνης
- Ρύθμιση έντασης ήχου του ηχείου
- Πρόβλημα "Καθόλου εικόνα"
- Memo
- Средства управления и их назначение
- Установка/хранение монитора с подставкой EZ-UP
- Подключение кабелей
- Закрытие кабелей монитора
- Регулировка громкости громкоговорителя
- Отсутствует изображение на экране
- Memo
- 控制与功能
- 安装/存放带EZ-UP底座的显示器
- 连接电缆
- 扣住显示器电缆
- 调节扬声器音量
- 无图像的问题
- Memo
