DOCTER NOBILEM 7 x 50 NAVIDOC: Operation and settings
Operation and settings: DOCTER NOBILEM 7 x 50 NAVIDOC
E
nl
ar
ge
m
en
t
Ø
O
bj
ec
tiv
e
le
ns
(
m
m
)
Ø
O
ut
le
t p
up
il
(m
m
)
O
ut
le
t p
up
il
in
te
rf
ac
e
(m
m
)
P
up
il
di
st
an
ce
(
m
m
)
E
ye
r
el
ie
f
M
ax
. N
ea
r
po
in
t
F
ie
ld
o
f v
ie
w
a
t 1
00
0
m
W
ei
gh
t
H
ei
gh
t (
m
m
)
W
id
th
w
ith
m
id
dl
e
pu
pi
l e
nd
di
st
an
ce
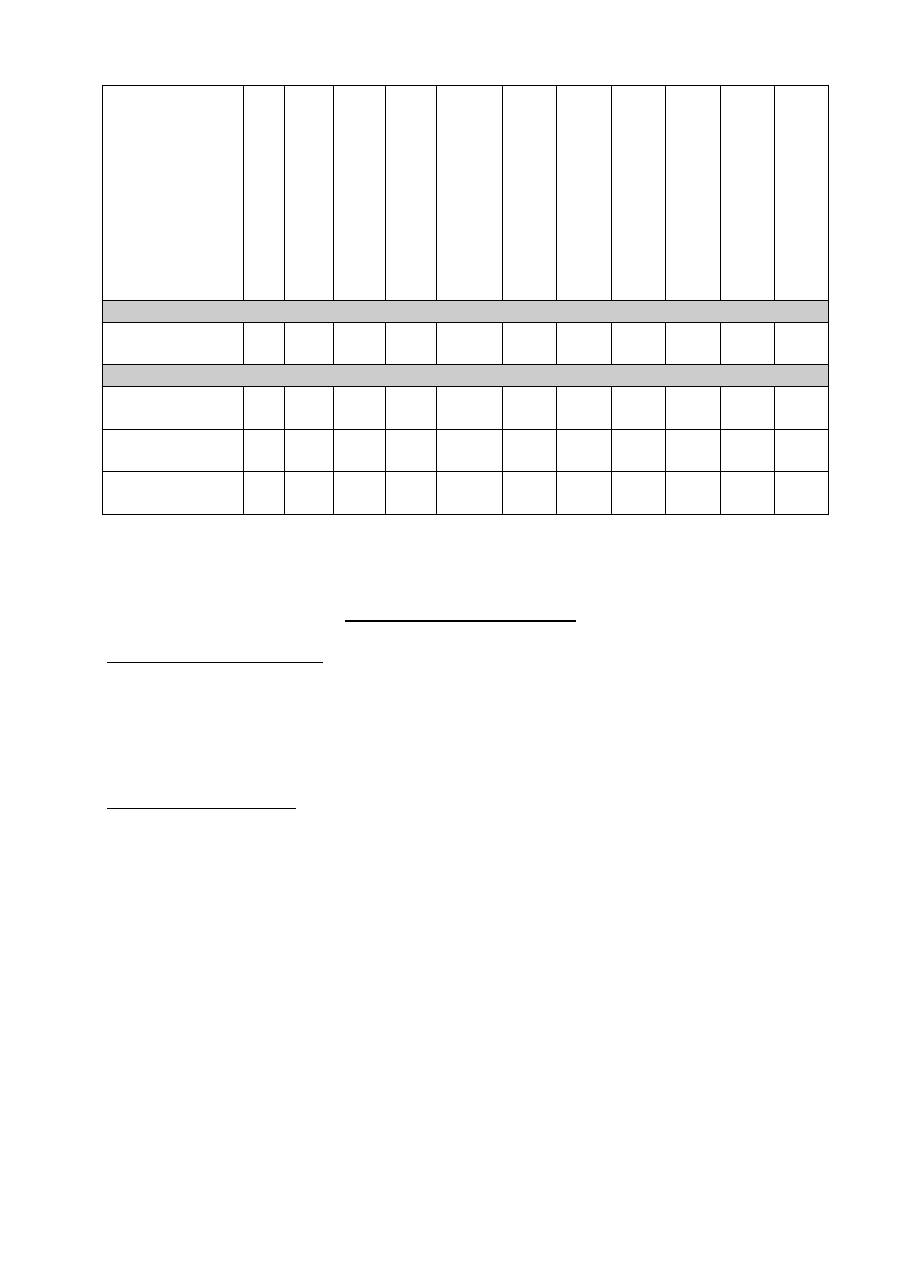
Individual focussing (IF)
NOBILEM 7x50
B/GA
7
50
7.1
17.3 53-74 18.7 5.8
128 1250 182 207
Nautical binoculars (IF)
NAVIDOC 7x50
B/GA
7
50
7.1
17.3 53-74 18.7 5.8
128 1250 182 207
NAVIDOC 7x50
B/GA (S)
7
50
7.1
17.3 53-74 18.7 5.8
128 1250 182 207
NAVIDOC 7x50
B/GA (CS)
7
50
7.1
17.3 53-74 18.7 5.8
128 1250 182 207
S – with graticule
CS – with compass and graticule
Operation and settings
Adaptation of the eye cups
NOBILEM models (except NOBILEM – Navidoc) are equipped with protective eyecups
(1) whose use assist those wearing glasses and who are emmetropic
to use the whole
field of view of the
binoculars
.
Those wearing glasses turn the eye cups over at (2) and
thus achieve the correct ocular – eye-distance. Persons who are emmetropic or who
wear contact lenses leave the eye cups in their erect position (3)
Setting the eye spacing
In order to achieve the largest possible circular picture the binoculars must be set to the
individual eye spacing. Take the binoculars in both hands and turn the middle joint (4) of
the binoculars while looking through it until the picture is sharp and circular. The tight
setting of the middle joint at the works prevents the inadvertent movement of the eye
spacing while carrying and watching. An eye-side graticule marking allows the user to
recognize the setting.

Eye error equalization
Models with centre adjustment:
•
With the left eye look through the left binocular half and on the knob of the centre
adjustment (5) set the focus sharp on an object. Keep the right eye closed while
doing this.
•
Then look through the binoculars with both eyes and at the right ocular change
the dioptric setting (6) until an equally sharp, circular picture is obtained.
Models with individual focussing:
•
The eye error equalization occurs through adjusting the right and left ocular (7)
individually for each eye.
•
When viewing, the right picture for the right eye as well as the left picture for the
left eye are individually adjusted at the right and left ocular.
•
Adjust the settings of the oculars until you have an even sharp and circular
picture.
•
Caution:
The adjustments for right and left should be carried out by looking at
the same object in order to prevent incorrect settings.
Distance settings
Models with centre adjustment
•
Different object distances require different binocular settings.
•
During viewing the object the centre adjustment knob (5) is rotated to the right
and left until the sharpest and most contrasting view is achieved.
Models with individual focussing
•
If the two oculars (7) are adjusted to the sharpest setting then there is no need
for further adjustment for viewing different distances.
•
Only for viewing objects that are near to the maximum near point of the
binoculars will it be necessary to adjust the oculars in the + - direction.
Additional equipment variants and their application
The NOBILEM – Model 7x50 B/GA (IF) can be equipped optionally at the works with a
graticule plate for estimating distances of viewed objects.
Use with the graticule
If the binoculars is equipped with a graticule plate (on the right ocular side) then it is
possible to determine distances and sizes of objects. The estimation of distance with
the graticule plate is possible from a distance of 100 m.

The scale on the graticule plate is arranged in such a manner that the distance between
two large lines (an interval) corresponds to an object size of 10 m in 1000 m. With the
aid of the scale it is possible with a known size of the object to estimate its distance.
Here the following calculation formula must be used.
With a known distance of the object it is possible to determine its size according to the
following formula:
NOBILEM Navidoc nautical binoculars
The NOBILEM Navidoc was designed specially for use at sea and is optionally
equipped ex works with graticule plate or graticule plate and compass. The use of the
graticule plate with the Navidoc is similar to the method described above.
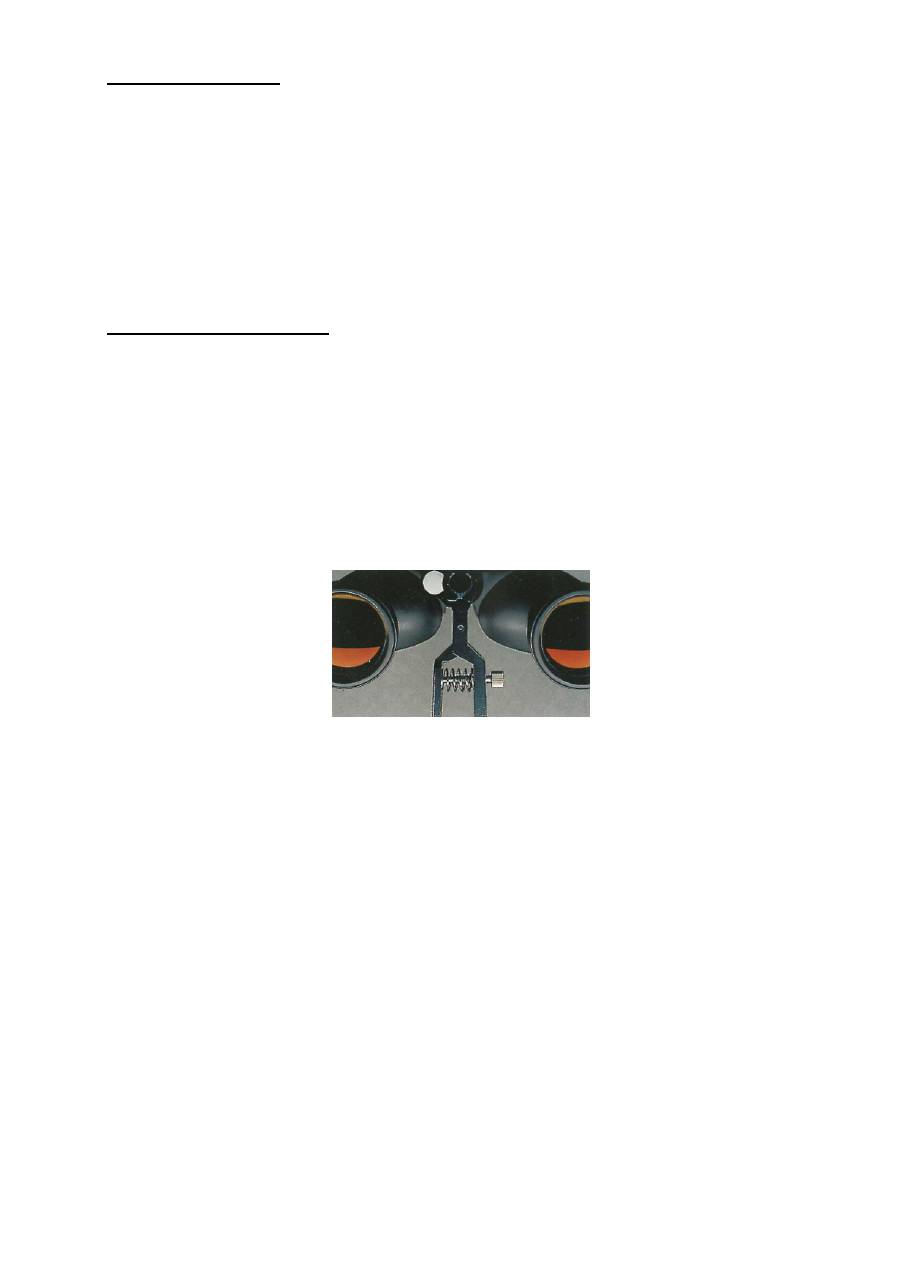
Additionally to the graticule plate the Navidoc can be equipped at the works with a high
performance magnetic compass (8) with 360° Rose (right ocular side). The compass
possesses a 1° division and is mirrored in a special graticule plate. In this way an exact
determination of the points of the compass can be undertaken.
The points of the compass are determined as follows:
•
0°
North
•
90°
East
•
180°
South
•
270°
West
Maintenance
With careful handling, the life of a binoculars is practically unlimited. The outside
surfaces of the optics should be carefully cleaned from time to time with a fine hair
brush.
Do not wipe off large dirt particles (e.g. sand) on the lenses but remove them with a hair
brush in order to avoid scratching the coating layer. Fingerprints should be wiped off
with an optical cloth after breathing on them or with a soft cloth.
Do not use chemical
solvents
Object size in m x 100
Distance in m =
No of intervals, which the object
accepts on the graticule
Object size in m =
Distance in m x No of intervals which the object
accepts on the graticule
100
Otional accessories
The steadier the binoculars are held the better the viewing quality. Leaning against
something or support always brings viewing advantages. The use of a tripod is a
necessity for long viewing periods or for high degrees of magnification. With the use of
an adapter and stand clamp (9) obtainable at a specialist shop or from the works, the
Nobilem can be fastened to any commercially available photographic tripod.
A practical swimming belt (10) is available for the NOBILEM – Navidoc models as an
optional accessory.
Use with the tripod clamp
In order to use the NOBILEM models with commercially available tripods it is necessary
to use a tripod adapter.
Installation:
•
Remove the protective cap from the threaded hole of the middle joint
•
Screw the bolt of the adapter into the threaded hole
•
Screw the tripod clamp on to the tripod
•
Link the clamp with the adapter pin in a 90° angle
