Elta 6699: 19. 18.
19. 18.: Elta 6699
19. 18.
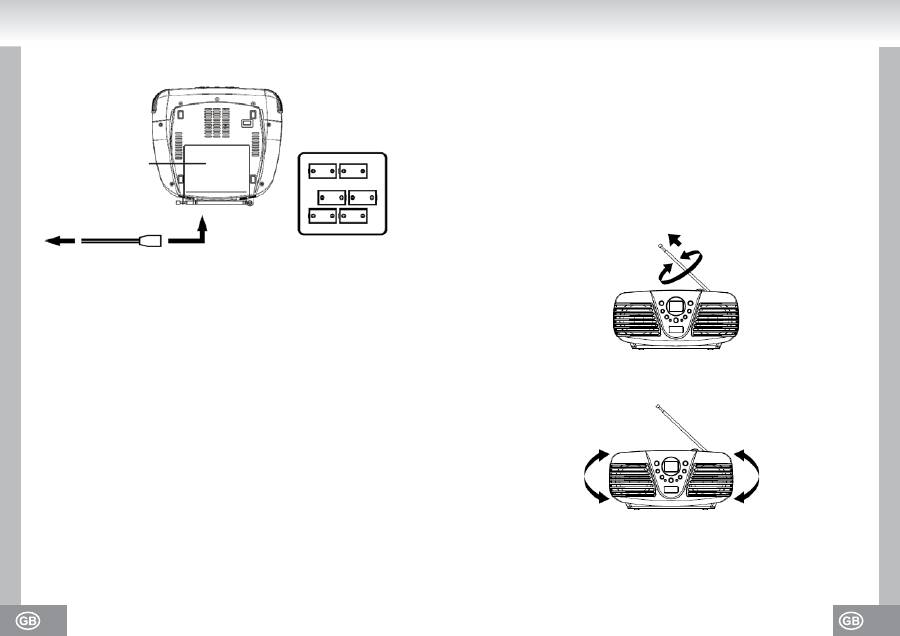
CONNECTIONS AND INSTALLATION
Power supply
Bottom view
Battery compartment
To a wall outlet
To the AC jack
MAINS OPERATION
The unit is designed for mains power supply AC 230V ~ 50Hz but may also be operated with 6
batteries type “LR14 / UM-2 / C”.
Do not connect the unit to any other power supply to avoid damage that is not covered by your
warranty.
Connect the smaller plug to the jack at the rear of the unit (AC 230V ~ 50Hz) and the mains plug to
a wall outlet.
Disconnect from mains power supply to completely turn off the unit.
BATTERY OPERATION
1. Open the battery compartment on the bottom side of the player by gentle pressing down and
push it to the rear.
2. Insert 6 batteries type “LR14 / UM-2 / C“ into the battery compartment. Please observe correct
polarities which are marked with “+” and “-“ in the battery compartment.
3. Replace the cover by pushing onto the battery compartment until it snaps in.
BATTERY SAFETY PRECAUTIONS
Follow the battery manufacturer’s safety, usage and disposal instructions.
Only use batteries of the same type and size.
Insert the batteries observing the polarity (+/-). Failure to properly align the battery polarity can
cause personal injury and/or property damage.
Do not mix battery types (e.g. alkaline, zinc/carbon, rechargeable batteries) or exhausted and new
batteries.
Remove exhausted batteries from the device. Remove the batteries when the device will not be
used for extended periods of time to prevent damage due to rusted or corroded batteries.
To avoid fire and explosion do not recharge normal batteries.Keep batteries away from children and
pets.
During battery operation of the device, disconnect the AC power cord.
Insert 6 batteries type “LR14 /
UM-2 / C” batteries into the
battery compartment
GENERAL OPERATING INSTRUCTIONS
RADIO OPERATION
1. Set the FUNCTION selector (2) to the RADIO position. The POWER LED (18) lights up.
2. Set the BAND selector (4) to the desired band: FM ST. (FM stereo), FM (FM mono), AM.
3. Select your station with the TUNING control (6), the adjusted frequency will be shown on the
frequency dial (7).
4. Adjust the volume with the VOLUME control (3).
5. To turn off the radio set the FUNCTION selector (2) to the OFF position. The POWER LED (18)
turns off.
FM Stereo / Mono
Stereo: Set the BAND selector (4) to FM ST. The FM ST. LED (14) lights up.
Mono: Set the BAND selector (4) to FM.
Recommendations For Better Reception
FM:
Fully extend the telescopic antenna (1) and turn it for better reception.
Medium Wave (AM):
The device has a built-in AM-antenna; change the position of the device if
reception is poor.
Оглавление
- 03. 02.
- 05. 04.
- 07. 06.
- 09. 08.
- 11. 10.
- 13. 12.
- 15. 14.
- 17. 16.
- 19. 18.
- 21. 20.
- 23. 22.
- 25. 24.
- 27. 26.
- 29. 28.
- 31. 30.
- 33. 32.
- 35. 34.
- 37. 36.
- 39. 38.
- 41. 40.
- 43. 42.
- 45. 44.
- 47. 46.
- 49. 48.
- 51. 50.
- 53. 52.
- 55. 54.
- 57. 56.
- 59. 58.
- 61. 60.
- 63. 62.
- 65. 64.
- 67. 66.
- 69. 68.
- 71. 70.
- 73. 72.
- 75. 74.
- 77. 76.
- 79. 78.
- 81. 80.
- 83. 82.
- 85. 84.
- 87. 86.
- 89. 88.
- 91. 90.
- 93. 92.
- 95. 94.
- 97. 96.
- 99. 98.
