Lacie Biggest Quadra: инструкция
Раздел: Профоборудование
Тип: Аппарат
Инструкция к Аппарату Lacie Biggest Quadra
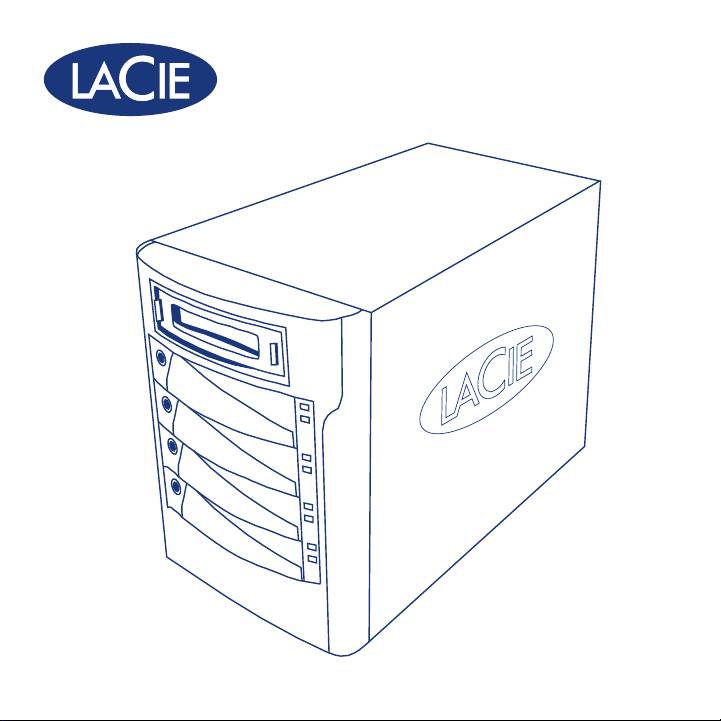
Biggest Quadra
Quick Install Guide
Box Content
Biggest Quadra with four SATA Hard Disks in Trays
Power Cable
eSATA cable
FireWire 800 Cable
FireWire 400/800 Cable
Hi-Speed USB 2.0 Cable
CD-ROM with User Manual and Utilities
Two Keys for Disk Tray Locks
Protect your investment – register for free technical support: www.lacie.com/register
2
0 5 0-1 5-S
eSATA
USB
LaCie Biggest Quadra
9
1
7
11
2
3
8
10
5
6
12
4
13
15
14
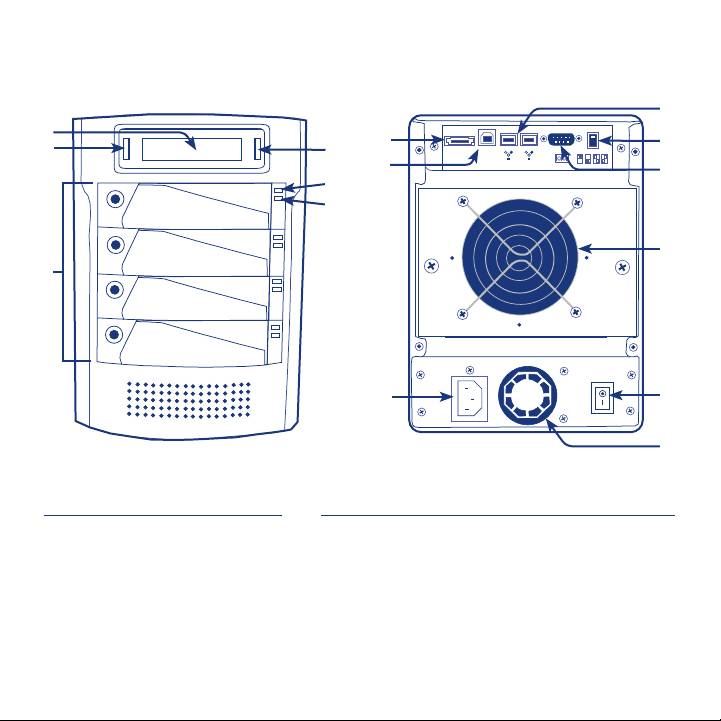
Front:
Back:
1. LCD Display
7. eSATA port
12. System Fan
2. Menu Button
8. USB Port
13. Power Connector
3. Enter/Mute Button
9. FireWire 800 Ports (2)
14. Power Supply Fan
4. Drive Trays with Key Lock (4)
10. RS232 Port
15. On/Off Switch
5. Disk Status LED
11. RAID Level Selector
Switches
6. Disk Activity LED
3
How Your LaCie Biggest Quadra is Preconfigured
• The Biggest Quadra is delivered with four 3.5” SATA II hard drives.
• The Biggest Quadra is preconfigured in RAID 5.
• The drive trays are unlocked. For more details on the drive tray locks please
check the User Manual.
1
Set the RAID Level
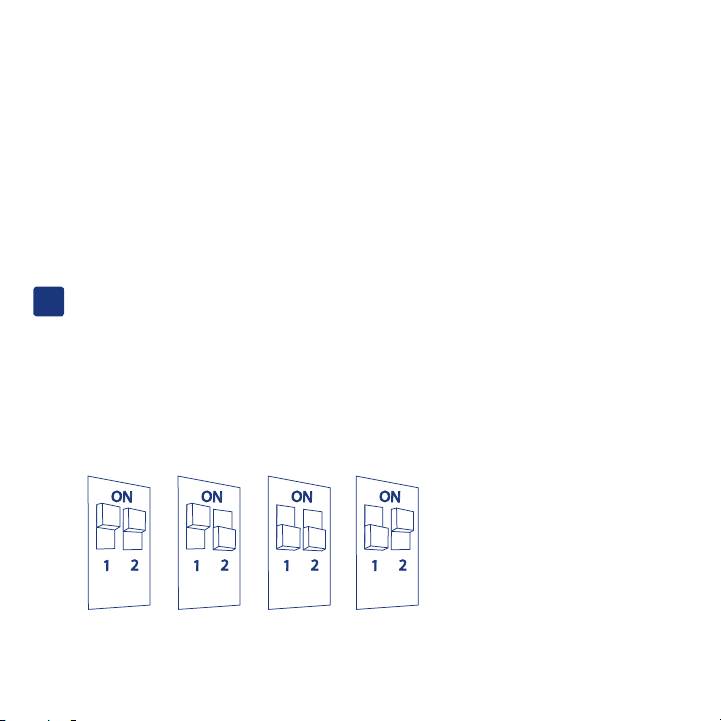
a. Make sure the Biggest Quadra is turned off.
b. Use the RAID level selector switches on the rear panel of the Biggest Quadra
to set the desired RAID level. See the User Manual for information on
RAID levels.
Note: The maximum total
capacity which will mount on
Windows 2000 and Windows
XP, regardless of the RAID mode,
is 2TB.
RAID 0 RAID 0+1 RAID 5 RAID 5+Spare
4
2
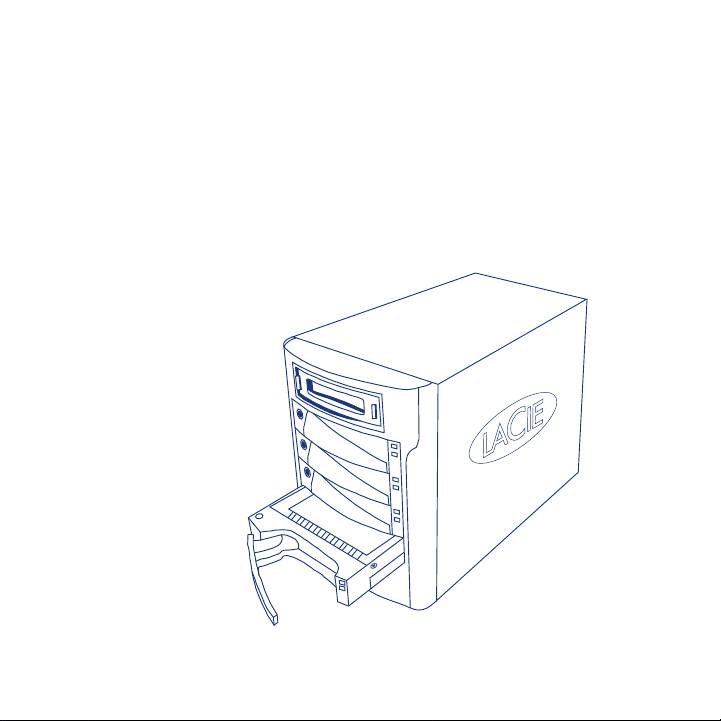
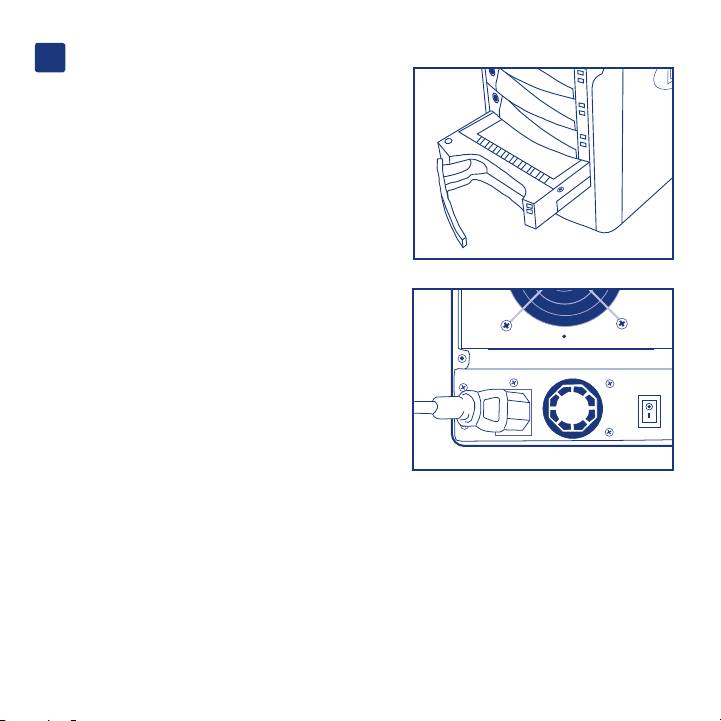
Initialize the Disks
a. Ensure that the drive trays are not locked
and then slide them out from the Biggest
Quadra slightly.
b. Connect the power cable to a grounded
electrical outlet and to the Biggest Quadra.
Turn on the Biggest Quadra using the
switch on the back.
c. Slide each of the drive trays back into the LaCie Biggest Quadra, and push the
drive tray handles flat to lock the drive trays into place.
The disks will be initialized automatically. The duration of this process depends
on the RAID level you selected and the capacity of disks installed.
5
Оглавление
- Quick Install Guide
- Set the RAID Level
- When initialization has completed, connect the
