Toshiba JOURNE F700: Step 4: (Optional) Insert a memory card. Step 5: Turn on the unit. Step 6: Operate the unit.
Step 4: (Optional) Insert a memory card. Step 5: Turn on the unit. Step 6: Operate the unit.: Toshiba JOURNE F700
Table of contents
- Before operating this unit (Journe F700), please carefully read and follow the instructions below.
- Follow the instructions below to install and operate the unit. Step 1: Check the package contents.
- Controls on the back Step 2: Install the foot stand.
- Step 3: Connect the AC power.
- Step 4: (Optional) Insert a memory card. Step 5: Turn on the unit. Step 6: Operate the unit.
- Using the Photo mode
- Using the Calendar mode Using the Music mode
- Need help? Regulatory Compliance
- Disposal of batteries and/or accumulators
F 700
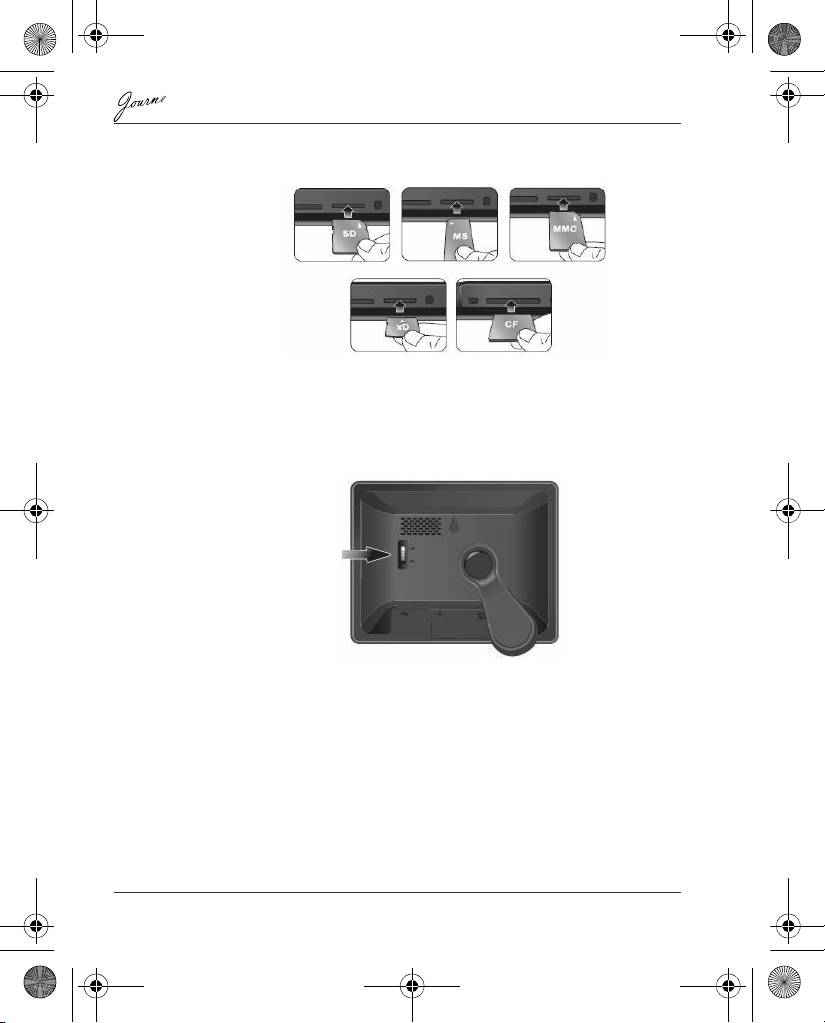
Step 4: (Optional) Insert a memory card.
The unit is preloaded with some demo images and music in the
internal memory. On the back of the unit, you can also insert a
memory card containing the content you want to show on the unit.
Step 5: Turn on the unit.
Sliding the power switch to ON turns on the unit.
Step 6: Operate the unit.
After the unit is turned on, available functions (represented by name
or icon) show on the screen. Their corresponding buttons also light
up on the control panel for a period of time.
Simply press the corresponding button below (if the unit is placed
horizontally) or beside (if the unit is placed vertically) the name or
icon indicating the function you want to use.
EN-6 Quick Start Guide
Power switch
GMH300054020.book Page 6 Sunday, August 31, 2008 10:54 PM
