De Dietrich DVI300: Installing your dishwasher Installing your dishwasher
Installing your dishwasher Installing your dishwasher: De Dietrich DVI300
Installing your dishwasher
Installing your dishwasher
This dishwasher
Water connections
must operate with a
Important :
check the water’s
wood panel.
hardness: all the
information you
require is provided in
the Chapter
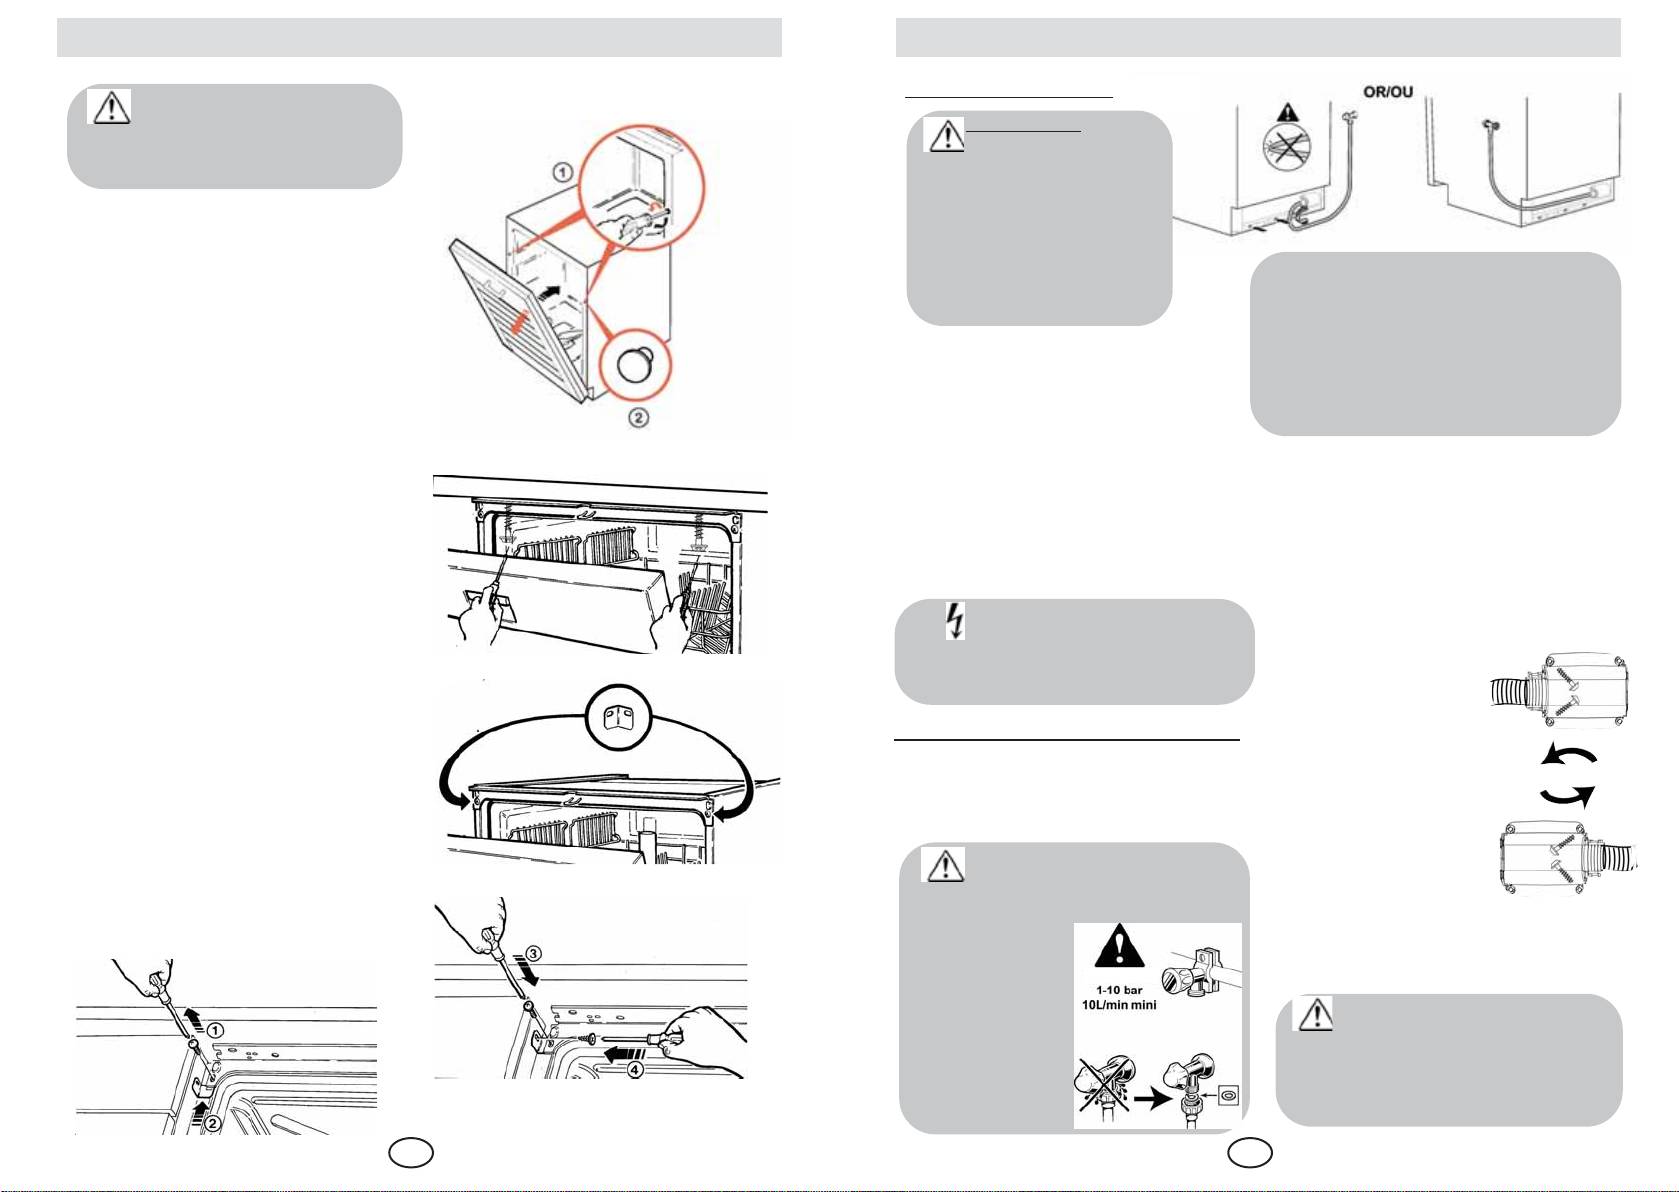
Facing the door
“Adjusting the water
To fit a door to match your units
softener” in your
When the tap is on the left-
operating instructions
hand side of the machine, use the
onto the dishwasher’s door, use the
manual.
“anti-kinking” hook supplied with the
installation template and the
machine to avoid any risk of the
accessories supplied with your
Tap: with threaded end, 20/27mm
supply hose* kinking while you are
machine.
dia. (3/4” BSP)
fitting your dishwasher.
Flow: 10l/min. minimum
(* For large diameter safety hoses-
Pressure: 1 bar to 10 bars
depending on the model)
Balancing the door (right and
(0.1 - 1 MPa)
In the event of high pressure, it is
If necessary, you can alter the
left)
advisable to fit a pressure regulator.
hose’s direction. To do this, loosen
Adjust the tension on the springs, if
Your Water Company will give you
the connection at the bottom left
required, to compensate for the
the necessary information.
on the rear of the machine and
weight of the facing panel. Adjust in
Length of the water supply pipe
swivel it as necessary. Fully tighten
an identical fashion to the right and
(standard unit): 1.50m
the connection again and check
that there are no leaks.
to the left. The adjustment is easier
“Hazardous Voltage” symbol
with the door closed.
(depending on the model)
For dishwashers fitted
the hose is fitted with an electrical
with safety hoses:
Fix your dishwasher to the worktop
device
You must remove the
protective cover (see
with two screws under the front
Connecting the hot water:
the drawing opposite)
corner bracket.
Check that your original hose is
to alter the hose’s
designed for connection to the hot
direction. To do this,
If your worktop is marble or a
water supply (red marking on the
loosen the two
similar material, you can fasten
hose).
screws (end fitting
T20), remove the
your dishwasher in place at the
If you use a self-
protective cover,
sides using two brackets (available
piercing tap, check that
position the
from the After-Sales department or
there is sufficient water flow.
connection in the
from your dealer).
direction you wish and then
Check that the
replace the protective cover.
seal is fitted
0,1 - 1 MPa
and that the
When you are making a
connection is
new installation, you must
tight.
use a new hose to connect the
machine to the water supply: you
must not re-use the old hose.
GB GB
1918
Installing your dishwasher
Installing your dishwasher
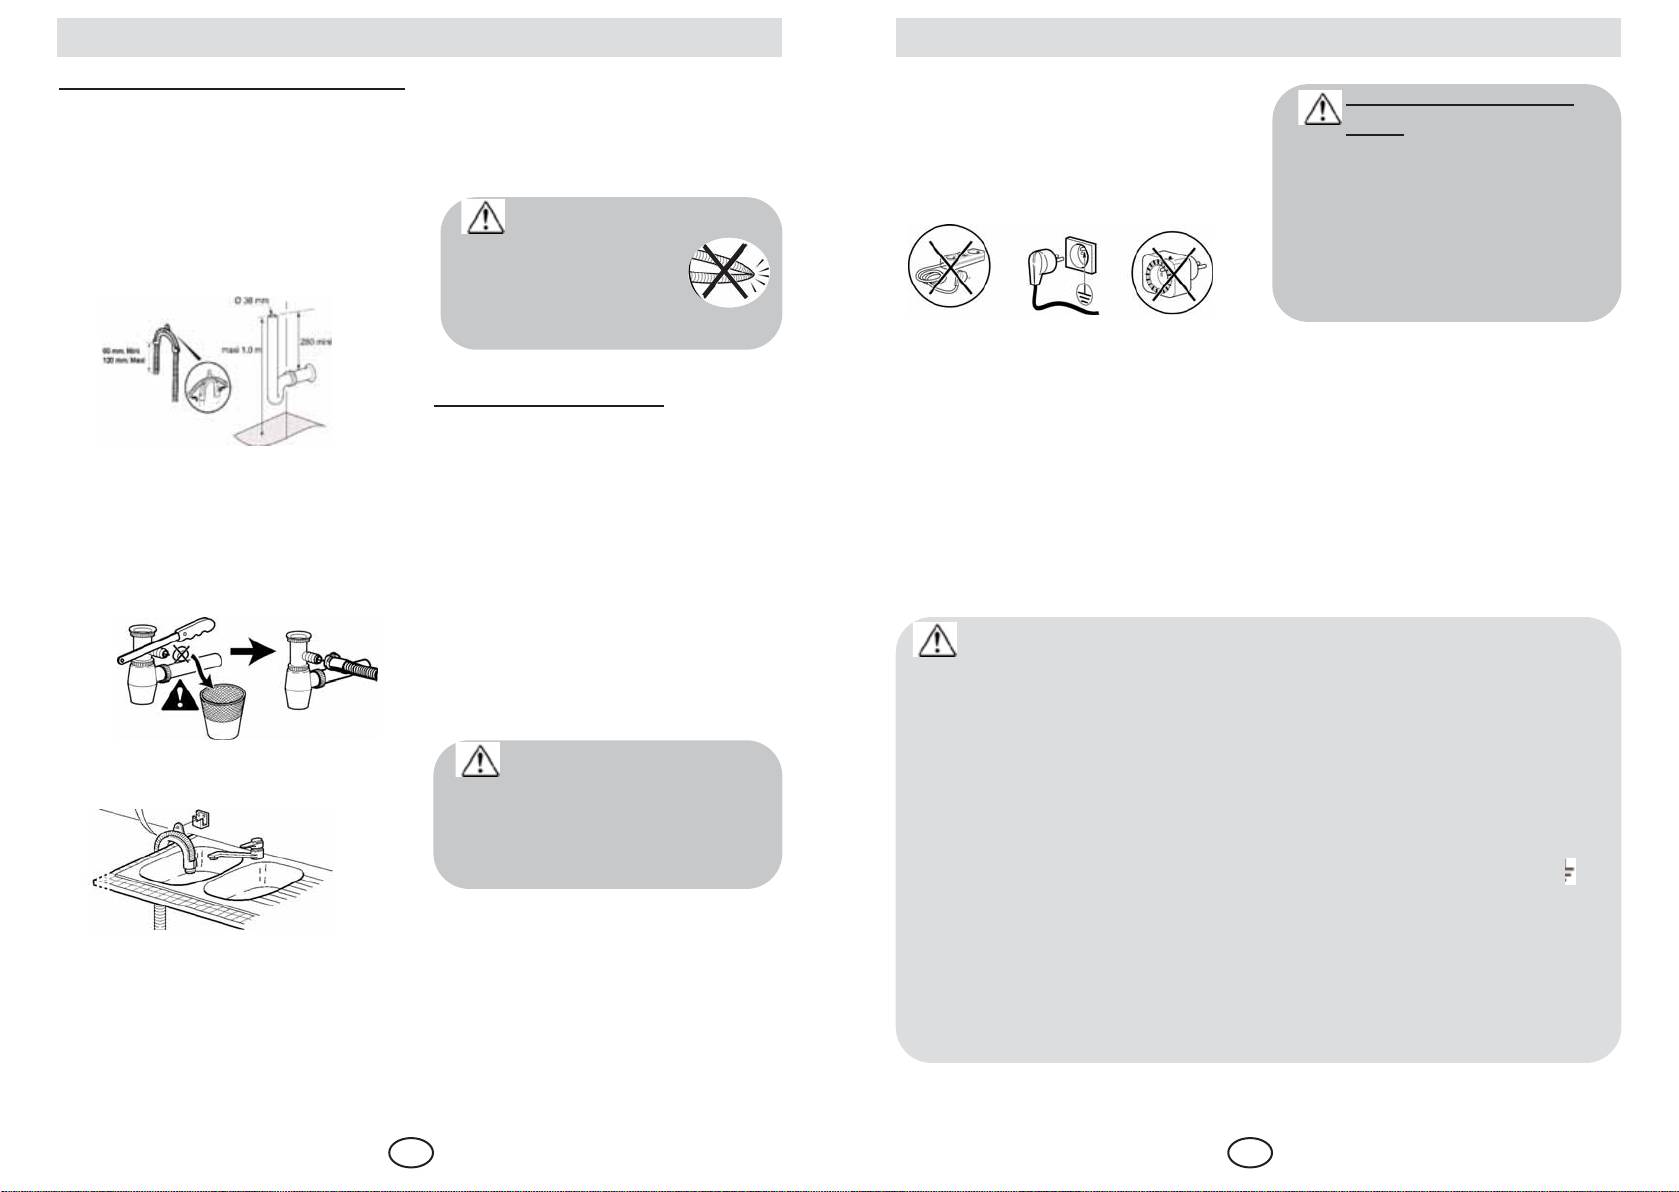
Draining away the waste water
For machines installed in columns,
Do not use an electrical extension,
Replacing the power
Length of the drain hose: standard
the height of the drain hose must
a double socket or an electrical
1.50m. If necessary, you can
not be higher than the top of the
cable
timer. The installation must comply
For your safety, this operation
increase the length of the drain
machine.
with the country’s prevailing norms.
must be performed by the
hose (4m max.). In this case, check
manufacturer’s After-Sales
that the machine drains correctly.
NB: Pull the pipe
department or a person with
Connect the drain hose:
gradually when
similar training and experience
- To a ventilated siphon
installing it to avoid
in order to avoid any risk.
kinking it.
Your dishwasher complies with
European Directives 73/23/EEC
(Low Voltage Directive) and
Electrical connection
89/336/EEC (Electromagnetic
Mains voltage: 230V
Compatibility), modified by
Fuse: 10A, 13A or 16A
Directive 93/68/EEC.
- To a sink U-bend
The socket outlet must be
Remove the stopper form the
grounded to Earth.
U-bend.
In all cases, the connection must
Remove the rubber stopper and, if
comply with the standards in force
necessary, add a collar.
in the country concerned, together
with the supplementary regulations
of the Electricity Authority. The
IMPORTANT for the dishwasher without plug.
machine must be switched off when
The wires in this mains lead ar coloured in accordance the
the connection is made to the
following code :
electrical circuit.
Green & Yellow Earth
Blue Neutral
We cannot be held
Brown Live
- Directly to your sink.
liable for any damage
As the colours of the wires in the mains lead of this appliance may not
caused by the faulty earthing
correspond with the terminal in your plug, proceed as follows ; The wire
of the machine.
which is coloured Green and Yellow must be connected to the terminal
which is marked with the letter «E» or by the earth symbol or
coloured Green end Yellow.
If you have any doubts regarding
The wire which is coloured Blue must be connected to the terminal
the condition of your installation, do
Ensure that you hold your drain
which is marked with the letter «N» or coloured Black.
not hesitate to have it checked by a
hose in place with the end
The wire which is coloured Brown must be connected to the terminal
qualified electrician.
connector to avoid flooding.
which is marked with the letter «L» or coloured Red.
The machine must be installed so
that the socket remains accessible.
GB GB
2120
Оглавление
- Sommaire Installation de votre lave-vaisselle
- Installation de votre lave-vaisselle Installation de votre lave-vaisselle
- Installation de votre lave-vaisselle
- Inhalt
- Installation der Spülmaschine Installation der Spülmaschine
- Contents Installing your dishwasher
- Installing your dishwasher Installing your dishwasher
- Installing your dishwasher
- Sumário
- Instalação da sua máquina de lavar louça Instalação da sua máquina de lavar louça
- Sumario Instalación de su lavavajillas
- Instalación de su lavavajillas Instalación de su lavavajillas
- Instalación de su lavavajillas
- Inhoudsopgave
- Installatie van uw vaatwasmachine Installatie van uw vaatwasmachine
- Installatie van uw vaatwasmachine Installatie van uw vaatwasmachine
- Indholdsfortegnelse Installation
- Installation Installation
- Installation de votre lave-vaisselle Installation de votre lave-vaisselle
- Sikkerhedsregler
- Ðßíáêáò ðåñéå÷ïìÝíùí
- ÅãêáôÜóôáóç ôïõ ðëõíôçñßïõ
- ÅãêáôÜóôáóç ôïõ ðëõíôçñßïõ ÅãêáôÜóôáóç ôïõ ðëõíôçñßïõ
- Spis treœci Instalacja zmywarki
- Instalacja zmywarki Instalacja zmywarki
- Instalacja zmywarki
- Содержание
- Установка Вашей посудомоечной машины Установка Вашей посудомоечной машины
