Whirlpool AKP 461 WH: USING THE ELECTRONIC PROGRAMMER
USING THE ELECTRONIC PROGRAMMER: Whirlpool AKP 461 WH
Table of contents
- YOUR SAFETY AND THAT OF OTHERS IS PARAMOUNT Scrapping of household appliances IMPORTANT SAFETY INSTRUCTIONS
- INSTALLATION SAFEGUARDING THE ENVIRONMENT DECLARATION OF CONFORMITY
- TROUBLESHOOTING GUIDE AFTER-SALES SERVICE CLEANING
- REMOVING THE DOOR MOVING THE TOP HEATING ELEMENT (SOME MODELS ONLY) MAINTENANCE
- REPLACING THE OVEN LAMP
- ACCESSORIES SUPPLIED ACCESSORIES NOT SUPPLIED INSTRUCTIONS FOR OVEN USE
- INSERTING WIRE SHELVES AND OTHER ACCESSORIES IN THE OVEN CONTROL PANEL DESCRIPTION HOW TO OPERATE THE OVEN
- USING THE ELECTRONIC PROGRAMMER
- FUNCTION DESCRIPTION TABLE
- COOKING TABLES Recipe
- Recipe
- RECOMMENDED USE AND TIPS
GB8
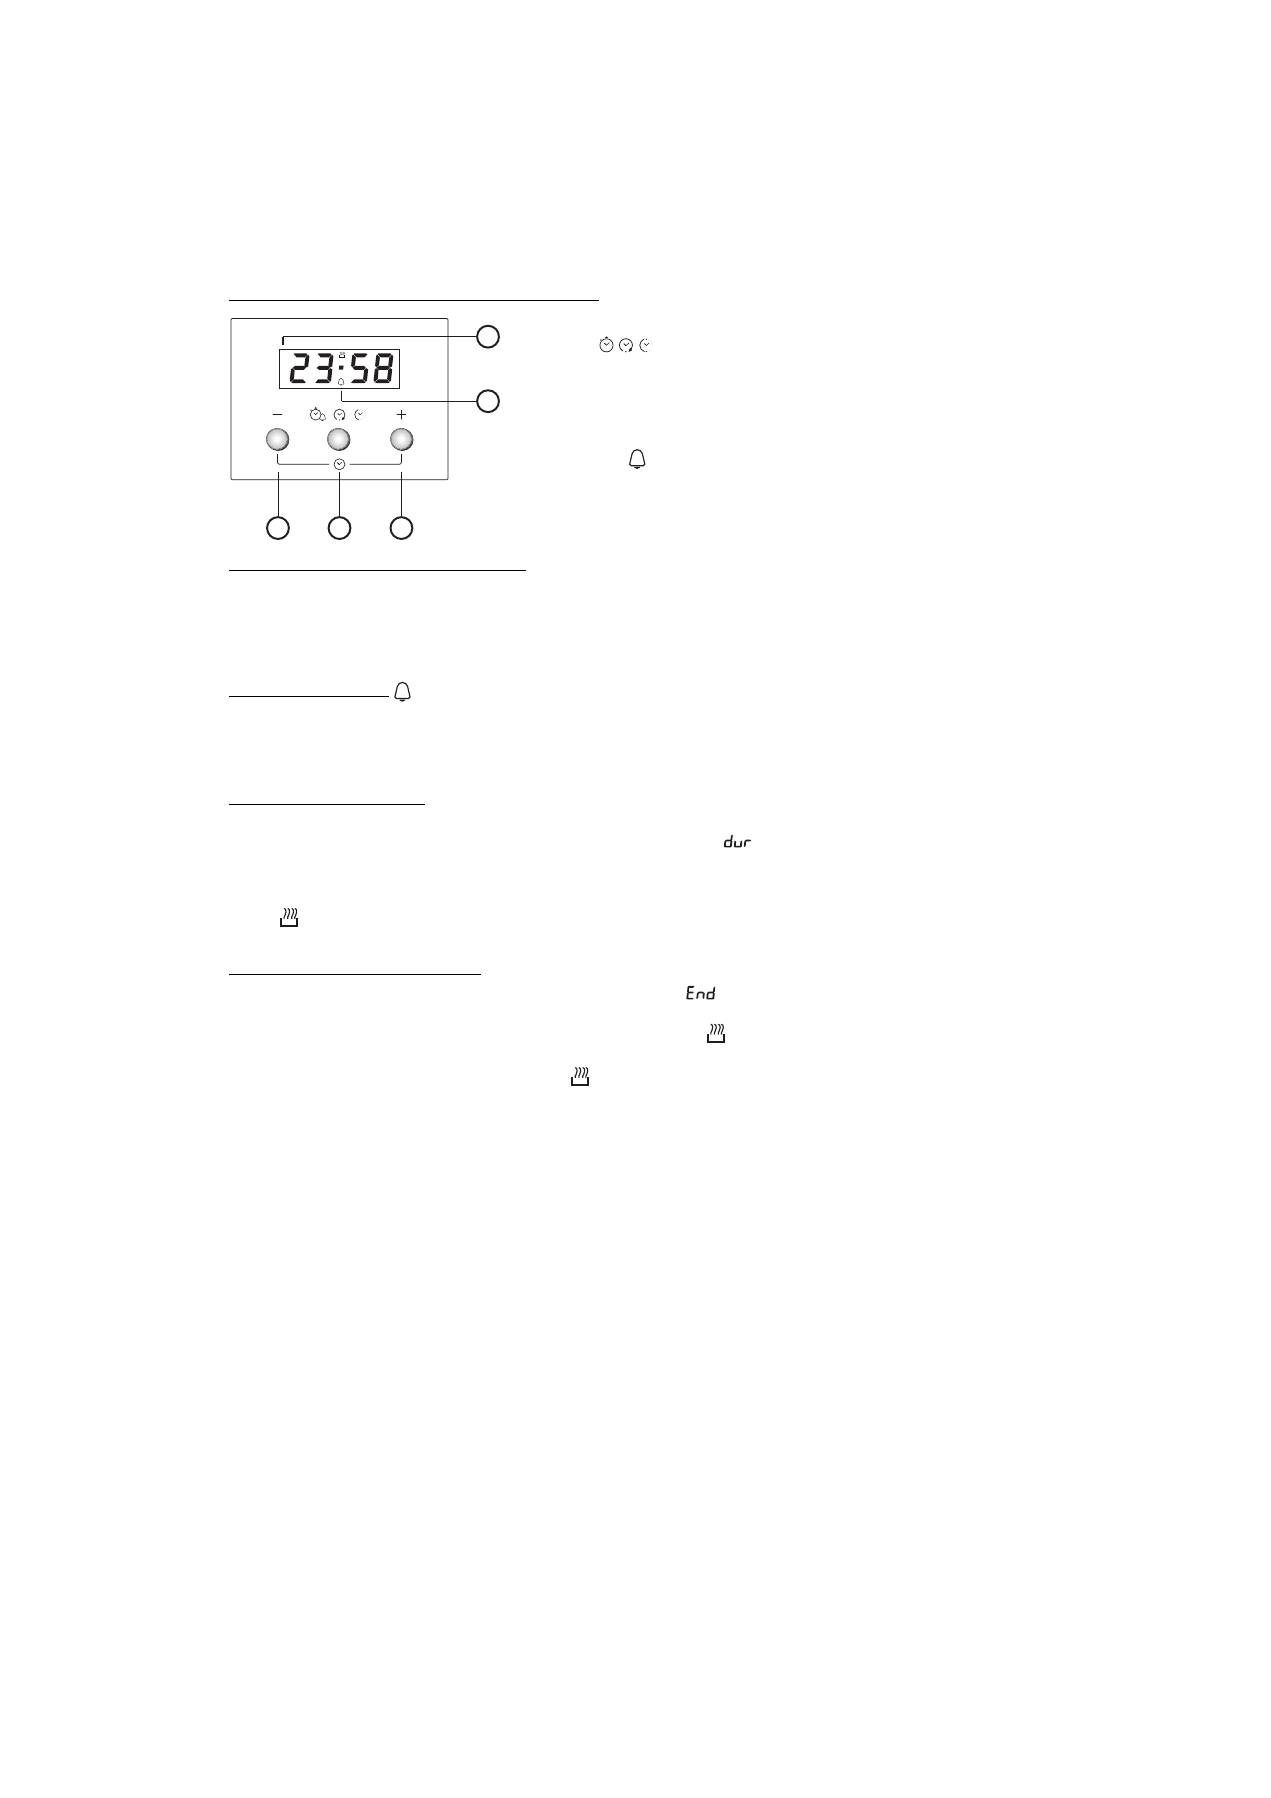
USING THE ELECTRONIC PROGRAMMER
Using the oven for the first time
Setting the time of day and the tone of the acoustic signal.
Upon connection of the oven to the mains power supply,
AUTO
and 0.00 flash on the display. To set the time of day, press
buttons
-
and
+
at the same time: the two central dots flash. Set the time of day using the buttons
+
and
-
. Having selected the
desired value, press the middle button. The display shows “ton 1”. To select the desired tone, press button –. Having selected
the preferred tone, press the middle button. To change the time of day, proceed as described above.
Setting the timer
To set the timer, keep the middle button pressed for about 2 seconds: the display shows 0.00 and the bell symbol flashes. Set
the timer using the button
+
(the maximum programmable value is 23 hours and 59 minutes). The countdown begins after a
few seconds. The display shows the time of day and the bell remains lit, confirming the timer has been set. ToTo display the
countdown status and change it if necessary, press the middle button again for 2 seconds.
Setting cooking time
After selecting the cooking mode and temperature using the knobs, press the middle button for 2 seconds: the display shows
0.00 and the bell symbol flashes. Press the middle button again: on the display
and 0.00 appear in sequence and
AUTO
flashes. Set cooking time using the buttons
+
and
-
(the maximum programmable value is 10 hours). After a few seconds the
display shows the time of day and
AUTO
remains lit, confirming the setting. To view the remaining cooking time and change it
if necessary, press the middle button for 2 seconds and then press it again a second time. At the end of the set time, the
symbol
switches off, the alarm sounds and
AUTO
flashes on the display. Press any button to deactivate the alarm. Return the
functions and temperature knob to zero and press the middle button for two seconds to end cooking.
Delaying cooking end time
After selecting cooking time, press the middle button: the display shows
, cooking end time and
AUTO
flashing in
sequence. Press the button
+
to view the desired cooking end time (cooking can be delayed by a maximum of 23 hours and 59
minutes). After a few seconds the display shows the time of day, the symbol
switches off and
AUTO
remains lit, confirming
the setting. To display the cooking end time and change it if necessary, press the middle button for 2 seconds and then press it
again twice. At the end of the countdown, the symbol
lights up and the oven proceeds with the selected cooking mode.
1.
Button
-
: to decrease the value shown on the display
2.
Button
: for selecting the various settings:
a. Timer
b. Cooking time
c. Cooking end time setting
3.
Button
+
: to increase the value shown on the display
A.
The symbol
indicates that the timer function is in operation
B.
The
AUTO
symbol confirms the setting has been made
A
U
T
O
2
3
1
A
B


