Whirlpool AKP 461 WH: REPLACING THE OVEN LAMP
REPLACING THE OVEN LAMP: Whirlpool AKP 461 WH
Table of contents
- YOUR SAFETY AND THAT OF OTHERS IS PARAMOUNT Scrapping of household appliances IMPORTANT SAFETY INSTRUCTIONS
- INSTALLATION SAFEGUARDING THE ENVIRONMENT DECLARATION OF CONFORMITY
- TROUBLESHOOTING GUIDE AFTER-SALES SERVICE CLEANING
- REMOVING THE DOOR MOVING THE TOP HEATING ELEMENT (SOME MODELS ONLY) MAINTENANCE
- REPLACING THE OVEN LAMP
- ACCESSORIES SUPPLIED ACCESSORIES NOT SUPPLIED INSTRUCTIONS FOR OVEN USE
- INSERTING WIRE SHELVES AND OTHER ACCESSORIES IN THE OVEN CONTROL PANEL DESCRIPTION HOW TO OPERATE THE OVEN
- USING THE ELECTRONIC PROGRAMMER
- FUNCTION DESCRIPTION TABLE
- COOKING TABLES Recipe
- Recipe
- RECOMMENDED USE AND TIPS
GB5
REPLACING THE OVEN LAMP
To replace the rear lamp
(if present):
1.
Disconnect the oven from the power supply.
2.
Unscrew the lamp cover (Fig. 6), replace the lamp (see note for lamp type) and screw the lamp cover back on.
3.
Reconnect the oven to the power supply.
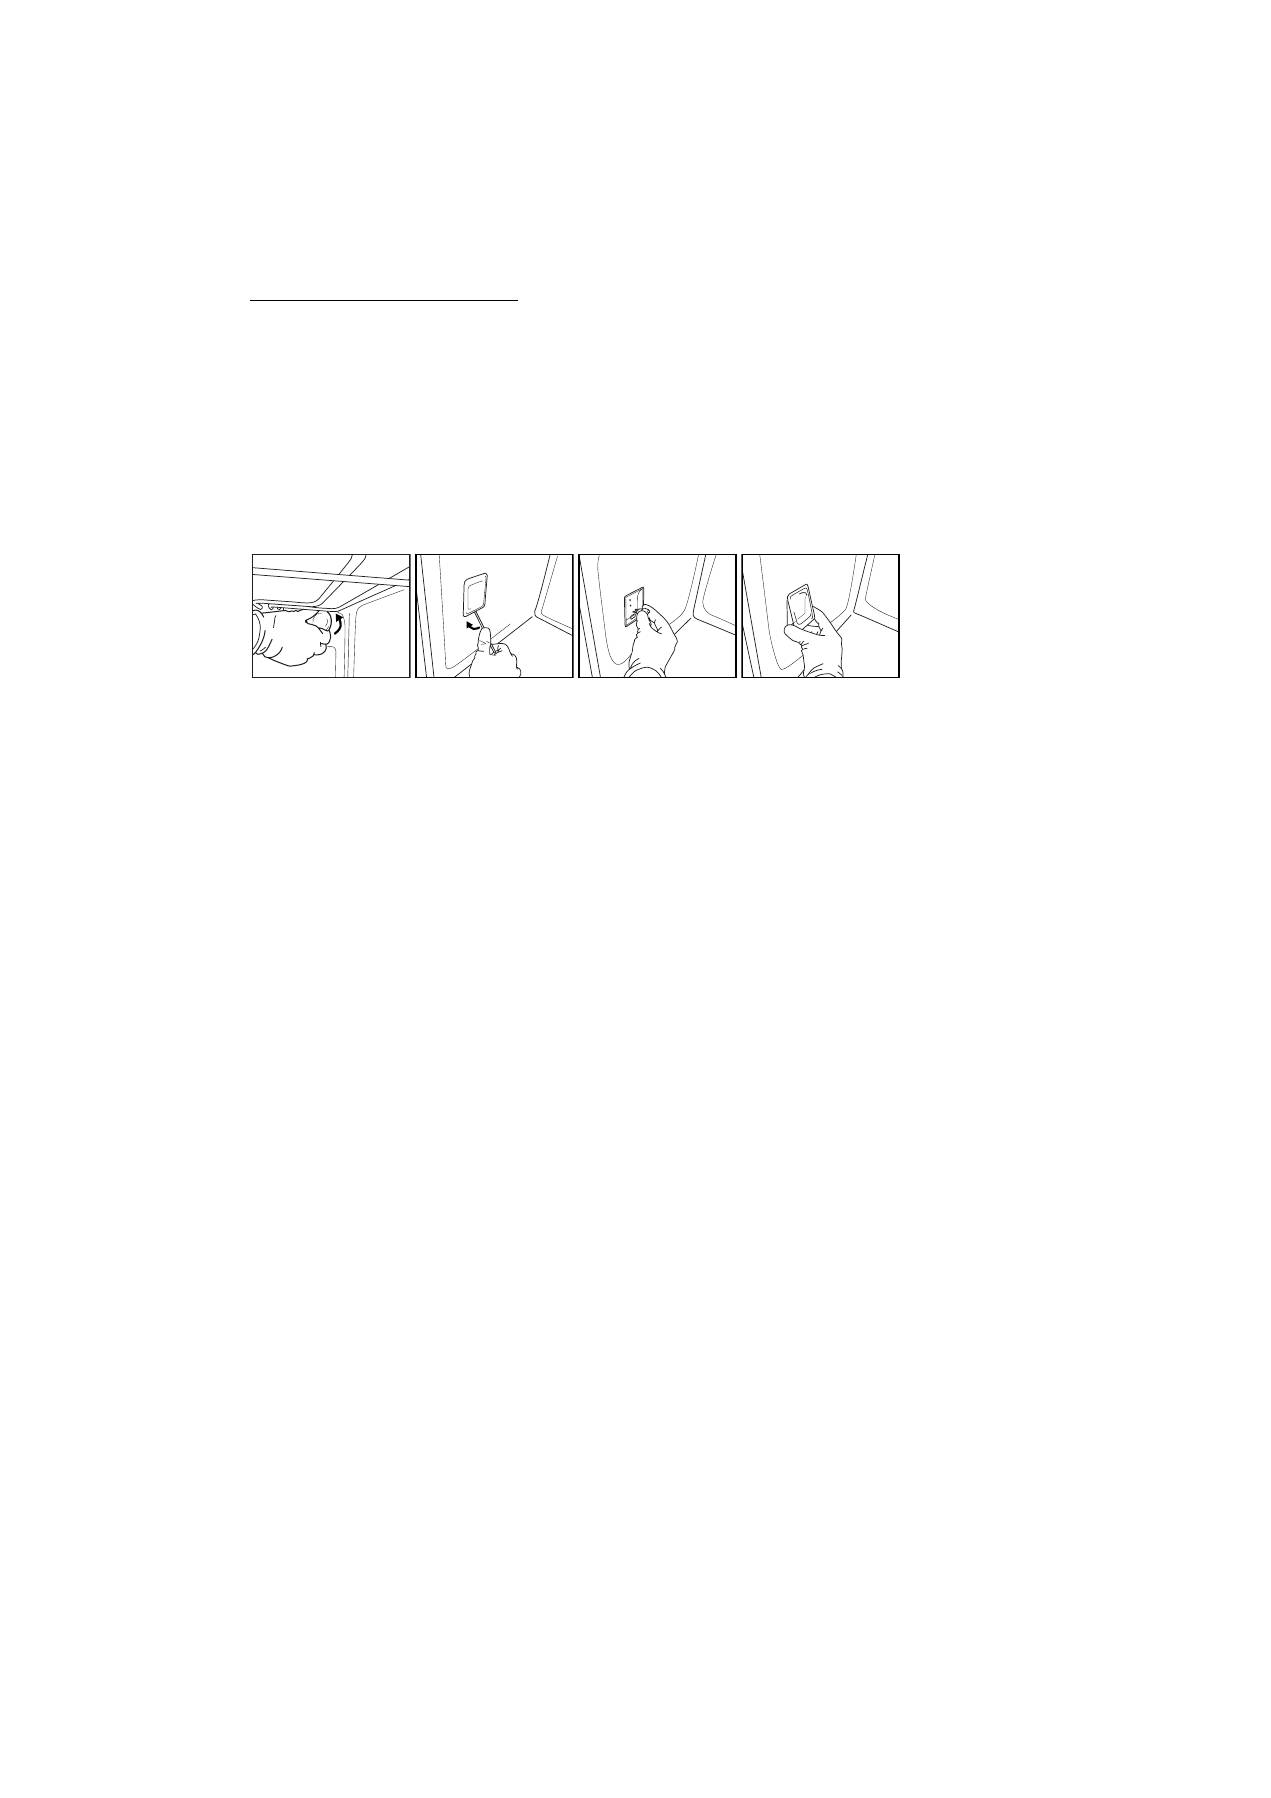
To replace the side lamp
(if present):
1.
Disconnect the oven from the power supply.
2.
Remove the side accessory holder grilles, if present (Fig. 3).
3.
Use a screwdriver to prise off the lamp cover (Fig. 7).
4.
Replace the lamp (see note for lamp type) (Fig. 8).
5.
Reposition the lamp cover, pushing it on firmly until it snaps into place (Fig. 9).
6.
Refit the side accessory holder grilles.
7.
Reconnect the oven to the power supply.
N.B.:
-
Only use 25-40W/230V type E-14, T300°C incandescent lamps, or 20-40W/230 V type G9, T300°C halogen lamps.
-
Lamps are available from our After-sales Service.
IMPORTANT:
-
If using halogen lamps, do not handle with bare hands since fingerprints can damage them.
-
Do not use the oven until the lamp cover has been repositioned.
Fig. 6 Fig. 7 Fig. 8 Fig. 9


