Whirlpool AKP 461 WH: INSERTING WIRE SHELVES AND OTHER ACCESSORIES IN THE OVEN CONTROL PANEL DESCRIPTION HOW TO OPERATE THE OVEN
INSERTING WIRE SHELVES AND OTHER ACCESSORIES IN THE OVEN CONTROL PANEL DESCRIPTION HOW TO OPERATE THE OVEN: Whirlpool AKP 461 WH
Table of contents
- YOUR SAFETY AND THAT OF OTHERS IS PARAMOUNT Scrapping of household appliances IMPORTANT SAFETY INSTRUCTIONS
- INSTALLATION SAFEGUARDING THE ENVIRONMENT DECLARATION OF CONFORMITY
- TROUBLESHOOTING GUIDE AFTER-SALES SERVICE CLEANING
- REMOVING THE DOOR MOVING THE TOP HEATING ELEMENT (SOME MODELS ONLY) MAINTENANCE
- REPLACING THE OVEN LAMP
- ACCESSORIES SUPPLIED ACCESSORIES NOT SUPPLIED INSTRUCTIONS FOR OVEN USE
- INSERTING WIRE SHELVES AND OTHER ACCESSORIES IN THE OVEN CONTROL PANEL DESCRIPTION HOW TO OPERATE THE OVEN
- USING THE ELECTRONIC PROGRAMMER
- FUNCTION DESCRIPTION TABLE
- COOKING TABLES Recipe
- Recipe
- RECOMMENDED USE AND TIPS
GB7
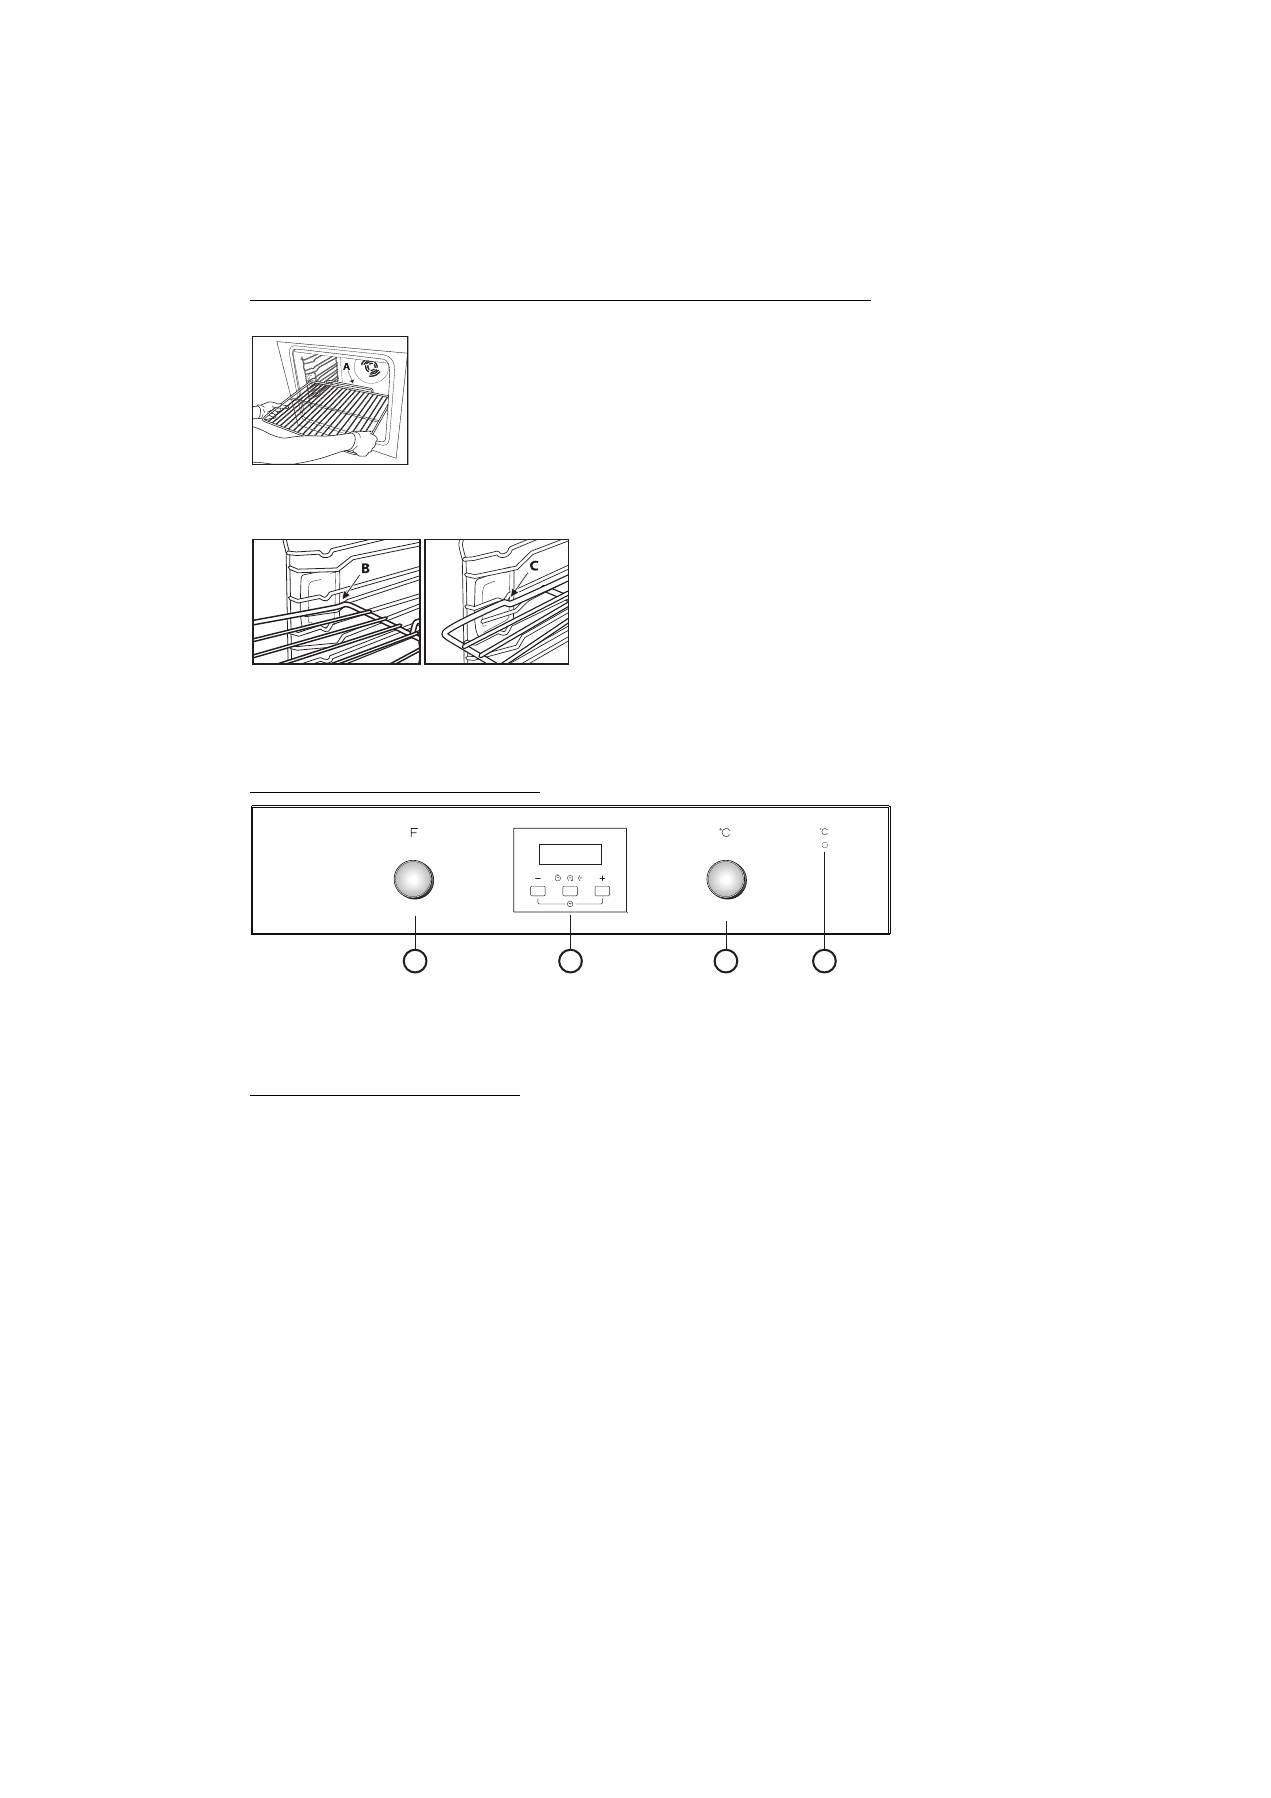
INSERTING WIRE SHELVES AND OTHER ACCESSORIES IN THE OVEN
The wire shelf and other accessories are provided with a locking mechanism to prevent their accidental removal.
1.
Insert the wire shelf horizontally, with the raised part “A” upwards (Fig. 1).
2.
Angle the wire shelf when it reaches the locking position “B” (Fig. 2).
3.
Return the wire shelf to the horizontal position and push it in fully to “C” (Fig. 3).
4.
To remove the wire shelf proceed in reverse order.
The other accessories, like the drip tray and baking tray, are inserted in exactly the same way. The protrusion on the flat surface
enables the accessories to lock in place.
CONTROL PANEL DESCRIPTION
1.
Function selector knob
2.
Electronic programmer
3.
Thermostat knob
N.B.: the knobs are retractable. Press the knobs in the middle and they pop up.
4.
Thermostat led
HOW TO OPERATE THE OVEN
•
Turn the selector knob to the required function.
The oven light switches on.
•
Turn the thermostat knob clockwise to the required temperature.
The thermostat led lights up, switching off again when the oven reaches the selected temperature.
At the end of cooking, turn the knobs to “
0
”.
Fig. 1
Fig. 2 Fig. 3
1
2
3
4


