Xoro HSD 6000: HSD 6000
HSD 6000: Xoro HSD 6000

DVD Home Theater
with MPEG4 playback
HSD 6000
master volume
DVD Home Theatre
on
off
p open/close | prevtt next |uu stop /
power standby
source
n play u
HSD 6000
User manual

CONTENTS
FEATURES 115
SAFETY PRECAUTIONS 116
Marking of safety .........................................................................................................................................................116
Basic safety requirements ...........................................................................................................................................116
ACCESSORIES 118
Package contents ........................................................................................................................................................118
OUTPUTS AND CONTROL ELEMENTS 119
Front panel.................................................................................................................................................................. 119
Back panel ...................................................................................................................................................................119
Remote control ............................................................................................................................................................120
CONNECTIONS 122
Video Output Terminals and Connections
...................................................................................................................122
l
Composite Video Output Terminal
.....................................................................................................................122
l
S-Video Output Terminal
.................................................................................................................................... 122
l
SCART Terminal
................................................................................................................................................ 123
l
Y PbPr Terminal
..................................................................................................................................................124
l
VGA Output.........................................................................................................................................................125
Audi ...................................................................................................................126
o Output Terminals and Connections
l
Down ixed Audio Output Terminals (L/R)
m .........................................................................................................126
l
Coaxial Digital Audio Output Terminals
and Optical ...........................................................................................127
l
Speaker System Terminals
.................................................................................................................................128
l
Audio (L/R) input connections
.............................................................................................................................129
INITIAL SETTINGS 130
Video setup..................................................................................................................................................................131
Amplifier Adjustment (SPEAKER SETUP)
................................................................................................................. 132
Delay settings ..............................................................................................................................................................134
Dolby Digital setup.......................................................................................................................................................135
LPCM setup.................................................................................................................................................................136
Disc coding and output format.....................................................................................................................................136
General setup ..............................................................................................................................................................137
Preferences .................................................................................................................................................................139
ON-SCREEN DISPLAY (OSD) 141
DVD OSD Modes ........................................................................................................................................................141
CD/VCD OSD Modes ..................................................................................................................................................141
BASIC OPERATION OF PLAYBACK
142
Preparation................................................................................................................................................................. 142
START 142
playback.........................................................................................................................................................
SKIP playback .............................................................................................................................................................142
STEP/PAUSE playback ...............................................................................................................................................143
Fast scan ...............................................................................................................................144
FORWARD/REVERSE
SLOW-MOTION Playback
...........................................................................................................................................145
STOP Playback
...........................................................................................................................................................146
ADVANCED 147
OPERATION OF PLAYBACK
R layback
epeated P .....................................................................................................................................................147
TITLE MENU (DVD Only)
............................................................................................................................................148
DVD MENU (DVD Only)
..............................................................................................................................................148
MULTI-ANGLE Playback
.............................................................................................................................................149
Сhanging SUBTITLE During Playback
........................................................................................................................149
Changing AUDIO LANGUAGE During Playback
.........................................................................................................150
DIRECT Function
........................................................................................................................................................150
VCD P (PBC)
layback control .......................................................................................................................................151
MULTIMEDIA FILES PLAYBACK
152
Playback with JPEG Files
............................................................................................................................................152
MP3 and MPEG4 Compatible Format
.........................................................................................................................154
MP3 and MPEG4 Root Menu
......................................................................................................................................154
W MPEG-4?
hat is ........................................................................................................................................................155
MPEG4 ..........................................................................................................................................................156
subtitles
AMPLIFIER / DIGITAL TUNER SYSTEM
157
Tuning operation
..........................................................................................................................................................157
Radio Data System Program Service station name
/
.................................................................................................159
DISC INFORMATION 160
Recommendations...................................................................................................................................................... 160
NOTES ON SERVICE
161
Troubleshooting.......................................................................................................................................................... 161
Specification ............................................................................................................................................................... 162
GLOSSARY 163
114

FEATURES
Playback formats
l
Compatible With DVD, SVCD, VCD, Audio CD, JPEG, MP3, MPEG-4 and Nero Digital
(Standard profile)
AnalogAudio Output
l
This DVD player can output either down mixed audio with LT/RT and Stereo modes or 5.1ch
audio output with the internal amplifier.
DigitalAudio Outputs
l
The DVD player features one optical audio one coaxial audio output. User selectable
SPDIF/RAW and SPDIF/PCM digital audio maximizes convenience when switching between
DVD and Audio CD playback.
®®
Dolby Digital & DTS Digital Audio Output Support
®®
l
This DVD player can send Dolby Digital or DTS Digital audio data via its built-in digital audio
®®
output to an external Dolby Digital or DTS Digital decoder.
Note:
DTS signal cannot be played using the internal amplifier and the included sound
system. DTS only works on external amplifiers when it is digitally connected.
High Quality 96kHz/24bit Audio D/A Converter
l
This DVD player features a 96kHz/24Bit D/A converter for superior audio reproduction of
encoded discs.
10-Bit/27MHz D/A Video Converter
l
This DVD player's 10-bit/27MHz D/A converter is four times more accurate than conventional
8-bit converters. The result is artifact-free and crystal clear video image.
Video Zoom Support
l
The user selectable digital video zoom-out, zoom-in on a specific portion of a video image is.
Multi-Speed Fast Forward/Reverse Scan
l
The digital fast forward/reverse scan function is capable of scanning with different speeds
Multi-Speed Slow Motion Forward / Reverse Scan
l
This DVD player offers perfect slow motion scans.
Volume Control ofAmplifier 5.1ch audio output all or individual control
l
This DVD player can control the volume of amplifier audio output from remote control.
Notes:
l
„Dolby“ and Doppel-D-Symbol are the trademarks of Dolby Laboratories.
l
Made with licence of Dolby Laboratories.
©
Dolby Laboratories Inc. All rights reserved
115

SAFETY PRECAUTIONS
Marking of safety
The lightning flash with an arrowhead symbol within an
equilateral triangle is intended to alert the user to the
presence of uninsulated "dangerous voltage" within the
product's enclosure that may be of sufficient magnitude
to constitute a risk of electric shock to persons.
The exclamation point within an equilateral triangle is
intended to alert the user to the presence of important
operating and maintenance (servicing) instructions in
the literature accompanying the appliance.
WARNING:
DO NOT EXPOSE THIS APPLIANCE TO RAIN OR MOISTURE,
DUE TO THE HIGH RISK OF FIRE OR ELECTRIC SHOCK, DO NOT OPEN
THE CABINET DANGEROUS HIGH VOLTAGES ARE PRESENT INSIDE
THE ENCLOSURE. ONLY QUALIFIED SERVICE PERSONNEL SHOULD
ATTEMPT THIS.
CAUTION:
This Digital Video Disc Player employs a Laser System. To
prevent direct exposure to the laser beam, do not try to open the enclosure.
Visible laser radiation when open and interlocks defeated. Use of controls or
adjustments or performance of procedures other than those specified herein
may result in hazardous radiation exposure.
DO NOT STARE INTO BEAM.
To ensure proper use of this product, please read this owner’s manual
carefully and retain for future reference. Should the unit require
maintenance, contact an authorized service location, or contact us. Only
qualified service personnel should remove the cover.
Basic safety requirements
Do not open the cabinet
Do not use the apparatus
Unplug the apparatus
near the water
during the lightning
storms or when unused
for a long period
116

117

ACCESSORIES
Package contents
Please verify that the following items are included within the DVD carton. If items are missing,
please promptly return this unit to the retailer for an exchange.
DVD Player
Acoustic system
Remote Control Unit
Audio and video cable
(combined Cinch cable)
AAA Batteries (x2)
SCART Cable
AM/FM Antenna
Operational manual
118

OUTPUTS AND CONTROL ELEMENTS
Front panel
POWER DISC TRAY
DISPLAY
OPEN/CLOSE
PREVIOUS TRACK
NEXT TRACK
STOP
PLAY
VOLUME ADJUST
Rear panel
SCART OUT
STEREO AUDIO OUT (LEFT)
AV IN
LEFT
VIDEO
INPUT
COMPONENT VIDEO
OUT
(
PR)
VIDEO
OUT
VGA
OUT
5.1
AUDIO
OUT
S-VIDEO
OUT
COMPONENT VIDEO
OUT
(
Y)
COMPONENT VIDEO
OUT
(
PB)
COAXIAL OUT
(DIGITAL)
AIN
V
RIGHT
STEREO AUDIO OUT RIGHT
OPTICAL OUT
(DIGITAL)
AM
IN
FM
IN
119

OUTPUTS AND CONTROL ELEMENTS
Remote control
STANDBY/ON
Turns on/off the DVD player unit.
SETUP
Customizes DVD player settings.
NTSC/PAL
Switch TV system between NTSC, PAL, and MULTI.
MENU
Some DVDs have complex submenus.
This button allows access to these submenus.
ENTER
Confirms selection of an item in the menu.
tupq
///
Used for navigation within a selection menu.
STOP
Stops playback.
SAVE
Saves the station selected.
AM/FM
Converts betweenAM and FM.
STEP
Pauses the playback and enters into step mode where
the video can be advanced frame by frame.
SLOW
Engages slow-motion forward/reverse playback.
ZOOM
Enters the zoom mode ( 1, 2) during playback.
xx
SUBTITLE
During playback of DVD discs with more than two
subtitle languages, this button toggles between
available subtitle languages.
REPEAT
Shows repeat playback for one title, or all titles on the
disc.
A-B
DisplaysA-B repeat playback.
AUDIO
During playback of a DVD disc with more than two audio
languages, this button changes the audio language
played.
VOCAL
To switch the output audio in MONO LEFT, MONO
RIGHT, and STEREO modes during SVCD, VCD, and
CDDAplayback.
6 VOL
CH
Activates the mode of 6 channels' Volume up/down.
MUTE
To mute the sound of playback.
OPEN/CLOSE
Opens or closes disc tray.
I/P
Change Video output signal between interleaved and
Progressive Scan.
Digits
Used for direct selection of menu choices, audio tracks,
and other inputs such as time and password.
INPUT
Converts InputAV, TUNER and DVD in turn.
PAUSE
Pause the playback of disc.
PLAY
Start the playback of disc.
REV
Fast reverse scan during playback. Toggles between
X2, X4, X6, and X8. Refer to p.26. or for back search of
Tuner stations.
FWD
Fast-forward scans during playback. Toggles between
X2, X4, X6, and X8. Refer to p.26. or for forward search
of Tuner stations.
PREV
Goes back to the previous chapter during play.
NEXT
Skips to the next chapter during playback.
GOTO
Enables search mode by title/chapter and time.
DISPLAY
On-Screen display of the DVD player's operational
status.
ANGLE
If the DVD disc contains multiple view angles, this
button will change the viewing angle displayed by the
DVD player.
SHUFFLE
Random play.
VOL-
Reduce the volume of analog audio output.
VOL+
Increase the volume of analog audio output.
120

OUTPUTS AND CONTROL ELEMENTS
Remote control
Operating instructions
Insert the batteries in the remote control
Point the remote control at the IR
1
Open the cover
Within about 7 m
0
with angle about 30
in the bothdirection
Remote control
2
Put the batteries
NOTES:
Do not expose the IR of the dvd player to
a strong light source or direct sunlight.
Make sure to match - and +
NOTES ON BATTERIES:
3
Close the cover
Improper use may cause battery leakage and
corrosion. Please follow the instructions below:
l
Do not insert the batteries in the wrong
direction
l
Do not use different types of batteries together
l
If you do not use the remote control for a long
time, remove the batteries
l
If the remote control operates not correctly,
replace the batteries
l
If battery leakage occurs, wipe the battery
NOTES:
liquid from the battery compartment, then
insert new batteries
l Direct the remote control at the infrared
l
Make sure that the used batteries are disposed
reciever (IR) of the player
properly according to you local regulations.
l
Do not drop the remote control
l
Do not spill water or put anything wet on it
l
Do not disassemble the remote control
121

CONNECTIONS
Video Output Terminals and Connections
Composite Video Output Terminal
Composite video output is the most commonly used video connection in use today and is supported by
most televisions andA/V receivers. Composite video is set to display without user setup.
S-Video Output Terminal
You will want to use S-video output with televisions or monitors equipped with an S-video input
whenever component video inputs are not available. To activate the S-video output, you must set the
DVD player's “VIDEO SETUP PAGE”/ “VIDEO OUTPUT” setting to S-VIDEO.
VIDEO OUT
DVD player
S-VIDEO OUT
Note:
l S-video cable andAV cable is not included with this player.
122

CONNECTIONS
Video Output Terminals and Connections
SCART Terminal
The SCART terminal can be connected to the TV set equipped with SCART connectors. The audio
transmitted on the SCART is stereo sound. Whenever the SCART terminal is used, you must set the
DVD player's “TV SETUP PAGE”/ “VIDEO OUTPUT” setting to “SCART”.
DVD player
SCART
WARNING: S-Video and SCART video jacks cannot output signals simultaneously.
Note:
l For selected TVs, when the TV set is at standby mode, power on the DVD player will automatically
power on the TV and switch to the SCARTvideo input channel.
123

CONNECTIONS
Video Output Terminals and Connections
Y PbPr Terminal
The Y Pb Pr terminal can be connected to the TV set equipped with Y Pb Pr connectors. These
connections do only tranmit video, no sound. If you want to have the sound transmitted to the TV set,
you must set the DVD players audio settings to stereo (downmix) and connect the stereo audio output
(2 wire RCA to the TV set. More information about audio transmisson can be found on the following
pages.
DVD player
COMPONENT VIDEO OUTPUT PB)(
COMPONENT VIDEO OUTPUT Y)(
COMPONENT VIDEO OUTPUT PR)(
Note:
l Do not connect the unit with 2 video connections (e.g. SCART and Y Pb Pr), otherwise the signal
quality is affected negatively.
124

CONNECTIONS
Video Output Terminals and Connections
VGAOutput
The can be connected to Th connection do only tranmit video, no sound.
VGAoutput PC Monitor. is es
If you want to have the sound transmitted to the , you must set
PC monitor or another external device
the DVD players audio settings to stereo (downmix) and connect the stereo audio output (2 wire RCA
to the . More information about audio transmisson can be
PC monitor or another external audio device)
found on the following pages.
DVD player
VGA Cable
125

CONNECTIONS
Audio Output Terminals and Connections
Down-MixedAudio Output Terminals (L/R)
Use down-mixed (stereo) audio output terminals for connection with your television or other non-
®
Dolby® Digital A/V receivers or amplifiers. These terminals provide down-mixed Dolby Digital audio
signals for standard 2-channel playback.
AUDIO OUT (LEFT)
AUDIO OUT (RIGHT)
DVD player
126

CONNECTIONS
Audio Output Terminals and Connections
Coaxial Digital Audio Output Terminals
®®
Use digital audio outputs for connection with an external Dolby Digital or DTS decoder. To use the
coaxial you will need to purchase a coaxial cable for connection with the Coaxial Input Terminal of an
AV amplifier. (Digital cable is not included with this player.)
DVD player
DIGITAL COAXIAL AUDIO CABLE (NOT SUPPLIED)
or
DIGITAL OPTICAL AUDIO CABLE (NOT SUPPLIED)
AV amplifier
127

CONNECTIONS
Audio Output Terminals and Connections
Speaker System Terminals
Use the Speaker System terminal to connect with the supplied external Speakers of FR, FL, R
Surround, L Surround, Center and Sub woofer.
DVD player
SPEAKER SYSTEMS
SUB+ FR+ S +R CEN+ SL+ FL+
SUBWOOFER
SPEAKER
SUB- FR- SR- CEN- SL- F -L
RIGHT FRON
LEFT FRON
SPEAKER
SPEAKER
RIGHT REAR
LEFT REAR
SPEAKER
SPEAKER
CENTER
SPEAKER
Note:
l Only use the supplied speaker system. Otherwise the unit may be damaged or the sound
reproduction may be bad.
128

CONNECTIONS
Audio Output Terminals and Connections
Audio (L/R) input connections
Audio (L/R) in is used for the connections of otherAudio (L/R) Equipment Output.
DVD player
STEREO
STEREO
INPUT
INPUT
LEFT
RIGHT
Audio Equipment
129

INITIAL SETTING
Press the SETUP button on the remote controller to set up
SETUP MENU MAIN PAGE-
the initial setting. The On-Screen Display (OSD) will
display below:
VIDEO SETUP
AUDIO SETUP
DOLBY DIGITAL SETUP
LPCM SETUP
GENERAL SETUP
PREFERENCES
EXIT SETUP
130

INITIAL SETTING
Video setup
Lagerung von Cds
There are three available items:
- - VIDEO SETUP PAGE - -
They are VIDEO DISPLAY, VIDEO TYPE, VIDEO
OUTPUT.
VIDEO DISPLAY
NORMAL/PS
VIDEO TYPE
NORMAL/LB
VIDEO DISPLAY
VIDEO OUTPUT
WIDE
l
NORMAL/PS
-
4:3 Pan & Scan video output for a
normal TV set
l
NORMAL/LB 4:3
-
Letterbox video output for a
normal TV set
l
WIDE
-
16:9 Wide Screen video output for a wide
screen TV set
MAIN PAGE
Note:
l
Aspect ratios available for playback will be printed on the DVD disc rear packaging.
l
Some DVDs are recorded in the Cinema Wide format (16:9 aspect ratio), and some are recorded
in the standard format (4:3 aspect ratio). Some DVD discs are recorded in both formats and may
have the Pan Scan feature available. The Pan Scan feature if available will fill the entire screen in
4:3 TV screen. However, it will cut some of the picture off at the two sides.
VIDEO TYPE (TV System)
l
MULTI
-
The DVD player will choose the correct
- - VIDEO SETUP PAGE - -
system to display the playback of inserted disc.
l
NTSC
-
The DVD player will output in NTSC format
VIDEO DISPLAY
regardless of what format the disc was designed for.
VIDEO TYPE
MULTI
l
PAL
-
The DVD player will output in PAL format
VIDEO OUTPUT
NTSC
regardless of what format the disc was designed for.
PAL
Note:
l
Press NTSC/PAL directly on the Remote Control to
alter NTSC, PALor MULTI of TV System being played.
MAIN PAGE
VIDEO OUTPUT
- - VIDEO SETUP PAGE - -
The VIDEO OUTPUT has five kinds of output ways:
S-VIDEO, SCART, Y/Cb/Cr, Y/Pb/Pr and VGA. If you are
VIDEO DISPLAY
using S-video output, please set this setting to “S-VIDEO”.
VIDEO TYPE
If you are using SCART output, please set this setting to
VIDEO OUTPUT
S-VIDEO
“SCART” and so on… which matches with your TV's input.
SCART
Y/Cb/Cr
Note:
Y/Pb/Pr
l
SCART video output, S-Video output, YUV output and
VGAoutput cannot be used simultaneously.
VGA
MAIN PAGE
131

INITIAL SETTING
Amplifier Adjustment (SPEAKER SETUP)
SPEAKER SETUP
- - AUDIO SETUP PAGE - -
This Unit is set to amplifier mode by default. If you do not
want to use the integrated amplifier section and the
SPDIF OUTPUT
OFF
DOWN MIX
SPDIF/RAW
supplied sound system for any reason, you must change
FRONT
SPDIF/PCM
the audio setup.
CENTER
REAR
SUBWOOFER
Audio Out & Test Tone
C NTER DELAYE
REAR DELAY
You can choose to send the player's audio signals to an
TEST TONE
external receiver using the following outputs:
LOUD SPEAKERS SETUP
l
SPDIF/RAW
-
Set to this selection will output the raw
®
bit stream signal of Dolby Digital or DTS from the
®
coaxial jack. In order to enjoy Dolby Digital DTS
®
discs, this unit's digital output jack must be connected to the digital-input jack of a Dolby Digital or
DTS compatible receiver or processor.
l
SPDIF/PCM
-
PCM stands for Pulse Code Modulation and is digital audio. Connecting this unit to
an amplifier with a built-in D/A converter can play the same digital audio format as on CDs.
Additionally, 2-channel analogue audio will output from the audio output jacks of amplifier.
DOWN MIX
- - AUDIO SETUP PAGE - -
l
LT/RT Please connect to a built-in Dolby Pro Logic
-
SPDIF OUTPUT
receiver or amplifier to enjoy the Dolby Pro-Logic
DOWN MIX
LT/RT
surround sound.
FRONT
STEREO
CENTER
OFF
l
STEREO Down mixed Stereo L/R audio output.
-
REAR
SUBWOOFER
l
OFF Turn off the DOWN MIX function to enable the
-
C NTER DELAYE
5.1ch setting items.
REAR DELAY
TEST TONE
LOUD SPEAKERS SETUP
FRONT SPEAKERS
- - AUDIO SETUP PAGE - -
The front speakers should be set to small when the unit is
used with the supplied sound system.
SPDIF OUTPUT
DOWN MIX
FRONT
LARGE
CENTER
SMALL
REAR
SUBWOOFER
C NTER DELAYE
REAR DELAY
TEST TONE
LOUD SPEAKERS SETUP
132

INITIAL SETTING
Amplifier Adjustment (SPEAKER SETUP)
CENTER
- - AUDIO SETUP PAGE - -
The center speaker should be set to small when the unit is
used with the supplied sound system.
SPDIF OUTPUT
DOWN MIX
FRONT
CENTER
LARGE
REAR
SMALL
SUBWOOFER
OFF
C NTER DELAYE
REAR DELAY
TEST TONE
SETUP CENTER SPEAKER SIZE
SURROUND SPEAKERS (REAR SPEAKERS)
- - AUDIO SETUP PAGE - -
The rear speakers should be set to small when the unit is
used with the supplied sound system.
SPDIF OUTPUT
DOWN MIX
FRONT
CENTER
REAR
LARGE
SUBWOOFER
SMALL
C NTER DELAYE
OFF
REAR DELAY
TEST TONE
SETUP CENTER SPEAKER SIZE
SUBWOOFER
- - AUDIO SETUP PAGE - -
Set the SUBWOOFER PRESENT or NONE. This option
should be set to “ON” when the unit is being used with the
SPDIF OUTPUT
DOWN MIX
supplied sound system.
FRONT
CENTER
REAR
SUBWOOFER
PRESENT
C NTER DELAYE
NONE
REAR DELAY
TEST TONE
DO YOU HAVE A SUBWOOFER?
133

INITIAL SETTING
Delay settings
CENTER DELAY
- - AUDIO SETUP PAGE - -
Adjust the delay time of CENTER output.
SPDIF OUTPUT
DOWN MIX
-
Note:
FRONT
5MS
CENTER
-
l
Set the “CENTER” item to LARGE or SMALLfirst.
REAR
-
SUBWOOFER
-
3MS
C NTER DELAYE
-
REAR DELAY
-
1MS
TEST TONE
-
OFF
LOUD SPEAKERS SETUP
REAR DELAY
Adjust the delay time of REAR output.
- - AUDIO SETUP PAGE - -
SPDIF OUTPUT
Note:
DOWN MIX
-
15MS
FRONT
-
l
Set the “REAR” item to LARGE or SMALLfirst.
CENTER
-
REAR
-
9MS
SUBWOOFER
-
C NTER DELAYE
-
3MS
REAR DELAY
-
OFF
TEST TONE
LOUD SPEAKERS SETUP
TEST TONE
- - AUDIO SETUP PAGE - -
Test the output ability of left, center, right, right surround,
and left surround speakers in sequence.
SPDIF OUTPUT
DOWN MIX
FRONT
CENTER
REAR
SUBWOOFER
Note:
C NTER DELAYE
l
Please set the “TESTTONE” item to OFF first.
REAR DELAY
TEST TONE
ON
OFF
LOUD SPEAKERS SETUP
134

INITIAL SETTING
Dolby Digital setup
There are four available items: They are DUAL MONO and
- - DOLBY DIGITAL SETUP - -
“DYNAMIC”, Pro Logic, PLII MODE.
DUAL MONO
STEREO
COMPRESSION
L-MONO
PRO LOGIC
R-MONO
DUAL MONO
MIX-MONO
There are four available modes: STEREO, L-MONO, R-
MONO, and MIX-MONO.
MAIN PAGE
AUDIO OUTPUT DESCRIPTION
MODE
LEFT SPEAKER
RIGHT SPEAKER
STEREO
STEREO -L
STEREO -R
L-MONO
L-MONO
L-MONO
R-MONO
R-MONO
R-MONO
MIX-MONO
L-MONO+R-MONO
L-MONO+R-MONO
COMPRESSION
- - DOLBY DIGITAL SETUP - -
“Compression Range” is the difference between the
-
-
maximum level and the minimum level of sounds. Sounds
DUAL MONO
FULL
-
-
6/8
on a movie originally designed for movie theaters feature a
COMPRESSION
-
-
very wide compression range, so sometimes it is not
-
-
PRO LOGIC
4/8
-
-
suitable for home use. Depending on the condition of your
-
-
2/8
listening environment, Compression Range function can
-
-
OFF
reduce the instant sound effect alteration of the movie
while playing back. When seeing movies in the night, turn
this function on to avoid the suddenly loud sound to
DYNAMIC RANGE COMPRESSION
influence your neighbors. (Default value is FULL, no
compression to be done.)
Notes:
l
This function works only during playback of Dolby
- - DOLBY DIGITAL SETUP - -
Digital recorded discs.
DUAL MONO
l
The level of Dynamic Range Reduction may differ
COMPRESSION
depending on the DVD discs.
PRO LOGIC
OFF
ON
Pro Logic
AUTO
Notes:
l
This function works only during playback of Pro Logic
MAIN PAGE
effect recorded discs.
135

INITIAL SETTING
LPCM setup
This option sets the audio output format sent using the
- - LPCM SETUP - -
unit's coaxial digital audio output.
LPCM OUT
LPCM 48K
Linear PCM OUT
LPCM 96K
l
LPCM 48K
-
In the Linear PCM setting, “48K” means
“the digital audio output maximum sampling rate is
48KHz”; therefore, when the title's encoding sampling
rate* is 96KHz, the output will be forced converted to
48KHz.
l
LPCM 96K
-
If “96K” is selected, then the maximum
MAIN PAGE
output-sampling rate is 96KHz and no conversion will
take place.
Notes:
l
Sampling rate:
When a sound wave is converted to a digital signal, the sound is sampled and converted to data at
a specific frequency rate. For example, a signal with a 96 kHz sampling rate indicates that in one
second, the analog signal was sampled 96000 times to produce the digital signal.
l
In LPCM set-up menu, there will be a case that even when “LPCM 96K” is selected, output signal
is converted to 48KHz if the disc has the copy guard management system in it.
Disc coding and output format
Disc
Audio encoding format
Digital output format
®
Dolby Digital Bit stream
Dolby Digital
(1~5.1 ch) or 48kHz/16bits
2ch Linear PCM
DVD
Linear PCM
Linear PCM
(48/96kHz, 24bits)
(48KHz/16 bits)
Linear PCM
Video CD
MPEG 1
(44.1KHz sampling)
Linear PCM
Audio CD
Linear PCM
(44.1kHz/16bit)
136

INITIAL SETTING
General setup
There are five available selections: ANGLE MARK, OSD LANG, CAPTIONS and SCREEN SAVER.
ANGLE MARK
- - GENERAL PAGE - -
During playback of a title with multiple angle sections, the
message “ will appear on the upper corner of the
“
ANGLE MARK
ON
screen.
OSD LANG
OFF
l
When ANGLE MARK is set to "ON", the angle mark
CAPTIONS
OSD will stay on the screen until the end of the
SCREEN SAVER
playback title or chapter.
l
When ANGLE MARK is set to "OFF", the angle mark
OSD will stay on the screen for 3 sec and then
disappear.
MAIN PAGE
OSD LANGUAGE
- - GENERAL PAGE - -
You can select the language for the setup menu or the
operation message display. The languages available
ANGLE MARK
depent on the firmware version and the country where you
OSD LANG
ENGLISH
purchase this device. If you need other language, it is
CAPTIONS
GERMAN
possible you will find a firmware on the internet at
SCREEN SAVER
in the download area.www.xoro.com
MAIN PAGE
CAPTIONS
- - GENERAL PAGE - -
Closed Captions (CC) is a standardized method of
encoding text into an NTSC television signal. A TV can
ANGLE MARK
display the text with a built-in decoder. Closed Captions
OSD LANG
can be carried on DVD. If a DVD title contains a CC mark
CAPTIONS
ON
on the rear of the box, then you can set Captions to “ON”
SCREEN SAVER
OFF
and read written captions on the TV screen. Default is set
to “OFF”.
MAIN PAGE
137

INITIAL SETTING
General setup
SCREEN SAVER
- - GENERAL PAGE - -
When this DVD player is idle (after about 5 minutes of
inactivity), the screen saver can be activated to prolong
PIC MODE
the TV monitor's life.
ANGLE MARK
OSD LANG
CAPTIONS
Notes:
SCREEN SAVER
ON
l
Caution: The DVD player can hold a still video image
OFF
or OSD image on your television screen indefinitely. If
you leave the still video image or OSD image
displayed on your TV for a very long time. It may cause
MAIN PAGE
the permanent damage to your TV screen.
138

INITIAL SETTING
Preferences
Preferences allow you to set the default AUDIO, SUBTITLE, DISC MENU, PARENTAL, PASSWORD
and factory DEFAULTS of this player. This setting is only available when the DVD player is in the
STOP mode by pressing the STOP button twice and then presses the SETUP button to call on the
“PREFERENCE PAGE” for selection settings.
Notes:
l
Pressing the STOP button once only pause the playback, to stop the playback completely by
pressing STOP twice.
AUDIO
-- PAGE--PREFERENCES
Set the unit to the DVD Audio language which should
playback by default. If the selected language is not
AUDIO
ENGLISH
available, the player will automatically select English.
SUBTITLE
FRENCH
DISC MENU
GERMAN
PARENTAL
SPANISH
PASSWORD
ITALIAN
DEFAULTS
MAIN PAGE
SUBTITLE
-- PAGE--PREFERENCES
Set the unit to the subtitle language which should playback
by default. If the selected language is not available, the
AUDIO
ENGLISH
player will automatically select English.
SUBTITLE
FRENCH
DISC MENU
GERMAN
PARENTAL
SPANISH
PASSWORD
ITALIAN
DEFAULTS
OFF
MAIN PAGE
DISC MENU
-- PAGE--PREFERENCES
Set the unit to the disc menu language which should
playback by default. If the selected language is not
AUDIO
ENGLISH
available, the player will automatically select English.
SUBTITLE
FRENCH
DISC MENU
GERMAN
PARENTAL
SPANISH
PASSWORD
ITALIAN
DEFAULTS
MAIN PAGE
139

INITIAL SETTING
Preferences
PARENTAL
-- PAGE--PREFERENCES
Functions to limit the playback of some discs that contain
mature scenes. The limitation varies from disc to disc;
AUDIO
1G
2
when it is activated, playback is completely prohibited.
SUBTITLE
3PG
There are eight levels of parental setting of this unit.
DISC MENU
4 PG13
Parental settings do only work if the disc supports this
5
PARENTAL
6PG R
feature.
PASSWORD
7 NC-17
8 ADULT
DEFAULTS
NO-PARENTAL
MAIN PAGE
PASSWORD
-- PAGE--PREFERENCES
The password is a 4-digit number. When you want to
change the password, select “CHANGE” as shown below.
AUDIO
SUBTITLE
DISC MENU
PARENTAL
PASSWORD
CHANGE
DEFAULTS
MAIN PAGE
You will be asked to enter the old password, then enter the
- - PASSWORD CHANGE PAGE - -
new password, and confirm it.
OLD PASSWORD
Notes:
NEW PASSWORD
CONFIRM PWD
l
The default password number is”3308”.
MAIN PAGE
DEFAULTS
-- PAGE--PREFERENCES
When you select “RESET”, all the initial settings will be
restored to the default setting.
AUDIO
SUBTITLE
DISC MENU
PARENTAL
PASSWORD
DEFAULTS
RESET
MAIN PAGE
140

ON-SCREEN DISPLAY (OSD)
DVD OSD Modes
There are two OSD display modes available when playing a DVD disc.
Mode 1
When the OPEN/CLOSE button is pressed, the OSD shows: the status of the pressed button and
some special Logoes are displayed on the screen.
Mode 2
Shows the playback information of a movie or title.
l
When pressing the DISPLAY button on R/C, the information OSD will display on the screen in the
sequence as shown below:
First time Second time Third time Fourth time
TITLE 002/04
CHAPTER TITLE REMAIN
CHAPTER ELAPSED
CHAPTER REMAIN
001/009
01:35:13
00:05:13
00:25:13
00:05:13
l
When pressing the DISPLAYbutton on the remote control again, it will turn off the OSD.
CD/VCD OSD Modes
There are two OSD display modes available when playing a VCD, and Audio CD disc.
Mode 1
Shows the status of the pressed button and some special messages are displayed on the screen as
previous description.
Mode 2
1. SINGLE ELAPSED 2. SINGLE REMAIN
Shows the playback time information of a disc.
SINGLE ELAPSED
SINGLE REMAIN
00:05:13
00:05:13
PBC ON (VCD 2.0 above only):
When pressing the DISPLAY button on R/C, the
information OSD will display on the screen in the
sequence as shown below:
PBC OFF or Audio CD playback:
1. SINGLE ELAPSED 2. SINGLE REMAIN 3. TOTAL ELAPSED 4. TOTAL REMAIN
SINGLE ELAPSED
SINGLE REMAIN
TOTAL ELAPSED
TOTAL REMAIN
00:05:13
00:05:13
00:05:13
00:05:13
l
When pressing the DISPLAYbutton on the remote control again, it will turn off the OSD.
141
BASIC OPERATION OF PLAYBACK
Preparation
l
If a television set is used, turn on its power and select the appropriate input AV, S-Video or SCART.
If the SCART connection is used then the TV will switch to the correct input when the DVD player is
turned on.
l
If a sound system is used, turn on the amplifier first and make sure its outputs are set properly.
START Playback
1 Turnon the DVD player.
.
2.
Press the OPEN/CLOSE button to open the disc tray.
3.
Place a disc onto the tray and make sure that it is placed squarely on the tray.
4. ENTER
Press the OPEN/CLOSE or button to play the disc.
Notes:
l
When using a DVD disc, some menu selections and some DVD playback functions are available
during playback.
l
When using a VCD disc with PBC, the PBC menu will be displayed on the screen. You can use the
PBC menu, or press the PBC button to set PBC off and the disc will play immediately.
l
For a VCD disc without PBC or anAudio CD, the disc will be played immediately.
SKIP Playback
DVD Playback
Before press NEXT button
After press NEXT button
l
Press the button to skip to the next
NEXT
uu
|
TITLE 002/04 CHAPTER 01/09
TITLE 002/04 CHAPTER 02/09
chapter.
Before press PREV button
After press PREV button
l
Press the button to skip to the
PREV
|
tt
TITLE 002/04 CHAPTER 02/09
TITLE 002/04 CHAPTER 01/09
beginning of the current chapter or previous
chapter.
142
BASIC OPERATION OF PLAYBACK
SKIP Playback
VCD/Audio CD Playback
PLAYING VCD PBC MENU
l
PBC ON (VCD 2.0 above only):
Press the or button
NEXT PREV
uu tt
||
Song 1
will go back to the PBC menu.
Song 2
Song 3
Song 4
Note
:
Song 5
l
There will be a case that playback stops when
Song 6
NEXT PREV
uu tt
||
or is pressed.
l
PBC OFF orAudio CD
uu||tt
Press the NEXT or PREV button will skip to
the next or previous track of VCD or Audio
CD.
Notes
:
l
PBC: Play Back Control.
See page 151.
l
This function is only available for Video-CD version 2.0 or higher.The PBC operation may differ by
disc, therefore, refer to the instructions for each disc.
STEP/PAUSE Playback
Step playback is available while playing discs
other thanAudio CD. It provides a frame-by-frame
still picture image.
||
||
l
Press the STEP button to freeze the image.
Press the STEP button again to skip to the
next frame, and so on.
l ENTER
Press the button to return to normal
play.
143
BASIC OPERATION OF PLAYBACK
Fast scanFORWARD/REVERSE
Using the and buttons to fast forward and reverse scan.
FWD REV
uu tt
DVD Playback
l
When the or button is pressed, the speed of playback changes in cycles of
FWD REV
uu tt
2468Play 2
aaaa a
l
When the button is pressed during fast forward/reverse scan, normal playback will be
ENTER
resumed.
uu 2
uu 8
tt 8tt 2
FF 2
FF 8
FR 2 FR 8
VCD/Audio CD Playback
l
When the or button is pressed, the speed of playback changes in cycles of
FWD REV
uu tt
1234 1
aaaa a
Play
l
When the button is pressed during fast forward/reverse scan, normal playback will be
ENT
ER
resumed.
uu 1
uu 4
FF 1
FF 4
Fast Forward
Notes:
l
It is normal that video image may seem discontinuous during fast forward/reverse scan.
l
When the fast forward scan reaches the end of a track (Audio CD/VCD) or a title (DVD), normal
playback of the next track/title will be resumed.
l
When the fast reverse scan reaches the beginning of a track (Audio CD/VCD) or a title (DVD), the
normal playback of the track/title will be resumed.
144
BASIC OPERATION OF PLAYBACK
SLOW-MOTION Playback
DVD Playback
l
When the button is pressed, the speed of playback changes in cycles of slow forward
SLOW
|u
2 4 8 and then slow reverse 2 4 8.
aa aa
l
When the button is pressed during slow forward/reverse scan, normal playback will be
ENT
ER
resumed.
|u 2
|u 8
FF 2
Slow Forward
FF 8
t|2
t|8
FR 2
Slow Reverse
FR 8
VCD/Audio CD Playback
l
When the SLOW button is pressed, the speed of playback changes in cycles of slow forward
1 2 3 PLAY 1.
aaa a
l
When the button is pressed during slow forward/reverse scan, normal playback will be
ENT
ER
resumed.
|u 2
|u 8
FF 2
Slow Forward
FF 8
Notes:
l During slow-motion play, you will not be able to hear the audio portion of the track.
145
BASIC OPERATION OF PLAYBACK
STOP Playback
DVD Playback
Pressing the button once only pre-stop the playback. You must press the button
STOP STOP
nn
twice to totally stop the playback.
Notes:
l
When the unit is not in use, please remove the disc and press the POWER button to turn off DVD
player.
PLAYING VCD PBC MENU
VCD/Audio CD Playback
Song 1
PBC ON (VCD 2.0 above only):
Song 2
l
Press button will go back to PBC
STOP
n
Song 3
(main page)
Menu.
Song 4
Song 5
Song 6
Notes:
l
Some function keys will be differed from its original definition even cease to function in some
discs. The main cause is those specific discs were already contained its operation function in
process of manufacturing. In this case, to operate the function key, please follow on-screen
indication for operation. The particular feature only exists in those specific discs; it will not further
affect DVD player's normal operation.
l
When PBC mode is ON, even when button is pressed some discs will not go back to PBC
STOP
n
Menu and “ ” is shown on the screen.
I
PBC OFF orAudio CD:
l
Press button will stop playback during PBC off orAudio CD playback.
STOP
n
146
ADVANCED OPERATION OF PLAYBACK
R laybackepeated P
TITLE/CHAPTER Repeat
When the button is pressed, the repeated playback is triggered and the OSD message is
REPEAT
changed in cycles of “CHAPTER REPEAT ON”, “TITLE REPEATON”, and “REPEAT OFF.”
l
CHAPTER REPEAT
-
Enables the repeated playback of a chapter for a DVD disc or track for a
Audio CD disc or a VCD disc.
l
TITLE REPEAT
-
Enables the repeated playback of a title for a DVD disc or a disc for a Audio CD
disc or a VCD disc.
l
REPEAT OFF
-
Resumes normal play.
CHAPTER REPEAT ON CHAPTER REPEAT OFF
A-B Repeat
You are able to perform a repeated playback between any two points of a track or a chapter.
1.
Press the A-B REPEAT button during playback to set the beginning point (A). The OSD message
“ATO B SETA “ will be shown on the right lower screen corner.
2.
Press theA-B REPEAT button again to set the end point (B). The OSD message “A TO B SET B ”
will be shown. In the meantime, the repeated playback begins between the two points,A and B.
3.
Pressing the A-B REPEAT button again resumes normal play. The OSD message “A TO B
CANCELLED” will be shown.
SET A
SET B
A TO B SET A
A TO B SET B
147
ADVANCED OPERATION OF PLAYBACK
TITLE MENU (DVD Only)
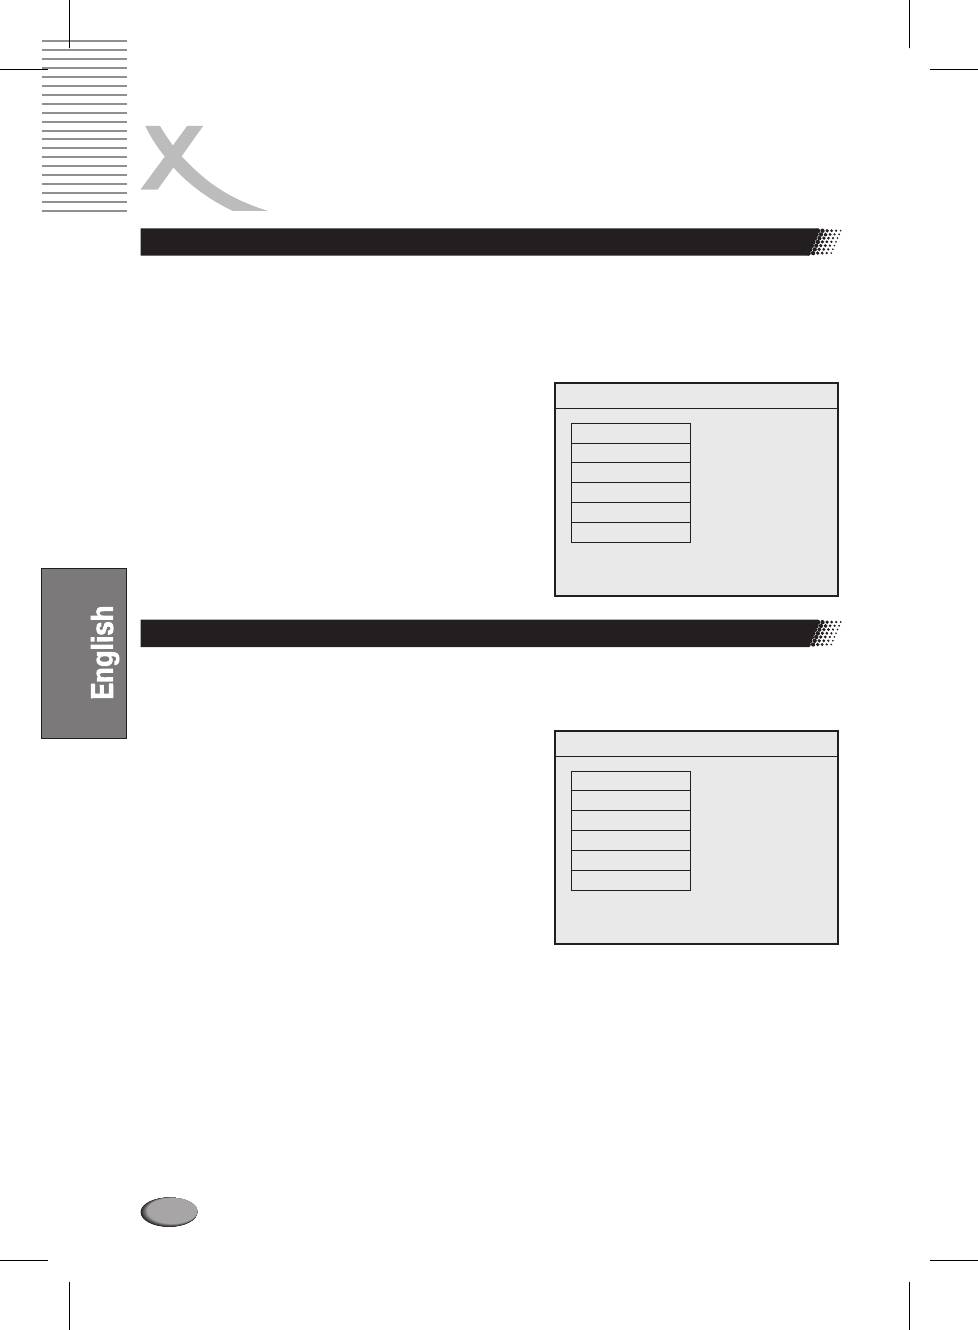
Some DVD discs have a title menu recorded within them to use for selecting titles for play. This feature
will only work with these discs.
Press the TITLE button during playback to reach the title menu. Pressing the TITLE button again
resumes the playback of the scene when the TITLE button was first pressed.
DVD TITLE MENU
DISC TITLE
Use the buttons to control the direction and
tupq
press the button to select the preferred title or you
ENTER
TITLE 1
can directly press the numeric buttons to select the title.
TITLE 2
TITLE 3
Note:
TITLE 4
TITLE 5
l
DVD discs are divided into units referred to as titles,
and titles are divided into chapters. Menu screens do
TITLE 6
not belong to any title. A disc that contains a movie
may have only one title with many chapter divisions.
DVD MENU (DVD Only)
Some DVDs have complex contents such as multi-subtitle, multi-audio, or multi-angle. In these
cases, you may use the DVD menu to select audio language, subtitle language, and angle.
1.
Press the MENU button during playback to display the
DISC MENU
DVD menu, if it is available on the disc.
2.
Use the buttons to control the direction
tupq
PLAY MOVIE
and press the button to select the preferred
ENTER
SPECIAL
item. Or you can directly press the numeric buttons to
CHPATERS
select the item.
SUBTITLES
3.
Pressing the MENU button again resumes the
AUDIO
playback of the scene when the MENU button was
CHARACTERS
first pressed.
148
ADVANCED OPERATION OF PLAYBACK
MULTI-ANGLE Playback
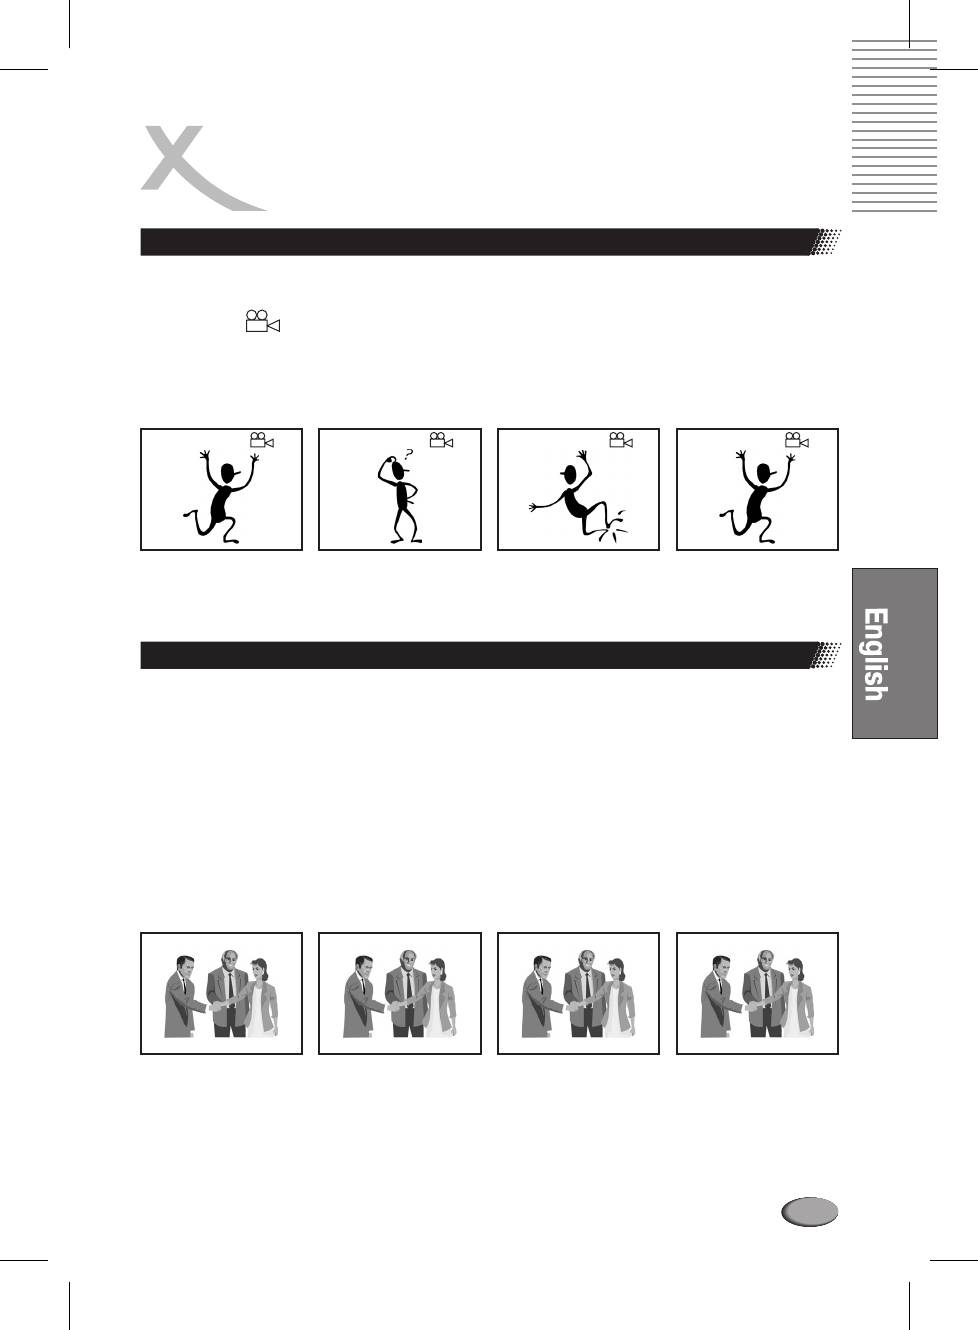
Some DVD discs may contain scenes with a number of different angle views. Whenever a scene with
multiple angle views is played, you can use theANGLE button to view this scene from different angles.
The OSD icon " “ will appear on the screen during the playback of a scene with multi-angle views.
When the ANGLE button is pressed, the angle for playback will change in cycles among the available
angle numbers.
ANGLE 1/3
ANGLE 2/3 ANGLE 1/3ANGLE /33
1/3 2/3 3/3 1/3
Note:
l
The "ANGLE MARK" in the initial setting must be set to "ON.”
Сhanging SUBTITLE During Playback
During playback of a DVD disc with more than two subtitle languages, you can change the subtitle or
disable the subtitle by pressing the SUBTITLE button.
l
When the SUBTITLE button is pressed, the subtitle for playback will change in cycles among the
available subtitle numbers and “OFF” status. “ OFF” will disable the subtitle display.
l
The OSD message will show the current subtitle number. If no selection is made, this OSD
message will disappear after 3 seconds.
Note:
l
“UNKNOW” will be displayed for languages that are not supported by the subtitle function in this
player.
English Subtitle
Chinese Subtitle English SubtitleSubtitle Off
SUBTITLE 01 / 02: ENGLISH SUBTITLE 02 / 02: CHINESE SUBTITLE OFF SUBTITLE 01 / 02: ENGLISH
How are you?
?
How are you?
Notes:
l
Sometimes the subtitle language can only be changed in DVD menu instead of during playback.
l
The number of available subtitle language is depending on the disc.
149
ADVANCED OPERATION OF PLAYBACK
Changing AUDIO LANGUAGE During Playback
English Language Chinese Language
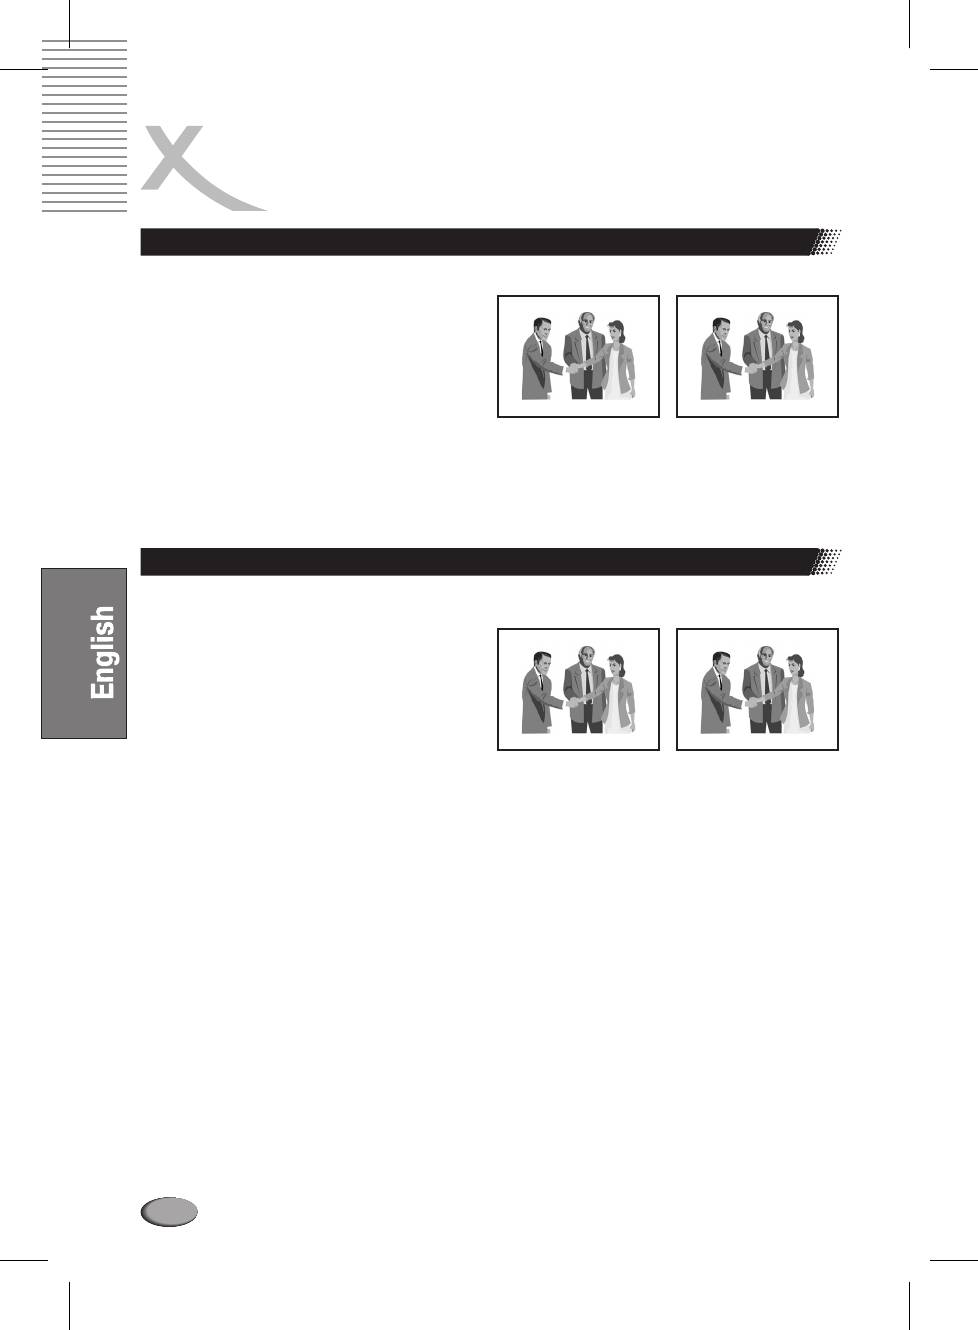
During playback of a DVD disc with more than two
audio languages, you can change the
AUDIO 01 / 02: ENGLISH AUDIO 02 / 02: CHINESE
audio/language by pressing theAUDIO button.
l
When the AUDIO button is pressed, the audio
/ language for playback will change in cycles
among the available audio/language
numbers.
l
The OSD message will show the current
subtitle number. If no selection is made, this
OSD message will disappear after 3 seconds.
Notes:
l
Sometimes the audio language can only be changed in DVD menu instead of during playback.
l
The number of available audio language is depending on the disc.
DIRECT Function
Under the search mode, specific title, chapter, or time can be located for immediate playback.
TITLE and CHAPTER search TIME search
DVD Search Functions
TITLE 01/35 CHAPTER 06/38 TIME _ _: _ _: _ _
During a DVD playback, pressing the GOTO
button can enable the search function. The OSD
will show three search methods after pressing
GOTO button one time and two times.
The “TITLE 01/35” indicates that the player is
currently playing title no. 1 of 35 titles. The
“CHAPTER 06/38” indicates that the player is currently playing chapter 6 of 38 chapters. The “TIME
00:20:12” indicates that the current playback time is 20 minutes and 12 seconds into the playback.
To search by title, use the buttons to highlight the first two digits of the “TITLE nn/nn”
tupq
section. Once highlighted, use the number keys on the remote to enter the title you want to play.
Presses to complete your search selection.
ENT
ER
To search by chapter, use the buttons to highlight the first two digits of the “CHAPTER
tupq
nn/nn” section. Once highlighted, use the number keys on the remote to enter the chapter you want to
play. Presses to complete your search selection.
ENT
ER
To search by time, use the buttons to highlight the “TIME nn:nn:nn” section. Once
tupq
highlighted, use the number keys on the remote to enter the time frame from which you want to play.
Presses to complete your search selection.
ENT
ER
VCD/Audio CD DIRECT Functions
1.
During a VCD orAudio CD playback, this unit only supports the time search function.
2.
Pressing the GOTO button during play will display the OSD for VCD/Audio CD search.
3.
When the time is set, play from this position will start immediately.
N:otes
l
Audio CD playback's background is start up logo.
150
ADVANCED OPERATION OF PLAYBACK
VCD P (PBC)layback control
This function is only available for Video-CD version 2.0 or higher. The PBC operation may differ by
disc, therefore, refer to the instructions for each disc.
l
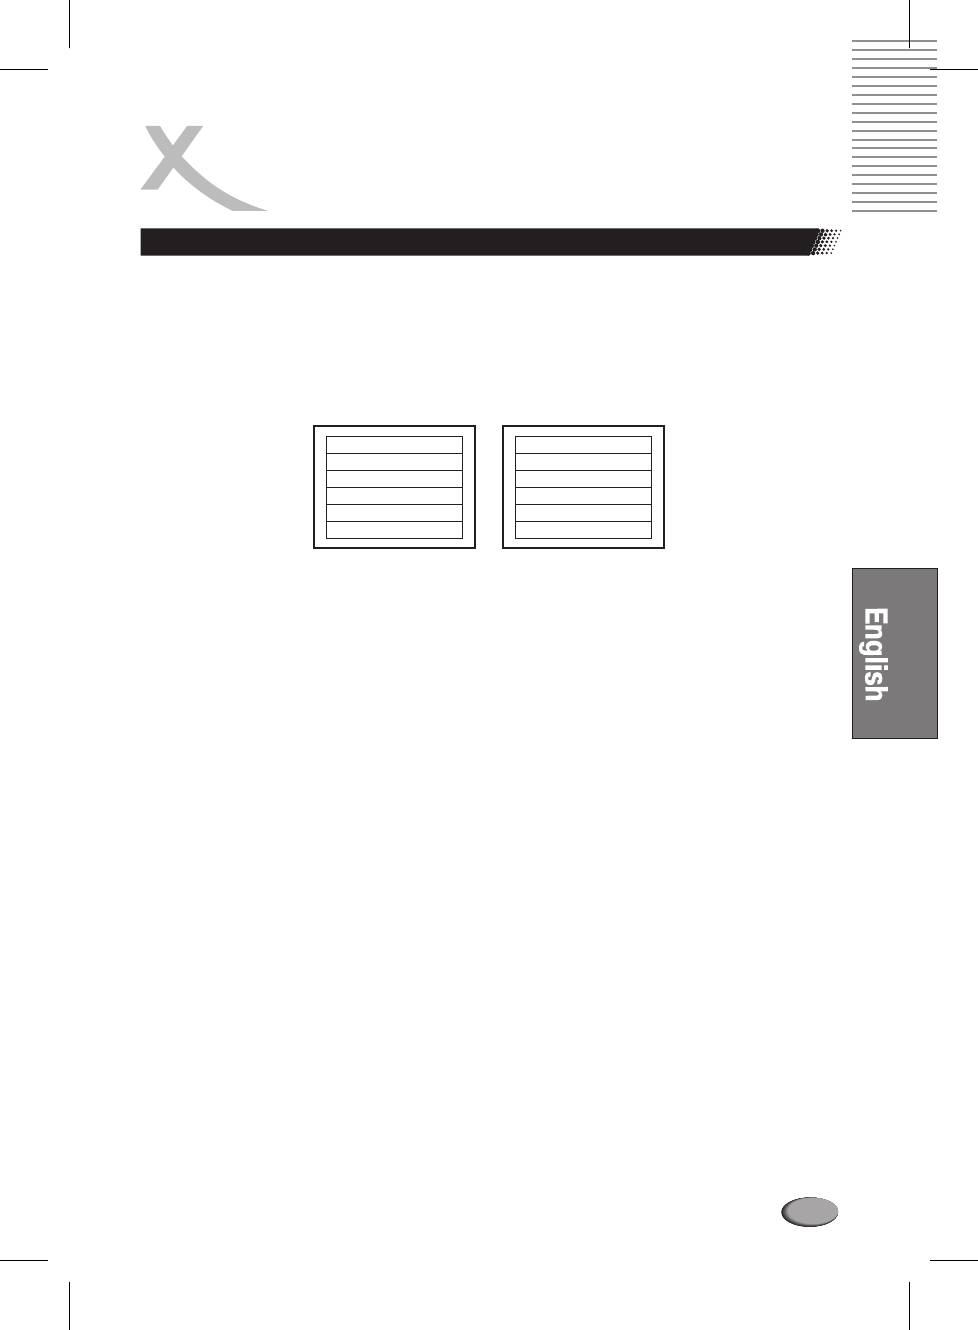
Press the button to switch on/off the PBC function. The OSD message “PBC ON” or “PBC
TITLE
OFF” will be displayed.
l
On the PBC menu, the and buttons are dedicated for “GO BACK TO
PREV NEXT||tt uu
PREVIOUS PAGE” and “GO TO NEXT PAGE” of the PBC menu, if available.
VCD PBC MENU Page 1
VCD PBC MENU Page 2
Song 1
Song 7
Song 2
Song 8
Song 3
Song 9
Song 4
Song 10
Song 5
Song 11
Song 6
Song 12
Digit Buttons
On the PBC menu, all items must be selected and executed by using the number buttons only.
151
MULTIMEDIA FILES PLAYBACK
Playback with JPEG Files
Section 1: What is a JPEG?
JPEG is short for the 'Joint Photographic Experts Group', a group of experts nominated to produce
standards for continuous tone image coding.
The best known standard from JPEG is 10918-1 (ITU-T T.81), which is the first of a multi-part set of
standards for still image compression. This allows you to create files (such as photographs, drawings,
and most clip-art) that can be archived on a CD-R for viewing on theAD-1600/1700M, computer, or the
web.
WHAT IS PICTURE CD?
This DVD player provides with the ability to playback most JPEG files, that are commonly used for
digital cameras, and KODAK Picture CDs to view your photos on a television in the comfort of your
home from a CD-R!
SECTION 2: PLAYING YOUR JPEG FILES
- - SMART NAVI - -
Normal Slide Show Presentation
Before playing, make sure of WITH MENU highlighted on
ROOT
ROOT
the PREFERENCES PAGE menu (See SMART NAVI).
JPG
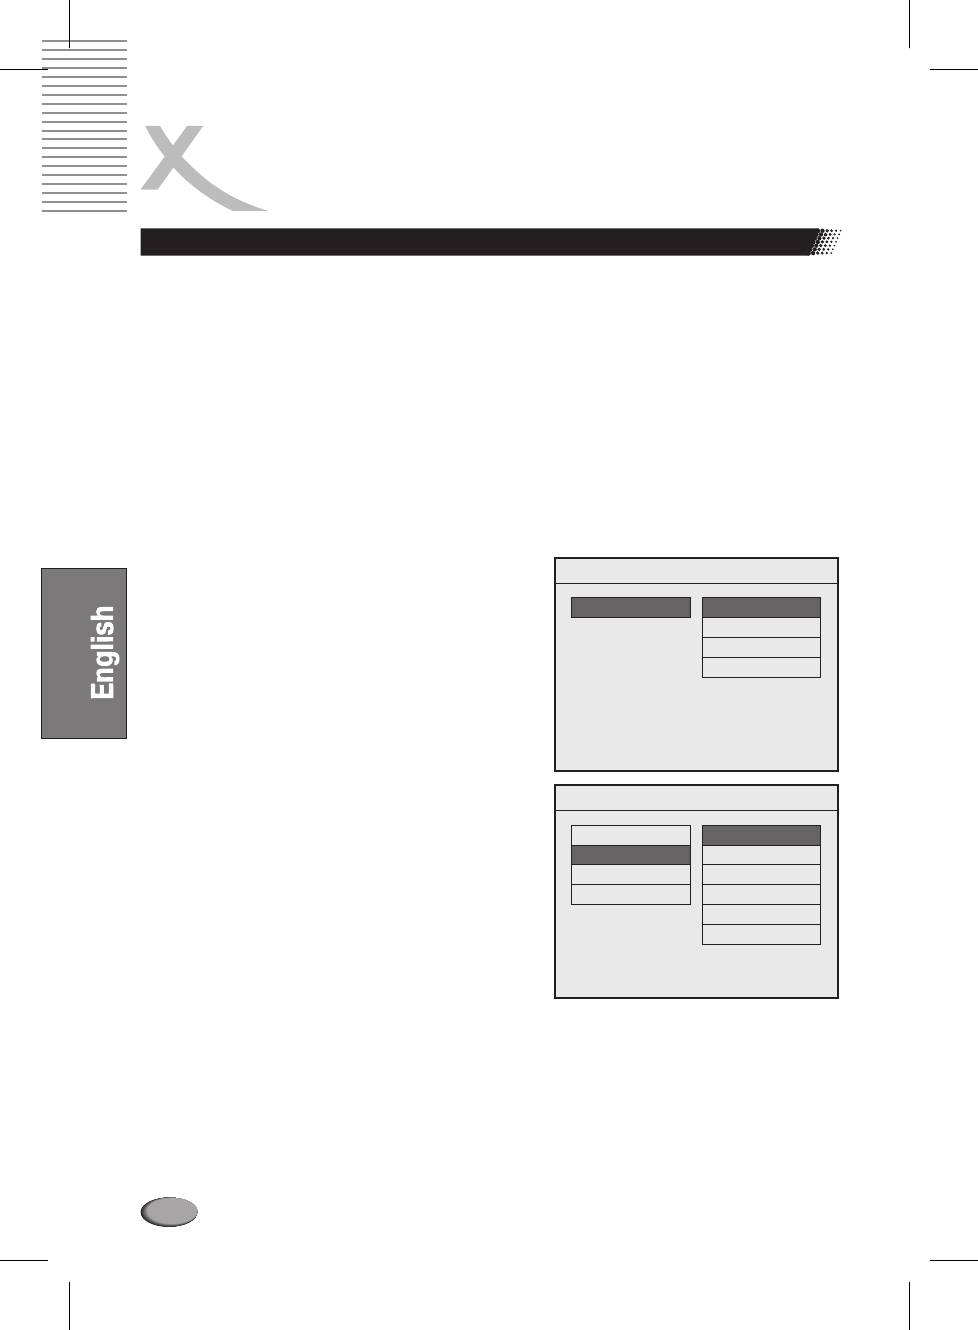
When a JPEG disc is loaded into the player, a menu will
MP3
appear on screen.
WMA
Run keys on the remote control to do the
tupq
- - SMART NAVI - -
selection of the folder JPG, MP3 (MPEG4), or other format
on the disc inserted:
r ROOT
r
0
r ROOT
N ATT00011
1
r MP3
N ATT00014
2
Use numeric keys to designate the number of the picture,
r WMA
N ATTOOO17
3
from which the photos showing go on accordingly.
N ATT00020
4
N BIGCAT
5
IMAGE ROTATION
There are four modes to rotate a picture: Invert, Mirror,
Left, and Right. These operations are allowed only when a
picture is being displayed normally, and will be cancelled
automatically when a new picture is displayed. The arrow key are used to select the different rotation
modes:
Up - Invert/Normal
p
,
Down - Mirror/Normal
q
,
Left - Turn left
t
,
Right - Turn right
u
.
152
MULTIMEDIA FILES PLAYBACK
Playback with JPEG Files
ZOOM
This features allows you to view a picture at the increments of 25%,50%,100%,150% and 200%.
Press the ZOOM button.An on screen message (“Zoom On”) will verify your selection. Use FWD and
REV keys to control the amount of zoom in and out. Press the direction keys , or , to move
pq tu
Up/Down or Left/Right the picture when the picture increment of 150% and 200%. With “Zoom Off”,
the picture is scaled to fit most of your TV screen.
Note:
l
When in the ZOOM mode, the slideshow transition and image transformation features are
disabled.
MENU
The MENU key is used to display nine pieces of thumbnail picture. From the stop position, press the
MENU key. After it is enabled, up to nine scaled-down thumbnails pictures will be displayed on the
screen. The NEXT and PREV keys can be used to display the next and previous nine pictures in the
current directory. Each of the nine pictures is numbered from 1-9. By pressing a number key, the
corresponding picture will be enlarged to fill most of your TV screen, from which pictures go on
displaying to the last one.
Skip Playback
l
Under the status of playback, you can use the NEXT and PREV buttons to skip forward and
reverse playback.
Stop or pause Playback
l
During playback, for entering the root menu of the JPEG disc, please press STOP button on the
remote control, press to resume the playback.
ENT
ER
l
During playback, for pausing of playback, please press STEP button on the remote control, press
ENT
ER
or STEP again to resume the playback.
153
MULTIMEDIA FILES PLAYBACK
MP3 and MPEG4 Compatible Format (Refer to Playback with JPEG Files)
Start Playback
1.
Place MP3 files recorded disc into the DVD player, then it will enter the menu of the disc
automatically.
Note:
There will be no second menu if all the contents of the songs are recorded in the Root menu.
2.
Please use arrow buttons for movement to select a track (song) and press
ENT
ERtupq
button to play.
MP3 and MPEG4 Root Menu
Song Selection
l
Direct select with numeral keys Press the numeral button directly from to and to select the
.
0 9 +10
song what you want. If you want to select #25 song, you have to press button twice and
EX: +10
then press 5 button.
l
Direct select with navigation keys Under stop status, you can use arrow buttons for
.
tupq
movement to select a title/song, then press button to confirm.
ENT
ER
Fast Forward/Reverse Scan (for MP3)
l
Under the status of playback, you can use the FWD and REV buttons to fast forward and reverse
scan.
l
When the FWD or REV button is pressed, the speed of playback changes in cycles of
1234PLAY1…
aaaa a
l
When the button is pressed during fast forward/reverse scan, normal playback will be
ENT
ER
resumed.
Skip Playback
l
Under the status of playback, you can use the NEXT and PREV buttons to skip forward and
reverse playback.
Pause Playback
l
Pressing the STEP button during playback will pause the playback.
l
To resume normal play, please press the or STEP button.
ENT
ER
Stop Playback
l
Press the STOP button to stop playback.
N:
otes
l
Sometimes it will not have menu if all MP3 files are burned in the root directory (no sub-directory
existence)
l
It sometimes takes a long time to load an MP3 disc; during this time no other function (Stop or
Eject) can be accessed.
l
Even if the disc contains several sub directories, only the directory name of the folder where the
MP3 files are stored is displayed.
N:
ote
l
When the unit is not in use, remove the disc and power off the player.
154
MULTIMEDIA FILES PLAYBACK
W MPEG-4?hat is
MPEG-4 is a highly efficient video compression standard being able to shrink MPEG-2 video files to
1/8 of it's original size. Most video streaming technologies , for example DivX and XviD, are based on
this standard. MPEG4 is the most popular and widest spread digital video technology.
HOW TO PLAYBACK YOUR MPEG-4 CD?
1. Press OPEN/CLOSE. Place the CD on the disc tray, and press OPEN/CLOSE again to close the
disc tray.
2. Select a folder or an AVI file contained on the CD. Use the direction keys to navigate among the
items.
3. Press PLAY. The player will start the playback.
HOW TO CREATE YOUR OWN MPEG-4 DISC?
1. Convert your source material (e.g. videos from your camcorder) with a suitable program like “Dr.
DivX” to MPEG-4 file format.
2. Place a blank recording media (recordable CD or DVD) into PC CD/DVD burner or other record
devices.
3. Burn your favourite MPEG-4 files on that media using a burning application software like Nero
Burning ROM, Clone CD, etc. Do not use UDF file format for burning. We recommend to use ISO
9660 Level 1 or 2. Do not use multisession.
Note :
s
1. The MPEG-4 file must be conforming to ISO MPEG-4 simple or advanced profile without using
Quarter pixel (QPEL)
2. We recommend to use max. bitrate of 2000 kBit/sec and a maximum resolution of 720 x 576 pixel
(PAL) or 720 x 480 pixel (NTSC).
3. Please use quality brand recording media as they usually provide better compatibility. We
recommend not to use maximum burning speed.
Advanced users:
1. When you create MPEG-4 files, DO NOT use progressive B-frames, GMC or QPEL. Even if your
player can play the files, it might cause problems on other DVD players.
2. Your DVD player is optimised for playback of standard resolution files, If the MPEG-4 file does not
show correct aspect ratio on your player, check the resolution. Optimal resolutions are 720 * 576 /
720 * 480 / 640 x 480 / 320 x 240 / 352 x 288
3. Your player can accept peak bitrates even much higher than 2000 kBit/sec. However, we cannot
guarantee that these files play back correctly, especially on other devices. If you want to use
higher bitrates than average 2000 kBit, we recommend to make some tests before converting
your video material.
As MPEG-4 is an open standard, we cannot guarantiee that all MPEG-4 files play back correctly
on this DVD player
.
155
MULTIMEDIA FILES PLAYBACK
DivX subtitles
Your Xoro DVD player can display DivX subtitles. It supports srt, sub and smi
Before you start playback, the subtitle file must be activated. As soon as the player has read the CD
index, a menu shows the movie and the subtitle files. The subtitle file is displayed with a question
mark, this is normal. Navigate with the arrow keys to the desired subtitle file and press SUBTITLE key
on the remote control. The player prompts “DivX subtitle selected”. Now, you can start the movie and
the selected subtitles will be displayed. You can deactivate the subtitle display simply by pressing
SUBTITLE key on the remote control.
Note:
l
Subtitles are not supported in all languages. It may be possible that other languages are
supported, too due to an improved firmware. Also, other subtitle formats may be supported by
newer firmware. You can check www.xoro.com for newer firmware. Please note that some
programs create subtitles which are not compatible with this player.This is normal and is no defect
of the player.
156
AMPLIFIER / DIGITAL TUNER SYSTEM
Tuning operation
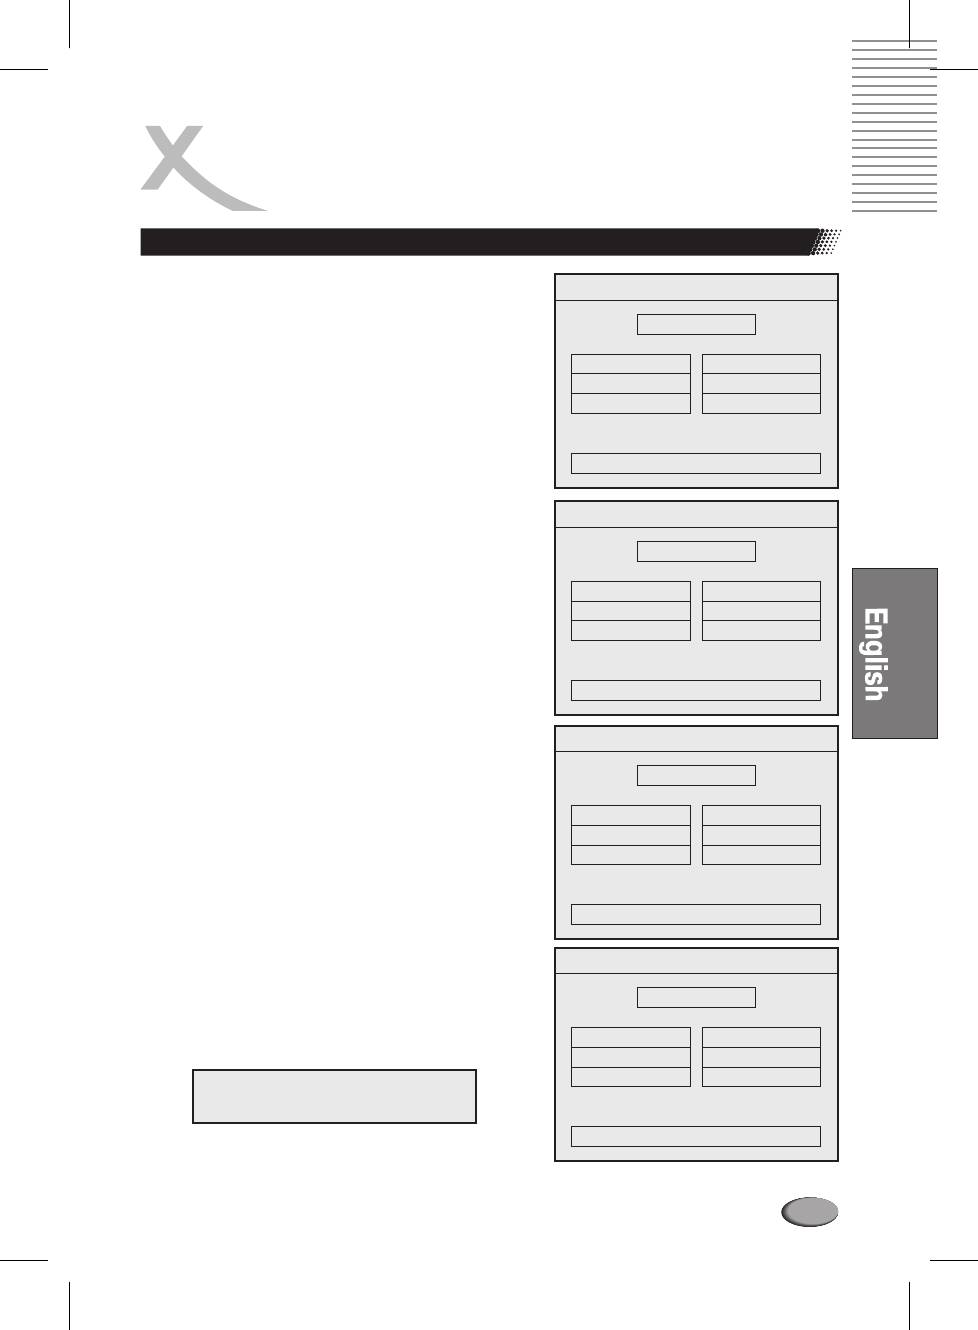
After power-on, the machine will be at the DVD mode with
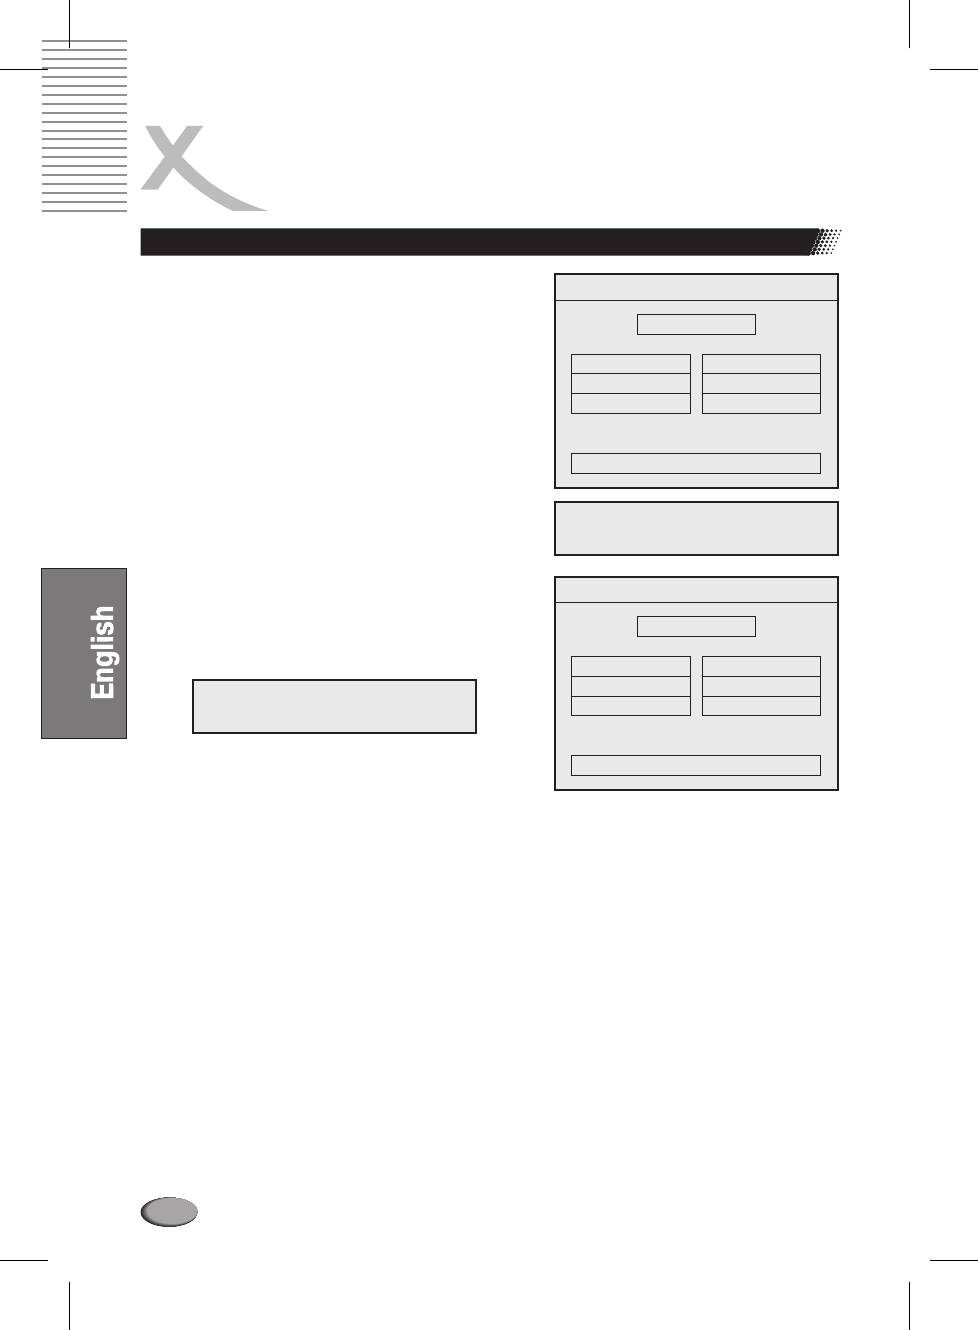
- - TUNER MENU - -
the AMP default setting. If you want to enjoy the Tuner you
can, when a DVD disc loaded on the disc tray, press the
FM MODE
STOP on the remote control twice to stop the DVD Player
(the first press is for a pre-stop.), and then you press the
STATION
1
key INPUT to turn on the Tuner. The on setting of the Tuner
FREQ
101.7 MHz
is the last one when the unit turned off. Press the AM/FM to
MODE
AUTO
listen to AM or FM broadcasting.
FM/AM selecting and saving
Press INPUT on the remote control to convert the DVD
mode into Tuner Mode and the OSD appears:
- - TUNER MENU - -
Press AM/FM on the remote control to convert the Tuner
broadcasting between AM/FM.
AM MODE
STATION
1
FREQ
540 KHz
MODE
AUTO
- - TUNER MENU - -
Press to convert between auto and manual station-
I/P
selection saving. The OSD appears:
FM MODE
STATION
5
FREQ
107.7 MHz
Under AUTO MODE, for both AM and FM, press FWD or
MODE
MANUAL (or AUTO)
REV to search up to higher frequencies or downward to
lower frequencies, up to 20 frequencies broadcasting (10
frequencies ofAM and FM each) can be tuned in and kept
in correspondence with the digitals 1 to 10.
When the STOP pressed, the searching stops. Once one
- - TUNER MENU - -
frequency is spotted, OSD appears e.g.:
FM MODE
It also appears on the VFD:
STATION
1
FREQ
107.7 MHz
MODE
MANUAL (or AUTO)
u FM 1 101.7 MHz
SAVE TO 1
157
AMPLIFIER / DIGITAL TUNER SYSTEM
Tuning operation
Each time one frequency is spotted there will be 3 seconds
- - TUNER MENU - -
program broadcasting from it, and then the searching
goes on to the next frequency searching until the digits 1 to
AM MODE
10 used up (AM and FM each).
STATION
1
Under MANUALMODE for bothAM and FM, press FWDor
FREQ
101.7 MHz
REV to tune in up to a higher frequency or downward to a
MODE
MANUAL
lower frequency, up to 40 frequencies broadcasting (AM
and FM each) can be tuned in and kept in correspondence
with the digitals 1 to 20. Each time one frequency is going
INPUT STATION
to be spotted, the OSD appears e.g.:
It also appears on the VFD:
AM 1 540 KHz
When the digit 2 pressed and press again the FREQ goes
- - TUNER MENU - -
up higher to 603KHz, OSD appears:
AM MODE
Also the VFD appears:
STATION
2
FREQ
603 KHz
SAVE TO 2
MODE
MANUAL
SAVE TO 2
The program of the frequency spotted goes to broadcast. With the same way above go on to do the
next frequency searching. To get an optimum of receiving broadcast you can press or for a fine
tu
frequency adjustment of the program broadcasting, and the result of which can be kept by pressing
ENT on the remote control.
After saving you can run any digit of 1~20, in each of which one FREQ frequency broadcasting has
been saved, to listen to the broadcast of the AM Or FM frequencies corresponding with what you have
ever saved.
Notes:
1. You can save up to 40 frequencies, FM andAM each.
2. Machine will save the frequencies re-cycle.
3. VFD of the machine will display the saved message being played when the TUNER is on.
4. The FM frequency range: 87.5 108MHz
Frequency-step = 50KHz
TheAM frequency range: 530-1600KHz
Frequency-step = 10KHz
158
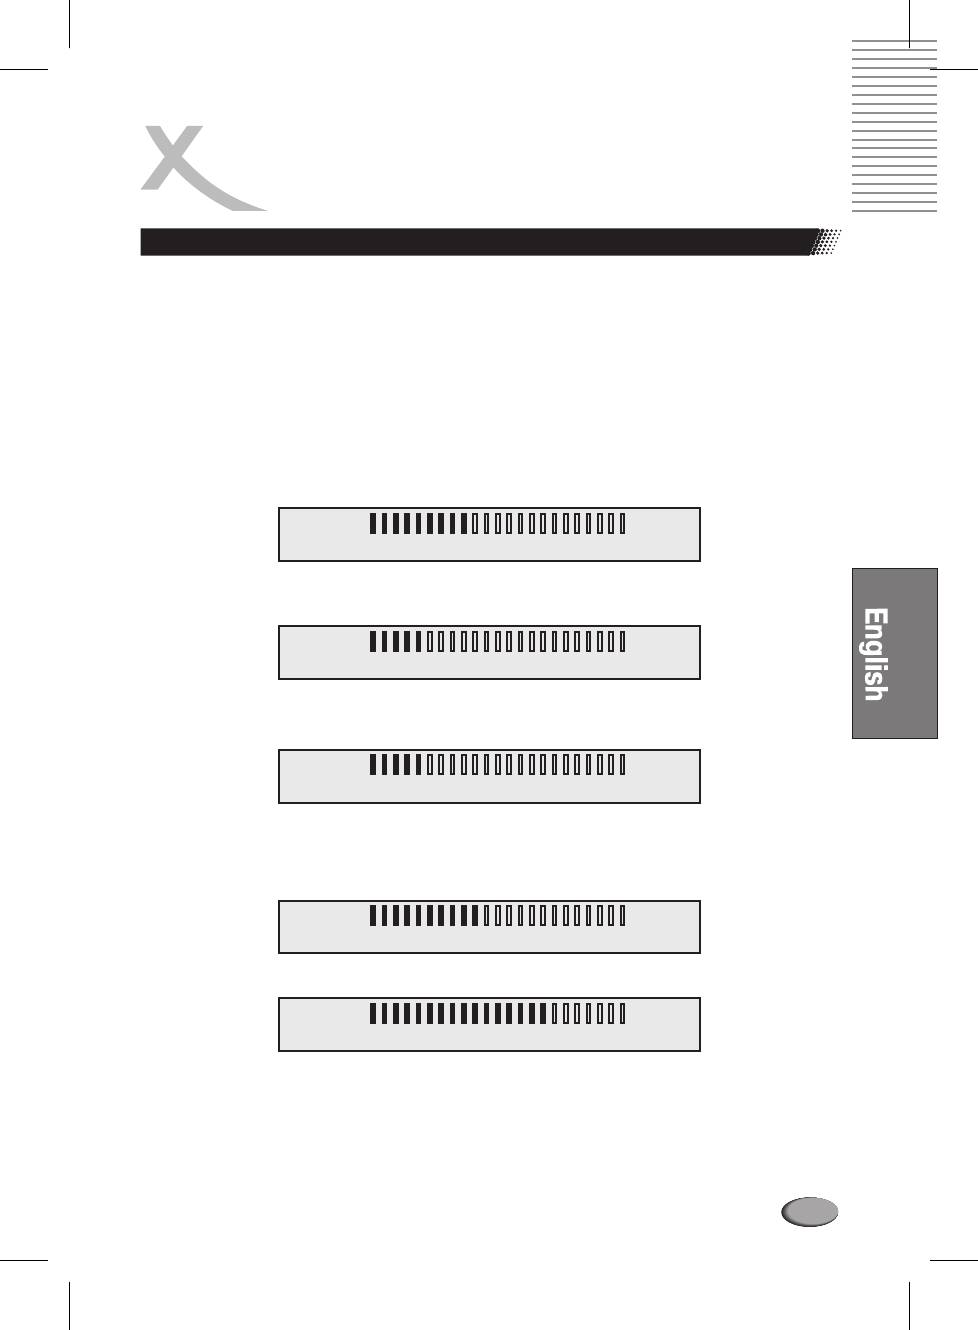
RDS PS FUNCTION
Radio Data System Program Service station name
The name of the RDS station now being received instead of the frequency will display on the VFD.
e.g.: BBC R3
In FM mode, press DISPLAY on the remote control to show DISPLAY PTY and conversion of RT,
FREQ, PS.
N:
ote
l
This function can be used under Tuner mode only.
AMP Volume up/downAdjustment
Press the Key 6ch VOL on the remote control, TV OSD appears: (the last mode shown) e.g.:
ALL
06
VOLUME ALL
Press 6ch VOL twice, OSD Appears:
LF
05
VOLUME Single
Press 6ch VOL thrice to six times the OSD converts in turn of RF, LS, RS, CN and SW;
SW
05
VOLUME Single
Press 6ch VOL continually it goes in cycle.
Press the Key VOL+ or VOL- on the remote control to change the Volume value of LF, RF, LS, RS, CN
or SW separately. e.g.
CN
10
VOLUME Single
or in all of them,
ALL
10
VOLUME ALL
N:
ots
l
You can adjust the Volume, as well, by turning the Volume knob in the front panel of the machine.
l
For a good reception the FM & AM antenna is required and that have to be put in an optimum
location when listening to broadcasting over the tuner.
159
DISC INFORMATION
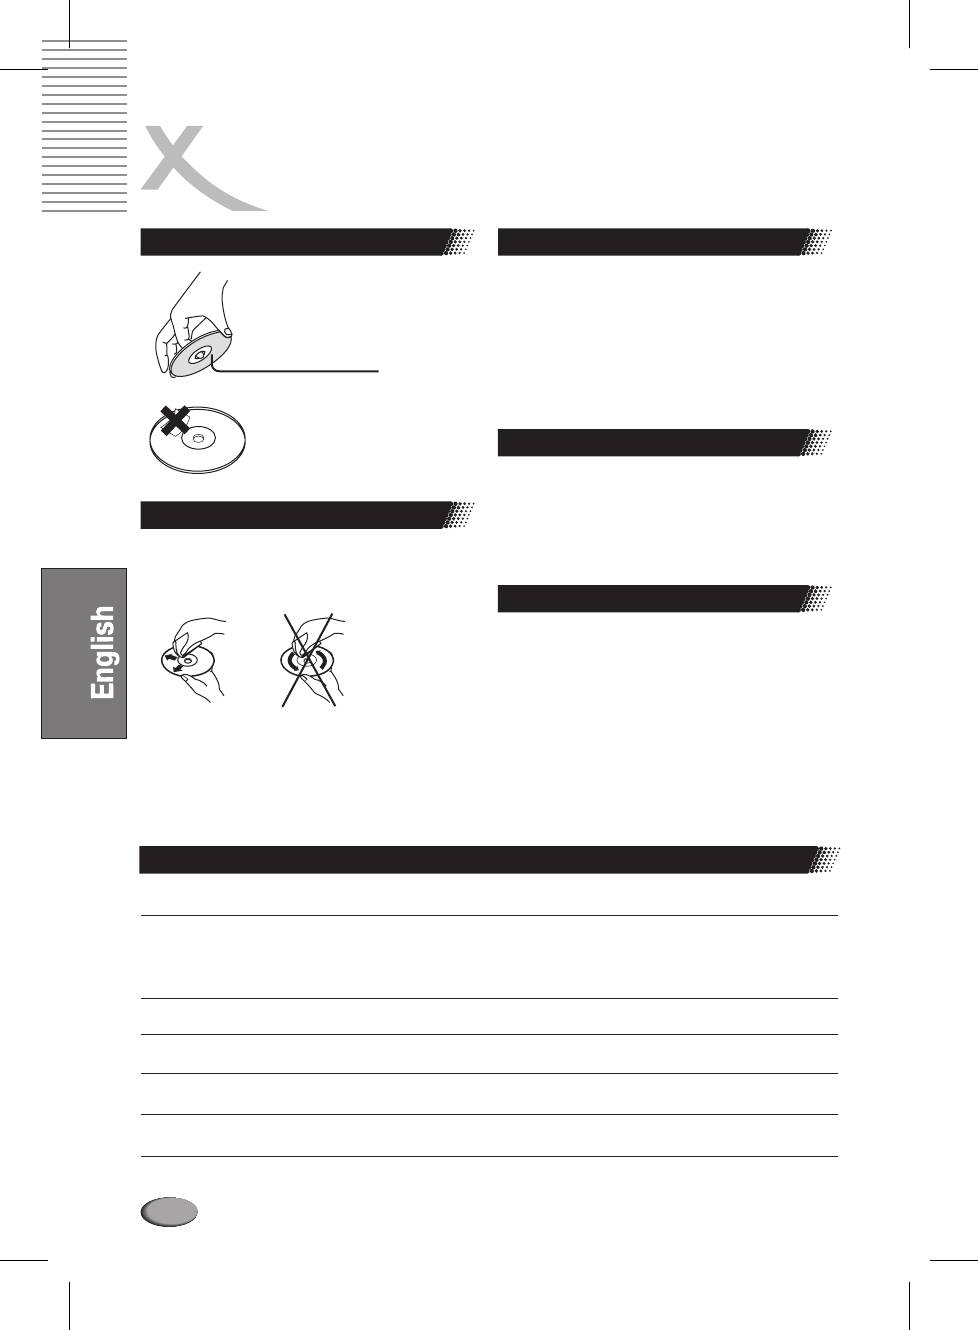
Handling precautions
On storing discs
l Do not touch the playback side
l Do not store discs in a place subject to direct sunlight
of the disc.
or near heat sources.
l Do not store discs in places subject to moisture and
dust such as a bathroom or near a humidifier. Store discs
Aufnahmeseite
vertically in a case. Stacking discs or placing objects on
their case may warp the discs.
l Do not attach paper or tape
Copyright notes
to discs.
l It is forbidden by law to copy, broadcast, show on
cable, play in public, and rent copyrighted material
To clean discs
without permission.
Просмотр JPEG картинок
l DVD video discs are copy protected, and any
recordings made from these discs will be distorted.
l
Fingerprints and dust on the disc may cause picture
and sound deterioration. Wipe the disc from the center
outwards with a soft cloth.Always keep the disc clean.
About this manual
l This user's manual explains the basic instruction of
this DVD player. Some DVD video discs are produced in
a manner that allows specific or limited operation during
playback. As such, the DVD player may not respond to
all operating commands.
l
If you cannot wipe off the dust with a soft cloth, wipe
the disc lightly with a slightly moistened soft cloth and
finish with a dry cloth.
l
Do not use any type of solvent such as thinner,
benzine, commercially available cleaners or antistatic
spray for vinyl Lps. It may damage the disc.
Discs that can be played
Disc mark
Contents
CD-Size
Maximum playback time
Approximately 2 hours (single sided single)
Approximately 4 hours (single sided double)
Audio + VideoDVD 12 cm
Approximately 4 hours (double sided single)
Approximately 4 hours (double sided double)
Audio + VideoSVCD
12 cm
Approximately 45 minutes
Audio + VideoVideo CD
12 cm
Approximately minutes74
AudioAudio CD
12 cm
Approximately minutes74
M3P
Audio
12 cm
160
NOTES ON SERVICE
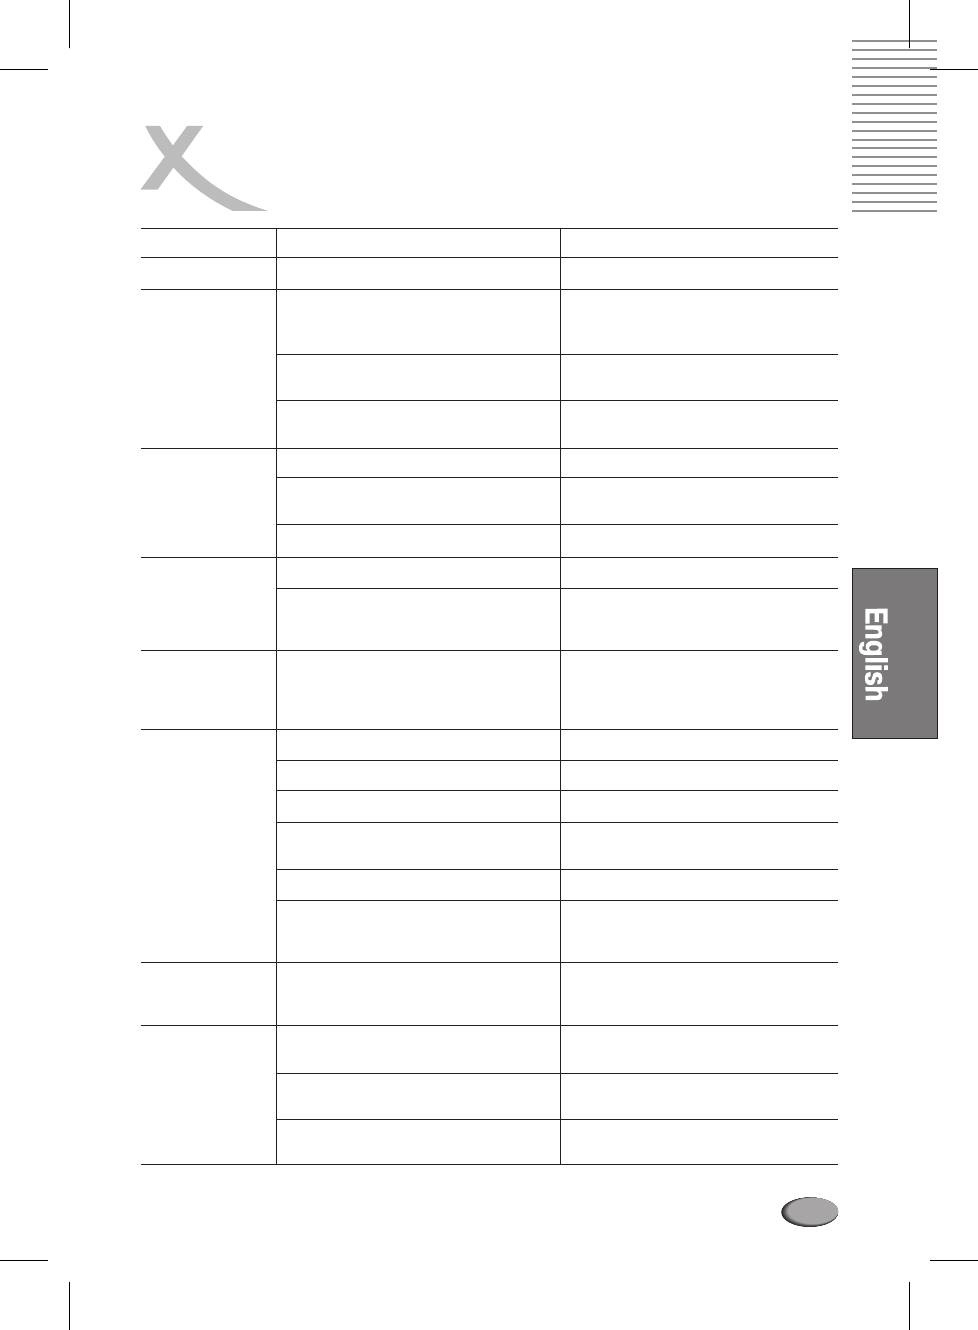
Check the following guide for the possible cause of a problem before contacting service.
Technical Support of Xoro/MAS: Tel.: 040/77 11 09 17, Internet: www.xoro.de/support.htm
Symptoms
Cause
Correction
No power
The power plug is disconnected
Connect the power plug into the wall outlet
No picture
The TV is not set to receive DVD
Select the appropriate video input mode on
signal output
the TV so the picture from the DVD player
appears on the TV screen
The video cable is not connected securely
Connect the video cable into the jacks
securely
The DVD video mode is not matched
Refer to Connecting to a TV (page 10)
with the TV
The audio cable is not connected securely
Connect the audio cable into the jacks
No sound
The power of the equipment connected with
Turn on the equipment connected with the
the audio cable is turned off
audio cable
The setting of output sound type is not correct.
Set the audio setting correctly.
The disc is dirty.
Eject the discs and clean it.
The playback picture
has occasional
It is in fast forward or fast reverse playback.
Sometimes a small amount of picture
distortion may appear. This is not
malfunction.
Brightness is
unstable or noises
The copy protection’s effect.
Connect the DVD player to the TV directly.
are produced on
playback pictures
The DVD player
No disc is inserted.
Insert a disc.
does not start
playback
An unplayback disc is inserted.
Check the disc type and color system.
The disc is placed upside down.
Place the disc with the playback side down.
The disc is not placed within the guide.
Place the disc on the disc tray correctly
inside the guide.
A menu is on the TV screen.
Clean the disc.
The parental lock function is set.
Press the SETUP button to turn off the menu
screen. Cancel the parental lock function or
change the parental.
Buttons do not work
Power supply fluctuations or other
Turn the power on or off with the POWER
abnormalities such as static
button. Or disconnect the power plug and
electricity may interrupt correct
insert it into the wall outlet again.
The remote control
The remote control is not pointed at
Point the remote control at the remote
does not work
the remote sensor of the DVD player
sensor of the DVD player
properly
The remote control is too far from
Operate the remote control within
the DVD player
about 7 m
The batteries in the remote control
Replace the batteries with new ones
are exhausted
161
SPECIFICATIONS
Power Amplifier Rated output (max )
.
5 x 15W max. Subwoofer: 25W max.
Output terminals (Speakers Load)
8 ohms (of FR, FL, RS, LS, CENT);
6 ohms Subwoofer
Weight
4.0Kg / 9.25 pound.
External dimensions
(WxDxH)
430x295x50 (mm) / 16.9 x 11.6 x 2.0 (Inch)
0000
Operating temperature range
+5 C to +40 C / 41 F ~ 104 F
Operating relative humidity range
45%to75%
Video system
PAL 625/50 Hz
S-video terminal Y output level
1 Vp-p±0.2 (75 )
Om
C output level
0.88 Vp-p±0.176 (75 )
Om
Composite video terminal
1 Vp-p±0.2 (75 )
Om
Horizontal resolution
More than 500 Lines
Audio parameters Frequency Response
20Hz ~ 20kHz ±1dB
(Amplifier)
Dynamic Range
70dB>
S/N Ratio
> 80dB
1.
Class 1 laser product. Rating label on the back of the machine
2.
Danger: when the internal functions are out of order or
damaged, opening the cover may cause unseen
radiation.
3.
It should be kept away from direct sunlight.
4.
Caution: Do not open the top cover. No internal part
should be maintained or serviced by the user.
Qualified person should carry out all such work.
Note :s
l
Features and specifications are subject to change without notice.
l
Weight and dimensions are approximate.
162
GLOSSARY
5.1
developed completely new and is now 100% MPEG-4
5.1-multichannel encoding means, that 5 audichannels
compliant. The new codec os called DivX 4/5 and can
with full frequency response are present (left, center,
be obtained for free at his codec is also
www.divx.com. T
right, surround left, surround right) plus a subwoofer
compatible to videos encoded with the old DivX codec
channel (represented by the „.1”) providing deep
(DivX 3.11). Today, DivX just a brand name for the
humming frequencies you are used to know from
MPEG-4 encoder/player from DivX Networks that lives
®®
modern cinemas. Both Dolby Digital and DTS
from the fame of early DivX days.
support 5.1-coding and decoding.
Videos encoded with DivX 4/5 are fully MPEG-4
compliant and theoretically can be played on any
CD
MPEG-4 enabled DVD player.
A CD (Compact Disc) is a metal-coated plastic disc. It
®
has a diameter of 12 cm and a thickness of anout 1,2
Dolby Digital 5.1
®
mm. It was developed by Sony and Philips in 1985. The
Dolby Digital 5.1 is a system for transmission and
advantages are digital storage of music enabling very
storage of 5.1 channel sound on digital media as DVD,
natural sound reproduction. Beyond this, the data is
digital TV and sattellite transmission. Different from the
®®
stored more compact, the handling is easy. The long
codecs Dolby Surround and Pro Logic who do not
lifetime of the media and the fact that usage does not
work with channel separation to encode the surround
decrease quality made the CD the ideal storage media.
®
sound in a stereo recording, Dolby Digital is a discrete
In the meantime, 12 different storage media have been
system where the different audio channels keep
developed from the first CD. The mostly used are CD-
completely separated during encoding and decoding.
DA (Compact Disc - Digital Audio) , CD-ROM (Compact
Dolby Digital 5.1 is industry standard for coding of DVD
Disc - Read Only Memory), and the DVD (Digitale
movies with surround sound.
Versatile Disc).
One can store about 74 to 80 minutes of music on a CD
DSP
(-DA). This is equal to 650 to 700 MB
Digital Signal Processor. Microprocessor for digital
Signal transmission is performed touchless with a laser
processing of signals. Virtual Surround for example is
beam. The CD is being read from the middle to the outer
created with a DSP.
side. The data or music is recorded in a spiral from the
®
middle to the outer side.
DTS
A CD has pits and lands, the distance is about 1,6 mm.
® ®
DTS is a coding standard similar to Dolby Digital . DTS
The laser light created by a laser diode passes different
®
Digital Surround is a multichannel surround system
mirrors and prisms and then is focused by a lens to a
®
from Digital Theater Systems. Similar to Dolby Digital it
laser beam. This laser beam scans the data spiral of the
uses up to 5.1 channels. Different from Dolby, the data
CD. On the pits, the laser beam is reflected in another
rate can be far above 1 Mbit/sec so the sound is not
direction and is detected by a photocell. The photocell
®
compresses as strong as in Dolby Digital resulting in a
transmits the signal to a microprocessor which converts
higher sound quality.
the digital data to an audio signal. The rest is done by
The frequency range is from 20Hz to 20kHz at 20Bit, but
the sound system.
the subwoofer channels only transmits frequencies
below 80Hz. The coding system also is called CAC.
CVBS
Composite Video Interface. The video signal is
DVD
transmitted via a single signal line. CVBS should only
The DVD (Digital Versatile Disk) was introduced in
be used, if your playback device does not offer other
1995 and is a storage media with a large capacity.
interfaces for connection with you Xoro TV set, as
While a standard CD can store 650 MB of data, the DVD
CVBS due to technical reasons delivers worst quality
can store up to 9 GB. Especially when it comes to video
of all available interfaces (please also refer to YUV,
playback, a large storage capacity is important. Beyond
S-Video, SCART and RGB). The CVBS interface can
its high capacity, the consume
r enjoys high quality video
easily be identified from the yellow color of the RCA
and audio. A DVD can store up to 8 different
jack.
audiostreams, so in best case, the movie can be
watched in 8 different languages.
TM
DivX
TM
DivX is a new high quality video codec which is based
Photo-CD (JPEG CD)
on MPEG-4 standard and combined with MP3 audio.
A Photo-Cd is a storage system for image storage on a
Originally, the DivX-Codec was a Microsoft codec
CD-ROM in a platform independent multi resolution
(MPEG-4 v3). The official codec only used ASF format
structure (support of different resolutions and file
(no AVI) or WMV format with Windows Media Encoder
formats, e.g. JPEG, BMP, etc). As a single camera film
7. The official codec had a bitrate limit which was
dies not fill a complete CD, more films can be added to
removed on DivX.
the CD at a later time. A CD-R
OM drive must be
On the next stage of development, the codec was
multisession enabled to load images from a Photo-CD.
163
GLOSSARY
GUI
Graphic User Interface. See OSD
NTSC
Widespread TV standard, espacially in US and Asia.
HDCD
525 (480 viewable) Lines and 60 Hz refresh rate.
Pacific Microsonics has developed a digital audio
Describes the way the video information (brightness,
technology using the full potential of a CD. The HDCD
color, refresh rate etc.) is transmitted.
process (High Definition Compatible Digital) is a
Within Europe, this video standard only appears on
patented coding and decoding process transporting
imported media (like US DVDs).
thie complete details of a high resolution “master
recording” to a CD. There were several attempts to
OSD
improve the sound quality of CD's, but none which could
The OSD (On Screen Display) is all the menus and
be compared to HDCD process.
options shown on the screen.
Hosiden-connector
PAL
4-pin connector for S-Video connections
European TV standard. PAL stands for Phase
Alternation Line; refresh rate: 50 Hz
, Zeilenauflösung:
HUE
625 Lines, 576 visible lines. Describes the way the
HUE settings affect the color balance of the picture
video information (brightness, color, refresh rate etc.) is
transmitted.
Interlaced
The picture is created by writing two half pictures
PBC
with a 1 line set-off on the screen. This is standard
PBC stands for playback control. This function can be
on conventional 50 Hz TV sets.
used to show a menu on Video CD's (if contained on the
VCD). One can move in this menu with the arrow keys
®
Kodak Picture CD
and select the desired function with “enter”.
®
The KODAK Picture CD is the ideal media for
®
allropund photographers. All pictures are stored at an
Pro Logic
®
excellent resolution of 1024 x 1536 pixel. On the
Dolby Pro Logic is a matrix decoder for decoding the
KODAK Picture CD, the images of your camera film
four surround sound channels contained in the stereo
®
strip are stored. It is not possible to add pictures at a
track of Dolby Surround encoded programs (e.g. VHS
later point of time.
movies or TV shows).Dolby Surround is a matrix coding
®
Note:
There also are „Kodak Foto CDs “ availabe. As
system mixing four channels (left, center, right,
they have a proprietary file format, your DVD player
surround) to a stereo track. A Pro Logic decoder
cannot playback these media.
separates these four channels during playback.
Without Pro Logic decoder, the program only has stereo
Component-Signal
sound
please refer to YUV
Progressive Scan
Contrast
Progressive Scan writes a whole picture in one step,
Means the range of luminance between the brightest
while the normal interlaced TV-picture is composed of
and the darkest pixel which can be displayed.
two half pictures. It delivers a significally enhanced
picture, especially when used on vide beamers, PC
LPCM
monitors or LCD TV.
LPCM stands for:
LPCM
inear ulse ode odulation.
Digita, uncompressed audio recording. Standard on
RGB
Audio-CDs.
Red Green Blue. Describes the way of transmission and
display of video signals. The three in TV systems used
MP3
colors red, green and blue are transmitted separately.
MPEG 1 Layer 3 Codec, or short MP3,
was devel
oped
When used for connection between playback device
in 1987 by Fraunhofer Institut für Integrierte
and TV set, it delivers a quality similar to YUV.
Schaltungen and was e revolution in audio
compression.
In 1992 it became part of MPEG-1 video
R 232
S
format. As MP3 offered high quality audio at incredible
RS232 is a well known PC interface for data transfer. In
small filesize, it became an won standard. With this
home entertainment devices, it is usually for
codec one can compress audiofiles to about 1 MB /
reprogramming purposes or to load new firmware.
minute.
164
GLOSSARY
S/PDIF
S/PDIF (Sony/Philips Digital Interface) is a digital
Super Video CD (SVCD)
transmission standard for audio data. S/PDIF can
SVCD stands for Super Video CD. SVCD's are very
transmit audiofiles from one source to another without
similar to VCD's, one can store 35 60 minutes of high
having to leave the digital transmission which would
quality video with up to 2 Stereo audiotracks and 4
result in worse quality.
different subtitles. All Xoro DVD players can play
SVCD's.
S-Video
Desribes the way video signals are transmitted. With S-
Video CD(VCD)
Video, luminance and color information are transmitted
VCD stands for "Video Compact Disc". VCDs are
separately. S-Video interface can easily be identified by
similar to normal CDs. They contain movies with sound.
its 4-ports in a round connector.
A VCD can store 74 to 80 minutes of video with stereo
sound. For the storage of audio and video, MPEG-1 is
SECAM
used.All Xoro DVD players can play VCD's.
French TV standard. It is also used outside france in
some Easter European countries. Refresh rate is the
YPbPr
same as in PAL standard (50 Hz). The signal produces
please refer to YUV
625 TV lines.
YUV
Aspect ratio: 4:3 and 16:9
Videosignal with separated transmission of color and
Full Frame refers to programs developed for TV display
brightness information. Similar to RGB, the signal is
with an aspect ratio of 4:3. Widescreen refers to
transmitted via tree separate RCA cables. Also called
programs developed for screens with an aspect ratio of
Component Signal. YUV delivers best signal quality
16:9.
available with analogue signal transmission.
If a widescreen program is displayed on a 4:3 screen,
the picture will have black borders on top and bottom.
165
NOTES
166
NOTES
167
XORO by MAS Elektronik AG
Blohmstrasse 16/20
21079 Hamburg, Germany
Tel.: +49 (040) 77 11 09 17
Fax: +49 (040) 76 73 35 15
xoro@mas.de
www.xoro.de


