Laerdal Resusci Anne Simulator: инструкция
Раздел: Товары для здоровья
Тип:
Инструкция к Laerdal Resusci Anne Simulator
Resusci Anne Simulator
User Guide
English
www.laerdal.com

Resusci Anne Simulator
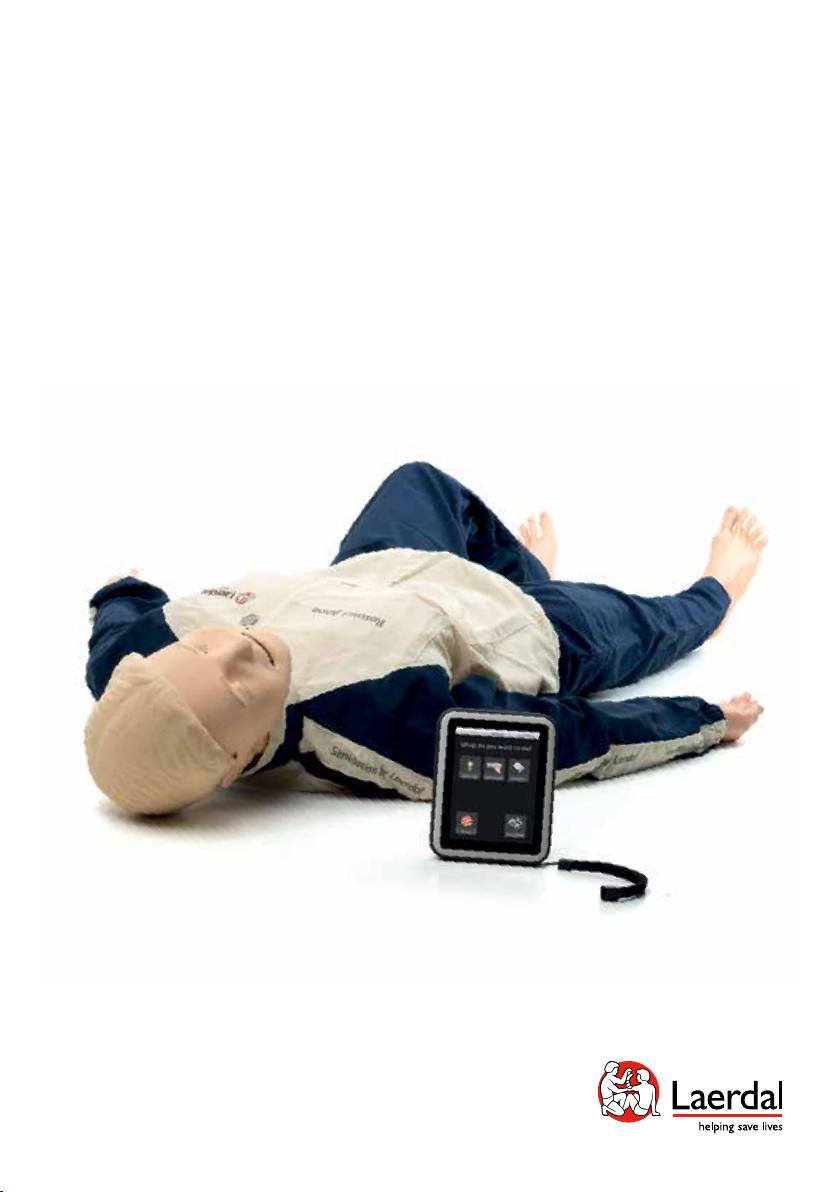
The Resusci Anne Simulator is a realistic manikin designed to meet the learning objectives of basic
healthcare and intermediate life support. The simulator supports training for CPR, defibrillation,
vital sign recognition and supraglottic airway management procedures.
––––––––––––––––––––––––––––––––––––––––––––––––––––––––––––––––––––––––––
Note
Photos/illustrations may vary from product.
22

Contents
English
1 Items included 4
2 Get started 6
3 Use 10
4 Maintenance 15
5 Cleaning 20
See Important Product Information pamphlet for more information or visit www. laerdal.com
2 3
2
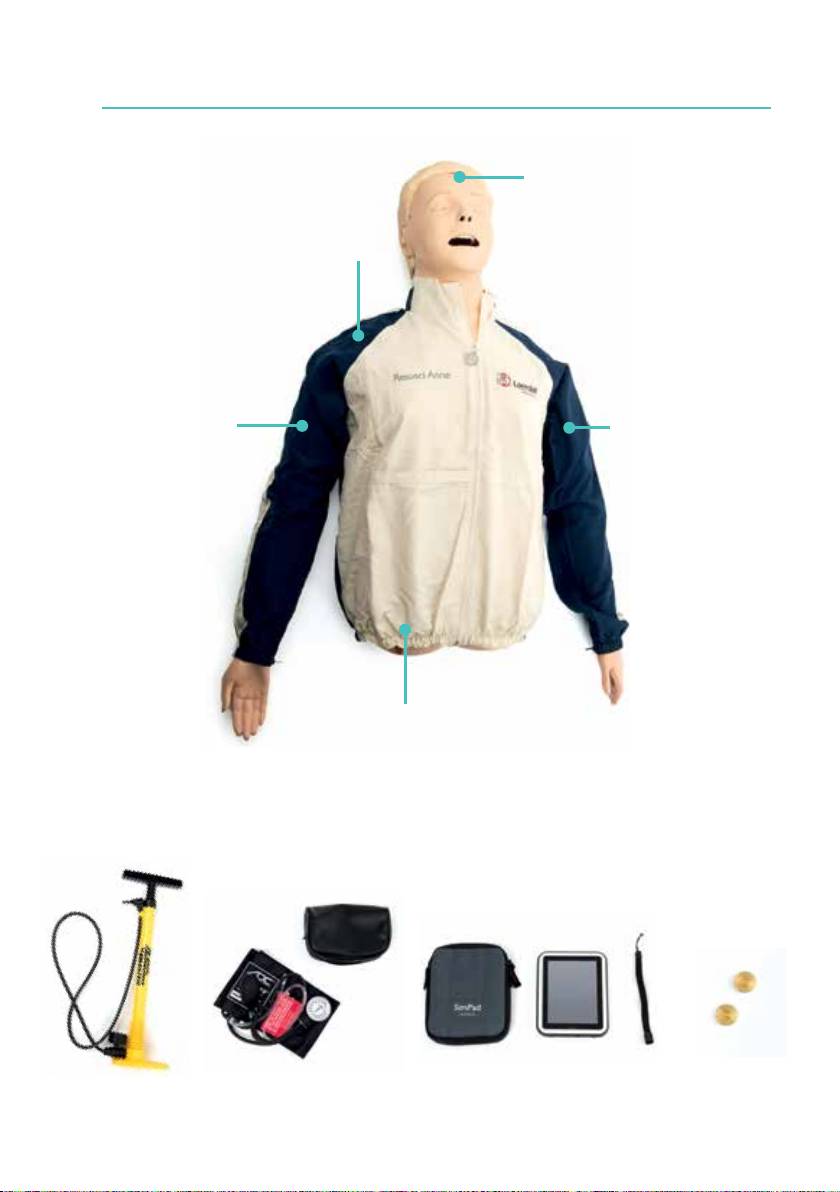
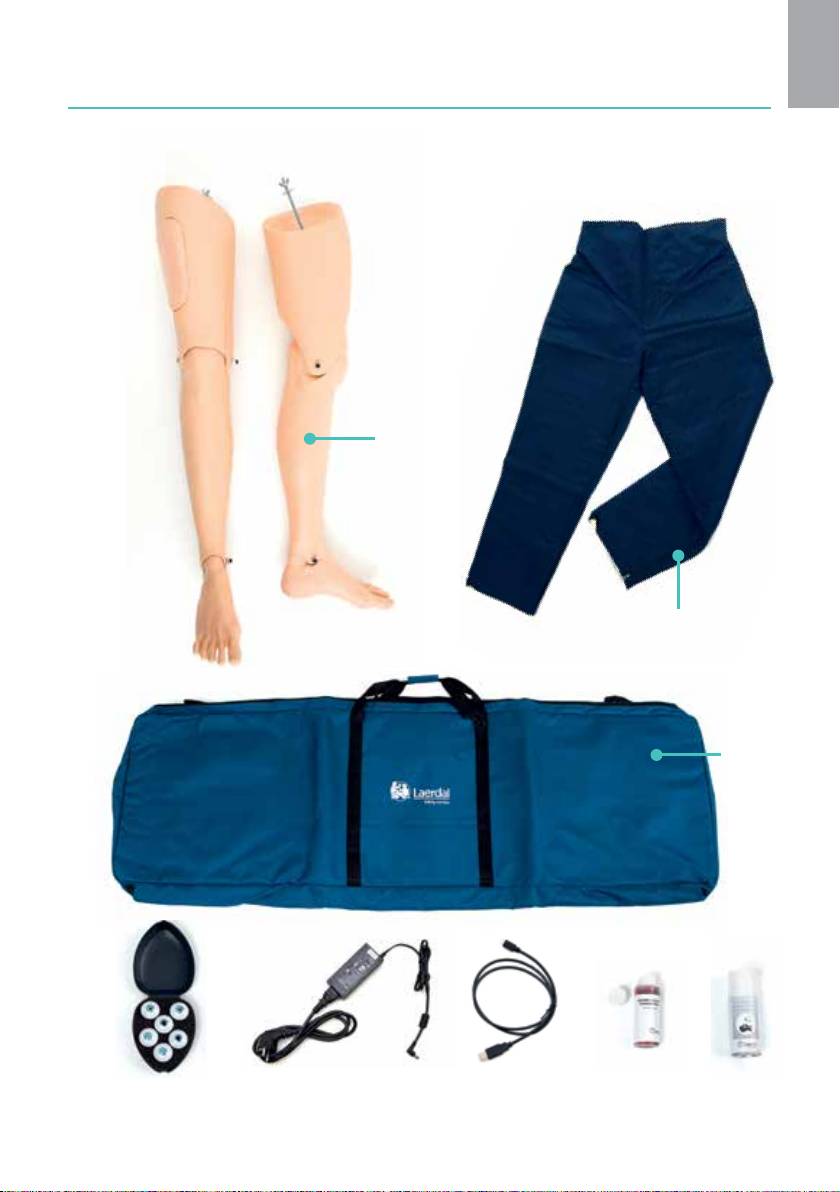
Items Included
1
Airway Management Head
Torso
Blood Pressure Arm
IV Arm
Extrication
Rescue Legs
Pants
Pelvis
Full body
soft pack
Air Pump
Blood Pressure (BP) Cuff
SimPad (Link Box with lithium-ion
Manual
3 Eye Sets (normal,
2 x AC Adapters
USB Cable
Simulated Blood
Lubricant
battery installed in manikin).
Defibrillation
constricted, dilated pupils)
SimPad Wrist Strap and Sleeve
Plates
4
Items Included
English
Airway Management Head
Torso
Blood Pressure Arm
IV Arm
Extrication
Rescue Legs
Pants
Pelvis
Full body
soft pack
Blood Pressure (BP) Cuff
Manual
SimPad (Link Box with lithium-ion
3 Eye Sets (normal,
2 x AC Adapters
USB Cable
Simulated Blood
Lubricant
Defibrillation
battery installed in manikin).
constricted, dilated pupils)
Plates
SimPad Wrist Strap and Sleeve
4 5
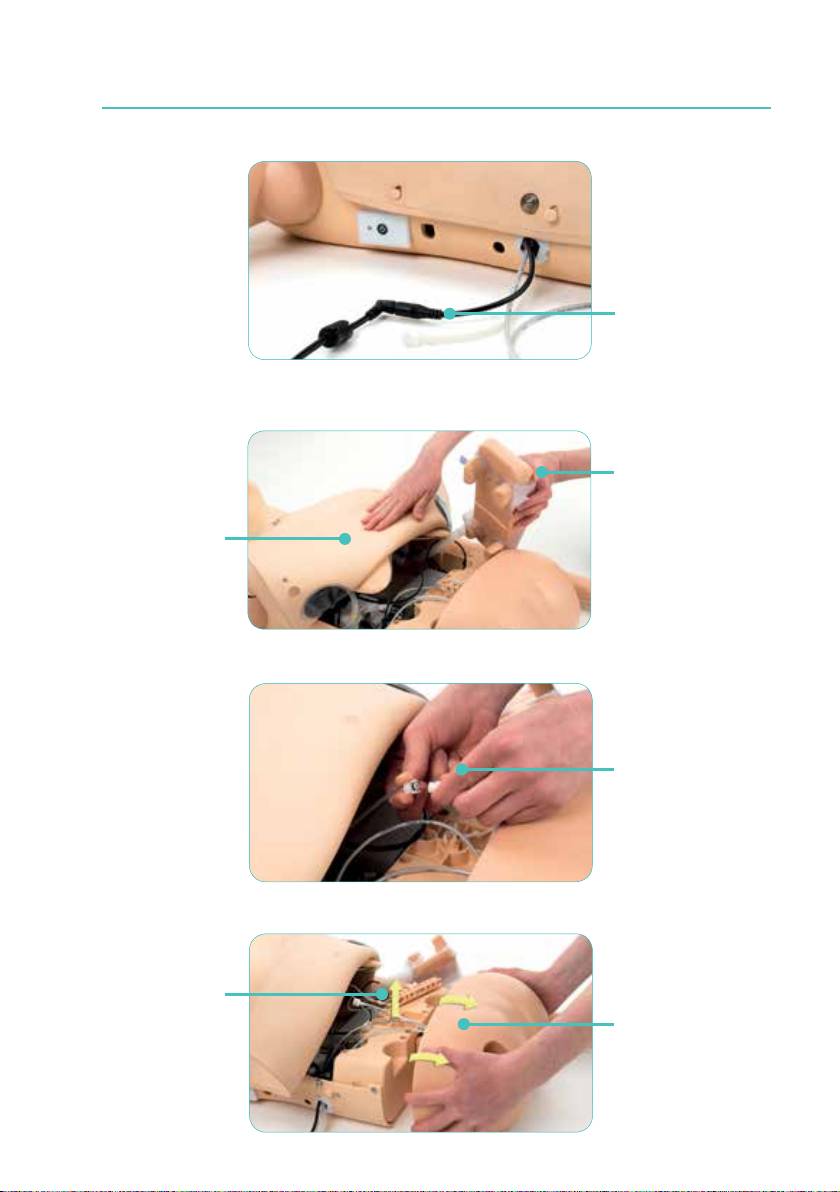
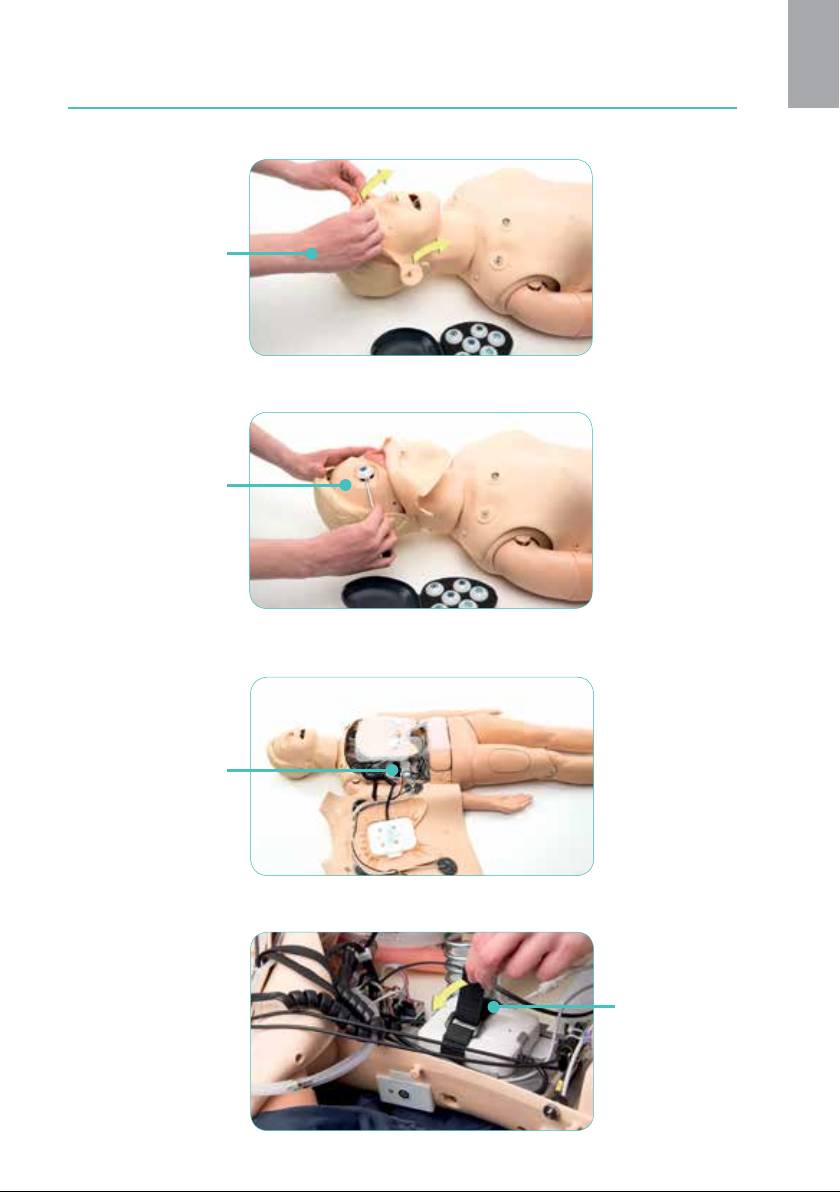
Get Started
2
Charge battery
Charge battery using
AC adapter included.
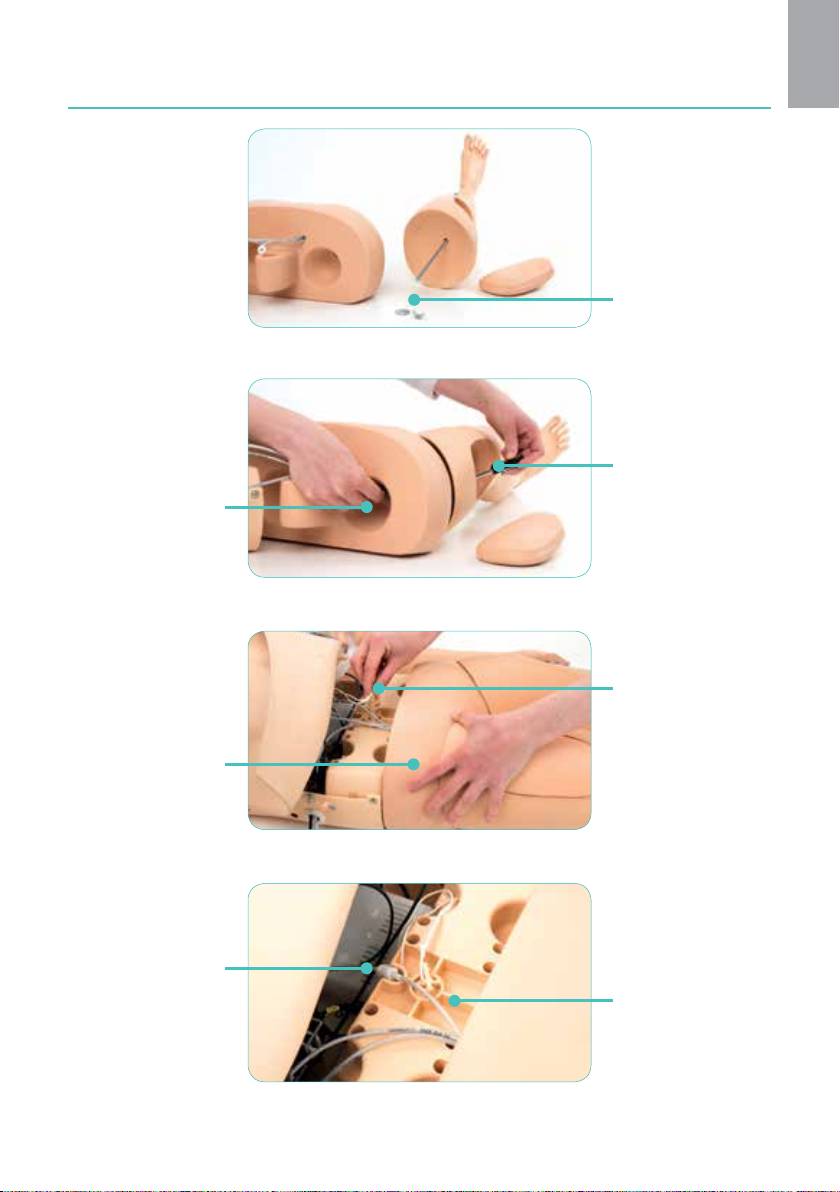
Attach legs
Remove stomach foam.
Detach lower chest skin
and fold back.
Twist to disconnect
tubing between
pelvis and torso.
Remove bolt
connector.
Disengage pelvis
from torso.
Do not disrupt
connection wires
between pelvis
and torso.
6
Get Started
English
Remove wing nut
and washer from bolt
inserted in leg. Spring
assembly remains in leg.
Use screwdriver to
Remove Thigh Pad
secure screw while
and insert bolt
driving bolt into wing nut.
through hole in pelvis.
Slide washer and wing
nut back over bolt.
Replace bolt
connector to
secure.
Reattach pelvis,
with legs, to torso.
Reconnect tubing
between pelvis and
Slide loose wires/tubes
torso and place in
down into pelvis.
grove.
To remove legs, reverse procedure.
6 7
Get Started
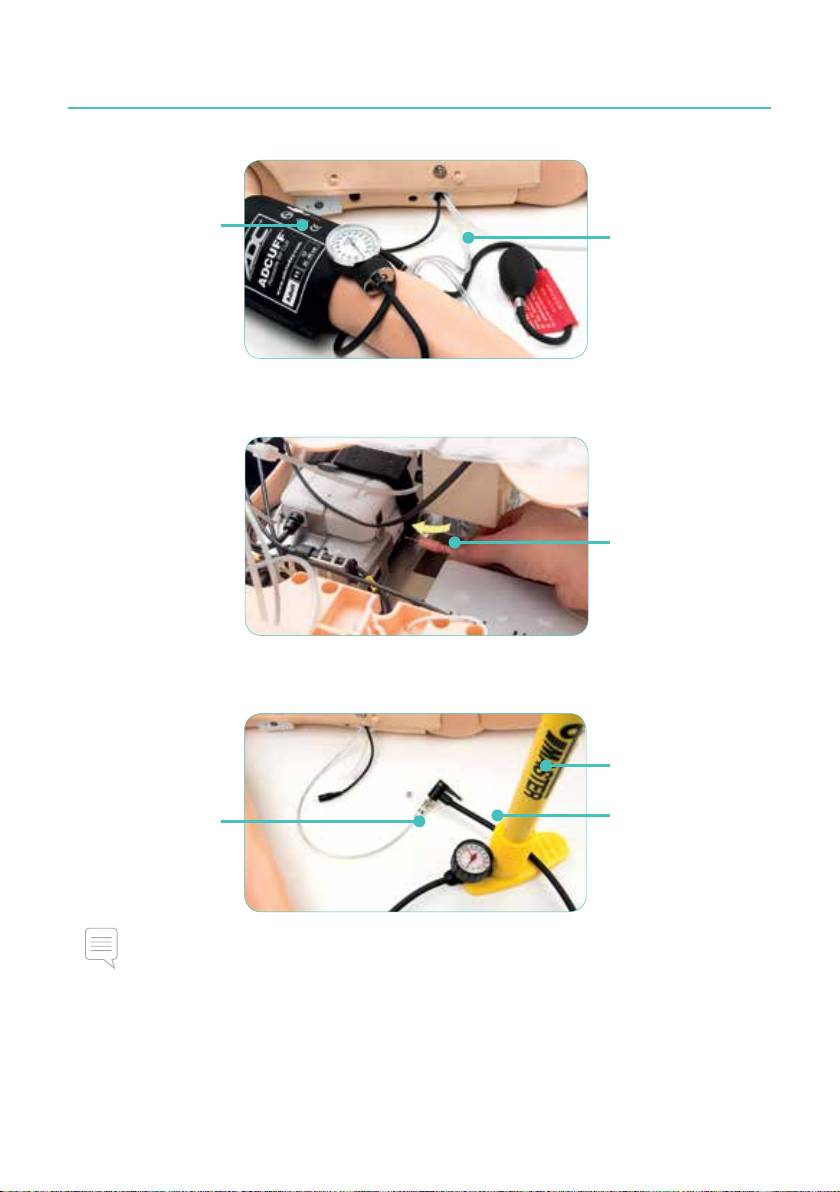
Connect blood pressure cuff to arm
Connect clear tubing on
Place blood
cuff to blood pressure
pressure cuff
connector on BP tubing.
on arm.
Insert connector and
twist to click into place.
Connect external microphone
(not included)
Plug microphone into jack
on side of Link Box. Pink
extension cable provided.
Fill air container
Use manual pump
provided. Do not to
exceed 10 bar (145 psi).
Attach air pump hose to
fill valve located on right
Detach air pump from
side of torso.
fill valve.
Air container is located
inside pelvis.
Note
If spontaneous breathing is activated and no chest rise is observed, ensure there is enough air in
the air container. Refill as necessary.
8
Get Started
English
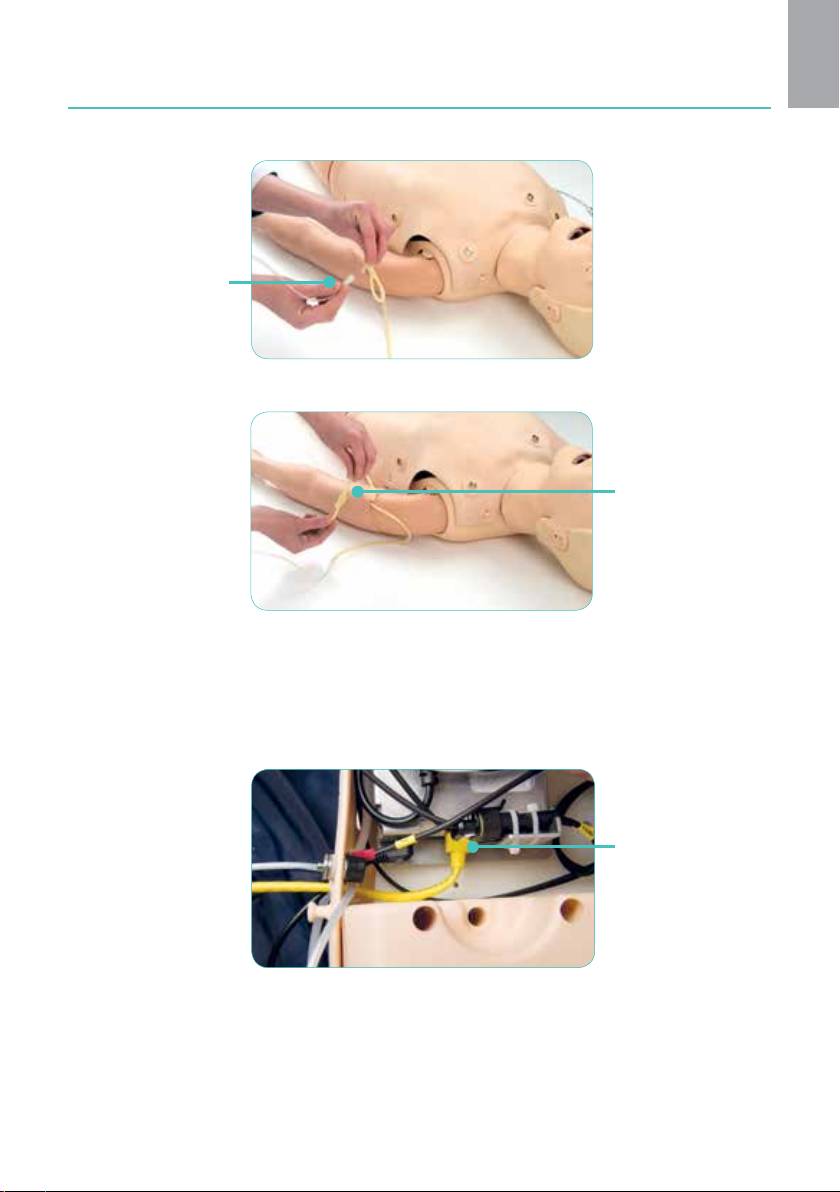
Prepare IV Arm
Select a vein and
attach IV tubing
to IV bag.
Allow fluid to flow
through arm and out
of other vein. Clamp
off flow (with a knot
or clamp) of fluid
from open vein.
Connect SimPad to simulator
Refer to SimPad User Guide for instructions.
Connect PC to simulator (optional for SimPad Patient Monitor)
To use PC software,
connect Ethernet cable
between simulator and
a computer. (Cable not
included).
8 9
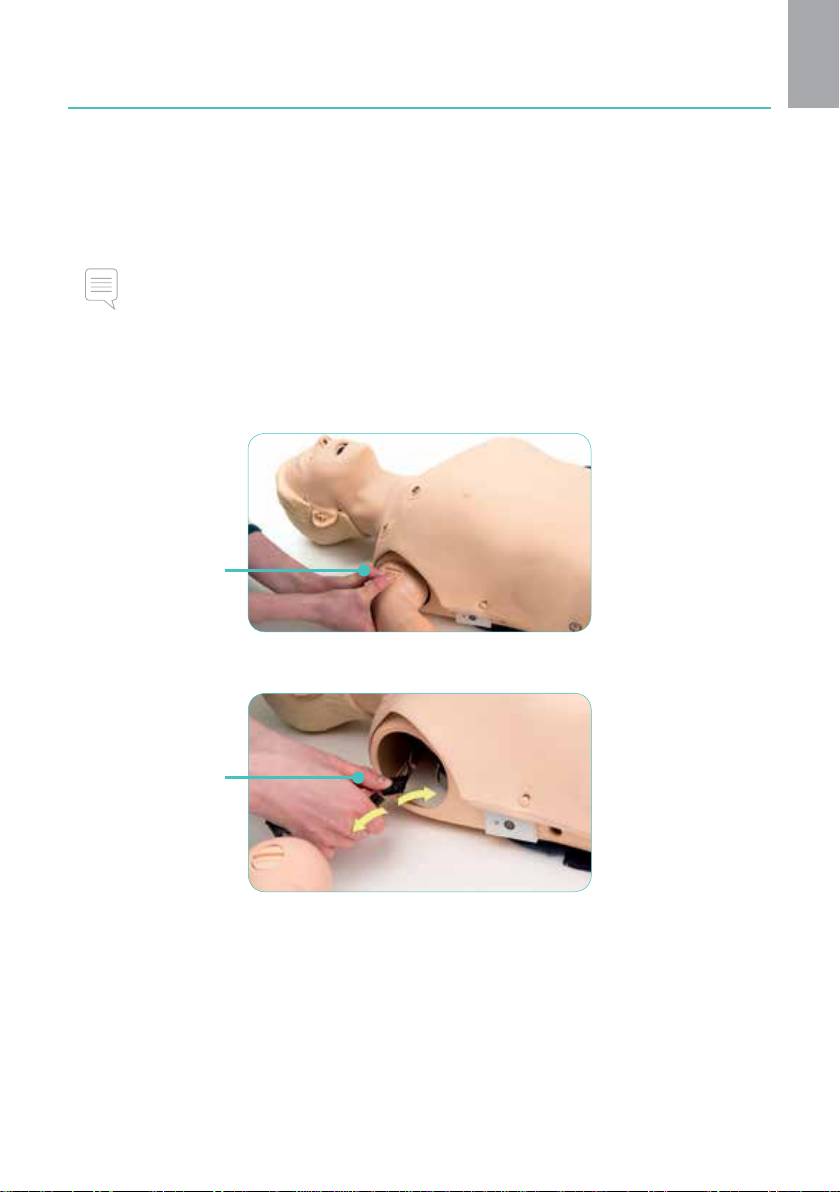
Use
3
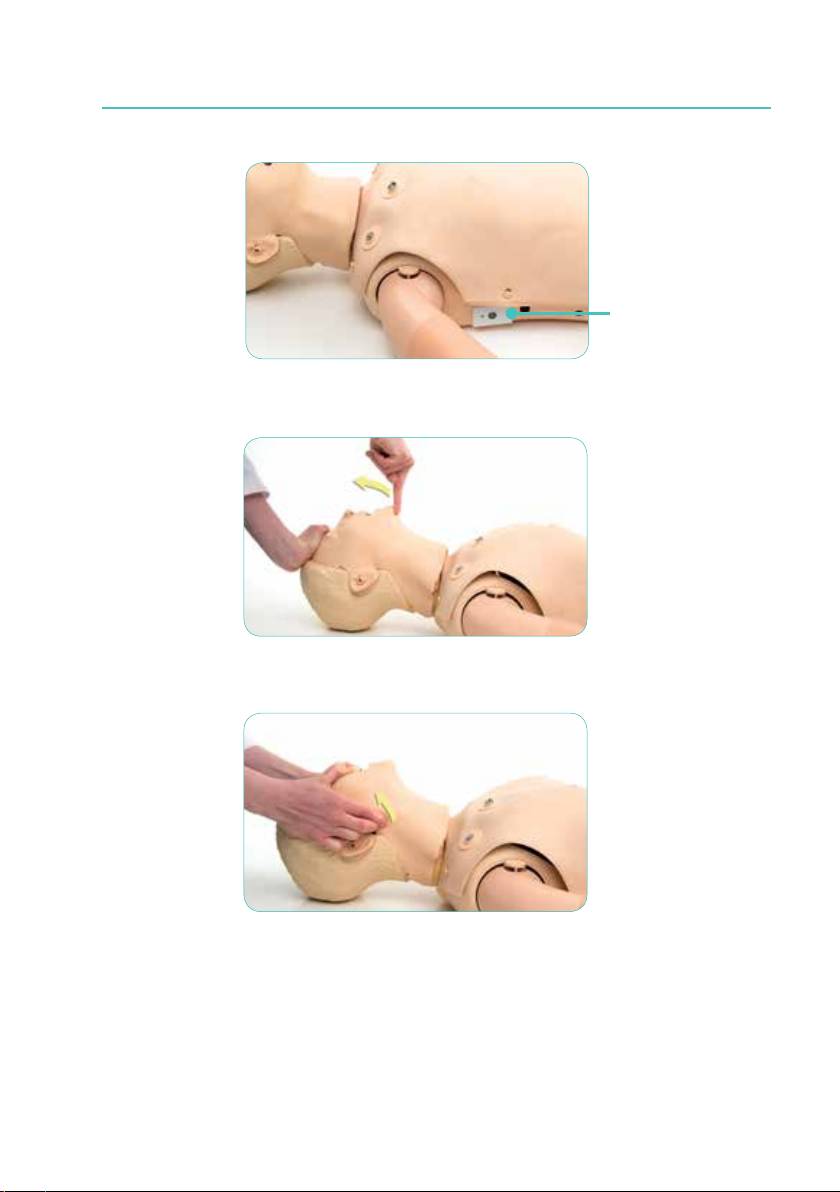
On/Off
On/Off button
Head tilt/Chin lift
Jaw thrust
Breathing
Spontaneous breathing is controlled by the SimPad.
10
Use
English
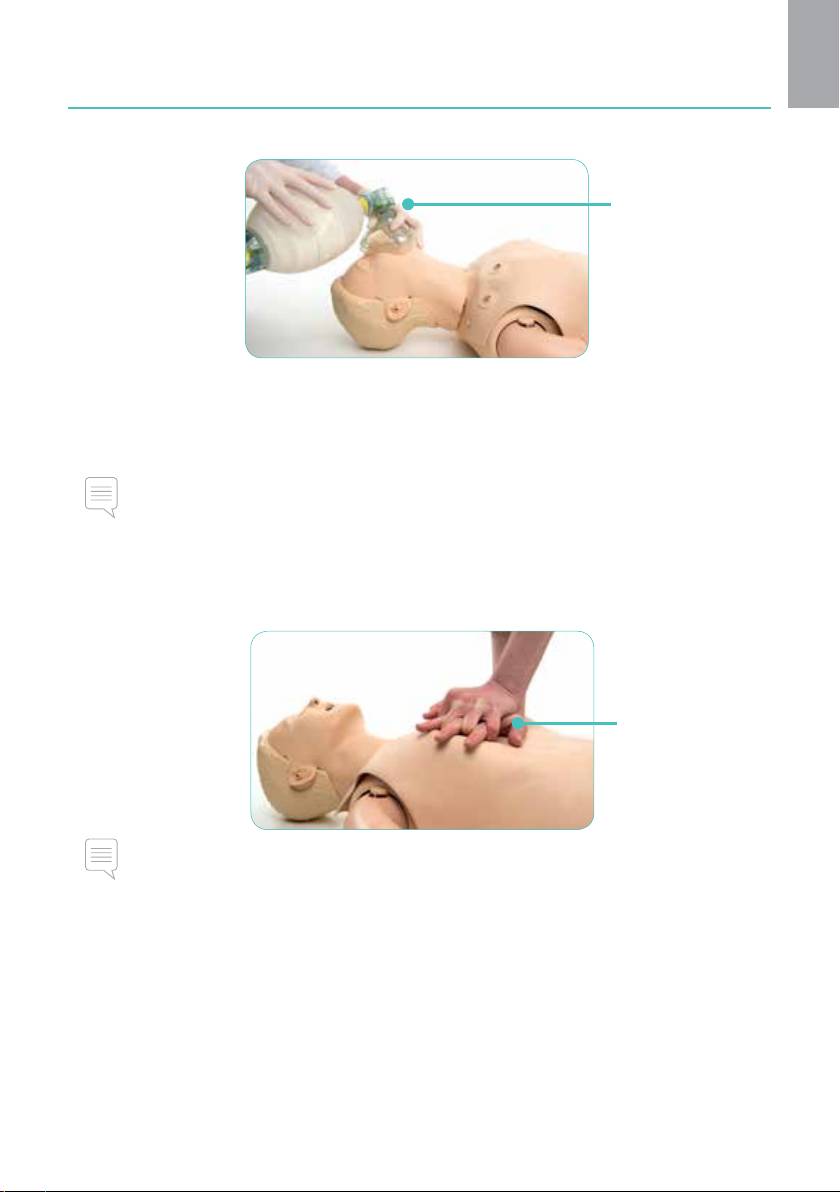
Ventilation
Airway management
tools can be used.
Airway obstruction
Airway obstruction can be activated by the SimPad.
Note
• If the simulator is turned off while closure valve is closed, valve remains closed.
Closure valve will open automatically when simulator is turned on.
• Do not use simulated vomit for suctioning.
Chest compressions
Manikin will detect
correct hand position.
Note
Spontaneous breathing must be deactivated while performing CPR.
10 11
Use
Defibrillation
Defibrillation connectors
and ECG connectors can
be used with AEDs or
manual defibrillators.
Note
Defibrillation must be performed on defibrillation connectors only. Observe safety precautions for
use of defibrillators.
Caution
• Do not provide more than 2 x 360J discharges per minute on average to prevent overheating.
• Manikin chest must be kept dry. Ensure manikin remains dry when using IV arm.
• To prevent chest pitting, do not apply conductive gel or conductive defibrillation pads
intended for patient use.
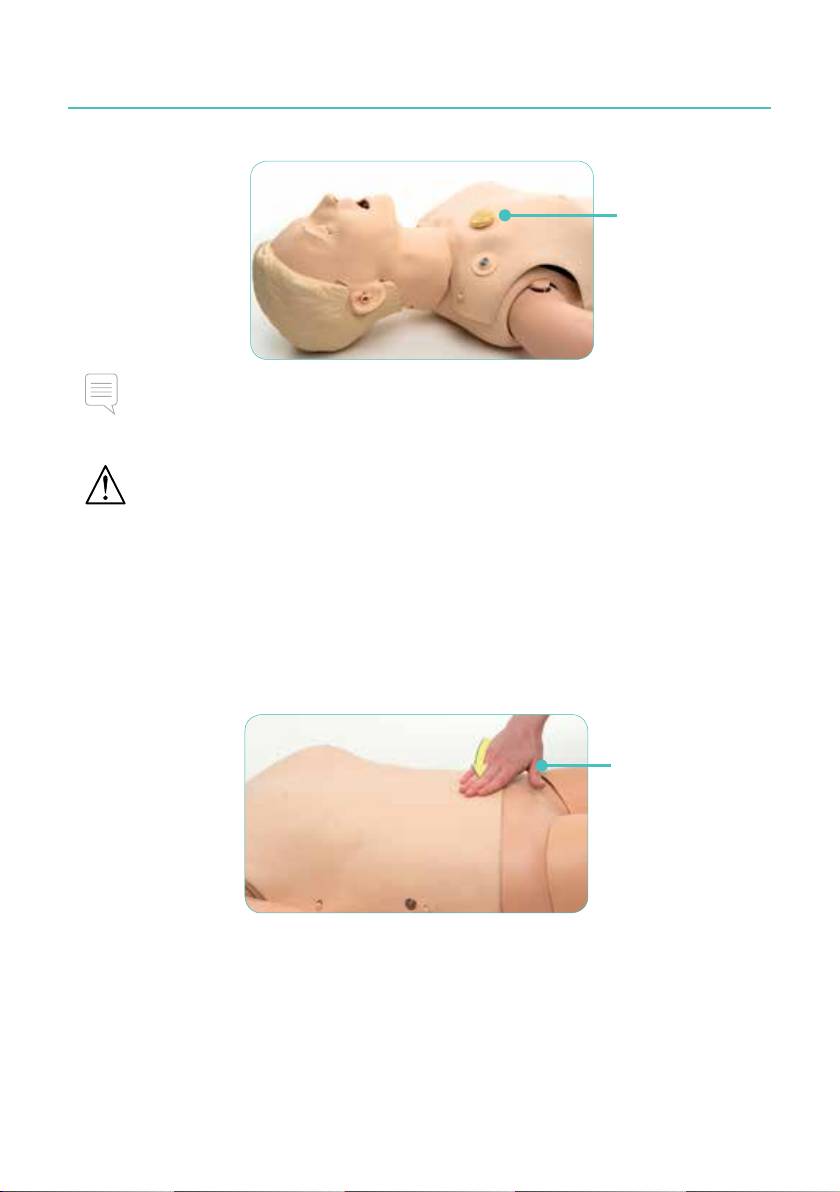
Lung
The simulator is equipped with one disposable unilateral lung.
Stomach
To deflate stomach,
press gently.
12
Use
English
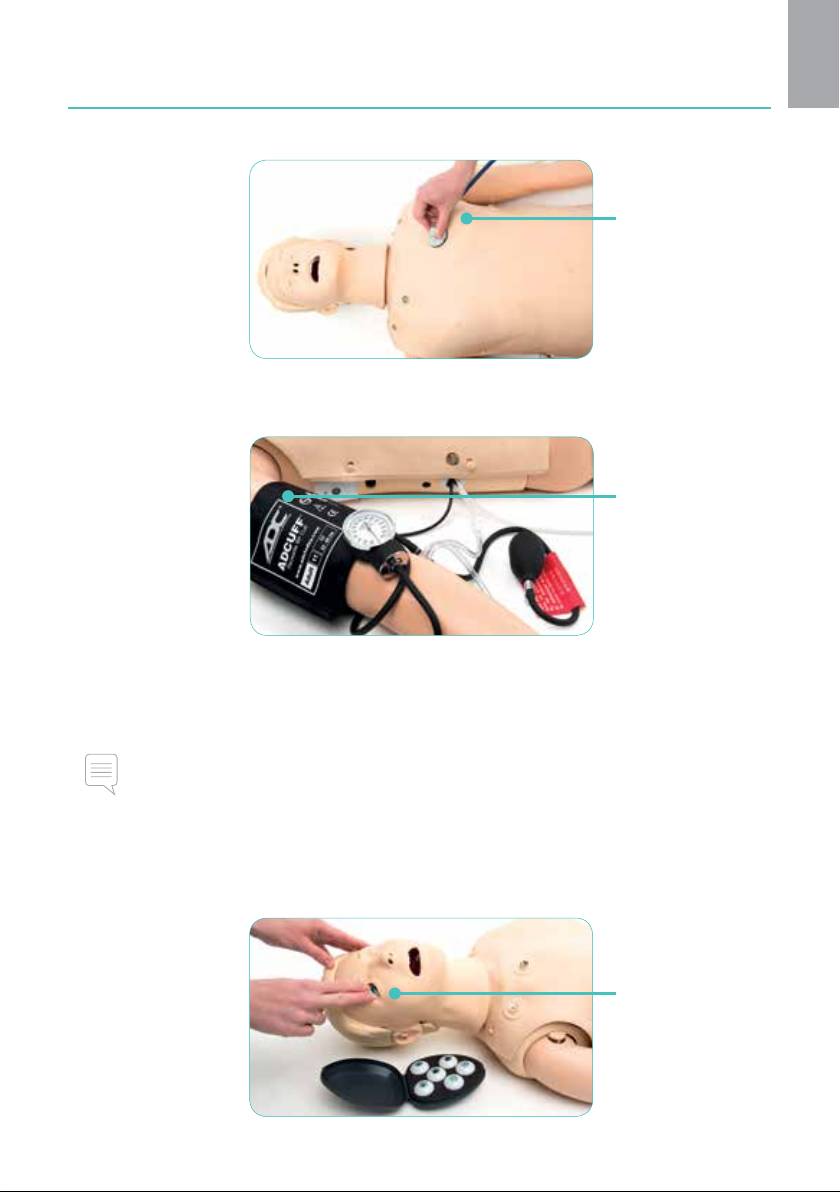
Heart and lung sounds
Heart and lung
sounds are controlled
by the SimPad.
Blood pressure
Right arm can be
used for blood
pressure training.
IV arm
Use left arm for IV training.
Note
If training session involves administration of fluids and/or drugs, empty arm immediately
following session.
Pupils
Use different pupils
to simulate various
patient conditions.
12 13
Use
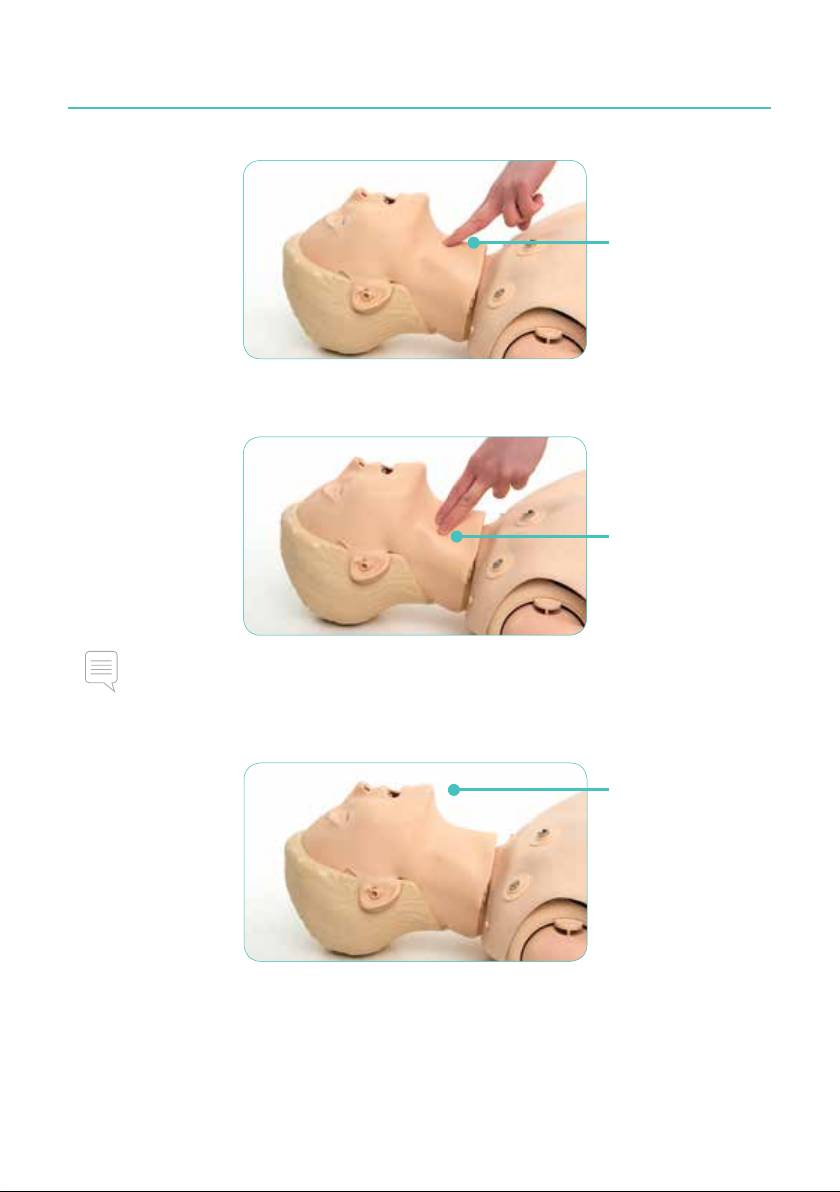
Cricoid cartilage
Cricoid cartilage
can be detected.
Carotid pulses
Carotid pulses
synchronize to ECG.
Note
Do not use excessive force when palpating the carotid pulse as this will result in no pulse felt.
Voice
Speaker in head emits
prerecorded or live sounds.
Refer to SimPad User Guide
for instructions.
To run simulations
Refer to SimPad User Guide for information on how to control the simulator during sessions.
1414
Maintenance
4
English
Pupil replacement
Pull back hair.
Detach the top of face
skin and ears and fold
back until eyes are
exposed.
Detach eye from head.
To insert new eye,
place in hole and press
into place.
Reattach face and hair
by reversing procedure.
Change battery
Only use Laerdal
lithium-ion battery.
Release strap securing
battery to Link Box.
14 15
14
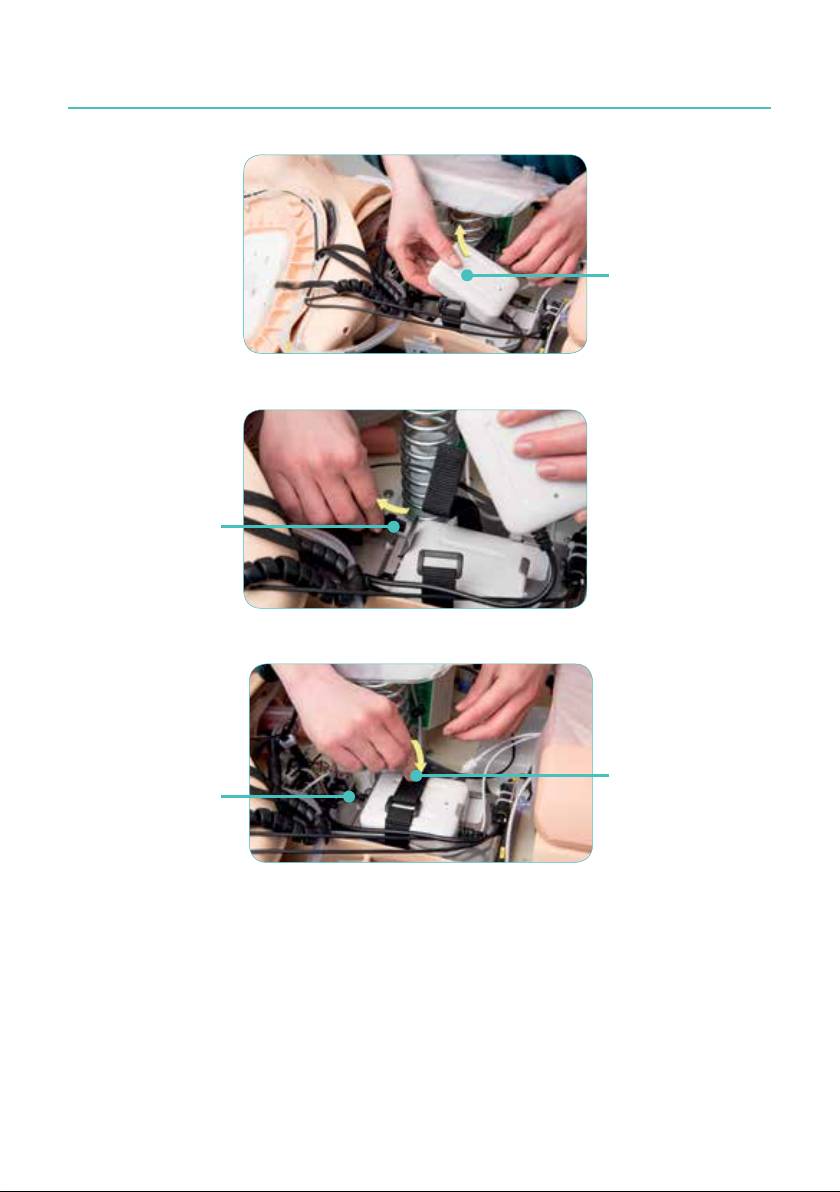
Maintenance
Remove battery.
Detach battery
connector from
Link Box.
Secure battery
Replace battery.
with strap.
Plug in battery
connector.
16
Maintenance
English
Ventilation
• Lubricate airway with two or three sprays prior to starting your training session.
• Lubricate airway management tools liberally prior to starting intubations. Consider whether
additional lubrication is needed later in the session.
• Use only lubrication provided. Do not use silicon or other lubricant, as this may damage manikin.
Note
Head contains electrical components. Due to inability to sanitize airway, mouth-to-mouth/
mouth-to-mask ventilation should not be performed.
BP arm assembly and disassembly
For transportation using hard case you must disassemble BP arm.
Press grooves to
release arm and
expose cable.
Detach cable.
Remove arm.
To reassemble, reverse procedure.
Ensure grooves on bolt fit properly into hole on torso.
Reattach chest skin.
16 17
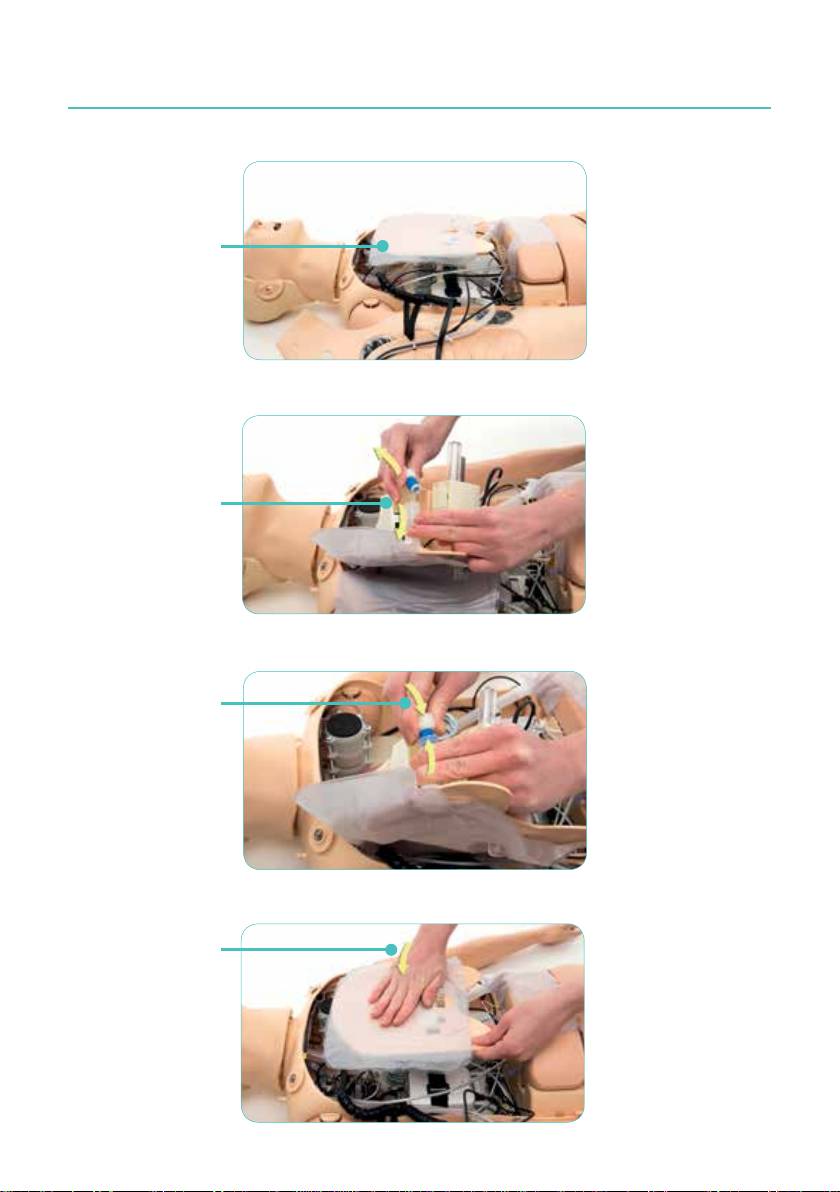
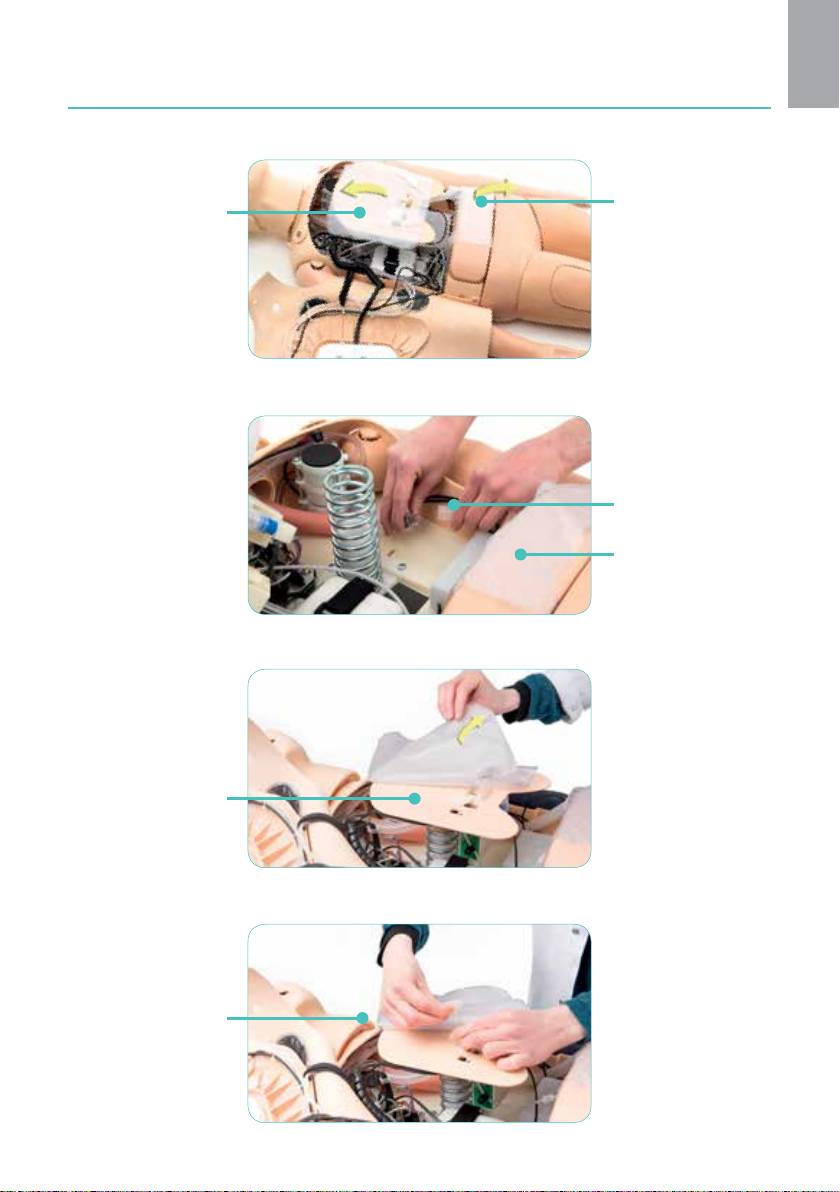
Maintenance
Lung replacement
Detach chest skin
to expose lung.
Detach tubing from
blue airway closure
valve located under
lung plate.
Reattach tubing to
airway closure valve
and attach new lung.
Press gently to
secure lung plate.
18
Maintenance
English
Stomach replacement
Detach chest skin
Lift stomach piece.
and lift lung plate
to locate and easily
access stomach
tubing.
Detach stomach
bladder and tubing
from stomach valve.
Attach new stomach
bladder.
Replace stomach piece.
Reattach chest skin.
Breathing bladder replacement
Detach chest skin
and locate breathing
bladder under lung.
Detach breathing
bladder and replace
with new bladder.
Reattach lung
to lung plate.
Reattach chest skin.
18 19

Cleaning
5
Preventive maintenance is the best method to ensure optimal operation. General inspection
should be conducted at regular intervals.
Periodically wash all skin parts that are not regularly sanitized using warm water and soap or
manikin wipes.
Most stains can be removed with warm water and soap or Laerdal manikin wipes. Before use,
test cleaning agents on a non-critical area (e.g. under the chest cover).
Note
Pigments from lipstick and pens may be impossible to remove. Avoid using coloured plastic
gloves when handling the manikin, as they may cause discolouration.
20
