EMTEC Electronics INTUIX H380: 15-50mm
15-50mm: EMTEC Electronics INTUIX H380
- 21 -
i.
Do not attempt to Learn directly under an incandescent or low-energy light as these can cause
interference with the IR transmissions. Keep at least one metre away from any such light
sources.
j.
Avoid learning the Volume/Mute keys on your original remote unless you are sure these operate
the same target device e.g. some original DVD remotes also include TV Volume/Mute key
control – these can be two different types of code.
k.
Avoid learning the VCR keys on your original remote unless you are sure these operate the
same target device e.g. some original TV remotes also include VCR key control – these can be
two different types of code.
l.
Learning a key can take up to 3 seconds. Do not release the key being Learned until the
“Success” or “Key Learn Error” screens have been displayed.
m.
If learning the first or second keys for a Mode results in continuous errors then try the following :-
i. End the Learn session by pressing the Exit key.
ii. Clear out the learned commands for that Mode.
iii. Check the IR LEDs are correctly aligned between the two remotes.
iv. Adjust the distance between the two remotes to be closer (e.g. 15mm) or further away
(e.g. 50mm) from each other.
v. Try learning the original remote for that Mode again.
If the problem occurs again with the same key check the original remote key being learned –
does it transmit? Does it operate the target device? Try learning that key under a different clear
Mode. If it learns okay then it is likely to be a different code type from the others and cannot be
learned under the same Mode.
Learning Notes :
a.
You cannot learn under the Setup, Home Cinema or Macro keys.
b.
All learned commands for a Mode are deleted if the same or a new 4-digit code is entered for
that Mode (includes Direct Code Entry, Code Search and Brand Search entries).
c.
The Backlighting is turned off for Learning.
8.1 To Learn Commands
a.
Press and hold
S
key until “Code Setup” is displayed (takes approximately 2-3 seconds).
b. Release
S
key.
c. Using
the
Up/Down
keys, navigate to “Learn Setup”. Press and release
OK
key.
d.
“Learn One Mode” is displayed. Press and release
OK
key.
e.
“Select a Mode Key?” is displayed. Press and release the desired Mode key (TV, VCR, DVD,
etc.).
f.
“Select a Key to Learn?” is displayed. Press and release the LCD remote key to be taught with
original remote code.
g.
“Learning: Please Wait” is displayed. Press and hold original remote key until the “Success” or
“Key Learn Error” screens have been displayed (see Tips on Learning) followed by the “OK-
Learn More or Exit?” screen (this process can take up to 2 or 3 seconds to complete). Release
the original remote key.
h.
“OK-Learn More or Exit?” screen is still displayed. To learn more keys, press and release the
OK
key and repeat from step “f”. To exit at this point, press and release the
Exit
key.
i.
“Please Wait” will be displayed briefly and the remote will exit Setup and return to normal
operation.
8.2 To Clear all stored Learned Commands under a Mode
:-
a.
Press and hold
S
key until “Code Setup” is displayed (takes approximately 3 seconds).
b. Release
S
key.
c. Using
the
Up/Down
keys, navigate to “Learn Setup”. Press and release
OK
key. “Mode Learn”
is displayed.
d. Using
the
Up/Down
keys, navigate to “Clear One Learn Mode”. Press and release
OK
key.
e.
“Select a Mode Key?” is displayed. Press and release the desired Mode key (TV, VCR, DVD,
etc.).
f.
“Confirm OK to Clear” is displayed. Press and release
OK
key.
g.
“Please Wait” will be displayed briefly and the remote will exit Setup and return to normal
operation.
8.3 Master Clear
To Clear all stored Learned Commands
(recommended on first time Learning):-
a.
Press and hold
S
key until “Code Setup” is displayed (takes approximately 2-3 seconds).
b. Release
S
key.
c. Using
the
Up/Down
keys, navigate to “Learn Setup”. Press and release
OK
key. “Mode Learn”
is displayed.
d. Using
the
Up/Down
keys, navigate to “Clear All Learn Modes”. Press and release
OK
key.
e.
“Confirm OK to Clear” is displayed. Press and release
OK
key.
15-50mm
- 22 -
f.
“Please Wait” will be displayed briefly and the remote will exit Setup routine and return to normal
operation
9. Macros
The MACRO key, in conjunction with digits 1, 2 and 3, lets you to program and store up to 3 sequences of
key-presses of your choice. One press of the respective Macro digit key results in that sequence of key-
presses (IR commands) being sent. Any sequence of key-presses that you regularly perform can be
reduced to two keypresses (MACRO key followed by digit 1, 2 or 3 key). For example pressing MACRO
followed by a single key can turn on your TV, turn on your cable box, change to your favourite channel, turn
on your VCR, and tell it to record, etc. A total of 10 keypresses can be stored under each of the 3 Macro
digits.
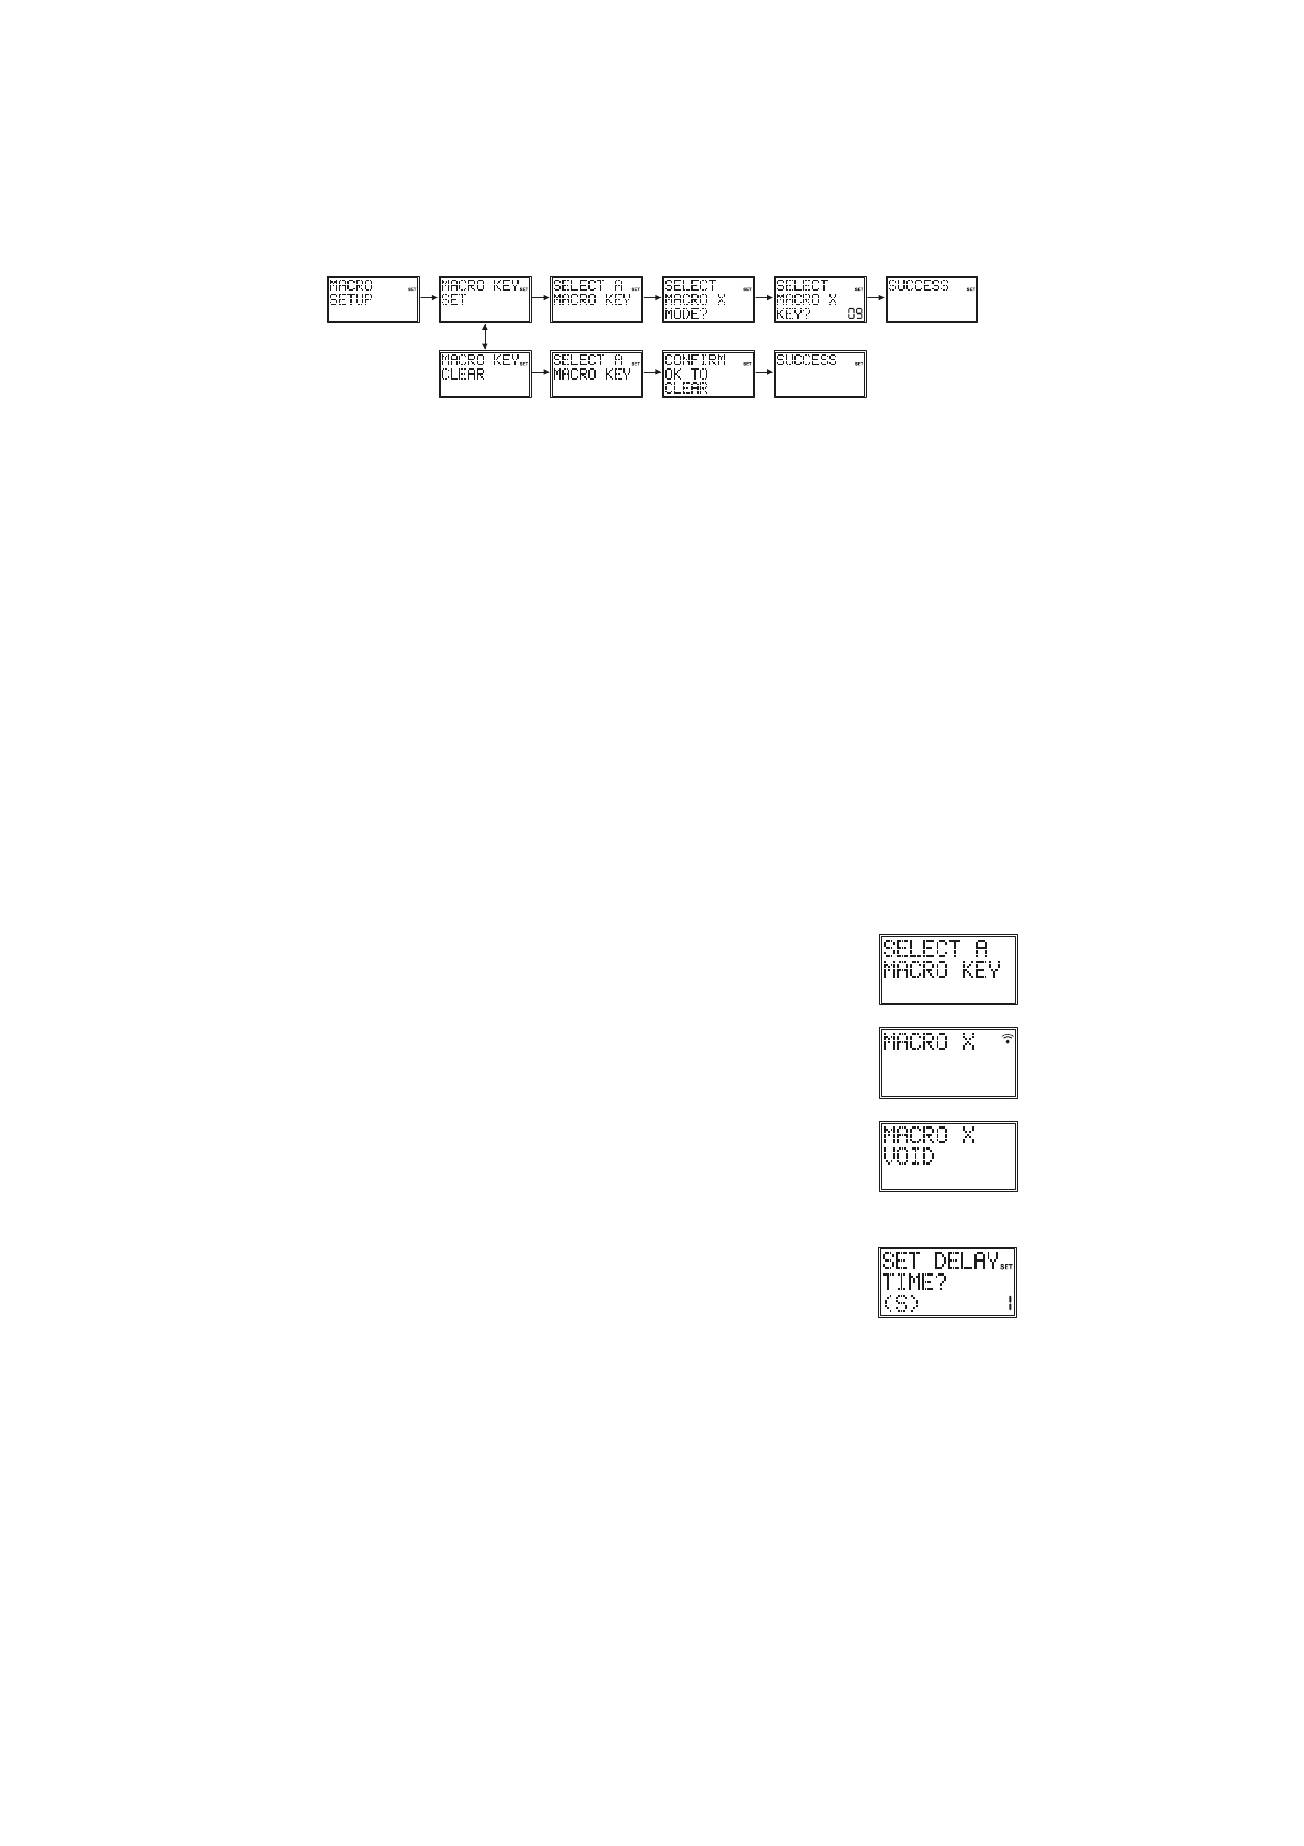
9.1 To Setup a Macro
a.
Press and hold
S
key until “Code Setup” is displayed (takes approximately 3 seconds).
b. Release
S
key.
c. Using
the
Up/Down
keys, navigate to “Macro Setup”. Press and release
OK
key.
d.
“Macro Key Set” is displayed. Press and release
OK
key.
e.
“Select a Macro Key” is displayed. Press and release digit key
1
,
2
or
3
where you want to store
the Macro.
f.
“Select Macro X Mode” (where “X” is 1, 2 or 3) is displayed. Press and release the desired
Mode
key (TV, VCR, DVD, etc.). The first key in a Macro sequence must always be a Mode key.
g.
“Select Macro X Key?” is displayed along with the key count (initially “02”). Press and release
the keys you want to be included in the Macro, in the order you want them to be sent (up to
“10”).
h.
To store the Macro at any point, press and release the
Macro
key. Note the Macro will be stored
automatically on the 10th keypress.
i.
“Success” will be displayed and the remote will exit Setup routine and return to normal
operation.
9.2 To Clear a Macro
a.
Press and hold
S
key until “Code Setup” is displayed (takes approximately 2-3 seconds).
b. Release
S
key.
c. Using
the
Up/Down
keys, navigate to “Macro Setup”. Press and release
OK
key.
d. Using
the
Up/Down
keys, navigate to the “Macro Key Clear” screen. Press and release
OK
key.
e.
“Select a Macro Key” is displayed. Press and release digit key
1
,
2
or
3
for the Macro you want
to delete.
f.
“Confirm OK to Clear” is displayed. Press and release
OK
key.
g.
“Success” will be displayed briefly and the remote will exit Setup routine and return to normal
operation.
In normal operation, to activate the Macro press and release the MACRO key
followed (within 20 seconds) by the digit key 1, 2 or 3.
“Macro X” is displayed while the Macro sequence is being carried out then remote
returns to normal operation.
If no Macro is stored under the chosen digit key then “Macro X Void” is briefly
displayed and the remote returns to normal operation.
9.3 Macro Notes
1.You might want to add "delays" in a Macro sequence (e.g. to allow for your TV warm-up time). Delays
can be added by using the
PAUSE
key followed by the number of seconds delay required at Step “g” in
setting a Macro. For example, to enter a delay of
3 seconds
, press and release
PAUSE
followed by
3
. Maximum delay is 9 seconds. It is not possible to have a
"0" digit entered after Pause i.e. there is no zero delay.
2. There is an automatic delay of half a second between each IR transmission
in a Macro sequence.
3. The first key stored in a Macro sequence MUST be a Mode key (TV, VCR, etc.).
4. Setup and Macro keys cannot be included in a Macro.
5. Press Setup to quit Macro Setup.
10. Problems and troubleshooting
The remote doesn’t work or loses codes entered
X=1,2,3
X=1,2,3

- 23 -
Confirm with your original remote that the equipment works correctly.
Make sure that you have pressed the corresponding mode key of the equipment or device that
you want to control.
If the listed code does not work, try the AUTOSEARCH method or enter the next code of that
brand.
To find the corresponding code for your equipment use the automatic search.
Check that the batteries have the correct polarity position.
The programming of the remote requires 2 AAA alkaline batteries (new). If the remote loses
codes within a few days/weeks the problem can be solved by using 2 new batteries from the
same brand.
If the backlight of the LCD screen is very weak, in general it will be necessary to replace the
batteries.
