Dascom 1325 User Guide: 4 Control Panel Operation
4 Control Panel Operation: Dascom 1325 User Guide
Tally Dascom 1325
12
4 Control Panel Operation
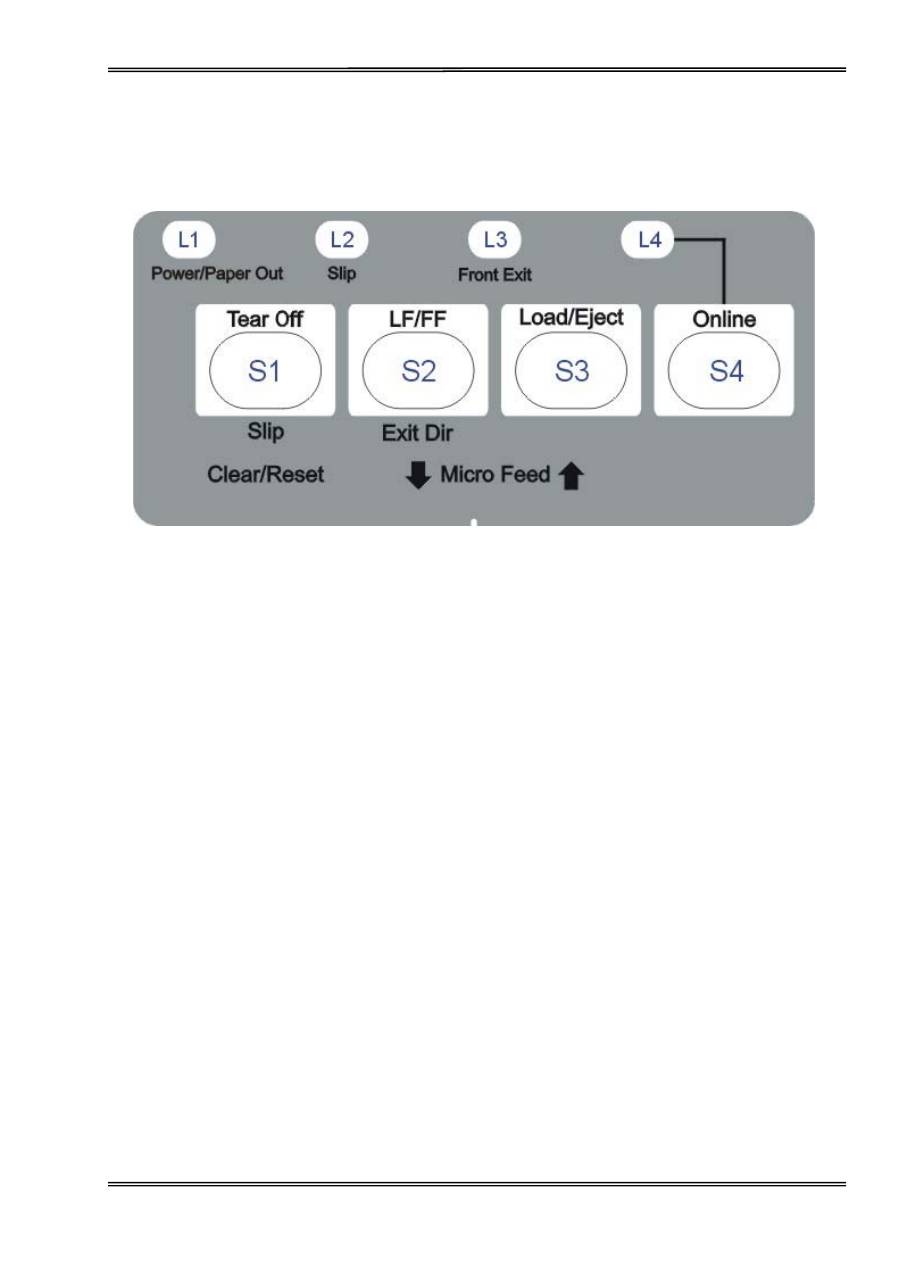
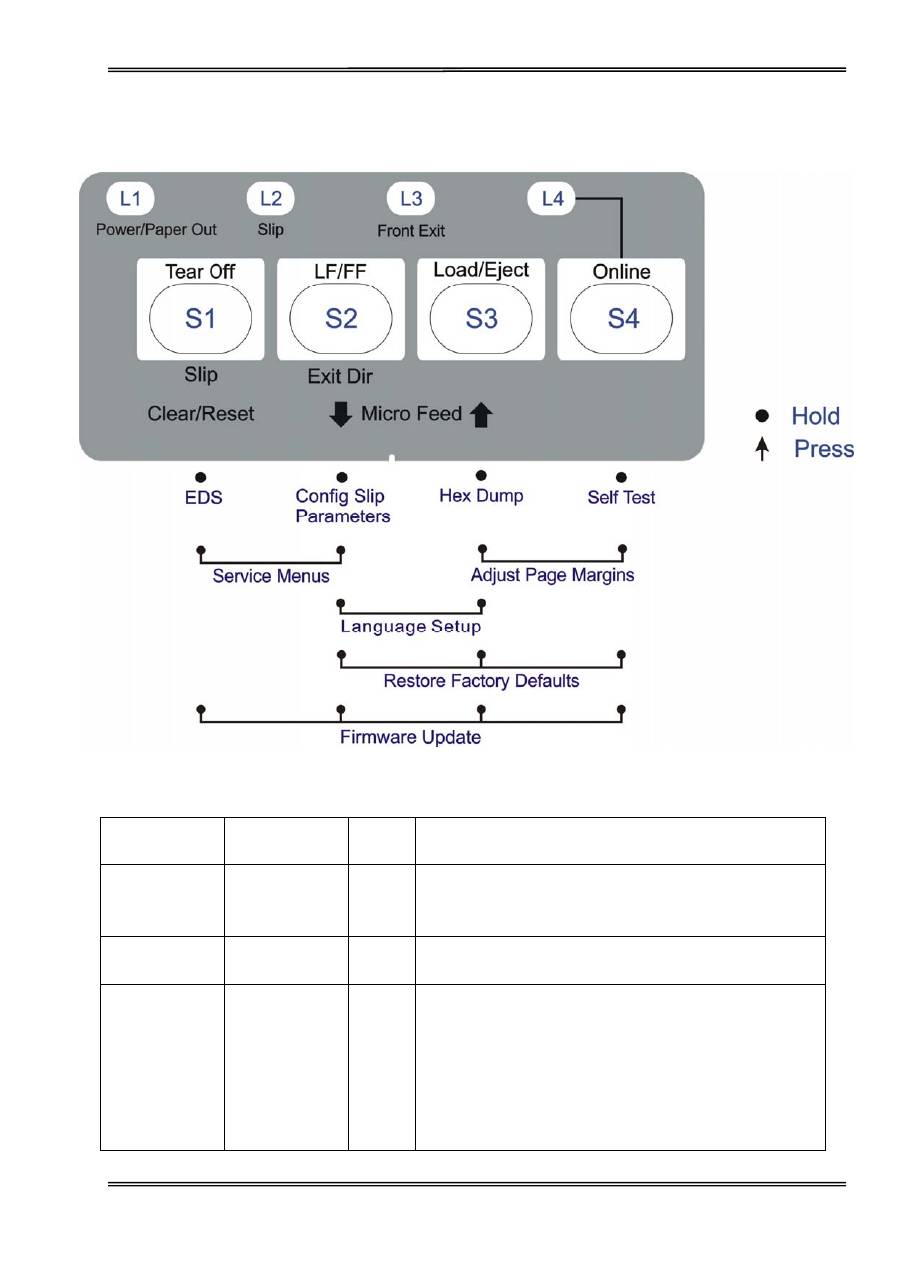
There are 4 switches S1~S4 and 4 LEDs L1~L4. The meaning and application of each switch and LED
are described below.
LED Indicators
“Power/Paper Out” LED:
On: Power on
Flashing: Paper out
Flashing + buzzer: Paper jam
“Online” LED:
On: The printer is in online state and ready to receive data from the computer.
Off: The printer is in offline state and cannot receive data.
“Front Exit” LED:
On: After printing, single sheet paper exits at the front.
Off: After printing, single sheet paper exits at the rear.
“Slip” LED:
On: Slip paper profile is selected.
Off: Slip paper profile is not selected.
(Note: “Slip” refers to a small paper form.)
Tally Dascom 1325
13
Control Panel Keys
“Online” Key:
This key switches the printer between online and offline states. Printing is stopped when the printer is
switched to offline state. When printer is switched to online state again, printing will resume.
“Load/Eject” Key:
When paper is loaded, pressing this key will eject the paper (single sheet mode) or park the paper
(continuous paper mode). When paper is not loaded, pressing this key will load the paper to the starting
print position.
“LF/FF” Key:
Pressing this key will feed paper one line forward. By holding down this key, the printer will initially feed a
few lines, then perform a form feed (continuous paper mode) or eject the form (single sheet mode).
“Tear Off” Key:
When online, this key will move any loaded continuous paper to the tear-off position. When offline, this
key is used to select the Slip paper profile.
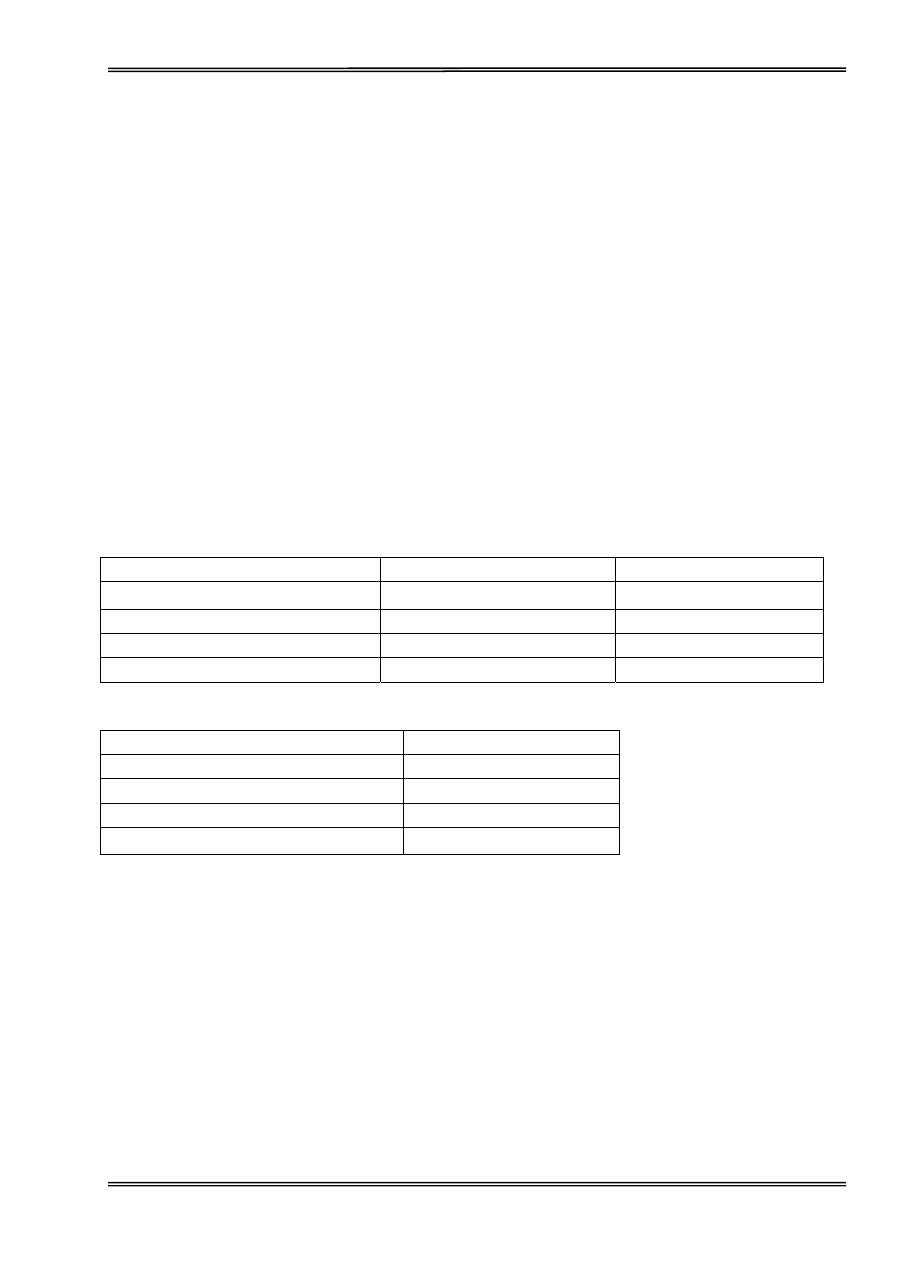
Table 4.1
Switch
Top Label
Bottom Label
S1 Tear
Off
Slip
S2
LF/FF
Exit Dir
S3
Load/Eject
-
S4 Online
-
Table 4.2
LED Function
L1 Power/Paper
Out
L2 Slip
L3 Front
exit
L4 Online

Tally Dascom 1325
14
Panel Operation
There are 3 states of operation: Online, Offline and Power On.
In the Online state, the keys provide the following functions: Go to Tear Off position, Line Feed/Form feed,
Load/Eject, and switch to Offline state.
In the Offline state, the keys provide the following functions: Select Slip paper profile, select paper exit
direction, Load/Eject, switch to Online state, micro feed, clear buffer and restore factory defaults.
To enter the Power On state, the user holds down a key or a combination of keys while powering up the printer.
This state provides the following functions: Configure Slip paper profile, Main Menu setup, Hex-dump, print
Main Menu, access Service Menu, adjust page margins, restore factory defaults, and firmware update.
The followings describe the 3 states in details.
Legend:
[A] = press and hold switch A
{B} = press and then release switch B
[A]+ {B} = press switch B while holding A
Tally Dascom 1325
15
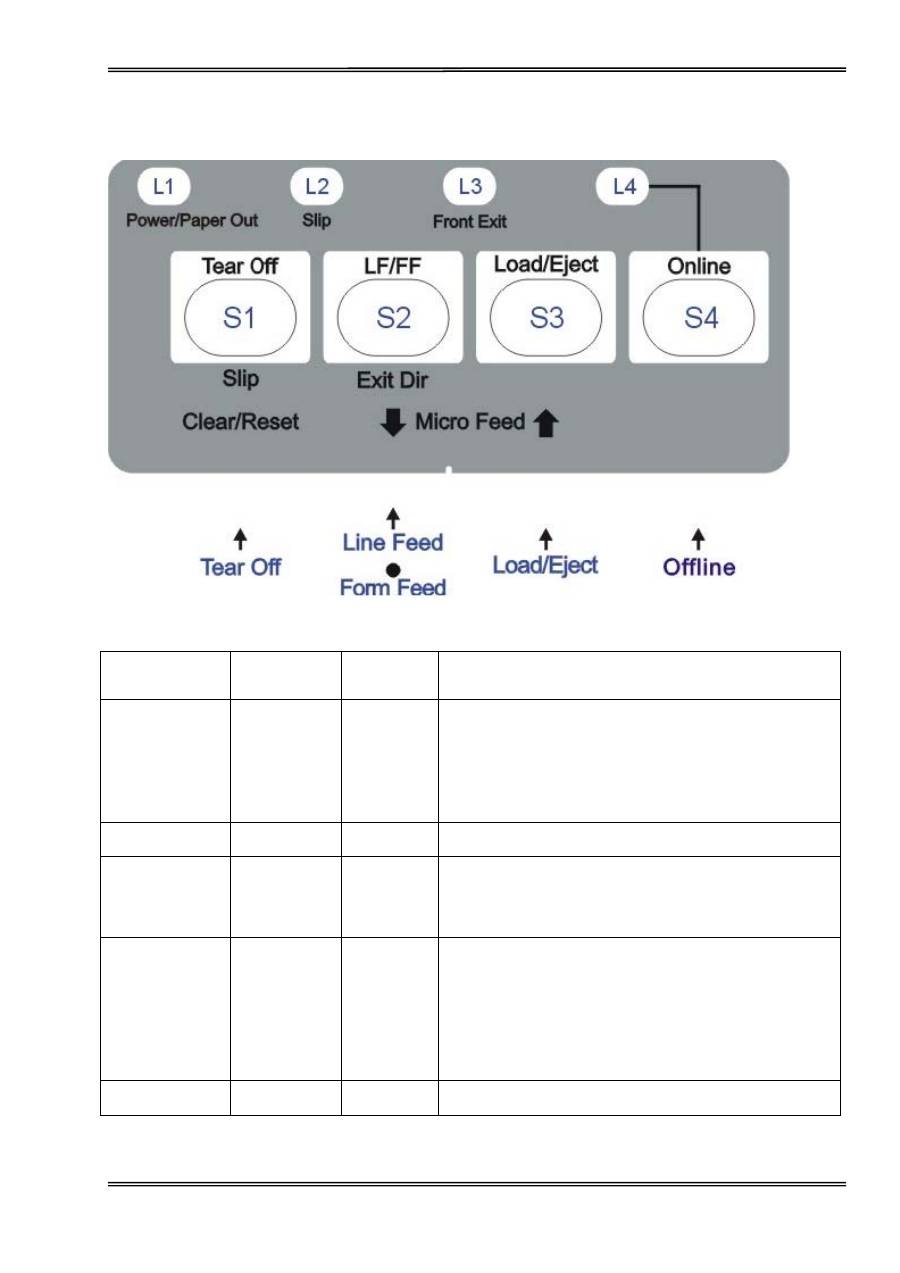
Online State
Function Name
Switch
Operation
LED Function
Description
Tear Off
{S1}
-
This is valid for tractor mode only. It feeds the form to the
tear-off position. After tearing off the form, printing starts
on the next TOF by:
pressing S1 once, or
receiving print data from the host.
LF
{S2}
-
Feeds a line with every press of S2.
FF [S2]
-
By holding S2, the printer initially feeds a few lines; then
feeds the form to the next TOF for rear tractor or ejects
the form for cut sheets.
Load/Eject {S3} -
Load:
Automatically loads the paper (according to path
selection) when no paper is on the platen.
Eject: For rear tractor, it retracts the form from the
platen to allow users to install cut sheets. (NOTE:
Users have to toggle the path selection lever.)
For cut sheets, it ejects the form on the platen.
Online
{S4}
L4
Toggles between Online and Offline states.
Tally Dascom 1325
16
Offline State
Function Name
Switch
Operation
LED Function
Description
Slip
[S1]
L2
Press and hold this key until printer beeps twice to activate
the Slip profile mode. L2 will turn on.
Press and hold this key until printer beeps twice to exit the
Slip profile mode. L2 will turn off.
Exit Dir
{S2}
L3
This is valid for single sheet mode only. It controls the exit
direction of the friction sheet paper.
Load/Eject {S3}
-
Load:
Automatically loads the paper (according to path
selection) when no paper is on the platen.
Eject: For rear tractor, it retracts the form from the platen to
allow users to install cut sheets. (NOTE: Users have to
toggle the path selection lever.)
For cut sheets, it ejects the form on the platen.
Online
{S4}
L4
Toggles between Online and Offline states
Micro Forward
{S3}+[S4]
-
While holding down S4, press S3 to micro feed paper up.
Micro Reverse
{S2}+[S4]
-
While holding down S4, press S2 to micro feed paper down.
Clear Buffer and
Reset
{S1}+[S4]
-
Clears the print buffer. Beeps once upon completion.
Pressing S1 longer initializes the printer to default settings.
Beeps 3 times upon completion.
Tally Dascom 1325
17
Power-On State
Function
Name
Switch
Operation
LED Function
Description
Menu Setup /
EDS
[S1]
-
Allows for Main Menu setting changes. Please read the
instructions printed on how to change settings when this
mode is activated. (EDS: Electronic DIP Switch)
Slip Setup
[S2]
-
Configures the Slip paper profile such as top and left
margins. Refer to Slip Setup section below for details.
Hex Dump
[S3]
-
Beeps once to indicate going into hex dump mode:
Prints data from host in hexadecimal representation.
Pressing S4 suspends the printing.
When the hex dump has finished, pressing S4 forces the
printing of the last line of data, as any line termination
control code from host has no function.
Switch off the power to terminate the hex dump.
Tally Dascom 1325
18
Self Test /
Status Page
[S4]
-
Prints the printer settings and self-test pattern.
Service Menu
[S1]+[S2]
-
Vertical Alignment, Change Pin Function and Endless Self
Test
Adjust Page
Margins
[S3]+[S4]
-
Includes Adjust Fanfold Top Margin, Adjust Single Top
Margin, Adjust Fanfold Left Margin, Adjust Single Left
Margin and Adjust Tear-Off position.
Restore Factory
Defaults
[S2]+[S3]+[S4]
-
Restore settings to factory defaults except for Change Pin,
Vertical Alignment and Adjust Page Margin Parameters.
Firmware
Update
[S1]+[S2]+[S3]+
[S4]
L1, L4
Alternate flashing of L1 and L4 indicates ready for
firmware update from host.
When new firmware is being received: L1 and L4 flash
together, followed by L1 and L3 flash together.
When downloading is completed, the carriage returns to
home position. Printer initializes normally.
Language
Setup
[S2]+[S3]
Allows user to select one of the following languages:
English, German, Russian, Italian, French, Spanish and
Turkish. Factory default is English. Refer to Language
Setup section below for details.
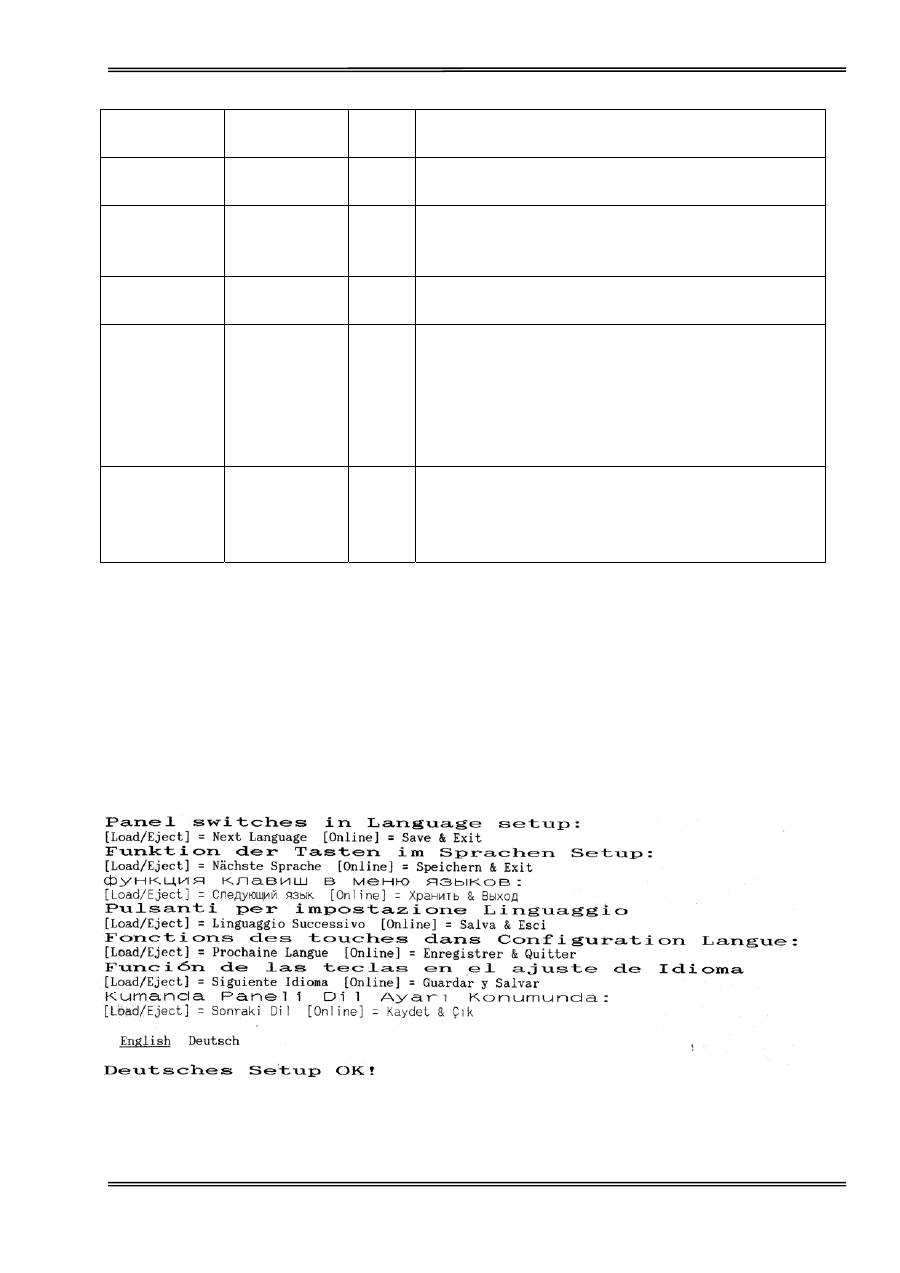
Language Setup
The panel menu can display the following languages:
English, German, Russian, Italian, French, Spanish and
Turkish. Factory default setting is English. To change it to another language, hold down the
[LF/FF]
and
[Load/Eject]
keys on the panel and power-on. Upon exiting the Language Setup Menu, a listing of the current
configuration is printed, and this is followed by Main Menu Setup.
Below is an example of changing from English to German language:
Tally Dascom 1325
19
Slip Setup
Slip media refers customized forms specific to each application. Each slip may have its own unique top margin
or left margin. This is called the slip profile. The Slip setting provides a convenient way to set the printer top
and left margin settings to the slip profile at the press of a panel key without the need to manually change the
top and left margins, whenever you want to do your slip printing. Likewise, should you decide to print on
standard paper forms, you can exit from the slip profile easily at the press of a panel key.
To configure the slip top and left margin parameters, please do the followings:
1. Power up printer while pressing
【
LF / FF
】
key until the print head starts moving, then let go.
2. Load paper. The printer prints the few lines below.
Slip Setup
【
LF / FF
】
= OK
【
Tear Off
】
= Back
【
Load / Eject
】
= Next
【
Online
】
= Exit
Current Setting: Fanfold Top Margin
3. Press
the
【
Load / Eject
】
key to scroll to the item you want to change. The available items are Fanfold
Top Margin, Fanfold Left Margin, Single Top Margin and Single Left Margin. To select the item, press
【
LF
/ FF
】
key. In the above example, the printer will print out:
Fanfold Top Margin
【
LF / FF
】
Press: PrevSetup
Fanfold Top Margin 0mm
4. Press
the
【
Load / Eject
】
key to increase by 1 mm, or press the
【
Tear Off
】
key to reduce 1 mm. The
range is 0~65 mm.
5. Press
the
【
LF / FF
】
key to confirm the current selection. To save selection into memory, press the
【
LF
/ FF
】
key. If you do not want to save, use the
【
Load / Eject
】
key to scroll to “No” before pressing the
【
LF
/ FF
】
key to confirm.
6. Press
the
【
Online
】
key to exit from Slip Setup.
