Dascom 1325 User Guide: 2 Setting Up Printer
2 Setting Up Printer: Dascom 1325 User Guide
Tally Dascom 1325
4
2 Setting Up Printer
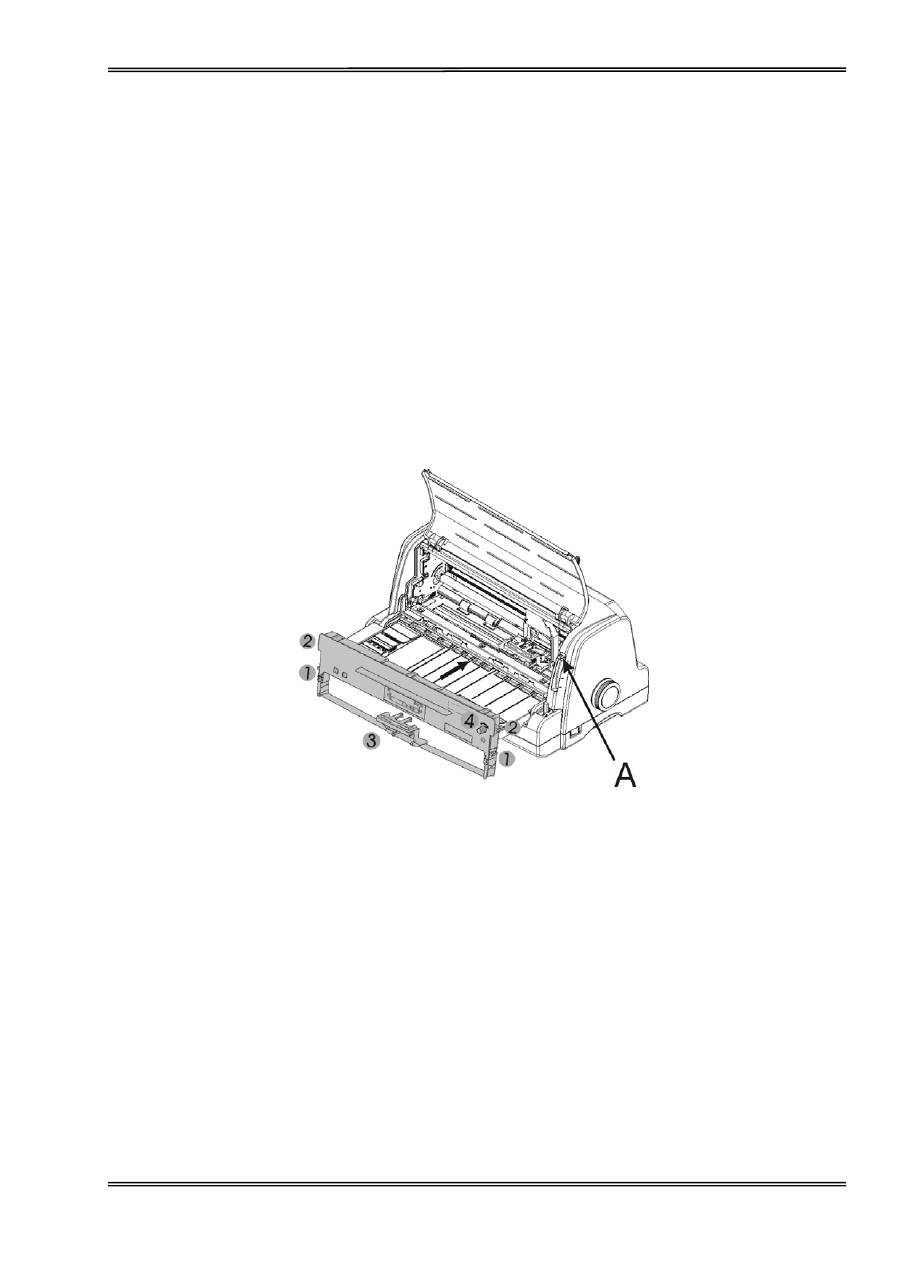
Install Ribbon
1. Ensure the power to the printer is off and the print gap lever “A” is set to the furthest open position. Move
the carriage to the centre of the print platen.
2. Install the recess positions
and
②
on the ribbon cassette into the printer mounting.
3. Press the ribbon frame
onto the print head.
4. Turn the ribbon knob
④
in clockwise direction until the ribbon fabric is taut. Move the carriage left and right
to ensure the carriage and ribbon fabric can move smoothly.
5. Ensure the print gap lever “A” is set to the original position.
6. Close the printer’s front cover. When printer is in operation, ensure the printer’s front cover is closed to
keep the noise level to a minimum.
Notes on Ribbon Cartridge Removal:
1.
Eject any paper loaded in the printer.
2.
Turn off the printer power.
3.
Set the gap lever to the most open position labeled “RIBBON”.
4.
Open the front cover.
5.
Move the carriage to the middle. Be careful not to touch the print head if printing had just been performed,
as the print head may be hot.
6.
Remove the blue ribbon frame from the print head.
7.
Use fingers to take hold of the handle on the ribbon cartridge firmly, and pull the cartridge towards you to
unlatch it. Some force may be needed to unlatch the cartridge.
8.
Remove the ribbon fabric from the print head carefully without entangling it.
Tally Dascom 1325
5
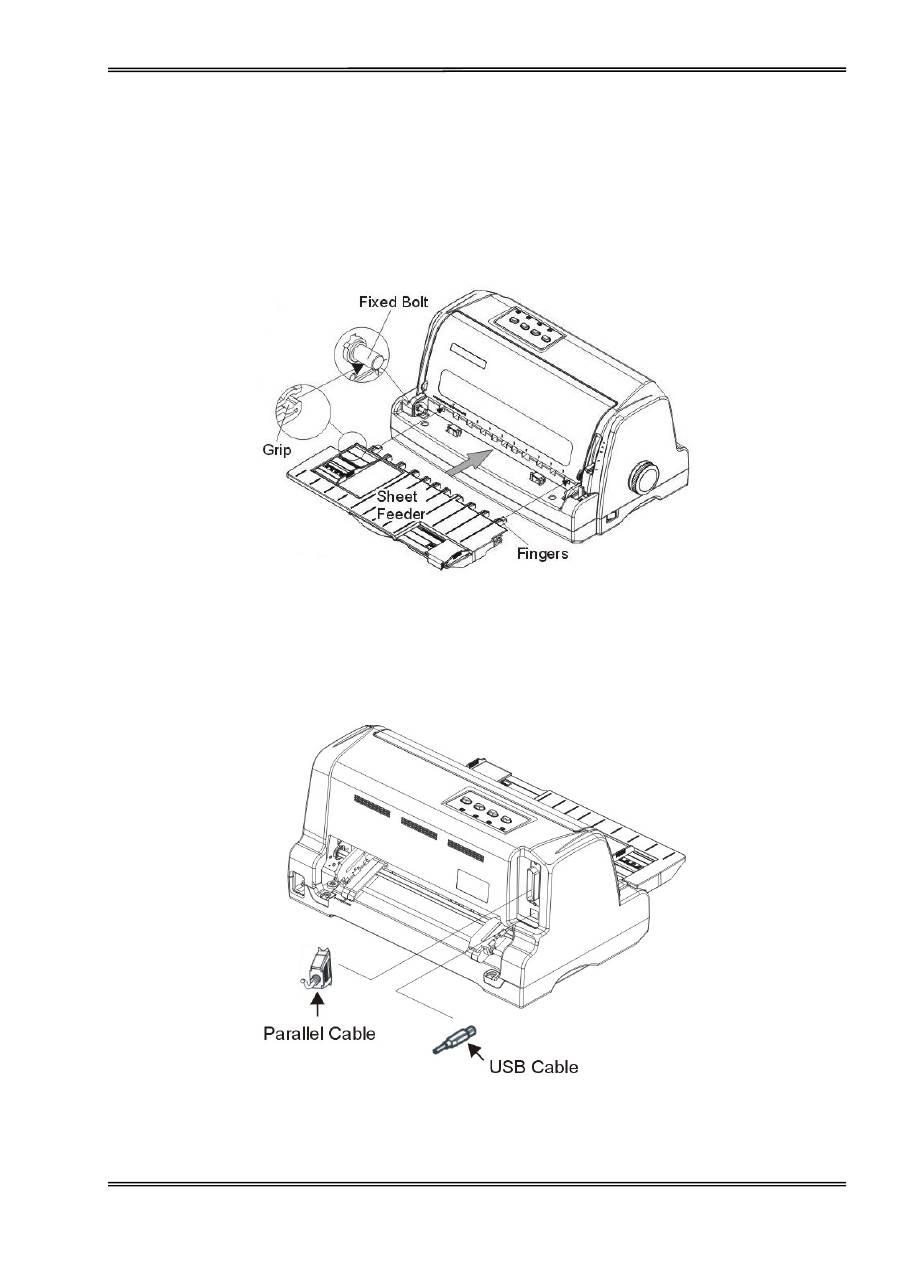
Install the Paper Loader
As shown in the picture below, ensure the sheet feeder fingers fit into the slots in front of the printer. Push in the
sheet feeder until its sides latch on the fixed bolts in the printer. The sheet feeder is now installed successfully.
To remove the sheet feeder, use one hand to hold the printer and the other hand to pull and unlatch the sheet
feeder.
Connecting the Interface Cable
The 36-pin Centronics parallel and USB ports are located at the rear of the printer. IMPORTANT: Make sure
the printer and the computer are switched off before connecting or disconnecting the interface cable to
prevent electrical damage to the interface ports.
Tally Dascom 1325
6
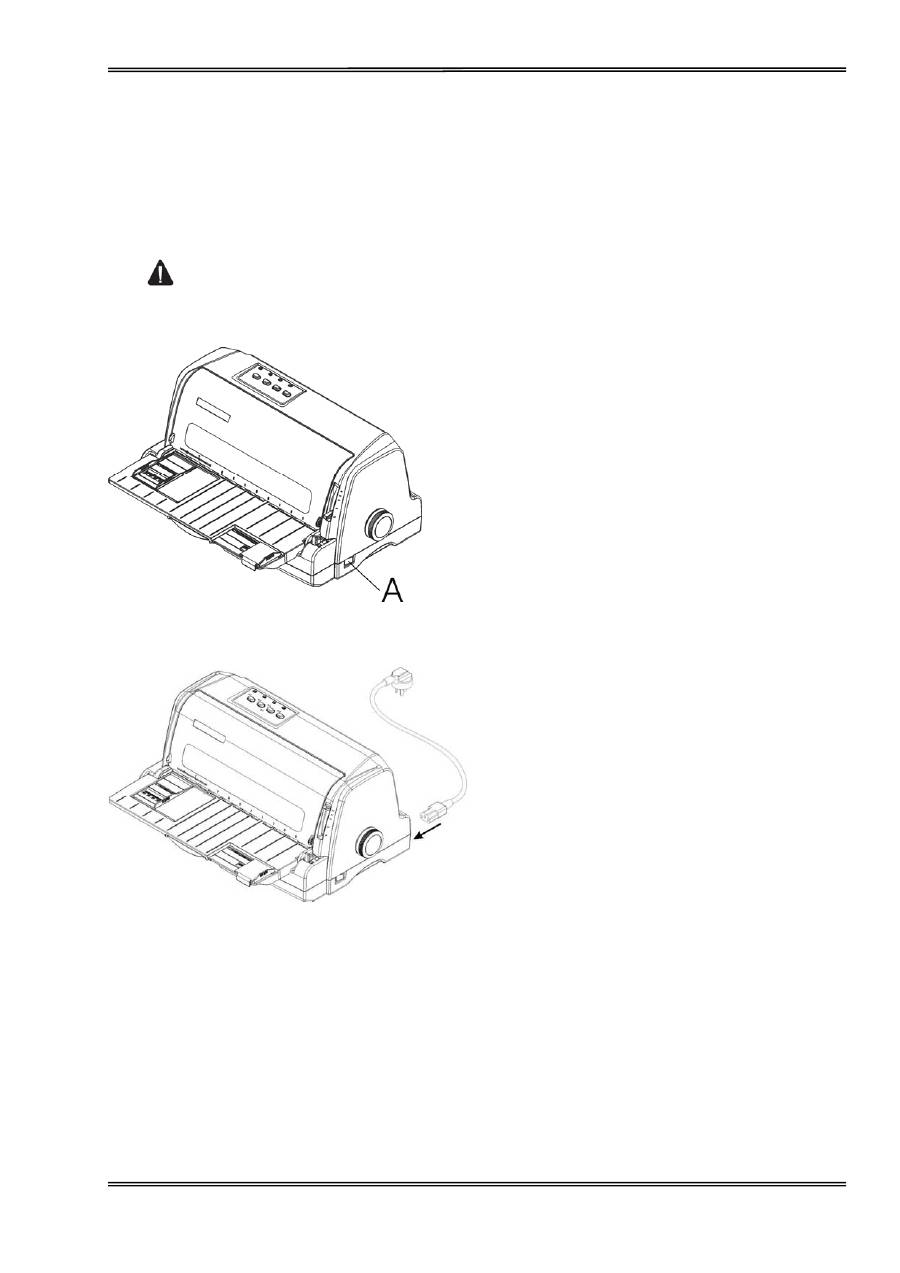
Connecting the Mains Power
Checking the printer voltage
Make sure that the device has been set according to your country’s power supply voltage. To do this, check the
rating plate at the back of the printer. Contact your dealer if the setting is incorrect.
Never switch on the printer if the voltage setting is incorrect; this may result in electrical
damage to the printer.
Make sure that the power switch
“A”, located to the right side of the
printer, is in the
OFF
position.
Connect the power cord to the
power inlet of the printer. Connect
the power cord plug to a mains
socket. Switch on the printer.
Tally Dascom 1325
7
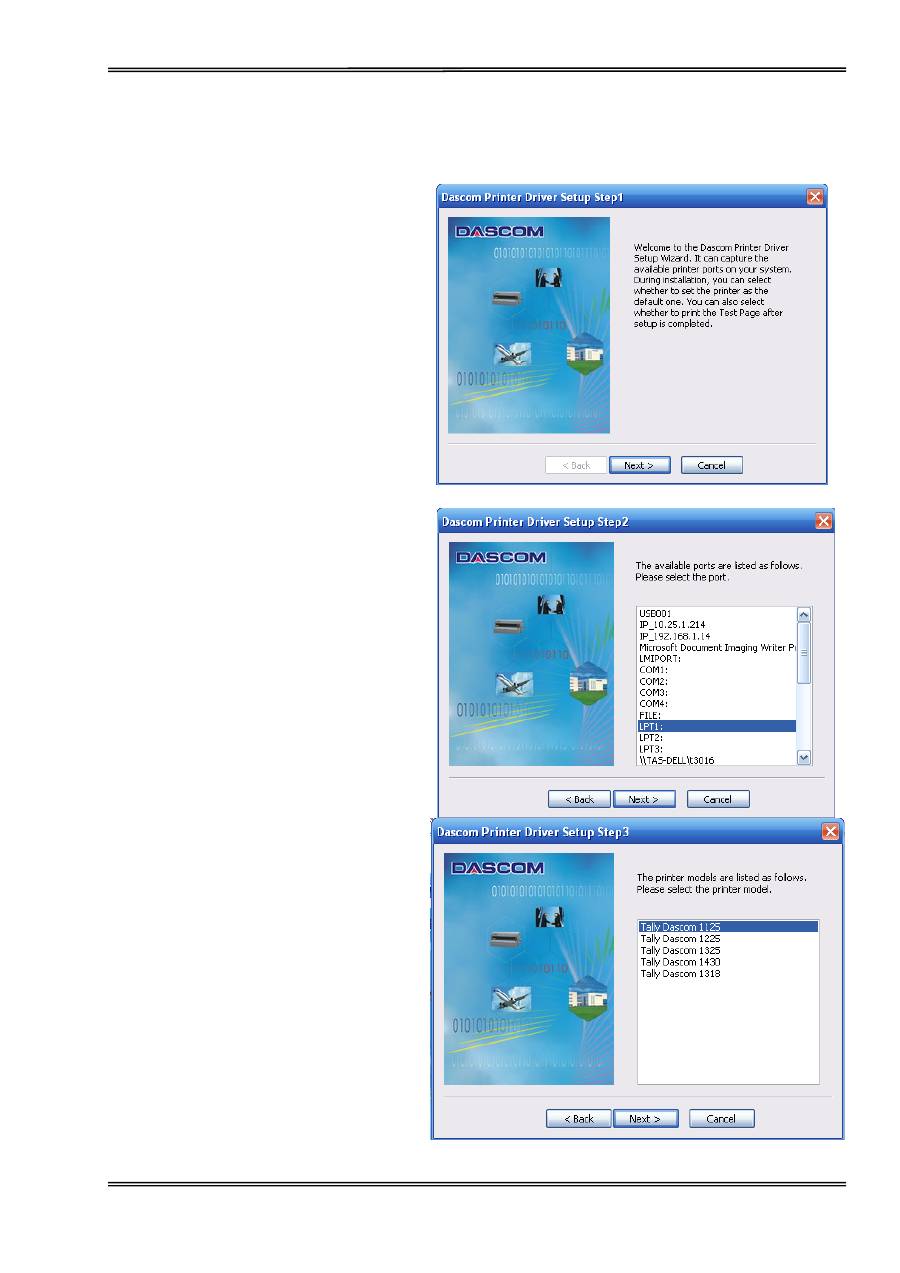
Installing the Windows Driver
(Windows 2000/2003/2008 Server/XP/Vista/7)
1. Your printer CDROM comes with
Windows drivers. Go to the Drivers
folder and run the Installer
“DriverSetup.exe”. You will see the
screen on the right. Click “Next” to
continue.
2. A list of ports available on your
system will be displayed as shown
on the right. Choose the desired
port to use. Click “Next” to continue.
3. Select the desired printer model as
shown on the right. Click “Next” to
continue.
Tally Dascom 1325
8
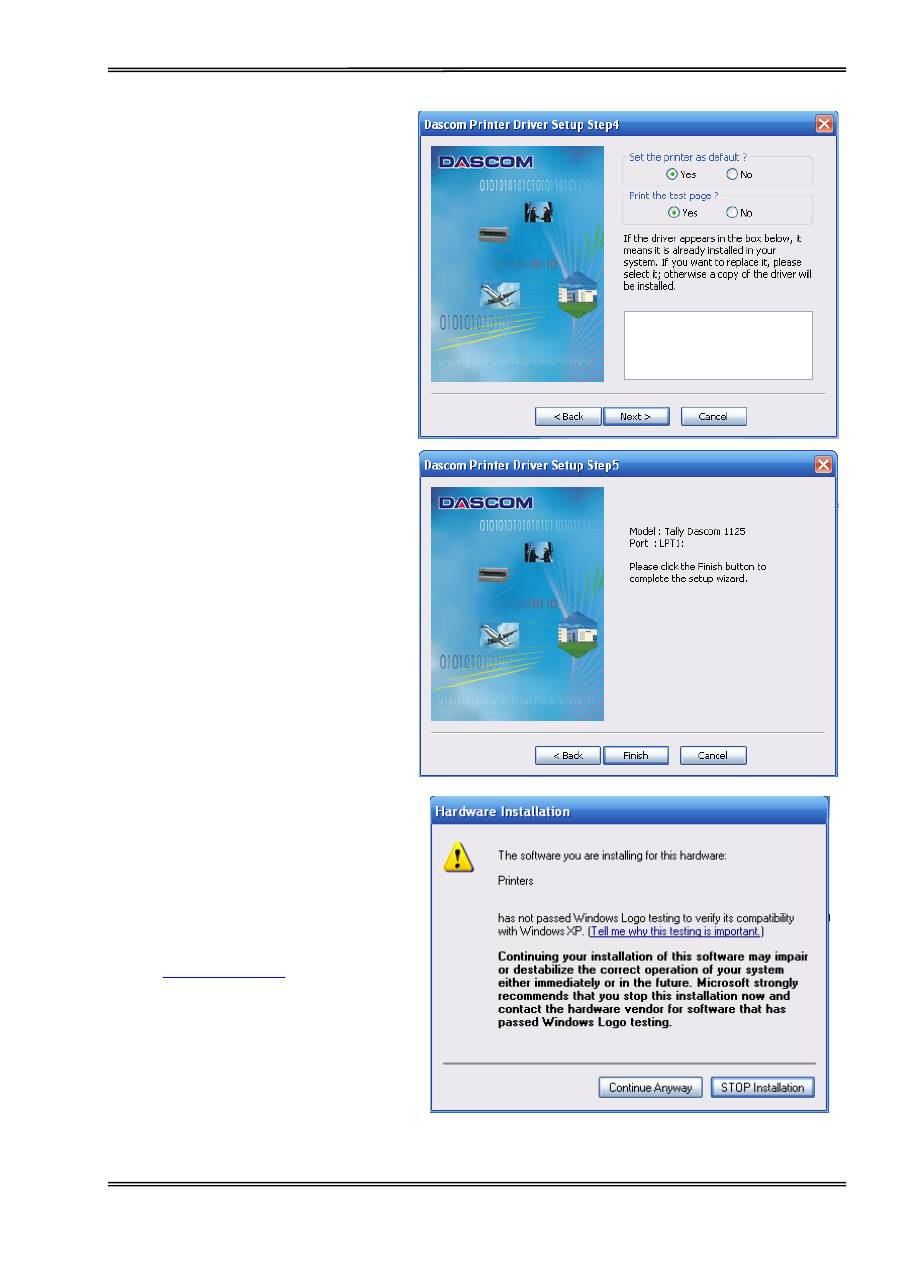
4. Here you can choose whether to
set the driver as the system
default driver, and whether you
want to print the Test Page after
installation is completed. If the
driver had been installed before,
it would be listed in the white box
on the right. Select the listed
driver (if any) if you want to
replace it; otherwise a copy of
the driver will be installed. Click
“Next” to continue.
5. Click “Finish” to start the
installation process.
6. If the driver is not yet Microsoft
Certified, the message on the right
would appear. Click “Continue
Anyway”. (As we continue to
expand our product portfolio, not all
of our drivers may be certified yet.
Please check our website
www.dascom.com
for the latest
certified drivers.)
Tally Dascom 1325
9
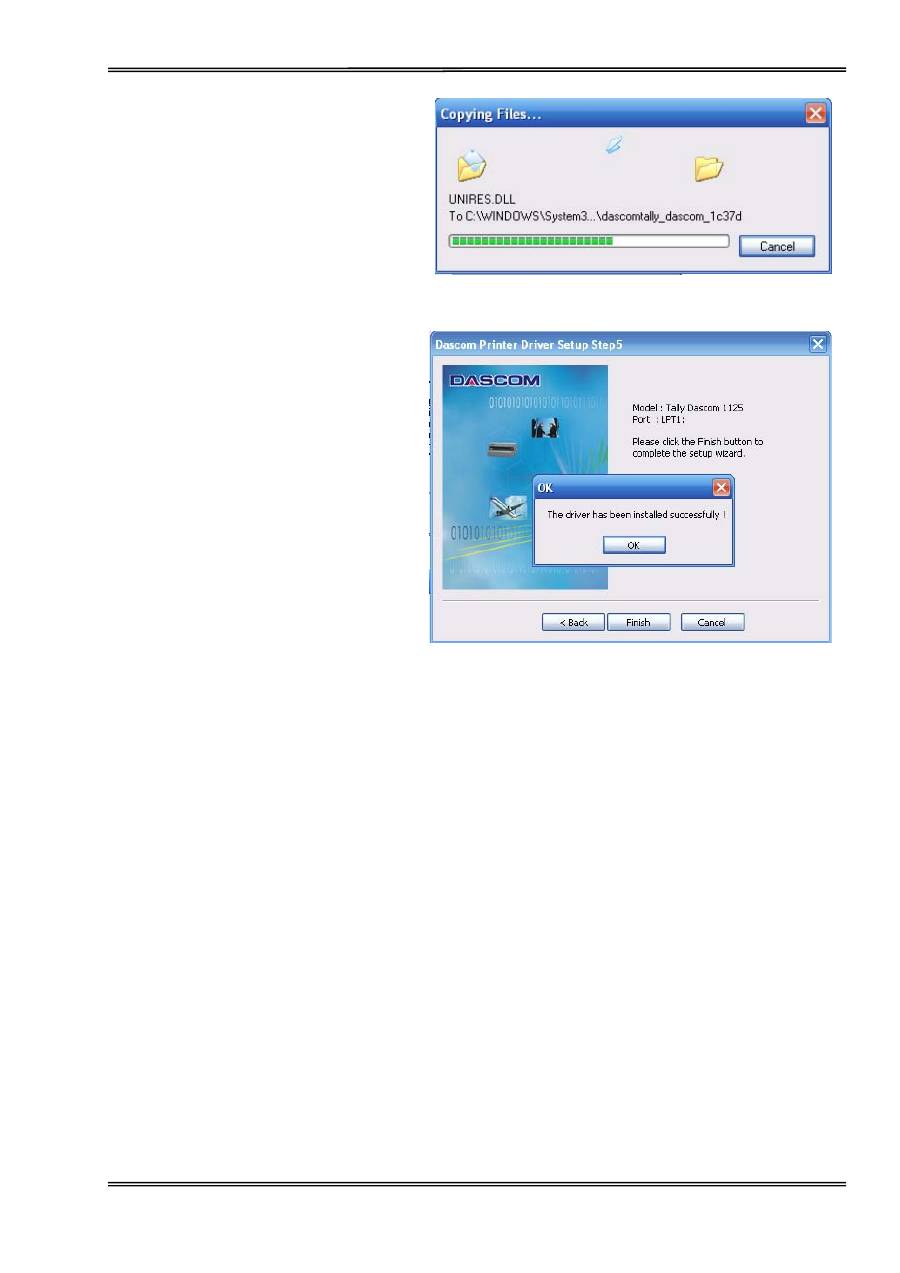
7. Installation in progress.
8. After installation is completed
successfully, you will see the
message on the right.
