Dascom 1325 User Guide: 3 Paper Installation Guide
3 Paper Installation Guide: Dascom 1325 User Guide
Tally Dascom 1325
10
3 Paper Installation Guide
The printer can handle either single sheets or continuous forms. Single sheets, also called cut sheets, include
envelopes and non-continuous, multipart forms. Continuous forms include labels and multipart forms fed into
the printer using the forms tractors. The printer is able to print 1~7 plies multipart paper.
Do not load paper that has been folded or is damaged, wrinkled, or curled.
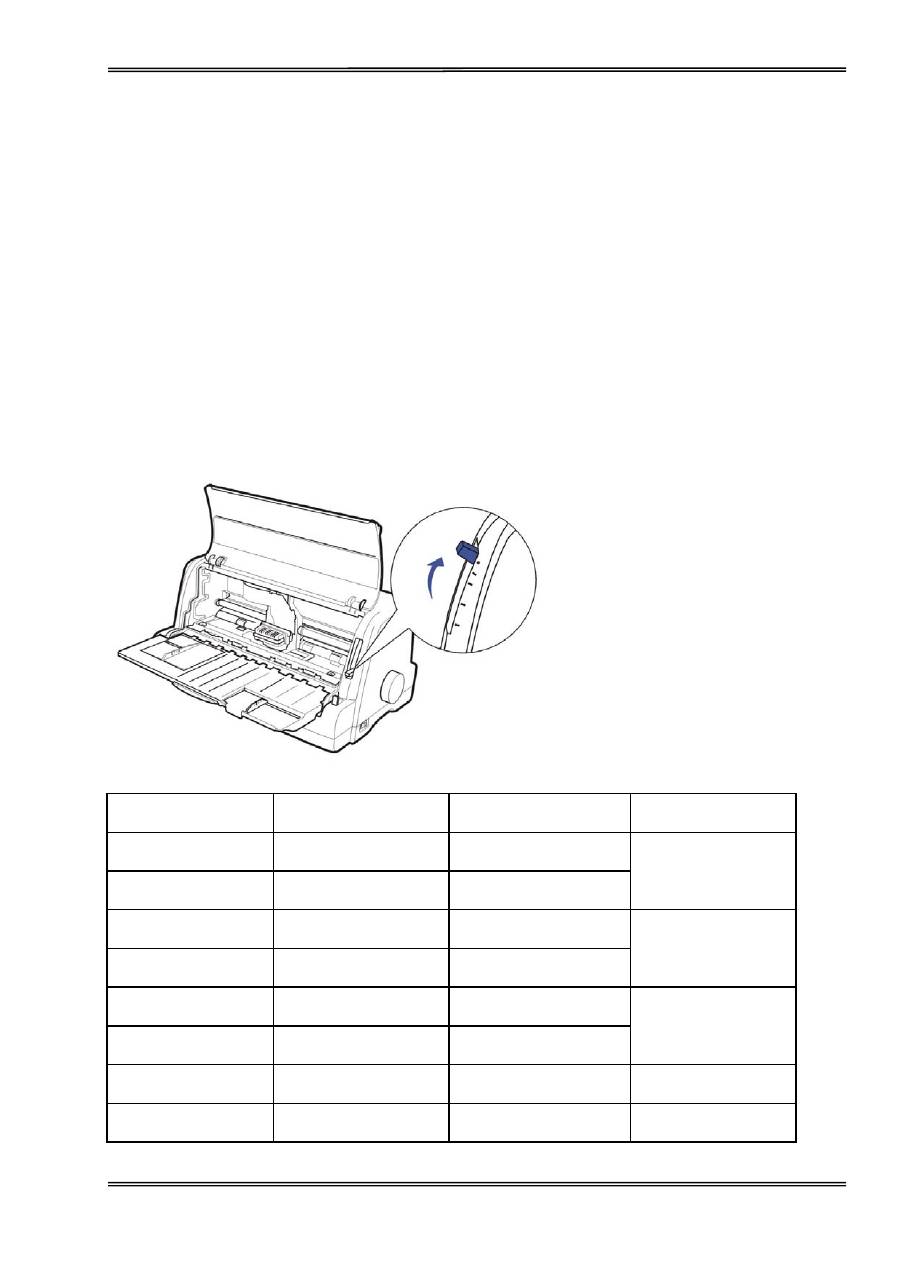
Adjusting the Print Gap Lever
The print gap lever is on the right side of the printer. Take care to adjust the print gap lever to a suitable
position whenever you change the number of copies being printed. Using the wrong print gap may cause print
head damage or paper jams.
Paper type
Weight (g/m
2
) / ply
Thickness (mm)
Gap lever position
Single sheet
52
~
100 0.06
~
0.12
1P
~
2P
2-ply
40
~
52 0.12
~
0.14
3-ply
40
~
52 0.17
~
0.22
3P
~
4P
4-ply
40
~
52 0.23
~
0.27
5-ply
40
~
52 0.28
~
0.33
5P
~
6P
6-ply
40
~
52 0.34
~
0.38
7-ply
40
~
52
0.39
~
0.45
7P
7-ply above
40
~
52 0.45
~
0.58
Change ribbon
Print Gap Lever
Tally Dascom 1325
11
There are 2 paper feed modes: friction feed and tractor feed.
Friction Feed Handling
1. Move the paper-feed lever forward to “ ” for friction feed mode.
2. Adjust the print gap lever if necessary.
3. Align the left paper guide with the mark on the left of the single sheet feeder. Adjust the right paper guide to
the width of the paper used.
4. Insert a sheet of paper. Make sure that the bottom edge of the paper engages snugly with the platen.
5. The paper should advance automatically to the print position. The printer is now ready to print in the online
state.
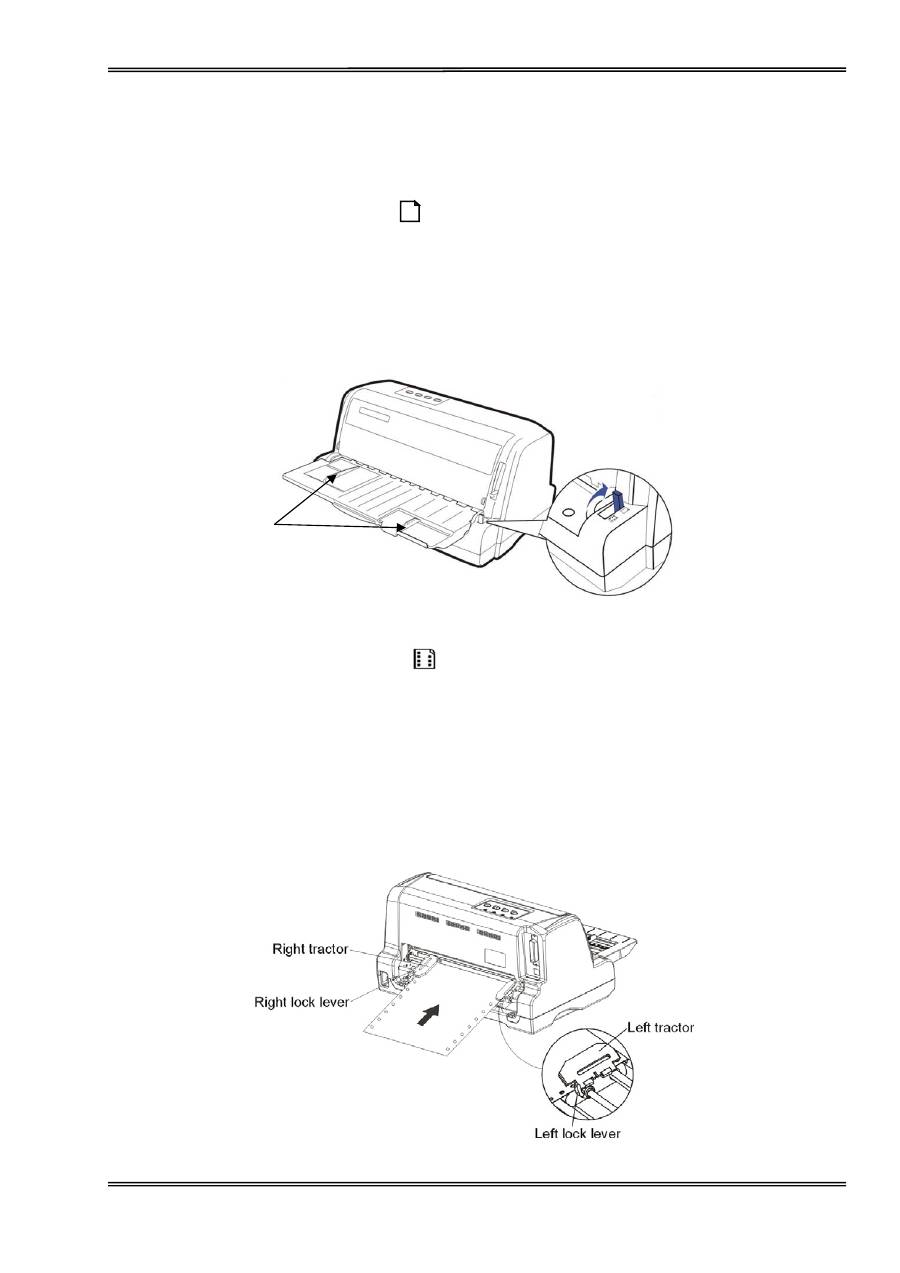
Tractor Feed Handling
1. Move the paper-feed lever backward to “ ” for continuous paper position.
2. Adjust the print gap lever if necessary.
3. Raise the tractor doors and fit the first 3 paper holes onto the left tractor pins. Close the left tractor door. In
the same way, install the paper on the right tractor.
4. Adjust the right tractor to the width of the paper until the paper is flat. Do not stretch the paper too taut.
Push the right lock lever down to secure the right tractor in place.
5. Press
the
【
Load/Eject
】
key to load the paper to the starting print position. The printer is now ready to print
in the online state.
Paper Feed Lever
Paper Guides
