Dascom 1325 User Guide: 1 Unpacking Guide
1 Unpacking Guide: Dascom 1325 User Guide
Tally Dascom 1325
1
1 Unpacking Guide
Place your packaged printer on a solid base.
Make sure that the “Up” symbols point in the correct direction.
Open the packaging, lift the printer out of the cardboard box and remove the remaining packaging
material.
Check the printer for any visible transport damage and missing items. If you find any transport
damage or if any accessories are missing, please contact your dealer. The following items should be
included:
o
Printer
o
Paper feed knob
o
Paper feed tray
o
Power
cord
o
Ribbon
cartridge
o
CD-ROM
o
Installation
Guide
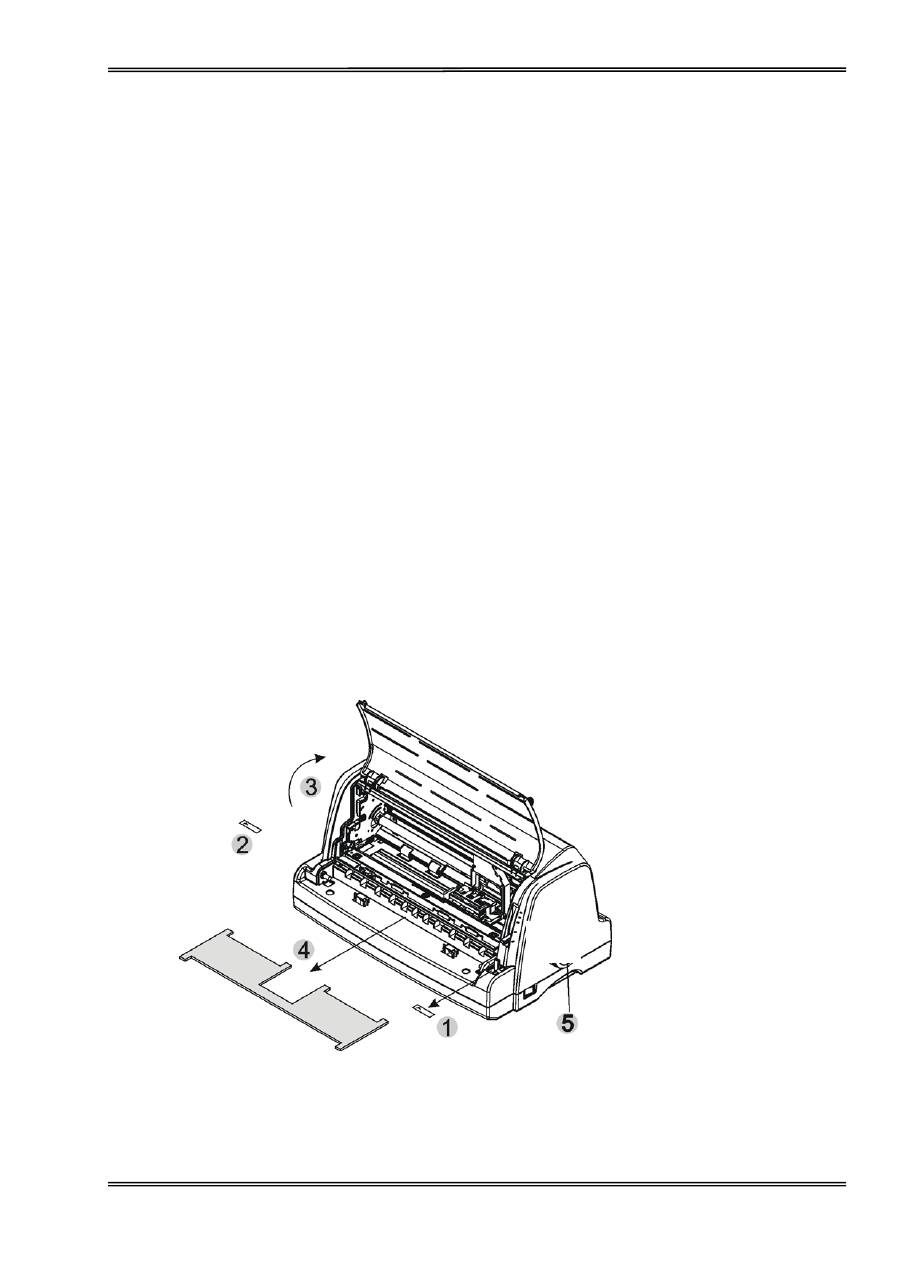
Remove the packaging materials from the printer as follows:
1. Remove the tape on the paper feed lever.
2. Remove other visible tape on the printer.
3. Open the front cover of the printer.
4. Remove the shipping cardboard from around the print head.
5. Install the paper feed knob.
Tally Dascom 1325
2
Placing the Printer
Place the printer on a solid, flat, stable surface; ensuring that the printer is positioned in such a way that it
cannot move, and that there is easy access to the control panel and paper input devices. Also ensure that there
is enough space for sufficient ventilation and for the printed output.
When selecting the printer location, observe the following additional instructions:
Never place the printer near to any flammable gas or explosive substances.
Do not expose the printer to direct sunlight. If you cannot avoid placing the printer near a window, protect it
from the sunlight with a curtain.
When connecting a computer to the printer, make sure the maximum recommended cable length is not
exceeded.
Ensure sufficient distance between the printer and any heating devices/radiators.
Avoid exposing the printer to extreme temperature or air humidity fluctuations. Avoid exposure to dusty
environments.
It is recommended the printer is installed in a position which reduces noise exposure to the work place
during printing.
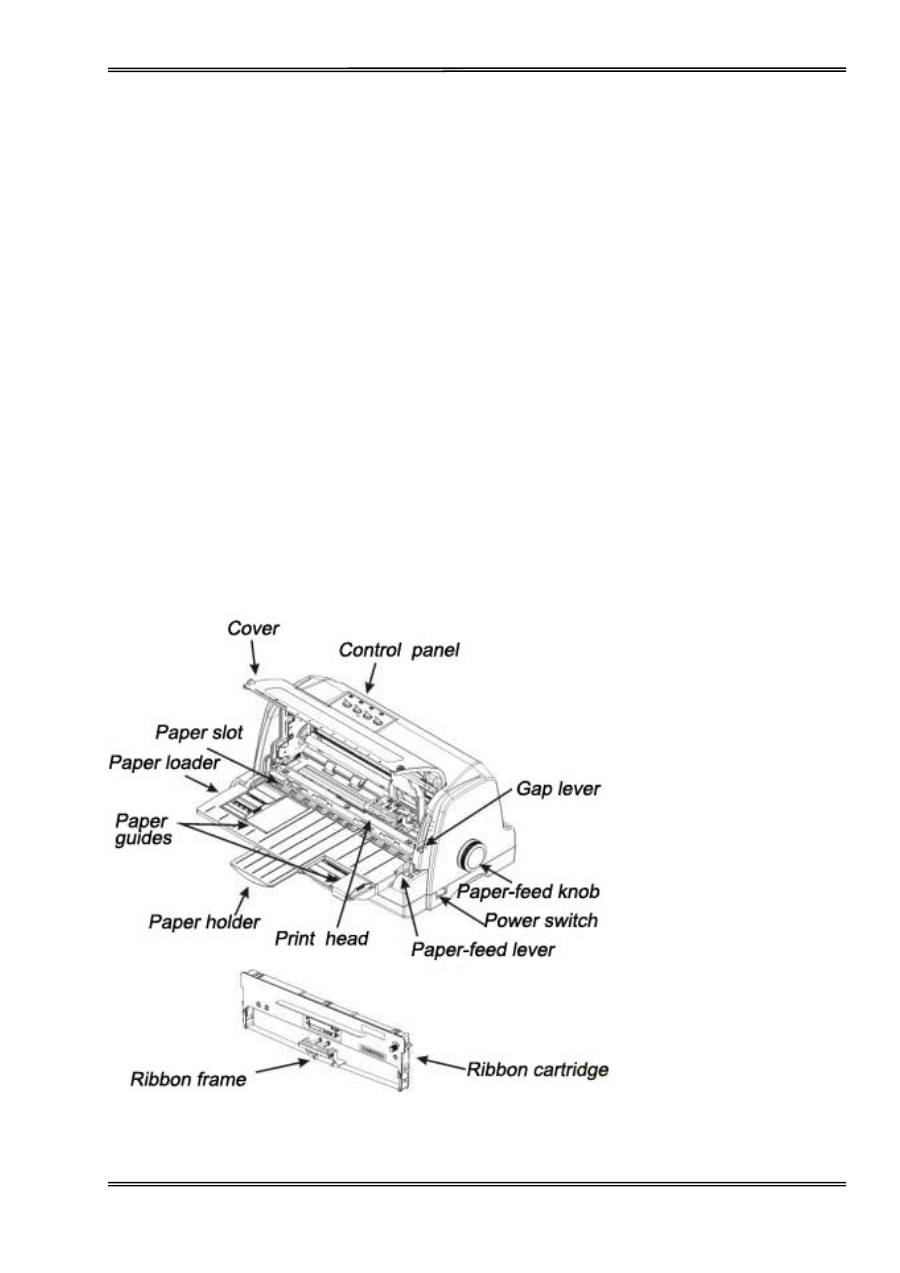
Printer Components
Tally Dascom 1325
3
Component Function
Gap Lever
Controls printing impact or density.
Adjusts the print gap lever according to the thickness of paper.
Paper Guides
Adjust positioning of single sheet paper.
Paper Loader
For single sheet.
Paper Holder
For single sheet in larger sizes.
Paper Slot
For friction feed (forward).
Print Head
24-pin printing mechanism
Cover
Protects print head and other components inside, and reduce noise.
Control Panel
Shows printer status, for printer setup.
Paper Feed Lever
Two positions: = continuous forms; = single sheet paper
Paper Feed Knob
Manual feed or vertical positioning of paper
Power Switch
Power printer ON or OFF
Ribbon Cartridge
Install ribbon in the printer.
Ribbon Frame
For guiding ribbon installation on print head.
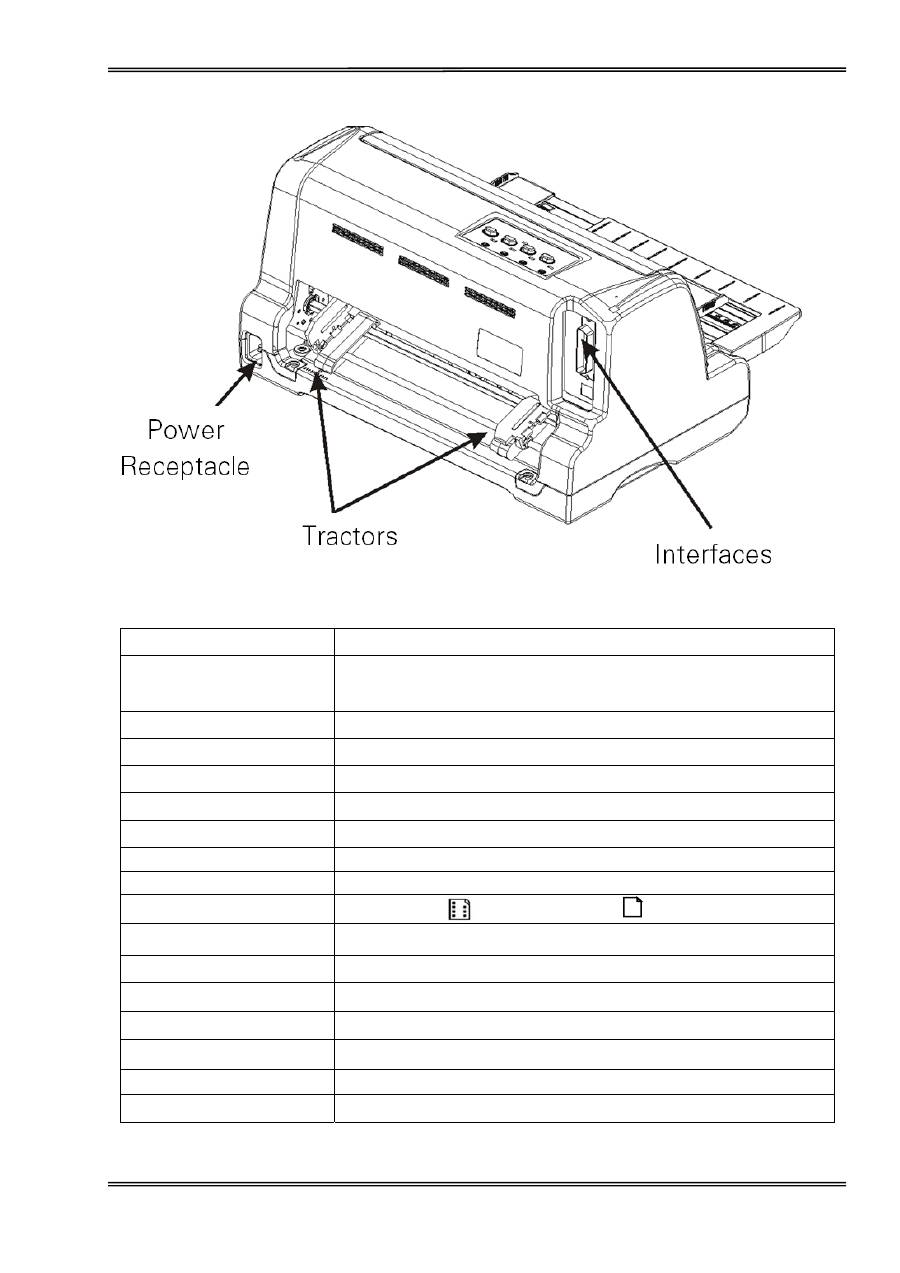
Tractors
For feeding and adjustment of continuous forms.
Power Receptacle
Connects power cord to the printer.
Interface
Connects interface cable from the host.
