National Geographic 259NE: инструкция
Раздел: Красота, здоровье, спорт. туризм, хобби
Тип: Термометр
Инструкция к Термометру National Geographic 259NE

259NE
Indoor/Outdoor Memory Thermometer
UK
3 - 7
Thermomètre intérieur/extérieur avec mémoire
FR
8 - 12
Draadloze binnen-/buitenthermometer met geheugen
DU
13 - 17
Innen- /Außenthermometer mit Speicherfunktion
DE
18 - 22
Termómetro de interior / exterior con memoria
ES
23 - 27
Innendørs/utendørs termometer med minne
NL
28 - 32
Trådlös inomhus-/utomhustermometer med minne
SW
33 - 37
Indendørs/udendørs termometer med hukommelse
DK
38 - 42
Wewnętrzny i zewnętrzny termometr z pamięcią
PL
43 - 47
Термометр с памятью для измерений в помещении/вне помещения
RU
48 - 52
4. 5. 6.
7. 8.
9.
A.
G.
B
H.
C.
D.
I.
E.
F.
1.
2.
3.
10.
2
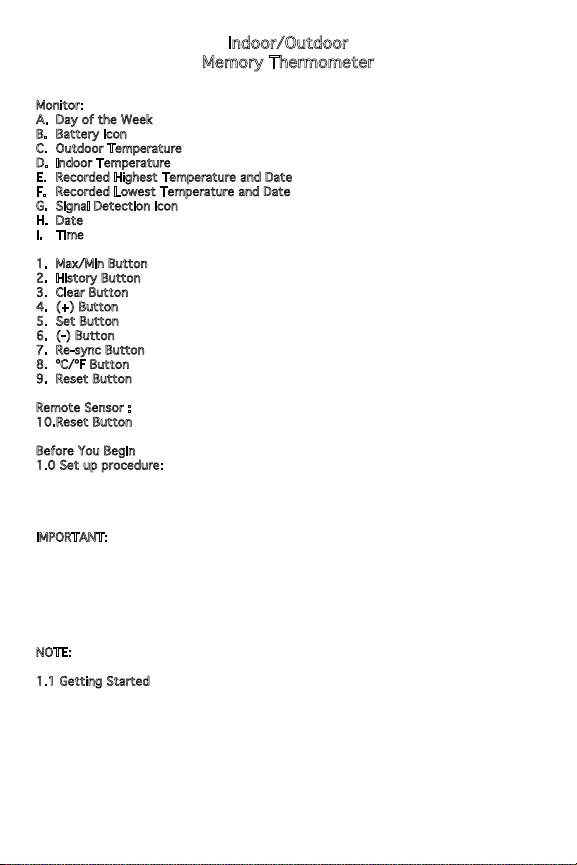
Indoor/Outdoor
Memory Thermometer
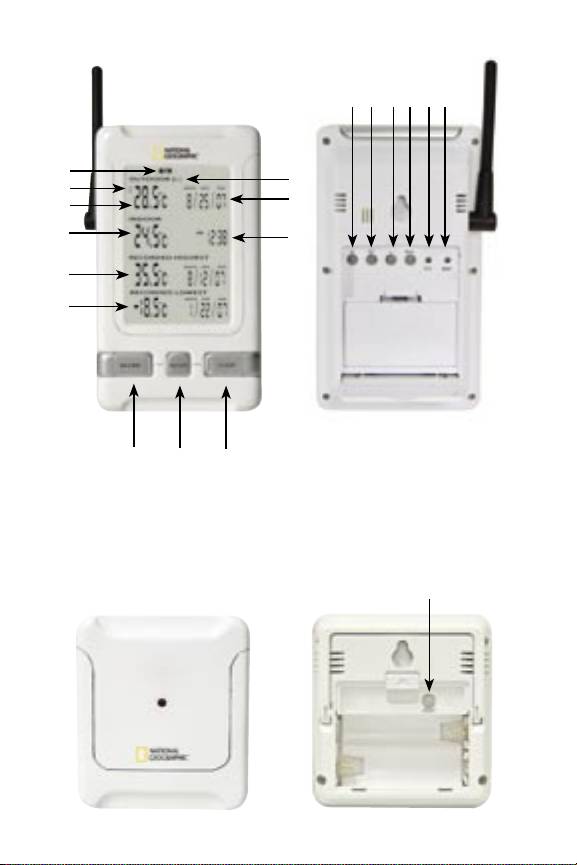
Monitor:
A. Day of the Week
B. Battery Icon
C. Outdoor Temperature
D. Indoor Temperature
E. Recorded Highest Temperature and Date
F. Recorded Lowest Temperature and Date
G. Signal Detection Icon
H. Date
I. Time
1. Max/Min Button
2. History Button
3. Clear Button
4. (+) Button
5. Set Button
6. (-) Button
7. Re-sync Button
8. ºC/ºF Button
9. Reset Button
Remote Sensor :
10. Reset Button
Before You Begin
1.0 Set up procedure:
1. Insert batteries into the monitor first and then press the RESET button once.
2. Place the monitor as close as possible next to the remote sensor and insert the
batteries into the remote sensor and press the RESET button.
IMPORTANT: The calendar and clock must be set up first before the monitor can
receive a signal from the remote sensor. (See section 3.0)
3. Position the monitor and remote sensor within effective transmission range, which
in usual circumstances is 30 to 45 meters. The range is affected by the building
materials and where the monitor and remote sensor are positioned; try various
locations for the best results.
NOTE: The remote sensor should be placed in a shaded area for accurate readings.
1.1 Getting Started
Once the remote sensor has been powered up (or the RESET button has been
pressed), you must set up the calendar and clock first, after setup the transmission
signal is sent to the monitor. The monitor will attempt to search for the signal for 5
minutes.
Once the signal is received, the dashes (--.-°F) on the monitor will change to the
current outdoor temperature. If after 5 minutes the screen does not change to show
the outdoor temperature, press the RE-SYNC button on the monitor. The monitor will
now attempt to search for the signal for another 6 minutes.
3

2.0 Troubleshooting
Press the RESET button at any time your display shows dashes (--.-°F) and/or ensure
that the remote sensor is in direct line to the monitor.
If the outdoor temperature cannot be received, check:
1. The distance between the monitor or remote sensor should be at least 0.9 to 1.2
meters away from any interfering sources such as computer monitors or TV sets.
2. Avoid placing the monitor onto or in the immediate proximity of metal window
frames.
3. Using other electrical products such as headphones or speakers operating on the
same signal frequency (433MHz) may prevent correct signal transmission and
reception.
4. Neighbors using electrical devices operating on the 433MHz signal frequency can
also cause interference.
5. Signals from other household devices, such as door bells and home security
systems, may temporarily interfere with the units and cause reception failure.
The transmission and reception of temperature reading will resume once the
interference has stopped.
The maximum transmission range is 45 meters from the remote sensor to the
monitor (in open space). However, this depends on the surrounding environment and
interference levels. The temperature signal travels in a straight line from the remote
sensor to the monitor. The signal will not curve around an object. If no reception is
possible, despite the observation of these factors, all units will have to be reset.
NOTE: To reset unit please see Set up Procedure. (See section 1.0).
3.0 Calendar and Clock Setup
1. Press and hold the SET button to activate the calendar setup mode.
2. Press the + or – button to toggle to the correct year.
3. Press the SET button to confirm.
4. Follow steps 2-3 to set the date, time and 12hr/24hr mode.
4.0 Recorded Highest and Lowest
The recorded highest and lowest outdoor temperature will always be displayed on the
screen. When the outdoor temperature becomes higher or lower than the current
record, the display immediately updates to the new record. This data will be retained
in the units memory even if the battery is removed or unit is reset.
IMPORTANT: The recorded highest and lowest temperature is stored by date,
therefore the calendar MUST be set correctly before use of the unit.
5.0 Five Year History
The unit will store the daily Max/Min records of outdoor temperature for up to 5
years.
1. Press and hold the HISTORY button until the calendar starts to flash.
2. Press the + or – buttons to toggle to the desired year and then press the HISTORY
button to confirm.
3. Repeat step 2 to set the desired month and date.
4. The Max/Min recorded measurement of outdoor temperature for that specific date
will be displayed for 5 seconds.
5. If there is no recorded measurement for that date, --.-°C or --.-°F will be displayed.
4
NOTE: Five years of data will be retained even if the battery is removed or the unit
is reset. After five years the oldest data will be replaced with the newest recorded
temperature data.
6.0 Year to Date History
The unit can also recall the recorded Max/Min outdoor temperature of the same date
last year, 2 years ago, and so on.
Example: if todayʼs date is 03/25/07 the unit will recall the Max/Min temperature for
03/25/06, 03/25/05, 03/25/04 etc. up to 5 years back.
1. Press the HISTORY button once, the monitor will display the recorded Max/Min
temperature of the same date last year; press the HISTORY button again to see
the temperature from two years ago, etc.
7.0 Maximum and Minimum Temperature
1. Press the MAX/MIN button once to display the maximum readings. Press the MAX/
MIN button again to display the minimum readings.
2. To clear the memory, press the CLEAR button when the Max/Min temperature is
displayed. It will clear the record of the shown field.
NOTE: Clearing the Max/Min temperature will not clear the recorded highest and
lowest temperature.
8.0 ºC/ºF Switchable
The default measurement for temperature is °F, press the ºC/ºF button to toggle
between °C and °F.
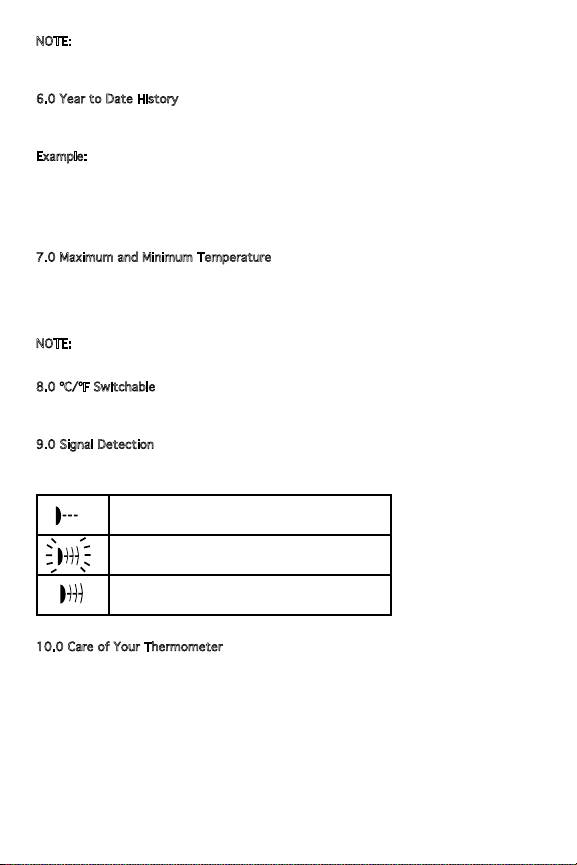
9.0 Signal Detection
The signal indicator on the monitor will display the following in the outdoor
temperature window:
No Signal Detected
Signal Detected
Successful Reception
10.0 Care of Your Thermometer
• Avoid exposing the thermometer to extreme temperatures, water or severe shock.
• Avoid contact with any corrosive materials such as alcohol, cleaning agents or
perfume.
• Do not subject the thermometer to excessive force, shock, dust, temperature or
humidity. Any of these conditions may shorten the life of the thermometer.
• Do not tamper with any of the internal components of this thermometer. This will
void the warranty and may cause damage.
5
11.0 Specifications
Temperature Measuring Range
Monitor -20°C to 70°C with 0.1°C resolution
-4°F to 158°F with 0.2°F resolution
Remote Sensor -50°C to 70°C with 0.1°C resolution
-58°F to 158°F with 0.2°F resolution
Temperature Checking Interval
Monitor Every 32 seconds
Remote Sensor Every 16 seconds
Power Source
(Alkaline batteries recommended)
Monitor 2 x AA batteries, 1.5V batteries
Remote Sensor 2 x AA batteries, 1.5V batteries
Battery life About 12 months
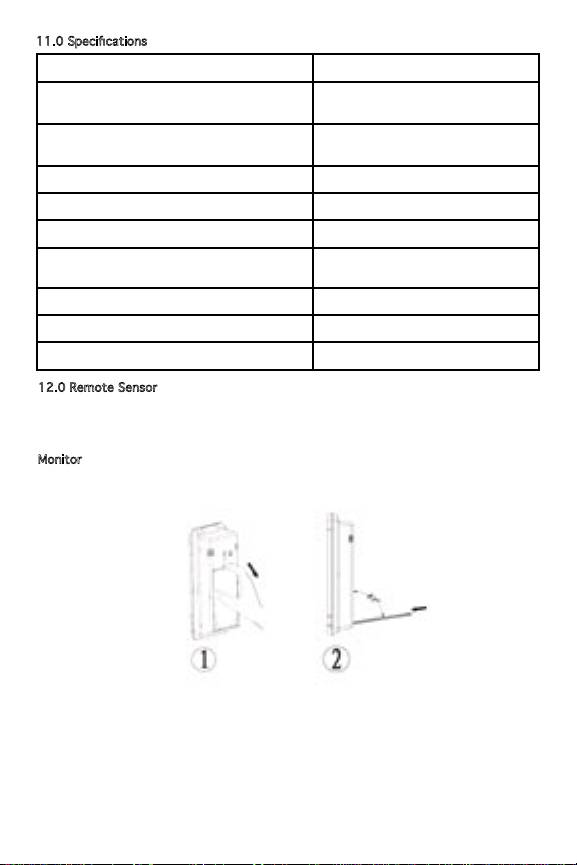
12.0 Remote Sensor
To prevent temperature interference, place the remote sensor away from direct
sunlight, air conditioning, and heater vents. The remote sensor is splash proof
designed, never immerse into water or expose to heavy rain.
Monitor
The monitor can be mounted on a wall or placed on any flat surface.
6
13.0 Disposal of the device (environment)
At the end of the product lifecycle, you should not throw this product
into the normal household garbage but bring the product to a collection
point for the recycling of electrical and electronic equipments. The
symbol on the product, user guide and/or box indicate this.
Some of the product materials can be re-used if you bring them to a
recycling point. By reusing some parts or raw materials from used products you make an
important contribution to the protection of the environment. Please contact your local
authorities in case you need more information on the collection points in your area.
Batteries must be removed before disposing of the device.
Dispose of the batteries in an environmental manner according to your country
regulations.
14.0 Warranty
Warranty period
The Topcom units have a 24-month warranty period. The warranty period starts on the
day the new unit is purchased.
Consumables or defects causing a negligible effect on operation or value of the
equipment are not covered.
The warranty has to be proven by presentation of the original purchase receipt, on
which the date of purchase and the unit-model are indicated.
Warranty handling
A faulty unit needs to be returned to a Topcom service centre including a valid purchase
note.
If the unit develops a fault during the warranty period, Topcom or its officially appointed
service centre will repair any defects caused by material or manufacturing faults free
of charge.
Topcom will at its discretion fulfill its warranty obligations by either repairing or
exchanging the faulty units or parts of the faulty units. In case of replacement, colour
and model can be different from the original purchased unit.
The initial purchase date shall determine the start of the warranty period. The warranty
period is not extended if the unit is exchanged or repaired by Topcom or its appointed
service centres.
Warranty exclusions
Damage or defects caused by incorrect treatment or operation and damage resulting
from use of nonoriginal parts or accessories not recommended by Topcom are not
covered by the warranty.
The warranty does not cover damage caused by outside factors, such as lightning,
water and fire, nor any damage caused during transportation.
No warranty can be claimed if the serial number on the units has been changed, removed
or rendered illegible.
7
Оглавление
- Indoor/Outdoor Memory Thermometer
- Thermomètre intérieur/extérieur avec mémoire Mode dʼemploi
- Binnen-/buitenthermometer met geheugen
- Innen- / Außenthermometer mit Speicherfunktion
- Termómetro de interior / exterior con memoria
- Innendørs/utendørs Termometer med minne
- Inomhus-/utomhus- termometer med minne
- Indendørs/udendørs Termometer med hukommelse
- Wewnętrzny i zewnętrzny Termometr z pamięcią
- Термометр с памятью для измерений в помещении/вне помещения
