Mitsubishi Electric Pro 930SB: инструкция
Раздел: Компьютерная техника, комплектующие, аксессуары
Тип: Монитор
Инструкция к Монитору Mitsubishi Electric Pro 930SB
User’s Manual
Uivatelská pøíruèka
Bedienungsanleitung
Ïäçãßåò ×ñÞóçò
Manual del usuario
Manuel de l’utilisateur
Manuale utente
Gebruikershandleiding
Podrêcznik u¿ytkownika
Ðóêîâîäñòâî ïîëüçîâàòåëÿ
Kullanécé Klavuzu
SB
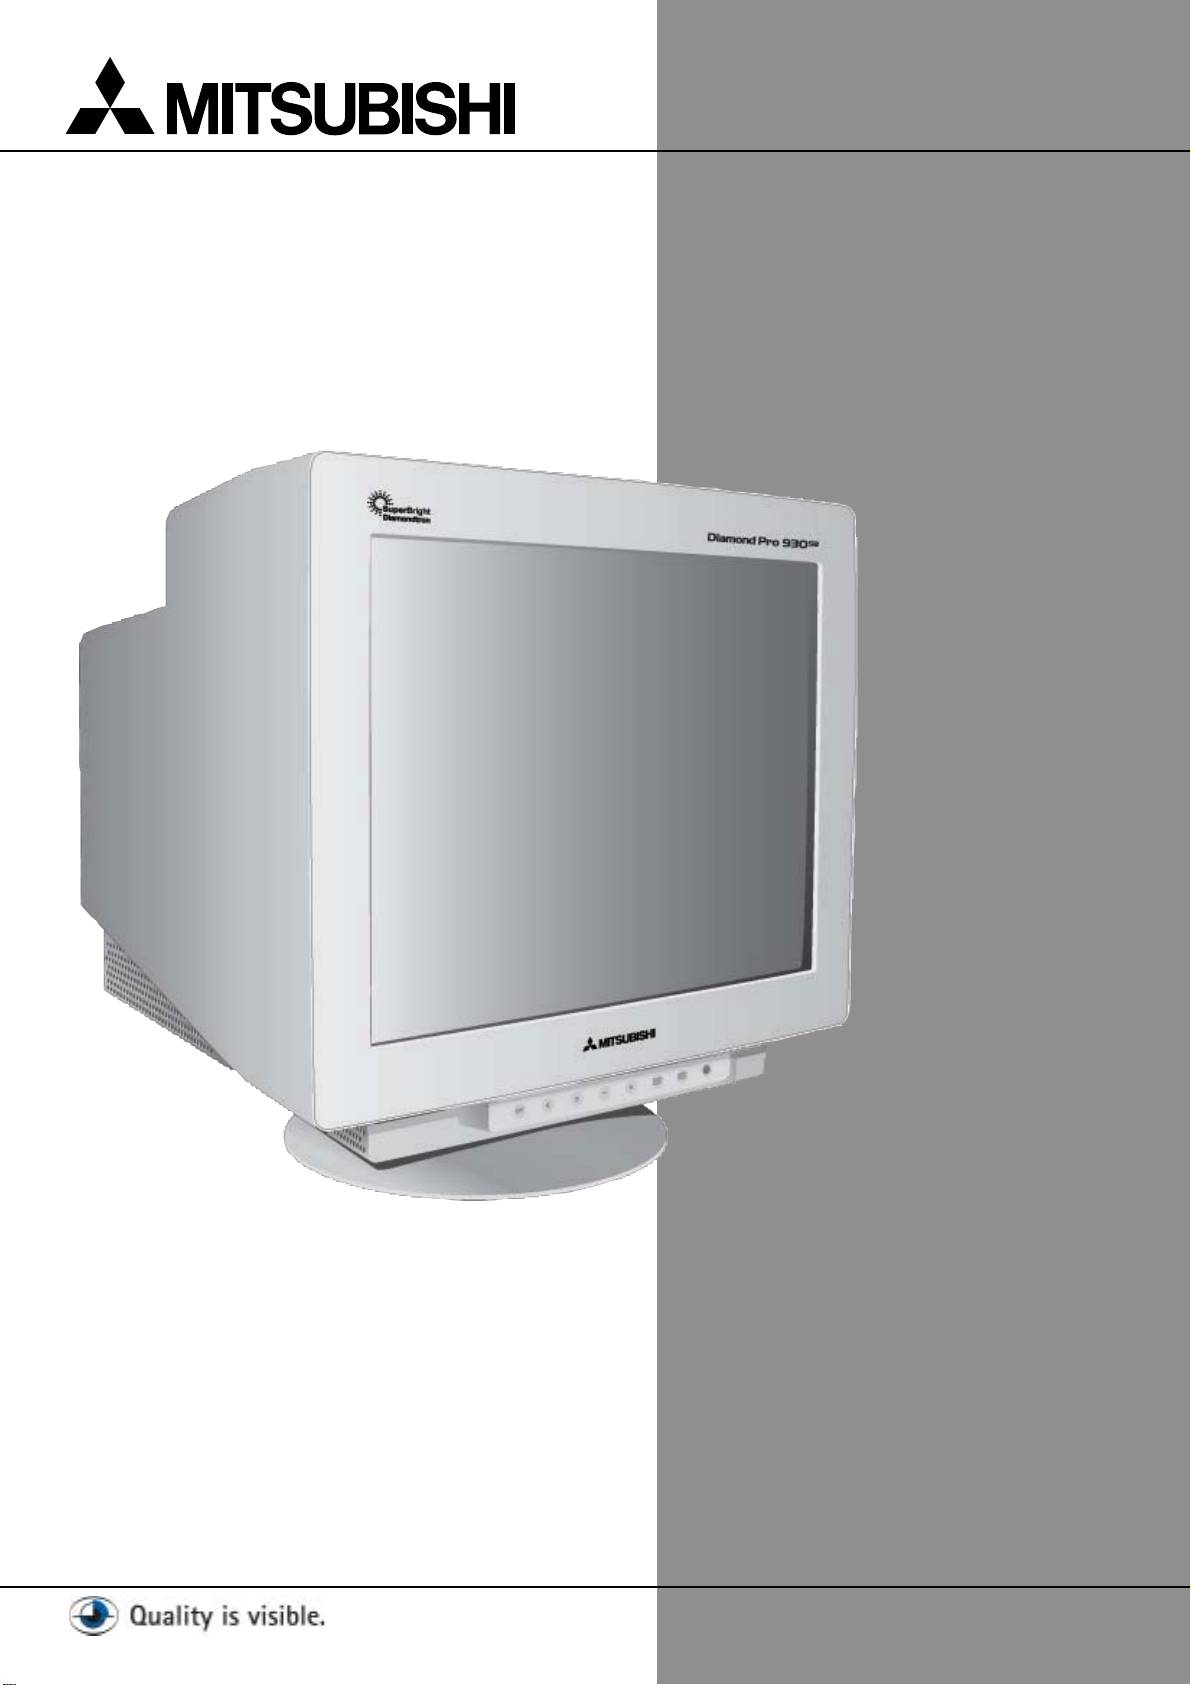
Diamond Pro 930
www.nec-mitsubishi.com
FCC Information
SB
1. Use the attached specified cables with the Diamond Pro 930
colour monitor so as not to interfere with radio and television
reception.
(1) Please use the supplied power cord or equivalent to ensure FCC compliance.
(2) Shielded captive type signal cable.
Use of other cables and adapters may cause interference with radio and television reception.
2. This equipment has been tested and found to comply with the limits for a Class B digital device, pursuant to part 15 of the FCC Rules.
These limits are designed to provide reasonable protection against harmful interference in a residential installation. This equipment gener-
ates, uses, and can radiate radio frequency energy, and, if not installed and used in accordance with the instructions, may cause harmful
interference to radio communications. However, there is no guarantee that interference will not occur in a particular installation. If this
equipment does cause harmful interference to radio or television reception, which can be determined by turning the equipment off and on,
the user is encouraged to try to correct the interference by one or more of the following measures:
• Reorient or relocate the receiving antenna.
• Increase the separation between the equipment and receiver.
• Connect the equipment into an outlet on a circuit different from that to which the receiver is connected.
• Consult your dealer or an experienced radio/TV technician for help.
Changes or modifications not expressly approved by the party responsible for compliance could void the user ’s authority to operate the
equipment.
If necessary, the user should contact the dealer or an experienced radio/television technician for additional suggestions. The user may find the
following booklet, prepared by the Federal Communications Commission, helpful: ”How to Identify and Resolve Radio-TV Interference Prob-
lems.“ This booklet is available from the U.S. Government Printing Office, Washington, D.C., 20402, Stock No. 004-000-00345-4.
DECLARATION OF CONFORMITY
This device complies with Part 15 of FCC Rules. Operation is subject to the following two conditions. (1) This device may not cause
harmful interference, and (2) this device must accept any interference received, including interference that may cause undesired operation.
U.S. Responsible Party: NEC-Mitsubishi Electronics Display of America, Inc.
Address: 1250 N. Arlington Heights Road
Itasca, Illinois 60143
Tel.No.: (630) 467-3000
Type of Product: Computer Monitor
Equipment Classification: Class B Peripheral
Models: N2901
We hereby declare that the equipment specified above
conforms to the technical standards as specified in the FCC Rules.
IBM is registered trademark of International Business Machines Corporation. Apple and Macintosh are registered trademarks of
Apple Computer Inc. Microsoft and Windows are registered trademarks of the Microsoft Corporation.
ENERGYSTAR is a U.S. registered trademark. All other trademarks or registered trademarks are property of their respective owners.
2

User’s Manual English
Uivatelská pøíruèka Èesky
Bedienungsanleitung Deutsch
Ïäçãßåò ×ñÞóçò ÅëëçíéêÜ
Manual del usuario Español
Manuel de l’utilisateur Français
Manuale utente Italiano
Gebruikershandleiding Nederlands
Podrêcznik u¿ytkownika Polski
Ðóêîâîäñòâî ïîëüçîâàòåëÿ Ðóññêèé
Kullanécé Klavuzu Türkçe
3
WARNING
CAUTION
TO PREVENT FIRE OR SHOCK HAZARDS, DO NOT EXPOSE THIS UNIT TO
RISK OF ELECTRIK SHOCK • DO NOT OPEN
RAIN OR MOISTURE. ALSO, DO NOT USE THIS UNIT'S POLARIZED PLUG
WITH AN EXTENSION CORD RECEPTACLE OR OTHER OUTLETS UNLESS
CAUTION: TO REDUCE THE RISK OF ELECTRIC SHOCK, DO NOT REMOVE
THE PRONGS CAN BE FULLY INSERTED.
COVER (OR BACK). NO USER SERVICEABLE PARTS INSIDE. REFER
REFRAIN FROM OPENING THE CABINET AS THERE ARE HIGH VOLTAGE
SERVICING TO QUALIFIED SERVICE PERSONNEL.
COMPONENTS INSIDE. REFER SERVICING TO QUALIFIED SERVICE
This symbol warns user that uninsulated voltage within the unit may have
PERSONNEL.
sufficient magnitude to cause electric shock. Therefore, it is dangerous to
make any kind of contact with any part inside this unit.
This symbol alerts the user that important literature concerning the operation
and maintenance of this unit has been included. Therefore, it should be read
English
carefully in order to avoid any problems.
SB
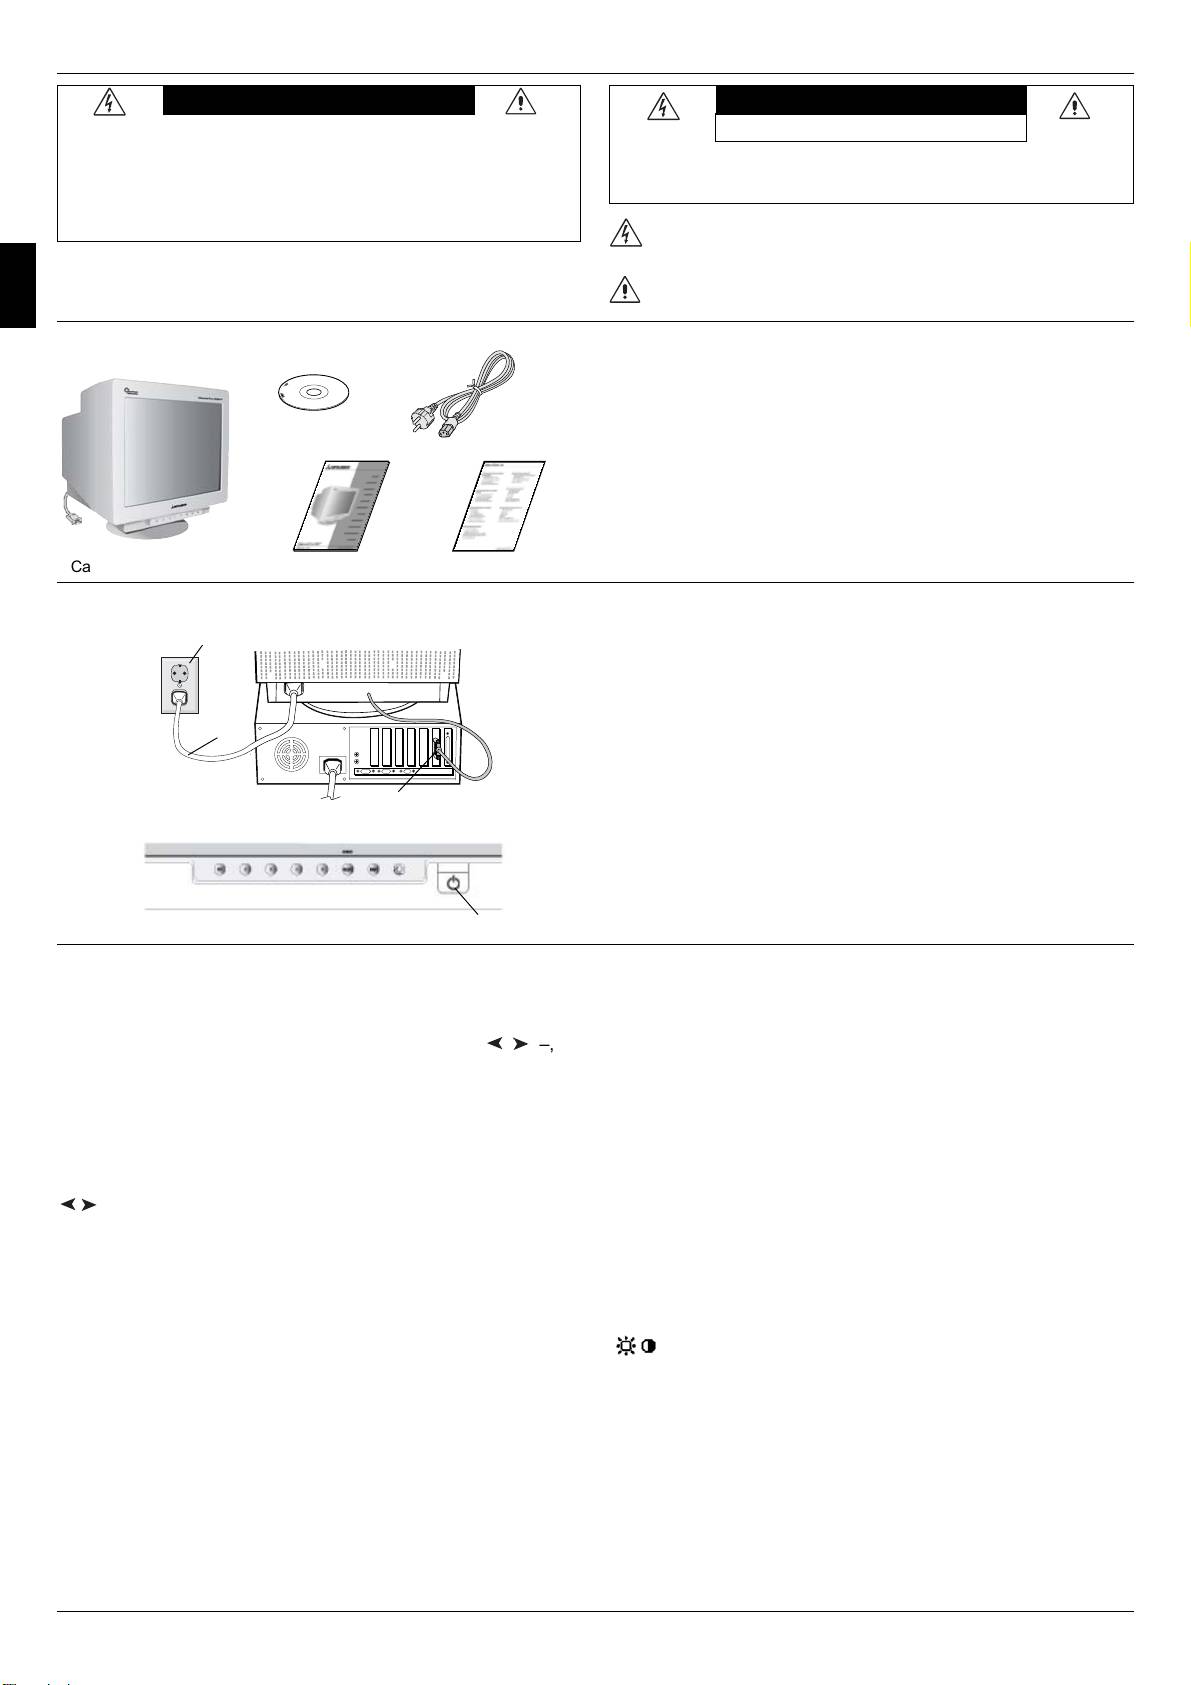
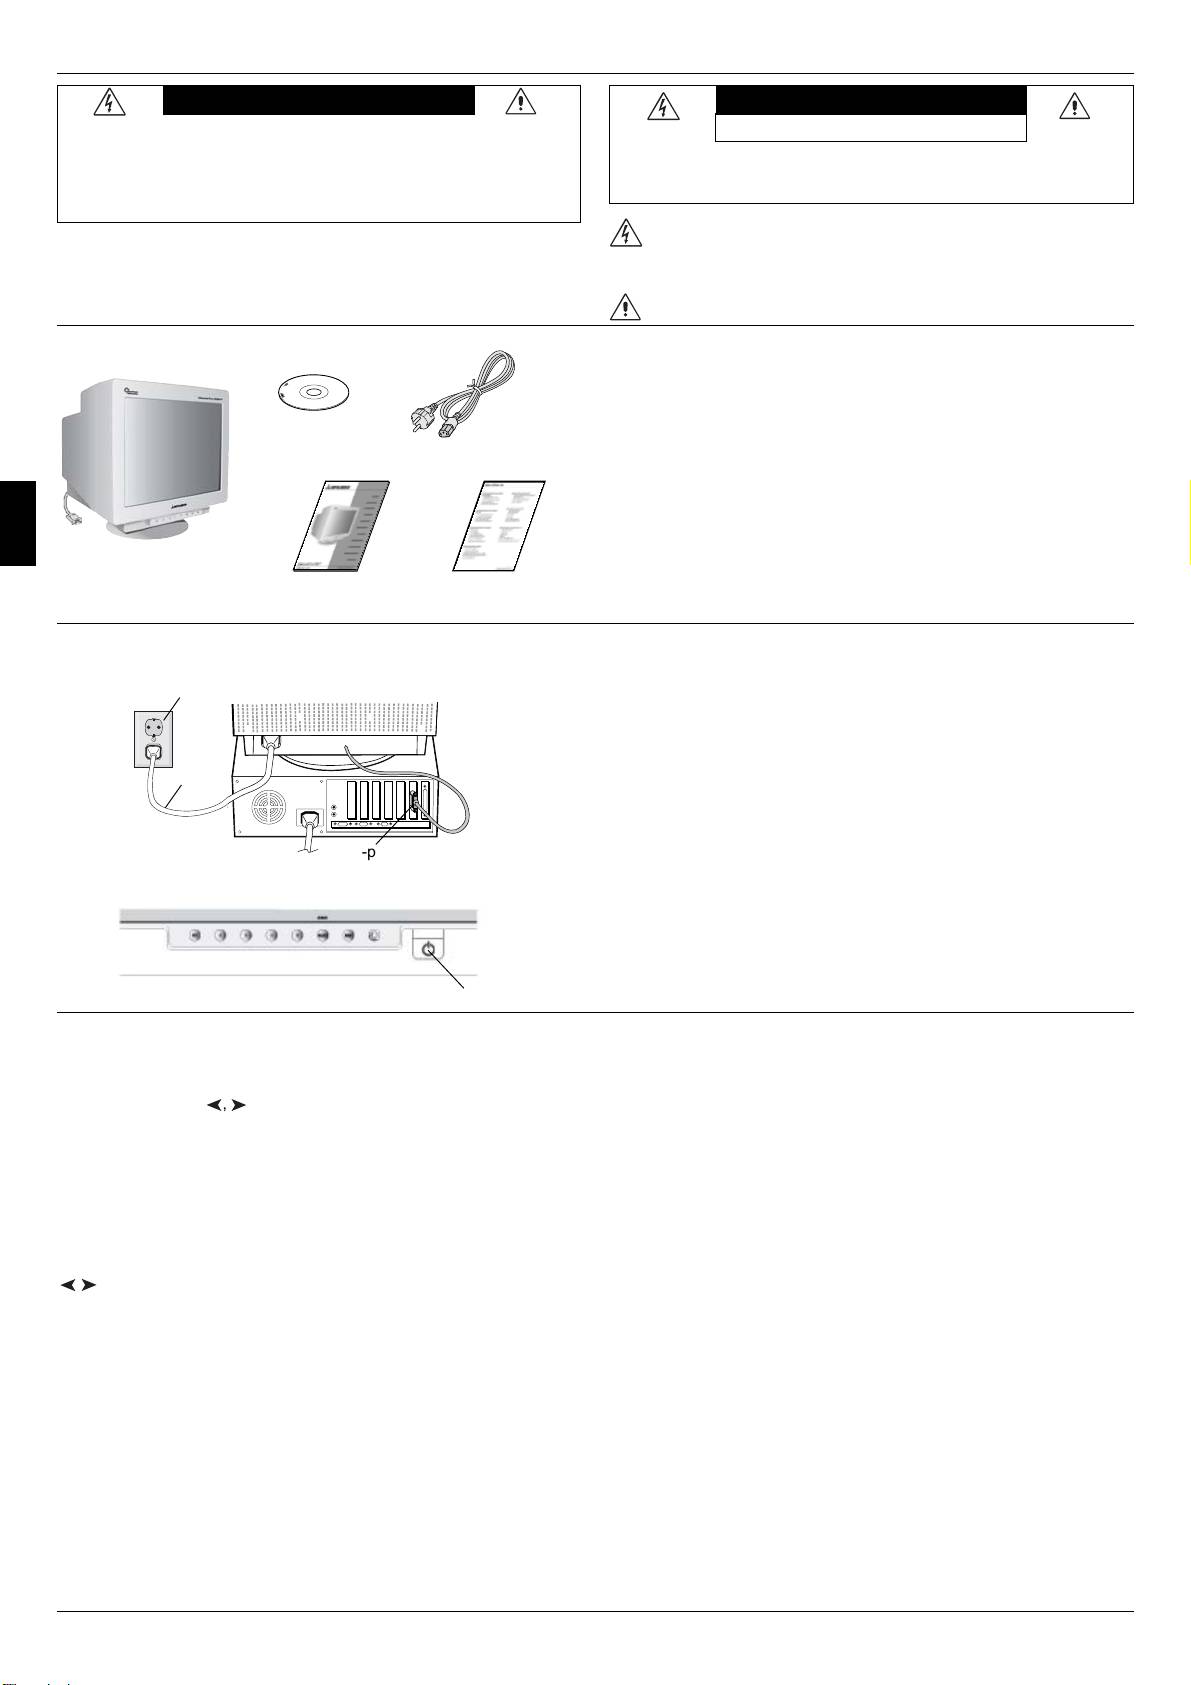
Contents
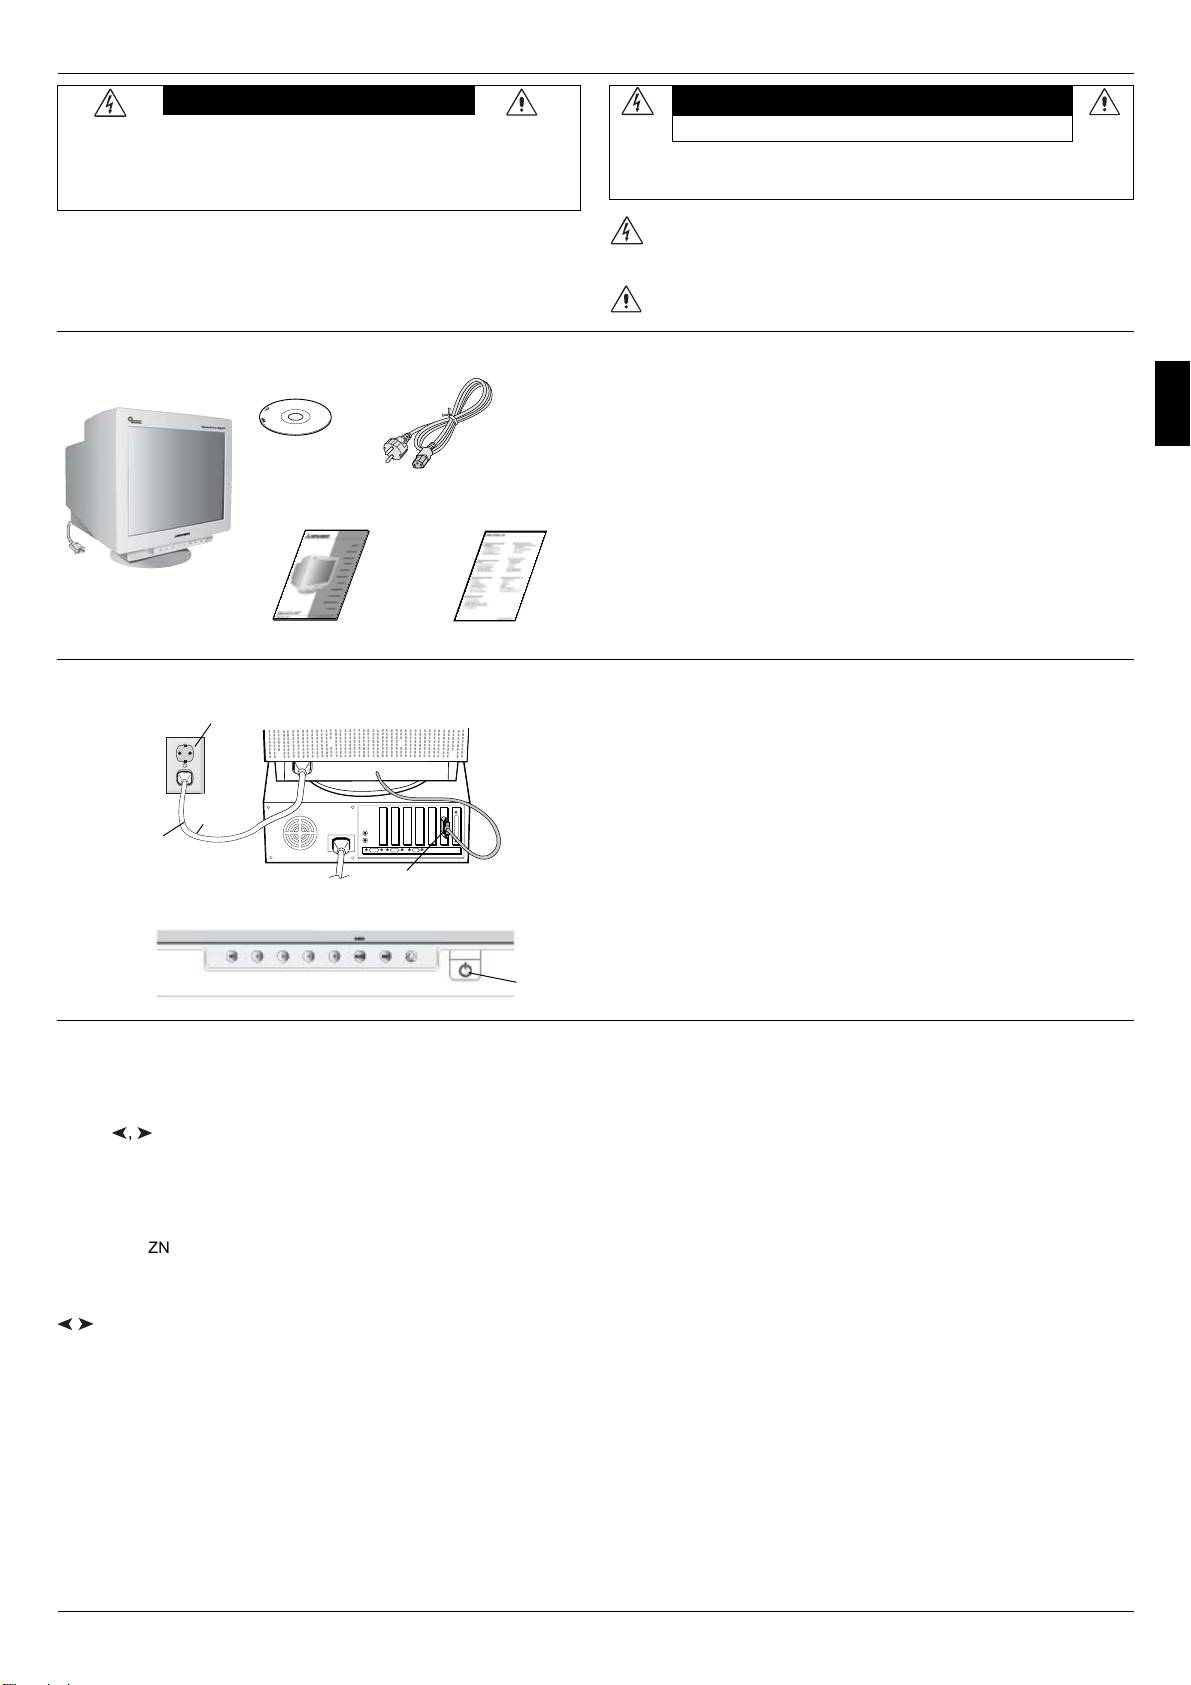
Diamond Pro 930
monitor box* should contain the following:
SB
• Diamond Pro 930
Monitor with tilt/swivel base
• Power cord
• Captive Signal Cable
• User ’s manual
• Sales Office List
• CD ROM – Includes complete User’s Manual in PDF format
and Windows related files (INF file and colour profile). To see
the complete User’s Manual, Acrobat Reader 4.0 must be
installed at your PC.
* Remember to save your original box and packing material to
Captive Signal Cable
User’s manual
transport or ship the monitor.
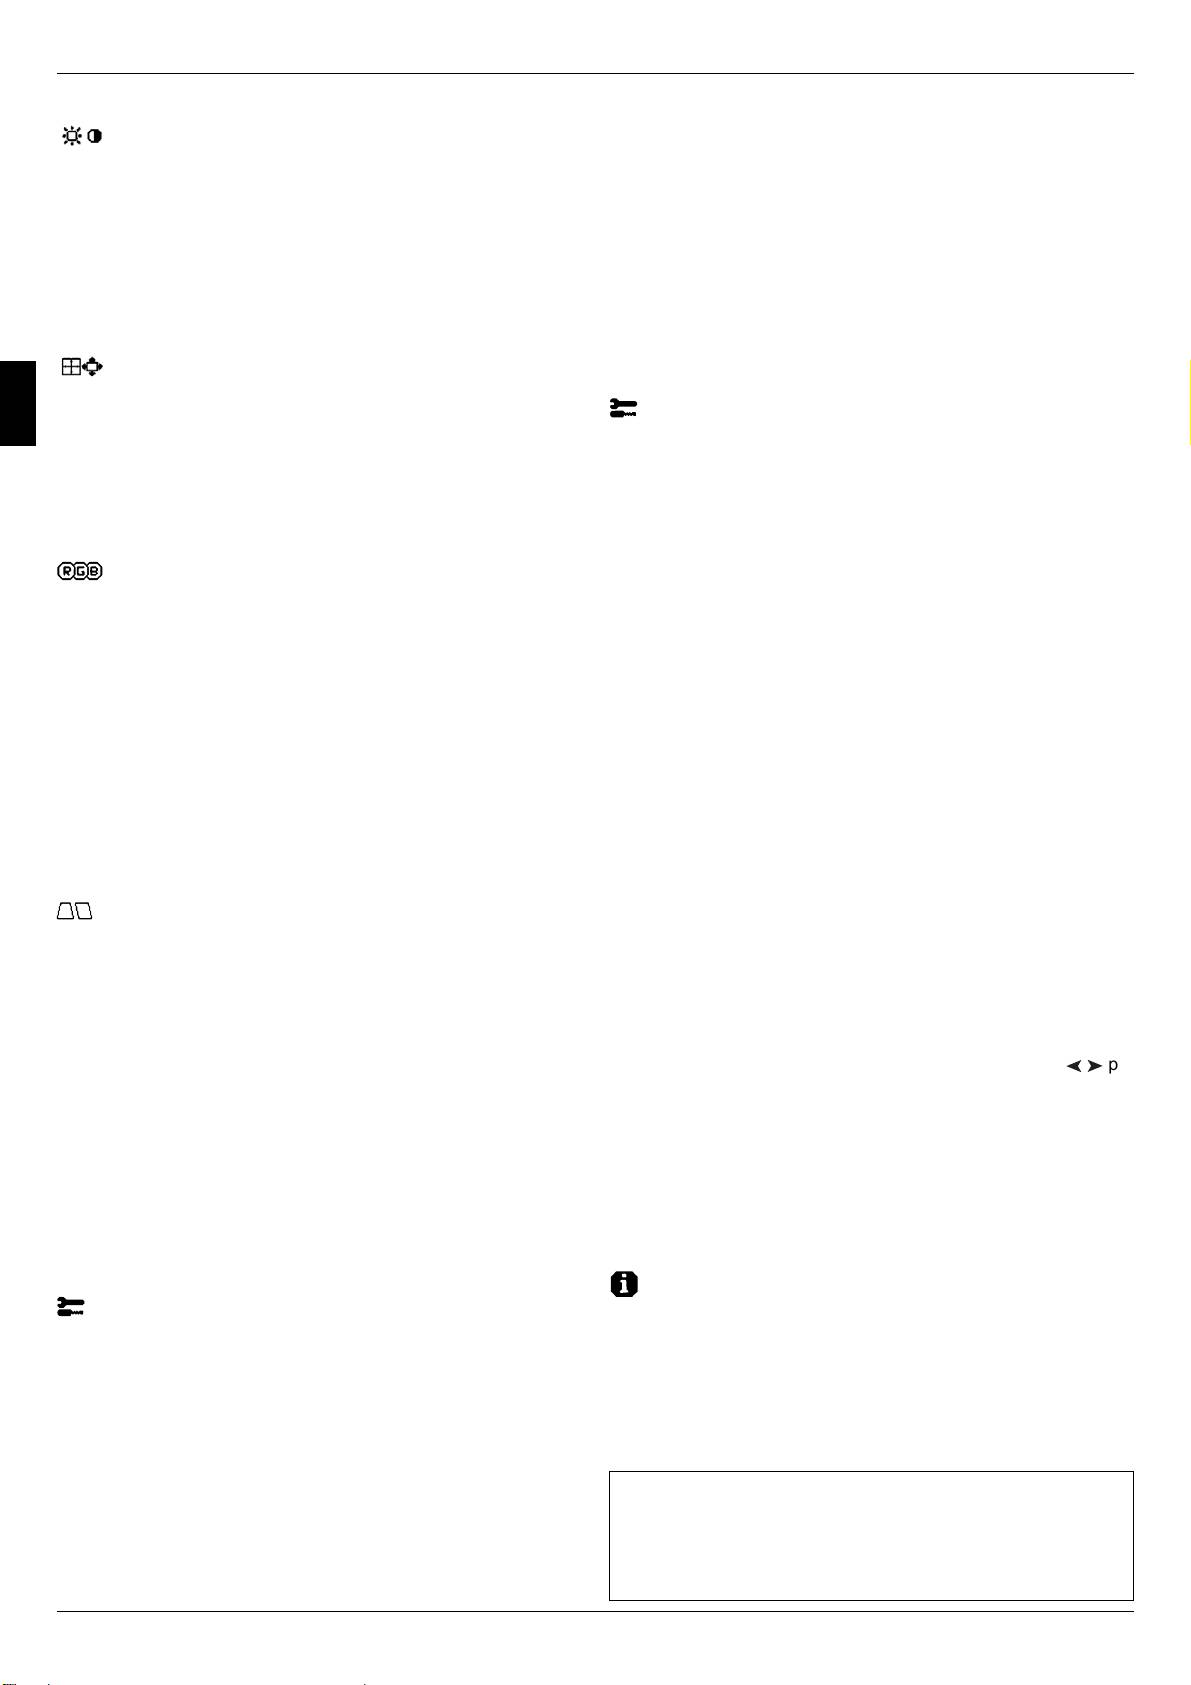
SB
To attach the Diamond Pro 930
monitor to your system, follow
Quick Start
these instructions:
Power Outlet
1. Turn off the power to your computer and
SB
Diamond Pro 930
monitor.
2. If necessary, install the display card. For more information, refer
to the display card manual.
3. For PC: Connect the 15-pin mini D-SUB of the captive signal
cable to the connector for the display card in your system (Figure A).
Tighten all screws.
SB
4. Connect one end of the power cord to the Diamond Pro 930
monitor and the other end to the power outlet (Figure A).
5. Turn on the monitor (Figure B) and the computer.
6. The Windows 95/98/2000/Me/XP INF file for your monitor can be
found on the CD-ROM, delivered with the monitor.
7. This completes the installation.
NOTE: If you need more information, please refer to complete
User's Manual in CD ROM.
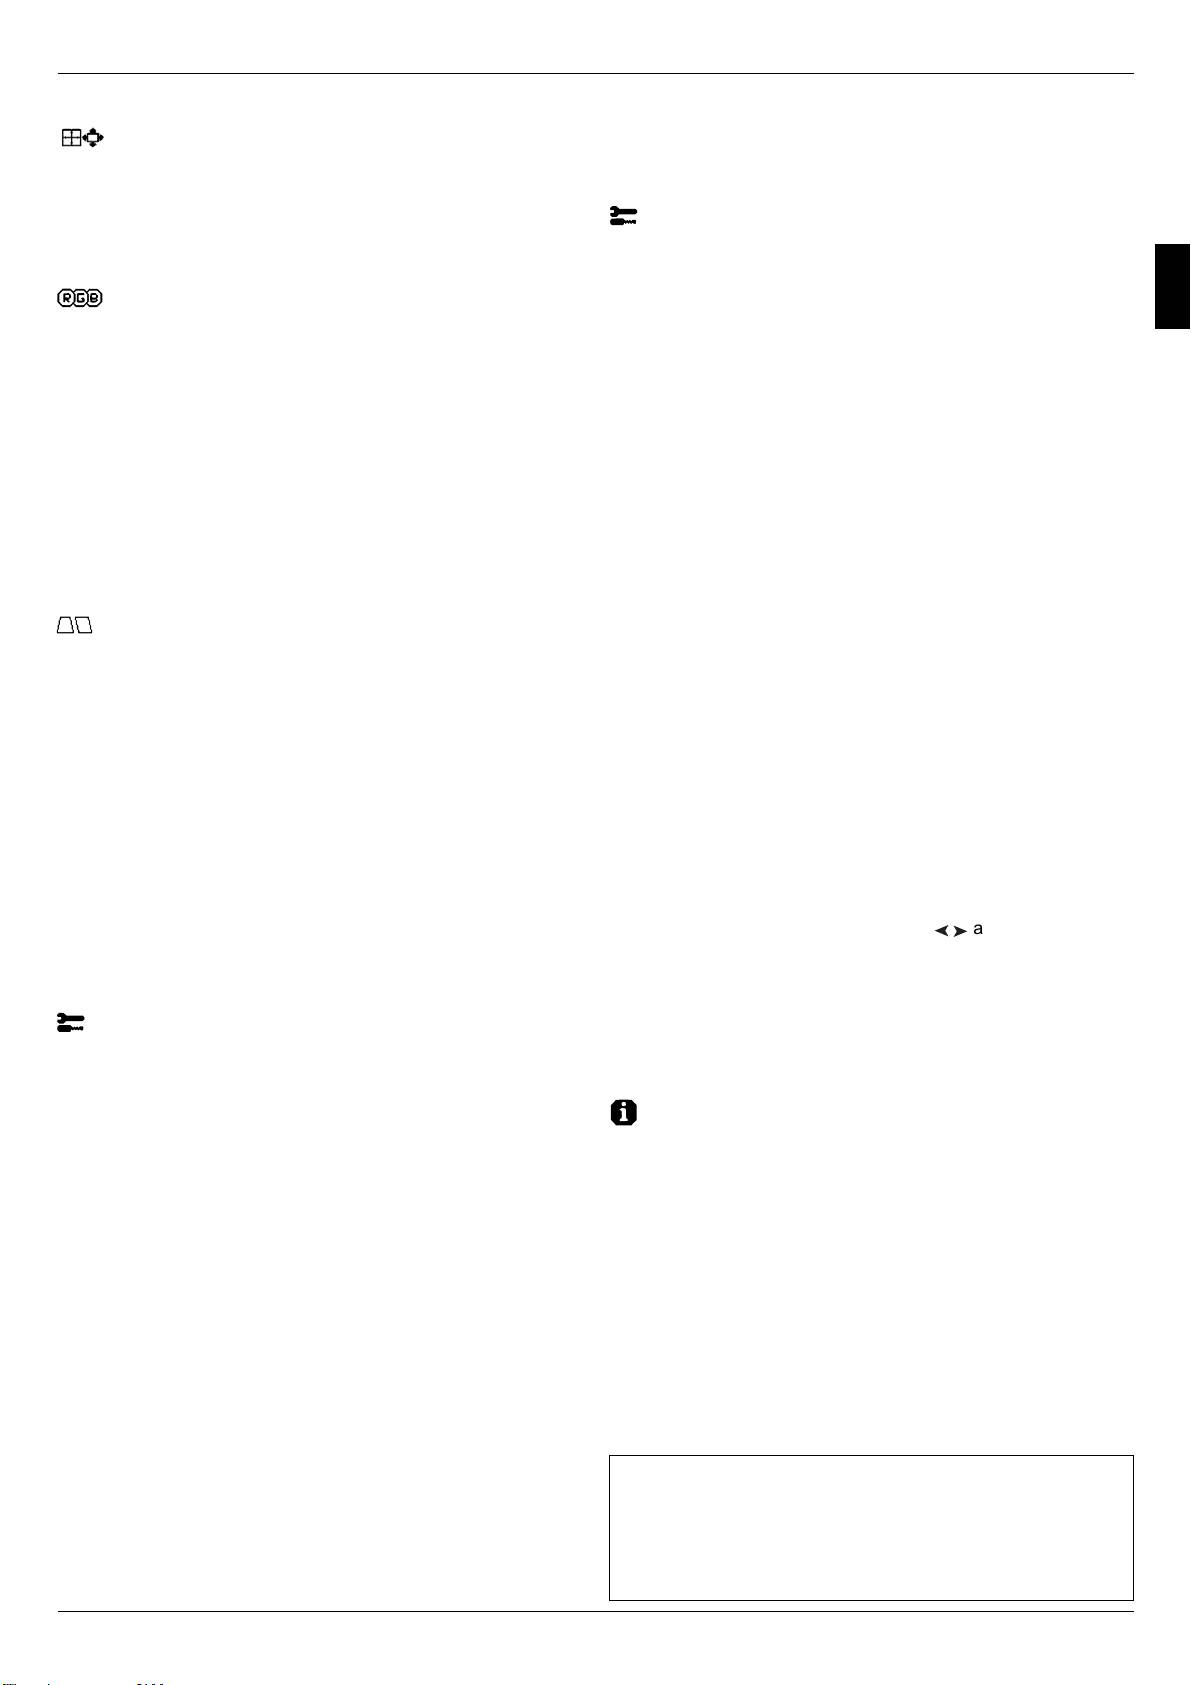
Controls
OSM (On-Screen Manager) control buttons on the front of the
monitor function as follows:
To access OSM press any of the control buttons (EXIT,
Main Menu
Sub-Menu
EXIT
Exits the OSM menu.
Exits to the OSM con-
trols main menu.
Y
/
Y
4
Y
/
,
/
Power Cord
CD ROM
Sales Office List
Power
Cord
15-pin mini D-SUB
Figure A
Figure B
Power Button
Main Menu Sub-Menu
each SB Mode is adjusted by appropriate color
control except for the sRGB mode whose color
setting cannot be adjusted. When the unit is turned
off, it will reset to SB off mode.
Y
, –, +).
Super Bright Mode OFF: for text based images
(normal use)
Super Bright Mode-1 ON: for images
Super bright Mode-2 ON: for moving image such
as DVD movies
Note: Deactivates the OSM menu and activates the OSM
menu when the OSM is turned off.
RESET Resets all the controls
Resets the highlighted
within the highlighted menu
control to the factory
CONTROL Moves the highlighted
Moves the highlighted
to the factory setting.
setting.
area left/right to select
area left/right to select
one of the sub-menus.
one of the controls.
Note: When RESET is pressed in the main and sub-
menu, a warning window will appear allowing
Note: Deactivates the OSM menu and to adjust Bright-
you to cancel the reset function.
ness with Hot key set “ON”
CONTROL
Has no function. Moves the bar in the - or
When Hot key function is set to “ON”, accessing the OSD is only possible
–/+
+ direction to decrease
with the “EXIT” button.
or increase the adjust-
ment.
Brightness/Contrast Controls
Note: Deactivates the OSM menu and to adjust Contrast
with Hot key set “ON”
Brightness: Adjusts the overall image and background screen
SELECT/
Enters sub-menu. Has no function.
brightness.
SBMODE
Contrast: Adjusts the image brightness in relation to the background.
Note: When the OSM is off, it will act as the SuperBright
(SB) function key. User can select between SB
Degauss: Eliminates the buildup of stray magnetic fields which
MODE OFF, SB MODE1, and SB MODE2. The first
alter the correct scan of the electron beams and affect the purity of
time this key is pressed, the current SB Mode is
the screen colours, focus and convergence. When activated, your
indicated. Within a 3 second window, if this key is
selected again, the SB MODE will change to the
screen image will jump and waver a bit as the screen is
next SB MODE. For example, the current mode is
demagnetized.
SB MODE OFF, the key is pressed twice within a
Caution: Please allow a minimum of 20 minutes to elapse between
3 second time frame, the SB MODE will change to
SB MODE1 and so on. The color temperature at
uses of the Degauss Control.
Controls – continued
RIGHT), use the –/+ control buttons to fine tune the GlobalSync
corrections.
Size and Position Controls
NOTE: Mitsubishi recommends that you perform GlobalSync
Left/Right: Moves the image horizontally (left or right).
correction while running a typical application such as a
spreadsheet or text document.
Down/Up: Moves the image vertically (up or down).
Narrow/Wide: Decreases or increases the horizontal size of the
Tools 2
image.
Language: OSM controls menus are available in 6 languages.
Short/Tall: Decreases or increases the vertical size of the image.
OSM Position: You can choose where you would like the
OSM controls menu to appear on your screen. Selecting
Color Control System
OSM Position allows you to manually adjust the OSM controls menu
English
Colour presets selects the desired colour setting. The bar is replaced
position from among Center, Top left, Top right, Bottom left and Bottom
by the colour setting choice. Each colour setting is adjusted at the
right.
factory to the stated Kelvin. If a setting is adjusted, the name of the
OSM Turn Off: The OSM controls menu will stay on as long as it is in
setting will change from Kelvin to Custom except sRGB mode.
use. In the OSM Turn Off sub-menu, you can select how long the
Red, Green, Blue: Color Control System decreases or increases
monitor waits after the last touch of a button for the OSM controls
the monitor’s red, green or blue colour guns depending upon which
menu to disappear. The preset choices are 5 thru 120 seconds.
is selected. The change in colour will appear on screen and the
OSM Lock Out: This control completely locks out access to all OSM
direction (decrease or increase) will be shown by the bars.
controls functions except Brightness and Contrast. When attempting
sRGB mode: sRGB mode provides the suitable colour managed
to activate OSM controls while in the lock out mode, a screen will
picture image. You can not change Red, Green and Blue colours,
appear indicating that OSM controls are locked out. To activate the
brightness and contrast individually.
OSM Lock Out function, press SELECT and hold + down
Colour Temperature Adjustment: Adjusts the colour temperature
simultaneously. To deactivate the OSM Lock Out, press SELECT
of the screen image.
and hold + down simultaneously.
Geometry Controls
IPM System Off Mode:
Geometry Controls Menu
Enable: The IPM System works normally and all stages of energy
savings are utilized.
The Geometry controls allow you to adjust the curvature or angle of
the sides of your display.
Disable: The Off Mode of the IPM System is not used.
Sides In/Out (pincushion): Decreases or increases the curvature
NOTE: For standard systems and graphics boards, keep the factory
of the sides either inward or outward.
setting at ENABLE.
Sides Left/Right (pincushion balance): Decreases or increases
NOTE: Do not keep the monitor on when ‘No Signal’ is applied.
the curvature of the sides either to the left or right.
This could cause image burn-in on the screen due to the
‘No Signal’ message being displayed.
Sides Tilt (parallelogram): Decreases or increases the tilt of the
sides either to the left or right.
EdgeLock Control: Operating your monitor at a nonstandard timing
may cause images to appear darker than normal or have color
Sides Align (trapezoidal): Decreases or increases the bottom of
distortion. Use of the EdgeLock control will adjust images to their
the screen to be the same as the top.
normal state.
Rotate (raster rotation): Rotates the entire display clockwise or
Y
Hot Key: This selection allows you to use
/
Y
as brightness control
counterclockwise.
and –/+ as contrast control. When Hot key function is set to “ON”,
Corner Correction: Allows you to adjust the geometry of the corners
accessing the OSD is only possible with the “EXIT” button.
of your display – Top or Bottom.
Factory Preset: Selecting Factory Preset allows you a reset most
Tools 1
OSM control settings back to the factory settings. A warning statement
will appear to confirm that you do want to reset ALL settings. Individual
Moiré Canceler: Moiré is a wavy pattern which can sometimes
settings can be reset by highlighting the control to be reset and
appear on the screen. The pattern is repetitive and superimposed
pressing the RESET button.
as rippled images. When running certain applications, the wavy
pattern is more evident than in others. To reduce moiré, adjust the
Information
level by using –/+ CONTROL buttons.
Display Mode: Indicates the current mode and frequency setting of
Linearity: This selection allows you to adjust the spacing of the
the monitor.
area on the screen. The purpose of this control is to ensure that a
Monitor Info: Indicates the model and serial numbers of your monitor.
one-inch circle is a true one-inch circle wherever it is on the screen.
Refresh Notifier: A message will advise you if the refresh rate of the
The best way to determine the vertical linearity is as follows:
signal being applied to the monitor by the computer is too low. For
• Draw equally spaced horizontal lines using a drawing applica-
further information, please refer to your display card or system
tion that has a ruler.
manual.
• Use the Vertical Balance control to adjust the lines near the top
and bottom of your screen.
• Use the LINEARITY (VER.) control to adjust the spacing between
the lines near the center and top of your screen.
Convergence: Aligns all three colors (R,G,B) to form a single color
(white). The purpose of this control is to ensure that a white line
drawn on the screen is as crisp and clear as possible.
• Use the CONVERGENCE (HOR.) control to adjust the alignment of
the lines in the up/down direction.
ENERGYSTAR Product
• Use the CONVERGENCE (VER.) control to adjust the alignment of
As an ENERGYSTAR Partner,
the lines in the left/right direction.
NEC-Mitsubishi Electronics Display of America, Inc. has
GlobalSync Control: Eliminates picture impurities that may result
determined that this product meets the E
NERGYSTAR guidelines for
from the earth’s magnetic field. While in the sub-menus
energy efficiency. The E
NERGYSTAR emblem does not represent
(GLOBALSYNC, TOP LEFT, TOP RIGHT, BOTTOM LEFT or BOTTOM
EPA endorsement of any product or service.
5
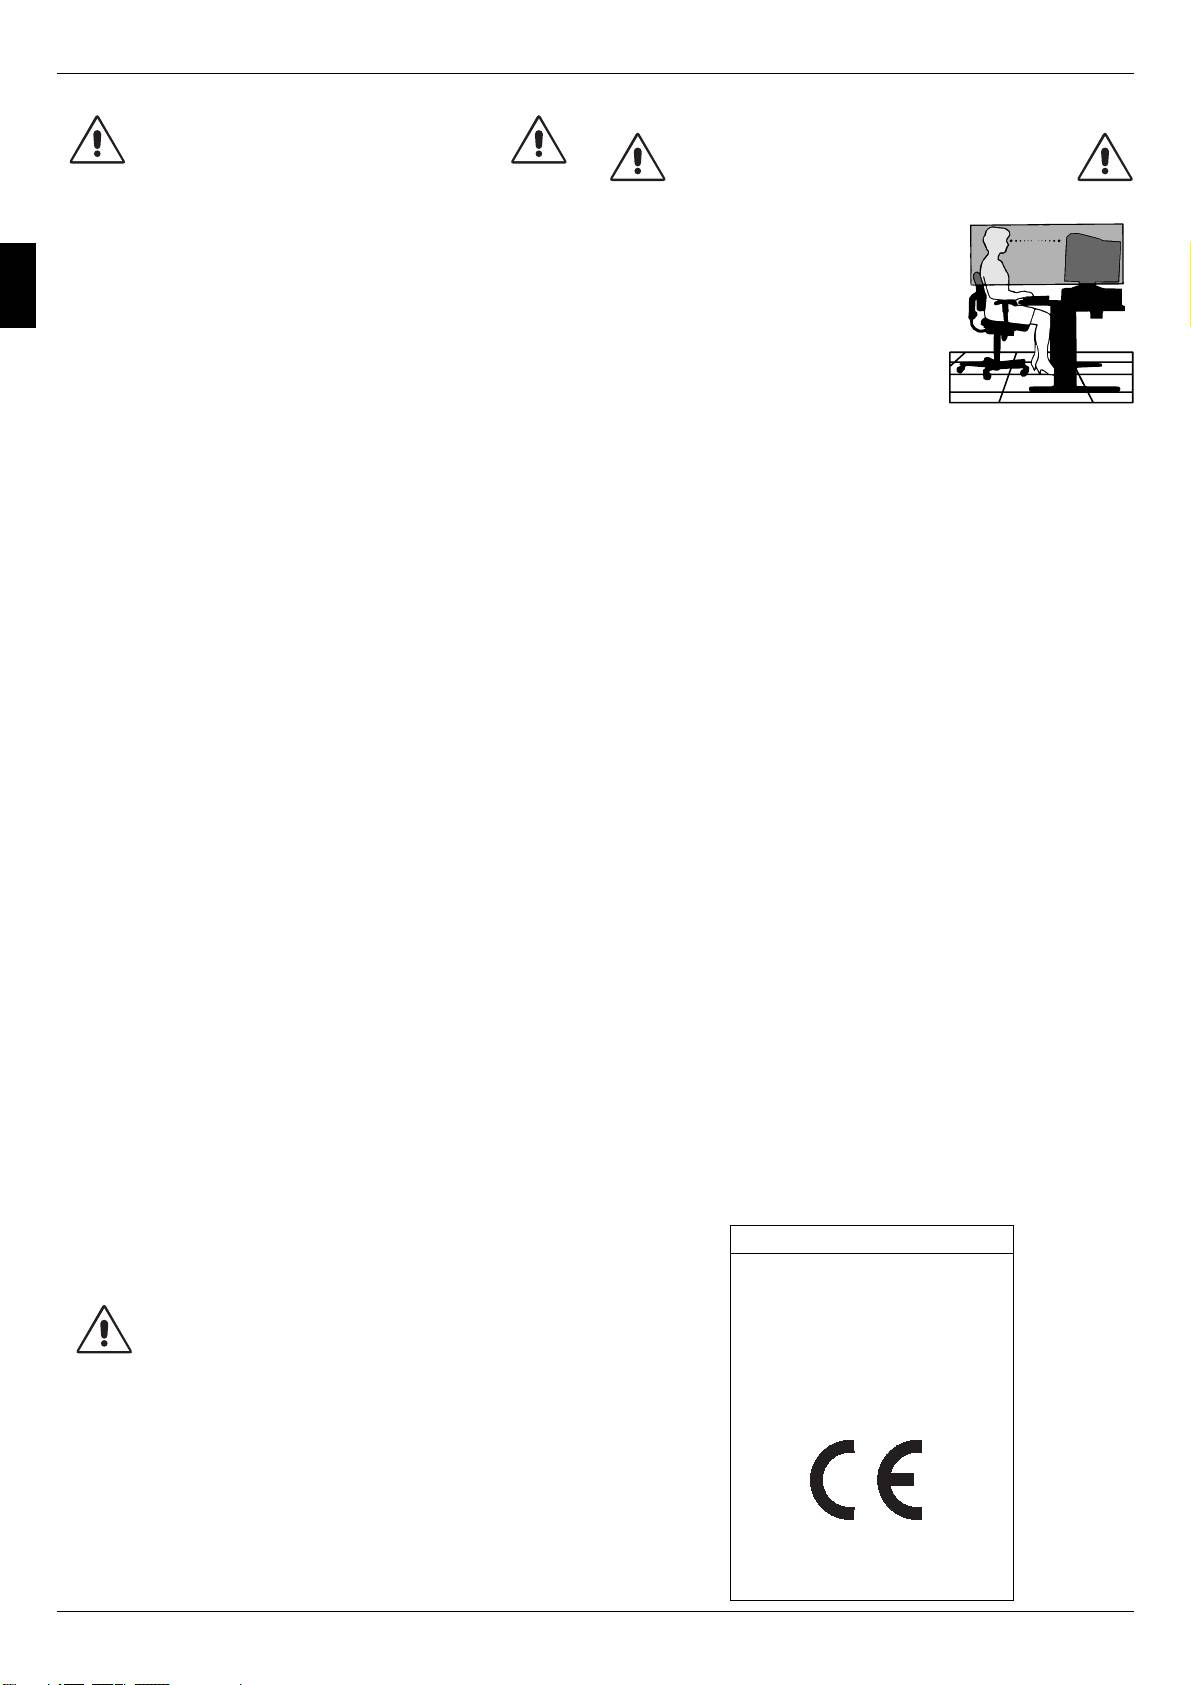
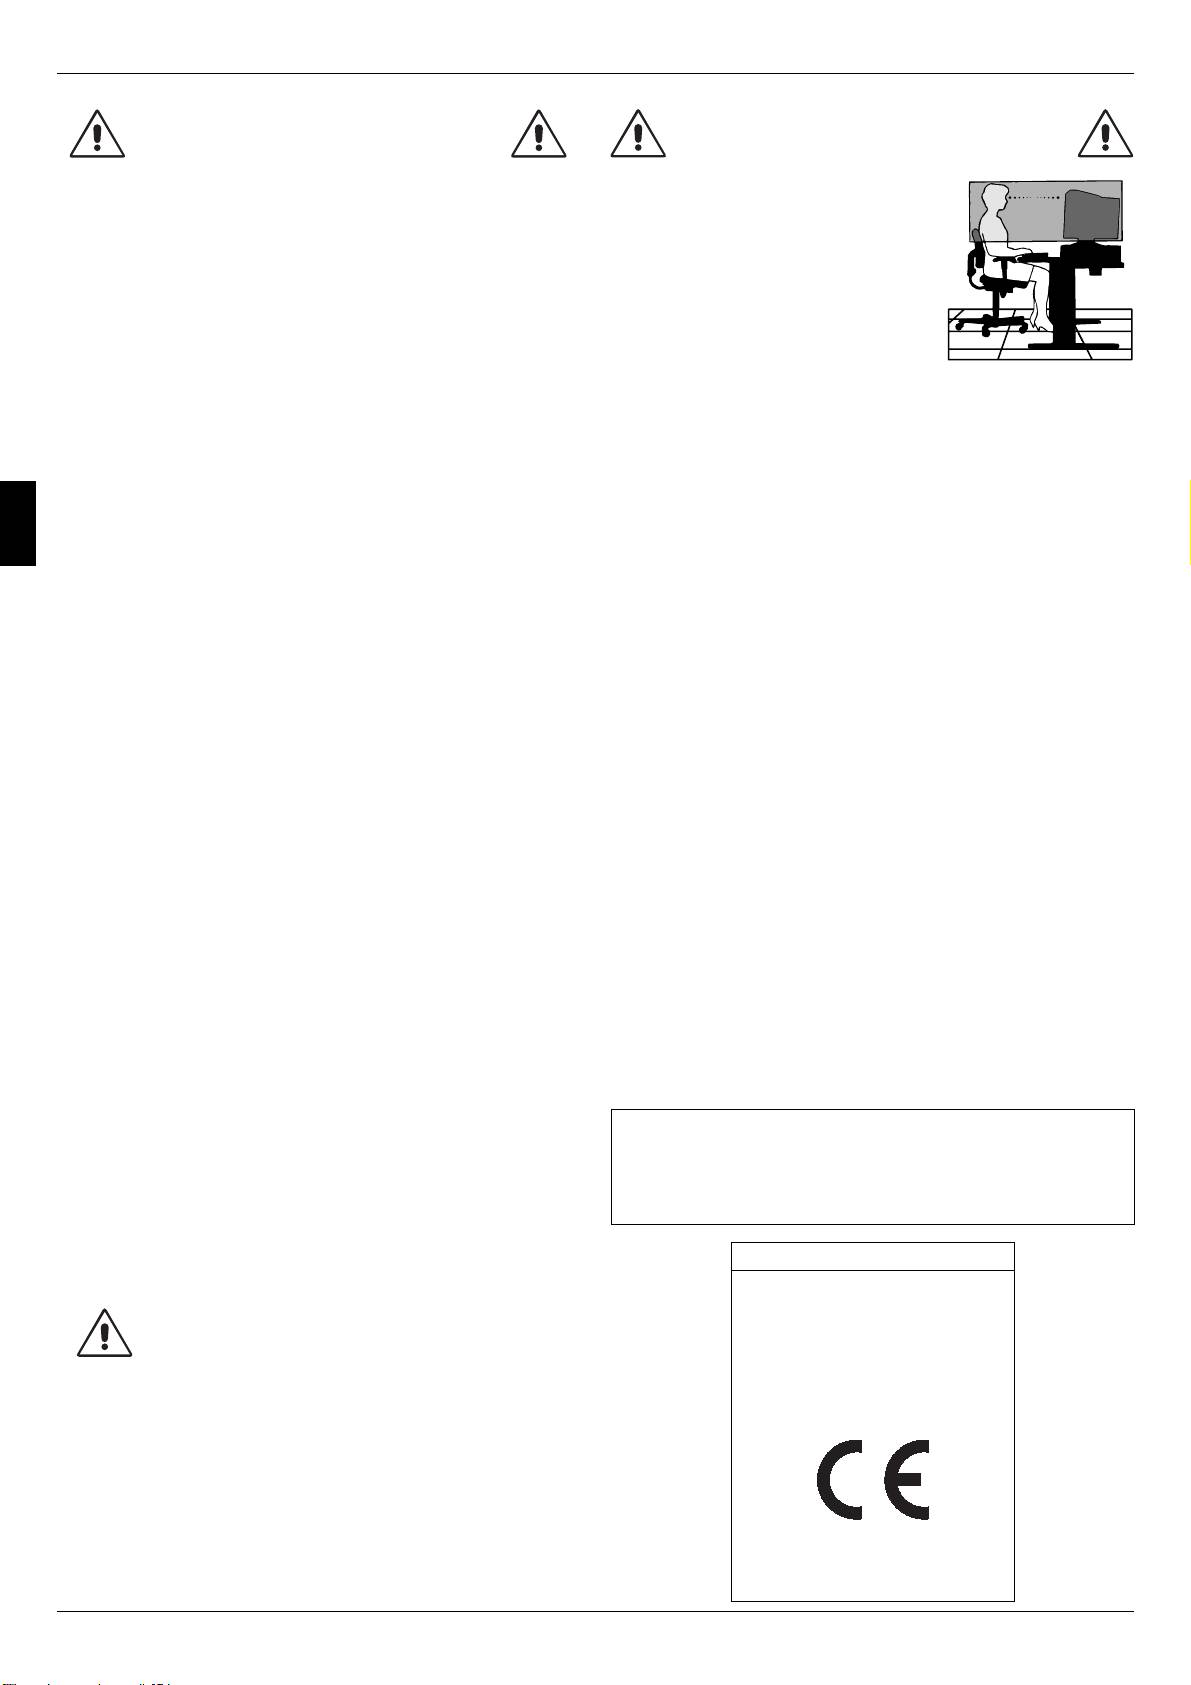
Recommended use
CORRECT PLACEMENT AND ADJUSTMENT
Safety Precautions and Maintenance:
OF THE MONITOR CAN REDUCE EYE,
SHOULDER AND NECK FATIGUE. CHECK
THE FOLLOWING WHEN YOU POSITION
• DO NOT OPEN THE MONITOR. There are no user serviceable
THE MONITOR:
parts inside and opening or removing covers may expose you
to dangerous shock hazards or other risks. Refer all servicing
• Adjust the monitor height so that the
to qualified service personnel.
top of the screen is at or slightly be-
• Use the monitor in a clean, dry area.
low eye level. Your eyes should look
• Do not spill any liquids into the cabinet or use your monitor
slightly downward when viewing the
English
near water.
middle of the screen.
• Do not insert objects of any kind into the cabinet slots, as they
• Position your monitor no closer than
may touch dangerous voltage points, which can be harmful or
40 cm and no further away than
fatal or may cause electric shock, fire or equipment failure.
60 cm from your eyes. The optimal
• Do not place any heavy objects on the power cord. Damage to
distance is 50 cm.
the cord may cause shock or fire.
• Rest your eyes periodically by focus-
• Do not place this product on a sloping or unstable cart, stand
ing on an object at least 6 m away. Blink often.
or table, as the monitor may fall, causing serious damage to
• Position the monitor at a 90° angle to windows and other light
the monitor.
sources to minimize glare and reflections. Adjust the monitor
• To separate the equipment from the power source you have to
tilt so that ceiling lights do not reflect on your screen.
remove the plug from the inlet socket.
• If reflected light makes it hard for you to see your screen, use
• In the UK, use a BS-approved power cord with a molded plug
an anti-glare filter.
having a black (5 A) fuse installed for use with this monitor. If a
• Adjust the monitor’s brightness and contrast controls to en-
power cord is not supplied with this monitor, please contact
hance readability.
your supplier.
• Use a document holder placed close to the screen.
SB
• When operating the Diamond Pro 930
with the AC 100 - 240
• Position whatever you are looking at most of the time (the screen
V power source in EU countries except UK, use the power cord
or reference material) directly in front of you to minimize turning
supplied.
your head while you are typing.
• Get regular eye checkups.
Cleaning Your Monitor
Ergonomics
A special coating is provided on the glass (CRT) surface of this
To realize the maximum ergonomic benefits, we recommend the
monitor to reduce a reflection and static electricity on the glass
following:
surface. Due to the delicate coating on the glass surface, use a
lint-free, non-abrasive cloth (cotton or equivalent) and a non-
• Adjust the Brightness until the background raster disappears.
alcohol, neutral, non-abrasive cleaning solution to minimize dust.
• Do not position the Contrast controls to its maximum setting.
If the screen requires more than a light cleaning, apply a soft
• Use the preset Size and Position controls with standard
neutral detergent and water directly to a soft cloth and use it upon
signals.
wringing water, to clean the glass surface. Clean your monitor
• Use the preset Colour Setting and Sides Left/Right controls.
regularly.
• Use non-interlaced signals with a vertical refresh rate between
75 - 160 Hz.
CAUTION: The following agents will cause damage to the CRT
• Do not use primary colour blue on a dark background, as it is
when cleaning the glass surface: Benzene, thinner, acid/alkaline
difficult to see and may produce eye fatigue due to insufficient
detergent, alcohol detergent, detergent with abrasive powder,
contrast.
detergent with anti-static agent, detergent for cleaning.
• Keep the monitor away from high capacity transformers, electric
Immediately unplug your monitor from the power outlet and refer
motors and other devices such as external speakers or fans,
servicing to qualified service personnel under the following
which may create strong magnetic fields.
conditions:
• If possible, position the monitor so that it is facing the east to
• When the power supply cord or plug is damaged.
minimize the effects of the earth ’s magnetic field.
• If liquid has been spilled, or objects have fallen into the moni-
• Changing the direction of the monitor while it is powered on
tor.
may cause image discolouration. To correct this, turn the
• If the monitor has been exposed to rain or water.
monitor off for 20 minutes before powering it back on.
• If the monitor has been dropped or the cabinet damaged.
• If the monitor does not operate normally by following operating
instructions.
Declaration of the Manufacturer
• Allow adequate ventilation around the monitor so
We hereby certify that the colour monitors
that heat can properly dissipate. Do not block venti-
Diamond Pro 930
SB
lated openings or place the monitor near a radiator
is in compliance with
Council Directive 73/23/EEC:
or other heat sources. Do not put anything on top of
– EN 60950
the monitor.
Council Directive 89/336/EEC:
• The power cable connector is the primary means of
– EN 55022
CAUTION
– EN 61000-3-2
detaching the system from the power supply. The
– EN 61000-3-3
monitor should be installed close to a power outlet
– EN 55024
which is easily accessible.
and marked with
• Handle with care when transporting. Save packag-
ing for transporting.
NEC-Mitsubishi Electric Visual Systems Corporation
686-1, NISHIOI OI-MACHI
ASHIGARAKAMI-GUN
KANAGAWA 258-8533, JAPAN
6
VAROVÁNÍ
UPOZORNENÍ
CHRAŇTE ZAŘÍZENÍ PŘED DEŠTĚM A VLHKEM. ZABRÁNÍTE TAK NEBEZPEČÍ POŽÁRU
RIZIKO ÚRAZU ELEKTRICKÝM PROUDEM • NEOTVÍRAT
NEBO ÚRAZU ELEKTRICKÝM PROUDEM. POLARIZOVANOU ZÁSTRČKU JEDNOTKY
NEPOUŽÍVEJTE VE SPOJENÍ SE ZÁSUVKOU PRODLUŽOVACÍ ŠŇŮRY NEBO JINÝMI
UPOZORNĚNÍ: Z DŮVODU SNÍŽENÍ RIZIK ÚRAZU ELEKTRICKÝM PROUDEM
ZÁSUVKAMI, POKUD KOLÍKY NELZE ZCELA ZASUNOUT.
NEODNÍMEJTE KRYT (NEBO ZADNÍ ČÁST). UVNITŘ SE NENACHÁZEJÍ DÍLY, DO KTERÝCH
UVNITR ZARÍZENÍ SE NACHÁZÍ VYSOKONAPETOVÉ KOMPONENTY, PROTO SKRÍN
UŽIVATEL MŮŽE ZASAHOVAT. SERVIS SVĚŘTE KVALIFIKOVANÉ OSOBĚ.
NEOTEVÍREJTE. SERVIS SVĚŘTE KVALIFIKOVANÉ OSOBĚ.
Tento symbol upozorňuje uživatele na neizolované napětí v rámci jednotky,
jehož intenzita může být dostatečně vysoká, aby způsobila úraz elektrickým
proudem. Jakýkoli kontakt s libovolným dílem uvnitř jednotky je proto
nebezpečný.
Tento symbol upozorňuje uživatele na důležitou literaturu týkající se provozu
a údržby jednotky dodanou společně s tímto zařízením. Chcete-li předejít
problémům, doporučujeme pečlivé pročtení příslušných materiálů.
SB
V balení* monitoru Diamond Pro 930
by se měly
Obsah
nacházet následující položky:
SB
• Monitor Diamond Pro 930
s naklápěcím a otočným
podstavcem
Česky
Napájecí šňůra
• Napájecí šňůra
CD ROM
• Statický signální kabel
• Uživatelská příručka
• Sales Office List
• CD-ROM obsahuje kompletní uživatelskou příručku ve formátu
PDF a soubory pro systém Windows (soubor INF a barevný
Statický
profil). Pro zobrazení kompletní uživatelské příručky musíte mít
signální kabel
na počítači nainstalovanou aplikaci Acrobat Reader 4.0.
*Původní karton a balicí materiál si uschovejte pro případnou
Uživatelská příručka Sales Office List
přepravu monitoru.
SB
Monitor Diamond Pro 930
připojíte k systému
Rychlý start
následujícím postupem:
Elektrická zásuvka
SB
1. Vypněte počítač a monitor Diamond Pro 930
.
2. V případě nutnosti nainstalujte grafickou kartu. Další informace
naleznete v příručce grafické karty.
3. PC: V systému připojte 15kolíkovou minizástrčku D-SUB
signálního kabelu ke konektoru grafické karty (Obrázek A).
Dotáhněte všechny šrouby.
Napájecí
4. Připojte napájecí šňůru jedním koncem k monitoru
SB
šňůra
Diamond Pro 930
a druhý konec zapojte do elektrické zásuvky
15kolíková
(Obrázek A).
Obrázek A
minizástrčka D-SUB
5. Zapněte monitor (Obrázek B) a počítač.
6. Soubor INF systému Windows 95/98/2000/Me/XP pro monitor
se nachází na disku CD-ROM, který je součástí dodávky.
7. Tím je instalace dokončena.
Hlavní
POZNÁMKA: Více informací naleznete v kompletní uživatelské
Obrázek B
vypínač
příručce na CD ROM.
Ovládací prvky
Hlavní nabídka Dílčí nabídka
Uživatel si může vybrat mezi funkcemi VYPNUTÝ
Ovládací tlačítka OSM (On-Screen Manager) na přední straně
REŽIM SB, REŽIM SB 1 a REŽIM SB 2. Při prvním
monitoru mají následující funkce:
stisknutí tlačítka je indikován aktuální režim SB.
Pro přístup k OSM stiskněte kterékoliv ovládací tlačítko
Pokud tlačítko stisknete znovu během tří sekund,
Y
(EXIT,
,
Y
, –, +).
změní se daný REŽIM SB na další REŽIM SB.
Pokud je například aktuální režim VYPNUTÝ
Hlavní nabídka
Dílčí nabídka
REŽIM SB a tlačítko je stisknuto dvakrát během
EXIT (Konec)
Ukončí nabídku OSM.
Výstup do hlavní
tří sekund, změní se REŽIM SB na REŽIM SB 1,
nabídky ovládacích
atd. Teplota barvy v každém režimu SB se serizuje
prvků OSM.
pomocí príslušného ovládání barev kromě režimu
sRGB, jehož barevné nastavení nelze měnit. Když
POZNÁMKA: Ukončuje nabídku OSM, a aktivuje nabídku
je přístroj vypnut, nastaví se do režimu VYPNUTÝ
OSM, pokud je OSM vypnuto.
REŽIM SB.
CONTROL
Posunuje vyznačenou
Posunuje vyznačenou
Super Bright Mode OFF: pro textový obsah
(Ovládací prvek)
oblast vlevo nebo
oblast vlevo nebo
Y
(normální používání)
/
Y
vpravo a vybírá jednu
vpravo a vybírá jeden
z dílčích nabídek.
z ovládacích prvků.
Super Bright Mode-1 ON: pro obrázky
POZNÁMKA: Je-li nabídka OSM vypnuta, slouží k rychlému
Super Bright Mode-2 ON: pro pohyblivý obraz,
nastavení jasu.
například filmy na DVD
CONTROL
Bez funkce. Posunuje pruh
RESET (Obnovit) Všechny ovládací
Obnoví původní nasta-
(Ovládací prvek)
směrem udávaným
prvky v označené
vení vybraného
–/+
tlačítky – nebo + a tak
nabídce se vrátí do
ovládacího prvku na
snižuje nebo zvyšuje
původního nastavení
hodnotu nastavenou z
hodnotu nastavení.
od výrobce.
výroby.
POZNÁMKA: Deaktivuje nabídku OSM a – pokud je zapnuta
POZNÁMKA: Stisknete-li RESET v hlavní nebo dílčí nabídce,
rychlé volba – upravuje kontrast.
objeví se dialog s varováním, který umožní funkci
SELECT/SBMODE
Vstupuje do dílčí
Bez funkce.
“reset” zrušit.
(Vyber/SBMODE)
nabídky.
POZNÁMKA: Když je OSM vypnuto, bude sloužit jako funkční
Když je funkce tlačítka pro rychlý přístup Hot Key nastavena na
tlačítko funkce SuperBright (SB – “super jas”).
”ZAP”, přístup k OSD je možný pouze pomocí tlačítka ”EXIT”.
7
Konvergence: Promení všechny tři barvy (Č, Z, M), aby vytvořily
Ovládací prvky – pokračování
jednu barvu (bílou). Účelem této regulace je zajistit, že bílá čára
Prvky pro ovládání jasu a kontrastu
nakreslená na obrazovce je co nejostřejší a nejjasnější.
• Použijte ovládání KONVERGENCE (HOR.) pro úpravu
Brightness (Jas): Nastavuje celkový jas obrazu a pozadí obrazovky.
nasměrování čar ve směru nahoru / dolů.
Contrast (Kontrast): Nastavuje jas obrazu vzhledem k pozadí.
• Použijte ovládání KONVERGENCE (VER.) pro úpravu
Degauss (Demagnetizace): Zabraňuje tvoření náhodných
nasměrování čar ve směru doleva / doprava.
magnetických polí, která ruší správné snímání elektronových paprsků
GlobalSync Control (Ovladač GlobalSync): Eliminuje vady obrazu,
a má špatný vliv na čistotu barev, ostrost a konvergenci. Při aktivaci
které mohou být způsobeny magnetickým polem Země. Nacházíte-li
této funkce začne obraz skákat a vlnit se, protože obrazovka se
se v dílčích nabídkách (GLOBALSYNC, TOP LEFT, TOP RIGHT,
demagnetizuje.
BOTTOM LEFT nebo BOTTOM RIGHT), použijte ovládací prvky –/+
Upozornění: Funkci demagnetizace používejte s minimálním
pro jemné doladění korekcí GlobalSync.
časovým odstupem 20 minut.
OZNÁMKA: Společnost Mitsubishi doporučuje, aby se seřízení
GlobalSync provedlo se spuštěnou běžnou aplikací, jako je tabulkový
Prvky pro ovládání velikosti a polohy
nebo textový procesor.
Left/Right (Vlevo a vpravo): Posune obraz horizontálně (vlevo nebo
vpravo).
Tools 2 (Nástroje č. 2)
Česky
Down/Up (Nahoru a dolů): Posune obraz vertikálně (nahoru nebo
Language (Jazyk): Nabídka OSM je k dispozici v 6 jazycích.
dolů).
OSM Position (Poloha OSM): Na obrazovce lze zvolit
Narrow/Wide (Zúžit nebo rozšířit): Horizontální zmenšení nebo
požadovanou pozici nabídky ovládacích prvků OSM. Výběr polohy
zvětšení velikosti obrazu.
OSM umožňuje nastavit umístění ovládací nabídky OSM na střed,
vlevo nahoru, vpravo nahoru, vlevo dolů nebo vpravo dolů.
Short/Tall (Zkrátit a prodloužit): Zmenšení nebo zvětšení
vertikálního rozměru obrazu.
OSM Turn Off (Vypnutí OSM): Nabídka ovládacích prvků OSM
zůstane zobrazena, dokud se používá. V dílčí nabídce OSM Turn
Color Control System (Systém nastavení barev)
Off (Vypnutí OSM) lze nastavit prodlevu monitoru pro vypnutí
Přednastavené barvy slouží k výběru požadovaného nastavení barev.
nabídky ovládání OSM od posledního stisknutí tlačítka.
Lišta je nahrazena vybraným nastavením barev. Při výrobě je každému
Přednastavené volby jsou od 5 do 120 sekund.
barevnému nastavení přiřazena hodnota v jednotkách Kelvin. Při
OSM Lock Out (Uzamčení OSM): Tento ovládací prvek
úpravě nastavení se místo označení Kelvin objeví Custom (Vlastní),
znemožňuje přístup ke všem funkcím OSM, kromě jasu a
kromě režimu sRGB.
kontrastu. Při pokusu o aktivaci ovládání OSM v režimu uzamčení
Red, Green, Blue (Červená, zelená, modrá): Color Control System
se na obrazovce objeví sdělení, že funkce OSM jsou uzamčeny.
snižuje nebo zvyšuje intenzitu červené, zelené a modré na monitoru,
K uzamčení funkcí OSM, stiskněte a podržte současně tlačítka
a to podle toho, která je vybrána. Na obrazovce se objeví změna
SELECT a +. Ke zrušení uzamčení funkcí OSM, stiskněte a podržte
barvy a na lištách je vidět směr (zmenšení nebo zvětšení intenzity
současně tlačítka SELECT a +.
barev).
Režim systému IPM Off (IPM vypnuto):
Režim sRGB: Režim sRGB poskytuje obraz s vhodným nastavením
Enable (Aktivovat): Systém IPM je aktivní a používají se všechny
barev. Červenou, zelenou a modrou barvu, jas a kontrast nelze měnit
úrovně úspory energie.
samostatně.
Disable (Deaktivovat): Režim Off (Vypnuto) se u IPM nepoužívá.
Color Temperature Adjustment (Nastavení barevné teploty):
Nastavuje barevnou teplotu obrazu.
POZNÁMKA: U standardních systémů a grafických karet nastavení
ENABLE od výrobce neměňte.
Prvky pro ovládání geometrie
POZNÁMKA: Pokud používáte hlášení “No signal”, nenechávejte
Nabídka Geometry Controls (Prvky pro ovládání geometrie)
monitor zapnutý. Zobrazené hlášení “No Signal” by mohlo způsobit
Ovladače Geometrie umožňují nastavení zakřivení nebo zkosení
vypálení obrazu na obrazovku.
bočních stran zobrazení.
Ovládání EdgeLock: Používání vašeho monitoru při nestandardním
Sides In/Out (pincushion) (Strany dovnitř a ven /poduškovité
načasování může způsobovat, že obrázky budou vypadat tmavší než
zkreslení/): Zmenšuje nebo zvětšuje zaoblení zobrazení směrem
normálně nebo bude docházet k distorzi barev. Použití EdgeLock
dovnitř nebo ven.
upraví obrázky do jejich normálního stavu.
Y
Sides Left/Right (pincushion balance) (Strany vlevo a vpravo
Horká tlacítka: Tato volba vám umožňuje používat tlačítka
/
Y
pro
/vyrovnání zakřivení/): Zmenšuje nebo zvětšuje postranní
regulaci jasu a tlačítka –/+ pro regulaci kontrastu. Když je funkce
zaoblení doleva nebo doprava.
tlačítka pro rychlý přístup Hot Key nastavena na ”ZAP”, přístup k
Sides Tilt (parallelogram) (Naklonění stran /zkosení/):
OSD je možný pouze pomocí tlačítka ”EXIT”.
Zmenšuje nebo zvětšuje sklon stran doleva nebo doprava.
Factory Preset (Nastavení od výrobce): Volba Factory Preset
Sides Align (trapezoidal) (Vyrovnání stran /lichoběžníkové
umožňuje vrátit většinu nastavení ovládacích prvků OSM na hodnoty
zkreslení/): Vyrovnává spodní část obrazovky podle její horní části.
nastavené od výrobce. Objeví se dotaz s upozorněním, zda se chcete
Rotate (raster rotation) (Natočit /natočení rastru/): Natočí celou
vrátit k původnímu nastavení všech funkcí (ALL). Jednotlivá nastavení
obrazovku ve směru nebo proti směru hodinových ručiček.
lze vrátit na hodnoty nastavené od výrobce označením příslušného
ovládacího prvku a stisknutím tlačítka RESET.
Korekce rohú: Umožňuje vám upravit geometrii rohů vašeho
displeje – nahoře nebo dole.
Information (Informace)
Tools 1 (Nástroje č. 1)
Display Mode (Režim zobrazení): Ukáže aktuální nastavení režimu
Moiré Canceler (Zrušení moaré): Moaré je vlnitý vzorek, který se
a frekvence monitoru.
někdy objevuje na obrazovce. Vzorek se opakuje a překrývá jako
Monitor Info (Informace o monitoru): Zobrazí model monitoru a
zvlněné obrazy. V některých aplikacích je vlnitý vzorek zřetelnější.
jeho sériové číslo.
Pro snížení moaré nastavte úroveň pomocí ovládacích prvků –/+.
Refresh Notifier (Upozornění na obnovovací frekvenci): Je-li
Linearita: Tato volba vám umožňuje upravit mezery mezi řádky plochy
obnovovací frekvence monitoru příliš nízká, objeví se na obrazovce
na obrazovce. Účelem tohoto ovládání je zajistit, že jednopalcový
zpráva. Další informace najdete v příručce ke grafické kartě nebo
kroužek je opravdu jednopalcový, ať je umístěn kdekoli na obrazovce.
v příručce systému.
Nejlepší způsob, jak určit vertikální linearitu, je:
Výrobek ENERGYSTAR
• Nakreslete horizontální čáry, které budou stejně daleko od sebe,
s pomocí nějaké aplikace kreslení, která má pravítko.
Jako partner ENERGYSTAR,
• Použijte ovládání Vertikální vyrovnání pro úpravu čar v horní a
určila společnost NEC-Mitsubishi Electronics Display of America, Inc.,
spodní části obrazovky.
že tento produkt splňuje požadavky směrnic ENERGYSTAR pro efektivní
• Použijte ovládání LINEARITA (VER.) pro úpravu mezer mezi
využití energie. Znak ENERGYSTAR nepředstavuje schválení EPA pro
čarami u středu a v horní části obrazovky.
jakýkoli výrobek nebo služby.
8
Provozní pokyny
SPRÁVNÝM UMÍSTĚNÍM A NASTAVENÍM
Bezpečnostní opatření a údržba:
MONITORU MŮŽETE PŘEDEJÍT ÚNAVĚ OČÍ,
BOLESTEM RAMEN A ŠÍJE. PŘI UMÍSŤOVÁNÍ
MONITORU POSTUPUJTE PODLE
• MONITOR NEOTVÍREJTE. Uvnitř monitoru nejsou žádné
součástky, které by mohl uživatel ovládat. Při otvírání nebo
NÁSLEDUJÍCÍCH POKYNŮ:
odstraňování krytů se vystavujete nebezpečí úrazu elektrickým
proudem a jiným rizikům. Veškeré zásahy tohoto druhu
• Umístěte monitor do takové výšky,
přenechejte odborníkům.
abyste horní část obrazovky měli
• Používejte monitor v čistém a suchém prostředí.
mírně pod úrovní očí. Pohled na střed
• Dbejte na to, aby se do monitoru nedostaly tekutiny a
obrazovky by měl směřovat mírně
nepoužívejte ho v blízkosti vody.
dolů.
• Do mezer obalu nezasouvejte žádné předměty. Mohly by se
• Doporučená minimální vzdálenost
dotknout nebezpečných částí pod napětím, což může způsobit
monitoru od očí je 40 cm, maximální
úraz elektrickým proudem, požár nebo selhání zařízení.
60 cm. Optimální vzdálenost je 50 cm.
• Na napájecí šňůru nepokládejte žádné těžké předměty.
•Při práci zaměřujte zrak pravidelně na
Poškození izolace může způsobit úraz elektrickým proudem
nějaký předmět vzdálený nejméně
Česky
nebo požár.
6 m. Často mrkejte.
• Neumísťujte výrobek na šikmé ani nestabilní vozíky, stojany nebo
• Umístěte monitor v úhlu asi 90° k oknu a jiným světelným
stoly; monitor se může pádem vážně poškodit.
zdrojům tak, aby se neodrážely na obrazovce. Monitor sklopte
•K přerušení přívodu elektrické energie je nutno odpojit kabel ze
zásuvky elektrického napětí.
tak, aby se na obrazovce neodrážela stropní světla.
SB
• Když budete zařízení Diamond Pro 930
provozovat v zemích
• Jestliže kvůli světelným odrazům vidíte na obrazovku s obtížemi,
EU – kromě VB – se zdrojem stř. el. napětí 100 - 240 V,
používejte antireflexní filtr.
používejte el. napájecí kabel, který je součástí dodávky.
• Jas a kontrast nastavte tak, aby byla zajištěna optimální
Ve všech ostatních případech používejte el. napájecí kabel,
čitelnost.
který odpovídá napětí zásuvky střídavého proudu, je schválený
• Používejte stojan na dokumenty, který umístíte v blízkosti
podle bezpečnostních norem Vaší země a splňuje ustanovení
obrazovky.
těchto norem.
• Obrazovku nebo referenční materiál, se kterým pracujete,
• Ve Velké Británii se smí používat k tomuto monitoru jen šňůra
umístěte před sebe, abyste při psaní co nejméně otáčeli
schválená BS se zalitou zástrčkou a s černou pojistkou (5 A).
hlavou.
Není-li napájecí šňůra přibalena, spojte se prosím s
• Choďte pravidelně na prohlídky k očnímu lékaři.
dodavatelem.
SB
•Při provozu monitoru Diamond Pro 930
v síti s napětím
Ergonomika
220 - 240 V v Austrálii používejte síťovou šňůru dodávanou s
Pro maximální ergonomickou pohodu doporučujeme:
monitorem.
• Nastavujte jas tak dlouho, dokud nezmizí rastr na pozadí.
• Ve všech ostatních případech používejte napájecí šňůru, která
• Nenastavujte ovladače kontrastu na maximum.
se shoduje se střídavým napětím zásuvky a která vyhovuje
•Při standardních signálech využívejte výrobcem nastavenou
bezpečnostním předpisům dané země.
velikost a polohu.
Čištění monitoru
• Použijte předem nastavené barvy a ovládací prvky stran obrazu
Na skleněném (CRT) povrchu tohoto monitoru se nachází
(Left/Right).
speciální vrstva, která eliminuje odrazy a statickou elektřinu. Kvůli
• Používejte neprokládané signály s vertikální obnovovací
jemné vrstvě na skleněném povrchu používejte neabrazivní hadřík,
frekvencí v rozsahu 75 - 160 Hz.
který nepouští vlákna (bavlněný nebo obdobný) a používejte
• Nepoužívejte primárně modrou barvu na tmavém pozadí; je
neutrální, neabrazivní čisticí prostředky bez obsahu alkoholu, které
špatně vidět a způsobuje únavu očí v důsledku nedostatečného
odpuzují prach. Vyžaduje-li si obrazovka důkladnější vyčištění,
kontrastu.
naneste jemný neutrální čistící prostředek a vodu přímo na jemný
• Neumísťujte monitor do blízkosti vysokokapacitních
hadřík a po vyždímání jej použijte na vyčištění skleněného povrchu.
transformátorů, elektromotorů a podobných zařízení, jako jsou
Pravidelně monitor čistěte.
externí reproduktory nebo ventilátory, které vytváří silné
magnetické pole.
UPOZORNĚNÍ: Následující chemikálie poškozují při čištění
• Umístěte monitor pokud možno obrazovkou k východu.
skleněného povrchu CRT: Benzen, ředidlo, kyselé/zásadité čistící
Minimalizujete tak působení zemského magnetického pole.
prostředky, čistící prostředky s brusným práškem nebo alkoholem,
• Otáčením zapnutého monitoru může dojít k rozladění barev.
čistící prostředky s antistatickou příměsí a čistící prostředky pro
Potom je třeba monitor alespoň na 20 minut vypnout a teprve
leštění.
po opětném zapnutí barvy znovu vyladit.
V níže popsaných případech je nutno okamžitě odpojit monitor ze
sítě a přivolat odborného technika:
Prohlášení výrobce
• Dojde-li k poškození napájecí šňůry.
Tímto potvrzujeme, že barevný monitor
• Dostane-li se do monitoru kapalina nebo cizí předměty.
Diamond Pro 930
SB
• Byl-li monitor vystaven dešti nebo vodě.
je v souladu se
• Pokud monitor upadne nebo se poškodí jeho obal.
směrnicí 73/23/EEC:
– EN 60950
• Pokud monitor řádně nefunguje, přestože jste dodrželi všechny
směrnice 89/336/EEC:
pokyny.
– EN 55022
• Zajistěte kolem monitoru odpovídající odvětrávání,
– EN 61000-3-2
aby se nepřehříval. Nezakrývejte větrací otvory a
– EN 61000-3-3
neumísťujte monitor do blízkosti topidel a jiných
– EN 55024
UPOZORNENÍ
tepelných zdrojů. Nepokládejte na monitor žádné
a je opatřen označením
předměty.
• Konektor napájecí šňůry je hlavním prostředkem
pro odpojení systému od přívodu elektrického
napětí. Monitor je třeba nainstalovat blízko
elektrické zásuvky, k níž máte snadný přístup.
NEC-Mitsubishi Electric Visual Systems Corporation
•Při dopravě a manipulaci zacházejte se zařízením
686-1, NISHIOI OI-MACHI
opatrně. Obal uschovejte pro případnou přepravu.
ASHIGARAKAMI-GUN
KANAGAWA 258-8533, JAPAN
9
WARNUNG
VORSICHT
SETZEN SIE DAS GERÄT WEDER REGEN NOCH FEUCHTIGKEIT AUS, DA ES ANDERNFALLS
STROMSCHLAGGEFAHR
••
••
• NICHT ÖFFNEN
ZU FEUER ODER STROMSCHLÄGEN KOMMEN KANN. VERWENDEN SIE DEN
NETZSTECKER DIESES GERÄTS KEINESFALLS MIT EINEM VERLÄNGERUNGSKABEL ODER
VORSICHT: ENTFERNEN SIE KEINESFALLS ABDECKUNG ODER RÜCKSEITE, DAMIT ES
EINER STECKDOSENLEISTE, WENN DIE STECKERSTIFTE NICHT VOLLSTÄNDIG
NICHT ZU STROMSCHLÄGEN KOMMT. IM INNEREN BEFINDEN SICH KEINE VOM
EINGEFÜHRT WERDEN KÖNNEN.
BENUTZER ZU WARTENDEN KOMPONENTEN. LASSEN SIE WARTUNGSARBEITEN VON
ÖFFNEN SIE DAS GEHÄUSE NICHT, DA SICH IM INNEREN KOMPONENTEN BEFINDEN,
QUALIFIZIERTEN WARTUNGSTECHNIKERN DURCHFÜHREN.
DIE UNTER HOCHSPANNUNG STEHEN.
Dieses Symbol weist den Benutzer auf nicht isolierte spannungsführende
Komponenten im Gerät hin, die Stromschläge verursachen können. Aus
diesem Grund dürfen Sie keinesfalls Kontakt mit einer Komponente im
Geräteinneren herstellen.
Dieses Symbol weist den Benutzer auf wichtige Informationen zu Betrieb und
Pflege dieses Geräts hin. Die Informationen sollten sorgfältig gelesen werden,
um Probleme zu vermeiden.
SB
Der Karton* mit dem Diamond Pro 930
Monitor sollte die
Inhalt
folgenden Komponenten enthalten:
SB
••
••
• Monitor Diamond Pro 930
mit Schwenk-/Neigefuß
••
••
• Netzkabel
Netzkabel
••
••
• Fest montiertes Signalkabel
CD ROM
••
••
• Bedienungsanleitung
••
••
• Sales Office List
••
••
• CD-ROM Diese enthält die vollständige Bedienungsanleitung
im PDF-Format und weitere Windows-Dateien, wie etwa die
INF-Datei und Farbprofile. Um das vollständige Handbuch
Fest
Deutsch
anzeigen und drucken zu können, muss auf dem Computer
montiertes Signalkabel
Acrobat Reader 4.0 installiert sein.
* Bewahren Sie den Originalkarton und das Verpackungs-material
Bedienungsanleitung Sales Office List
für spätere Transporte des Monitors auf.
SB
Gehen Sie folgendermaßen vor, um den Diamond Pro 930
Kurzanleitung
Monitor an Ihr System anzuschließen:
Stromsteckdose
SB
1. Schalten Sie den Computer und den Diamond Pro 930
Moni-
tor aus.
2. Bauen Sie die Grafikkarte ein, falls nötig. Informationen hierzu
finden Sie im Handbuch zur Grafikkarte.
Netz-
kabel
3. PC: Verbinden Sie den Mini-D-SUB-Stecker (15 Stifte) des fest
montierten Signalkabels mit dem Anschluss der Grafikkarte in
Ihrem System (Abbildung A). Ziehen Sie die Schrauben fest.
4. Stecken Sie ein Ende des Netzkabels an der Rückseite des
SB
15-poliger
Diamond Pro 930
Monitors und das andere Ende in die Steck-
Abbildung A
Mini-D-SUB-Stecker
dose ein (Abbildung A).
5. Schalten Sie Monitor (Abbildung B) und Computer ein.
6. Die INF-Datei für Windows 95/98/2000/Me/XP befindet sich auf
der CD-ROM, die mit dem Monitor geliefert wird.
7. Die elektrische Installation ist damit abgeschlossen.
HINWEIS: Weitere Informationen finden Sie in der vollständigen
Abbildung B
Netzschalter
Bedienungsanleitung auf CD-ROM.
Hauptmenü
Untermenü
Bedienelemente
MODE1 und SB MODE2 wählen. Beim ersten
Die Bedienelemente für den OSM (On-Screen Manager) an der Vorderseite
des Monitors haben folgende Funktionen:
Betätigen dieser Taste wird der aktuelle SB-Modus
Sie können auf das OSM-Menü zugreifen, indem Sie eine der Steuerungs-
angezeigt. Innerhalb einer Zeitspanne von
Y
tasten drücken (EXIT,
,
Y
, –, +).
3 Sekunden wird beim nochmaligen Betätigen der
Taste vom aktuellen SB-Modus in den nächsten
SB-Modus gewechselt. Beispiel: Der aktuelle SB-
Hauptmenü
Untermenü
Modus ist OFF. Innerhalb von 3 Sekunden drücken
EXIT
Schließt das OSM-Menü.
Rückkehr zum OSM-
Sie die Taste, und der SB-Modus wechselt zu SB
Hauptmenü.
MODE1. Die Farbtemperatur bei jedem SB-Modus
wird durch eine entsprechende Farbsteuerung
HINWEIS: Deaktiviert das OSM-Menü und aktiviert es, wenn
eingestellt. Ausnahme ist der sRGB-Modus, bei dem
OSM ausgeschaltet ist.
die Farbeinstellungen nicht verändert werden
STEUERUNG Verschiebt die Markie-
Verschiebt die Markie-
können. Wenn das Gerät ausgeschaltet wird,
Y
rung nach links oder
rung nach links oder
/
Y
erfolgt ein Zurücksetzen der Einstellungen auf SB
rechts, um die Unter-
rechts, um eine der
MODE OFF.
menüs auszuwählen.
Steuerungen auszu-
SB-Modus AUS: für textbasierte Bilder (normale
wählen.
Verwendung)
HINWEIS: Wenn das OSM-Menü deaktiviert ist, dienen diese
SB-Modus 1 EIN: für Bilder
Tasten als Direktzugriff auf die Helligkeitseinstellung.
SB-Modus 2 EIN: für bewegliche Bilder, wie
STEUERUNG
Keine Funktion. Verschiebt die Markie-
beispielsweise Filme auf DVD
–/+
rung in Richtung – oder
RESET
Setzt alle Steuerungen
Markierten Wert auf die
+, um den Wert zu ver-
im markierten Menü auf
Werkseinstellung zu-
ringern bzw. zu erhöhen.
die Werkseinstellungen
rücksetzen.
HINWEIS: Deaktiviert das OSM-Menü und dient zur Einstel-
zurück.
lung des Kontrasts, wenn der Direktzugriff akti-
HINWEIS: Wenn Sie RESET im Haupt- oder im Untermenü drük-
viert ist.
ken, wird ein Fenster mit einer Warnung ange-
AUSWAHL/SBMODE
Öffnet das Untermenü. Keine Funktion.
zeigt, in dem Sie das Zurücksetzen abbrechen
können.
HINWEIS: Wenn das OSM-Menü ausgeschaltet ist, hat RESET
die Wirkung einer SuperBright (SB)-Funktionstaste.
Wenn die Direktzugriffsfunktion aktiviert ist (“ON”), kann das OSD-Menü
Der Benutzer kann zwischen SB MODE OFF, SB
nur über die Taste “EXIT” aufgerufen werden.
10
• Korrigieren Sie die den Abstand zwischen den Linien im mittleren
Bedienelemente – Fortsetzung
und oberen Bildschirmbereich mit der Einstellfunktion
LINEARITÄT (VER.).
Helligkeit-/Kontrast-Steuerungen
Konvergenz: Die drei Grundfarben (Rot, Grün, Blau) werden zu glei-
Helligkeit: Bild- und Hintergrundhelligkeit des Bildschirms anpas-
chen Teilen überlagert, sodass sich Weiß ergibt. Mit dieser Funkti-
sen.
on kann sichergestellt werden, dass eine weiße Linie auf dem
Kontrast: Ändert die Bildhelligkeit im Verhältnis zum Hintergrund.
Bildschirm so scharf und deutlich wie möglich angezeigt wird.
Entmagnetisierung: Damit werden magnetische Streufelder besei-
• Mit KONVERGENZ (HOR.) kann die Ausrichtung der weißen Lini-
tigt, die den Verlauf des Elektronenstrahls stören. Dies führt zu bes-
en nach oben und unten korrigiert werden.
serer Farbreinheit, Bildschärfe und Konvergenz. Während des
• Mit KONVERGENZ (VER.) kann die Ausrichtung der weißen Lini-
Entmagnetisierungsvorgangs wackelt das Bild und die Farbwie-
en nach links und rechts korrigiert werden.
dergabe wird kurzzeitig verfälscht.
GlobalSync-Funktion: Unreinheiten in der Bilddarstellung, die durch
Vorsicht: Zwischen jeder Ausführung der Entmagnetisierungs-
das Magnetfeld der Erde verursacht werden, lassen sich beheben.
funktion sollten mindestens 20 Minuten liegen.
In den Untermenüs (GLOBALSYNC, OBEN LINKS, OBEN RECHTS,
UNTEN LINKS oder UNTEN RECHTS) ist mit den Tasten –/+ ein
Größen- und Positionseinstellung
Feinabgleich der GlobalSync-Korrekturen möglich.
Links/Rechts: Bild horizontal nach links oder rechts verschieben.
HINWEIS: Mitsubishi empfiehlt die GlobalSync-Korrektur durchzu-
Unten/Oben: Bild vertikal nach oben oder unten verschieben.
führen, während eine typische Anwendung, wie eine Textverarbei-
Schmal/Breit: Horizontale Größe des Bildes verringern oder erhö-
tung oder eine Tabellenkalkulation, ausgeführt wird.
hen.
Hilfsfunktionen 2
Klein/Groß: Vertikale Größe des Bildes verringern oder erhöhen.
Sprache: Die Menüs der OSM-Steuerungen sind in sechs
Color Control System (Farbsteuerungssystem)
Sprachen verfügbar.
Wählen Sie eine der vordefinierten Farbeinstellungen. Der Balken
OSM-Position: Sie können festlegen, wo das OSM-Steuerungs-
Deutsch
wird durch die Farbeinstellungsauswahl ersetzt. Jede
menü auf dem Bildschirm angezeigt werden soll. Zur Auswahl ste-
Farbeinstellung wurde werkseitig für den angegebenen Gradwert
hen die Positionen „Center“, „Top left“, „Top right“, „Bottom left“ und
in Kelvin definiert. Wenn Sie eine Einstellung ändern, wird die Ein-
„Bottom right“ (Mitte, Oben links, Oben rechts, Unten links und Un-
stellung nicht mehr mit „Kelvin“ bezeichnet, sondern mit „Anwen-
ten rechts).
der“ (Ausnahme: sRGB-Modus).
OSM Anzeigedauer: Das OSM-Steuerungsmenü wird ausge-
Rot, Grün, Blau: Das Color Control System (Farbsteuerungssystem)
blendet, wenn es nicht mehr verwendet wird. Im Untermenü
verringert und erhöht je nach Auswahl die Intensität der Farbstrahlen
„OSM Anzeigedauer“ können Sie festlegen, nach welchem Zeitraum
für Rot, Grün und Blau. Die Änderung der Farben ist auf dem Bild-
das OSM-Steuerungsmenü ausgeblendet wird, wenn der Benutzer
schirm sichtbar. Die Balken zeigen die Veränderung des Farbwerts
keine Taste drückt. Verfügbar sind die Optionen 5 bis 120 Sekun-
(Erhöhung oder Verringerung) an.
den.
Modus sRGB: Der Modus sRGB bietet immer die geeignete Bild-
OSM Abschaltung: Mit „OSM Abschaltung“ werden alle OSM-Funk-
darstellung mit Farbanpassung. Die Farbanteile für Rot, Grün und
tionen bis auf „Helligkeit“ und „Kontrast“ gesperrt. Wenn Sie versu-
Blau können nicht unabhängig voneinander eingestellt werden.
chen, auf OSM-Funktionen zuzugreifen, während diese Sperre akti-
viert ist, wird eine Meldung mit einem entsprechenden Hinweis
Farbtemperatureinstellung: Hiermit lässt sich die Farbtemperarur
angezeigt. Um die Funktion „OSM Abschaltung“ zu aktivieren, halten
des Bildes einstellen.
Sie die Taste SELECT gedrückt und drücken gleichzeitig die Ta-
Geometrie-Einstellungen
ste +. Um die Funktion „OSM Abschaltung“ zu deaktivieren, halten
Menü der Geometrie-Einstellungen
Sie die Taste SELECT gedrückt und drücken gleichzeitig die Ta-
Mit den Geometrie-Einstellungen können die Krümmung und die
ste +.
Seitenwinkel des Bildes korrigiert werden.
Modus IPM System Off (IPM-System aus):
Ein/Aus (Kissenausgleich): Krümmung der Seiten nach innen oder
Freigegeben: Das IPM-System arbeitet normal, alle Energie-
außen verringern oder erhöhen.
sparstufen werden benutzt.
Gesperrt: Der Off-Modus des IPM-Systems wird nicht benutzt.
Links/Rechts (Kissenverzerrung): Krümmung der Seiten nach links
HINWEIS: Für Standardcomputer und -grafikkarten sollte die Vorein-
oder rechts verringern oder erhöhen.
stellung FREIGEGEBEN beibehalten werden.
Parallel (Parallelogramm): Neigung der Bildseiten nach links oder
HINWEIS: Lassen Sie den Monitor nicht eingeschaltet, wenn „Kein
rechts justieren.
Signal“ angezeigt wird. Andernfalls könnte sich das Bild der Mel-
Trapez: Breite des unteren Bildrandes an die Breite des oberen
dung „Kein Signal“ auf dem Bildschirm einbrennen.
Bildrandes anpassen.
EdgeLock (Flankensperre): Wird der Monitor mit einem nicht
Drehen (Rasterlage): Das gesamte Bild wird im oder gegen den
standardgemäßen Signaltiming betrieben, erscheint das Bild even-
Uhrzeigersinn gedreht.
tuell dunkler als normal oder es weist Farbabweichungen auf. Mit
Corner Correction (Eckenkorrektur): Mit dieser Funktion kann die
der Funktion “EdgeLock” wird das Bild auf normale Werte korrigiert.
Geometrie der Bildkanten justiert werden – Top (Oben) oder Bottom
Direktzugriff: Diese Option dient zum direkten Zugriff auf die Funk-
(Unten).
Y
tionen
/
Y
als Helligkeitssteuerung und -/+ als Kontrast-steuerung.
Hilfsfunktionen 1
Wenn die Direktzugriffsfunktion aktiviert ist (“ON”), kann das OSD-
Moiré-Reduzierung: Der Moiré-Effekt erzeugt ein wellenförmiges
Menü nur über die Taste “EXIT” aufgerufen werden.
Muster, das manchmal auf dem Bildschirm zu sehen ist. Das Mu-
Werkseinstellung: Mit der Option „Werkseinstellung“ werden die
ster wiederholt sich und überlagert sich in der Struktur des ange-
meisten OSM-Einstellungen wieder auf die Werkseinstellungen
zeigten Bildes. Der Effekt kann in verschiedenen Anwendungen
zurückgesetzt. Es wird eine entsprechende Warnmeldung ange-
unterschiedlich stark auftreten. Mit den Steuerungstasten –/+ kann
zeigt, die Sie bestätigen müssen.
der Moiré-Effekt minimiert werden.
Einzelne Einstellungen können durch Markieren der betreffenden
Linearität: Diese Option dient zur Einstellung der geometrisch ex-
Steuerung und anschließendes Drücken der Taste RESET zurück-
akten Bildwiedergabe. Mit dieser Funktion wird sichergestellt, dass
gesetzt werden.
ein Kreis mit dem Solldurchmesser 2 cm überall auf dem Bild-
Information
schirm auch tatsächlich mit diesem Durchmesser erscheint. Die
Display Mode (Anzeigemodus): Die aktuellen Einstellungen für
vertikale Linearität lässt sich am besten folgendermaßen bestim-
Modus und Bildwiederholfrequenz des Monitors.
men:
Monitor Info: Die Modell- und die Seriennummer des Monitors.
• Zeichnen Sie mithilfe einer Grafikanwendung, die über eine Lineal-
Refresh Notifier (Meldung zur Wiederholrate): Wenn das an den
funktion verfügt, horizontale Linien mit gleichmäßigem Abstand.
Monitor geleitete Bildsignal eine zu geringe Wiederholrate vorgibt,
• Korrigieren Sie die Ausrichtung der Linien am oberen und unte-
wird eine entsprechende Meldung angezeigt. Weitere Informatio-
ren Bildschirmrand mit der vertikalen Lageeinstellung.
nen hierzu finden Sie im Handbuch zur Grafikkarte bzw. zum Com-
puter.
11
DURCH RICHTIGE AUFSTELLUNG UND EINSTELLUNG
Einsatzempfehlungen
DES MONITORS KÖNNEN ERMÜDUNGSERSCHEINUNGEN
VON AUGEN, SCHULTERN UND NACKEN
Sicherheitsvorkehrungen und Pflege:
VERMIEDEN WERDEN. BEACHTEN SIE BEI DER
AUFSTELLUNG DES MONITORS FOLGENDES:
• ÖFFNEN SIE DEN MONITOR NICHT. Es befinden sich keine vom Benut-
• Stellen Sie den Monitor so auf, dass sich
zer zu wartenden Teile im Inneren. Das Öffnen oder Abnehmen der
die Oberkante des Bildschirms auf Augen-
Abdeckungen kann zu gefährlichen Stromschlägen führen und birgt
höhe oder knapp darunter befindet. Ihre
weitere Risiken. Lassen Sie alle Wartungsarbeiten von qualifizierten
Augen sollten leicht nach unten gerichtet
Wartungstechnikern durchführen.
sein, wenn Sie auf die Bildschirmmitte blik-
• Verwenden Sie den Monitor in sauberer, trockener Umgebung.
ken.
• Lassen Sie keine Flüssigkeiten in das Gehäuse gelangen und stellen
• Platzieren Sie den Monitor in einem Abstand
Sie den Monitor in trockenen Räumen auf.
von 30 - 70 cm von Ihren Augen. Der opti-
• Führen Sie keinesfalls Objekte in die Gehäuseschlitze ein, da
male Abstand beträgt 50 cm.
spannungsführende Teile berührt werden können, was zu schmerz-
• Entspannen Sie Ihre Augen regelmäßig, in-
haften oder gefährlichen Stromschlägen, zu Feuer oder zu Beschädi-
dem Sie ein Objekt fokussieren, dass sich
gungen des Geräts führen kann.
in einer Entfernung von mindestens 6 m befindet. Blinzeln Sie häufig.
• Legen Sie keine schweren Objekte auf das Netzkabel. Beschädigun-
• Stellen Sie den Monitor in einem 90-Grad-Winkel zu Fenstern und an-
gen des Kabels können zu Stromschlägen oder Feuer führen.
deren Lichtquellen auf, um Blendung und Reflexionen zu verhindern.
• Stellen Sie dieses Produkt nicht auf wackelige oder instabile Flächen,
Neigen Sie den Monitor in einem Winkel, der Reflexionen der Decken-
Wagen oder Tische, da der Monitor fallen und dabei schwer beschä-
leuchten auf dem Bildschirm verhindert.
digt werden könnte.
• Ist das dargestellte Bild aufgrund von Reflexionen nur schwer zu
• Zur Trennung des Geräts von der Stromversorgung muss der Stecker
erkennen, sollten Sie einen Blendschutzfilter verwenden.
an der Gerätebuchse abgezogen werden.
• Stellen Sie Helligkeit und Kontrast des Monitors mit den entsprechen-
SB
• Wird der Diamond Pro 930
in Europa (außer Großbritannien) an ei-
den Steuerungen ein, um die Lesbarkeit zu optimieren.
nem Wechselstromnetz mit 100 - 240 V betrieben, muss das mit dem
• Stellen Sie neben dem Monitor einen Dokumentenhalter auf.
Deutsch
Monitor gelieferte Netzkabel verwendet werden.
• Platzieren Sie das beim Tippen häufiger betrachtete Objekt (Monitor
In allen anderen Ländern ist ein für die Spannung des Stromnetzes
oder Dokumentenhalter) direkt vor Ihnen, damit Sie den Kopf seltener
geeignetes und zugelassenes Netzkabel zu verwenden, dass den
drehen müssen.
Sicherheitsstandards Ihres Landes entspricht.
• Lassen Sie Ihre Augen regelmäßig untersuchen.
• Verwenden Sie in Großbritannien für diesen Monitor ein
BS-zugelassenes Netzkabel mit angeformtem Stecker. Der Stecker
Ergonomie
muss mit einer schwarzen Sicherung (5 A) ausgestattet sein. Setzen
Wir empfehlen folgendes Vorgehen, um eine ergonomisch optimale Ar-
Sie sich mit Ihrem Händler in Verbindung, wenn der Monitor ohne Netz-
beitsumgebung einzurichten:
kabel geliefert wurde.
• Korrigieren Sie die Helligkeit, bis das Hintergrundraster nicht mehr er-
SB
• Wird der Diamond Pro 930
Monitor in Australien an einem
kennbar ist.
Wechselstromnetz mit 220 - 240 V betrieben, muss das mit dem Moni-
• Verwenden Sie nicht die Maximaleinstellung der Kontraststeuerung.
tor gelieferte Netzkabel verwendet werden.
• Verwenden Sie bei Standardsignalen die vordefinierten Größen- und
Reinigen des Monitors
Positionseinstellungen.
• Verwenden Sie die voreingestellten Farbeinstellungen und die hori-
Die Oberfläche dieses Monitors ist mit einer speziellen Beschichtung
zontalen Seiteneinstellungen.
versehen, um Reflexionen und eine statische Aufladung der Glas-
• Verwenden Sie Signale ohne Zeilensprung (Non-Interlaced) mit einer
oberfläche zu vermeiden. Verwenden Sie zum Entfernen von Staub ein
vertikalen Wiederholfrequenz von 75 - 160 Hz.
farbloses weiches Tuch aus Baumwolle oder einem vergleichbaren Ma-
• Verwenden Sie die Primärfarbe Blau nicht auf schwarzem Hinter-
terial und ein nicht alkoholisches, neutrales und nicht scheuerndes Reini-
grund, da dies die Lesbarkeit beeinträchtigt und aufgrund des gerin-
gungsmittel, um Beschädigungen der empfindlichen Oberflächen-
gen Kontrasts zu starker Ermüdung der Augen führen kann.
beschichtung zu verhindern. Ist eine intensivere Reinigung erforderlich,
• Halten Sie den Monitor fern von Hochleistungstransformatoren, ande-
befeuchten Sie ein weiches Tuch mit Wasser oder einem sanften Neutral-
ren elektrischen Bildschirmen und sonstigen Geräten, wie Lautspre-
reiniger, der mit viel Wasser verdünnt ist und verwenden Sie dieses nach
cherboxen oder Ventilatoren, die starke magnetische Felder erzeugen
dem Auswringen des Wassers, um die Glasoberfläche zu reinigen. Rei-
können.
nigen Sie den Monitor regelmäßig.
• Richten Sie die Vorderseite des Monitors möglichst nach Osten aus,
VORSICHT: Die folgenden Reinigungsmittel führen zu einer Beschädi-
um die Wirkung des magnetischen Erdfeldes zu minimieren
gung der Kathodenstrahlröhre, wenn sie zur Reinigung der Glas-
• Wird die Ausrichtung des Monitors während des Einschaltvorgangs
oberfläche verwendet werden: Benzol, Verdünner, säure- bzw.
geändert, kann dies zu einer Entfärbung des Bildes führen. Schalten
laugenhaltige Reinigungsmittel, alkoholische Reinigungsmittel, Reinigungs-
Sie in solchen Fällen den Monitor für 20 Minuten aus und dann wieder
mittel mit Scheuerpulver, Reinigungsmittel mit antistatischen Zusatzstof-
ein.
fen, scharfe Reinigungsmittel.
Unter den folgenden Bedingungen müssen Sie den Monitor sofort vom
ENERGYSTAR-Produkt
Stromnetz trennen und sich mit einem qualifizierten Wartungstechniker in
Verbindung setzen:
NEC-Mitsubishi Electronics Display of America, Inc. hat als ENERGYSTAR-
Partner festgestellt, dass dieses Gerät den E
NERGYSTAR-Richtlinien für
• Das Netzkabel oder der Netzstecker ist beschädigt.
Energieeffizienz entspricht. Das E
NERGYSTAR-Emblem stellt keine EPA-
• Flüssigkeit wurde über den Monitor gegossen oder Gegenstände sind
Anerkennung eines Produkts oder einer Dienstleistung dar.
in das Gehäuse gefallen.
• Der Monitor wurde Regen oder Wasser ausgesetzt.
• Der Monitor wurde fallen gelassen oder das Gehäuse wurde beschä-
Erklärung des Herstellers
digt.
• Der Monitor arbeitet trotz Beachtung der Bedienungs-
Wir bestätigen hiermit, dass der Farbmonitor
anleitung nicht ordnungsgemäß.
Diamond Pro 930
SB
• Achten Sie auf ausreichende Luftzufuhr, damit die ent-
der
stehende Wärme abgeführt werden kann. Decken Sie
EG-Richtlinie 73/23/EG entspricht:
– EN 60950
die Lüftungsschlitze nicht ab und stellen Sie den Moni-
EG-Richtlinie 89/336/EG:
VORSICHT
tor nicht neben Heizkörpern oder anderen Wärmequellen
– EN 55022
auf. Stellen Sie keine Gegenstände auf den Monitor.
– EN 61000-3-2
• Durch Ziehen des Netzkabelsteckers kann das Gerät
– EN 61000-3-3
– EN 55024
vom Stromnetz getrennt werden. Der Monitor muss in
und mit folgendem Siegel gekennzeichnet ist
der Nähe einer Steckdose aufgestellt werden, die leicht
zugänglich ist.
• Transportieren Sie den Monitor vorsichtig. Bewahren
Sie die Verpackung für spätere Transporte auf.
NEC-Mitsubishi Electric Visual Systems Corporation
686-1, NISHIOI OI-MACHI
ASHIGARAKAMI-GUN
KANAGAWA 258-8533, JAPAN
12
