IBM Stylus-1070: Using Shooting Functions
Using Shooting Functions: IBM Stylus-1070
Using Shooting Functions
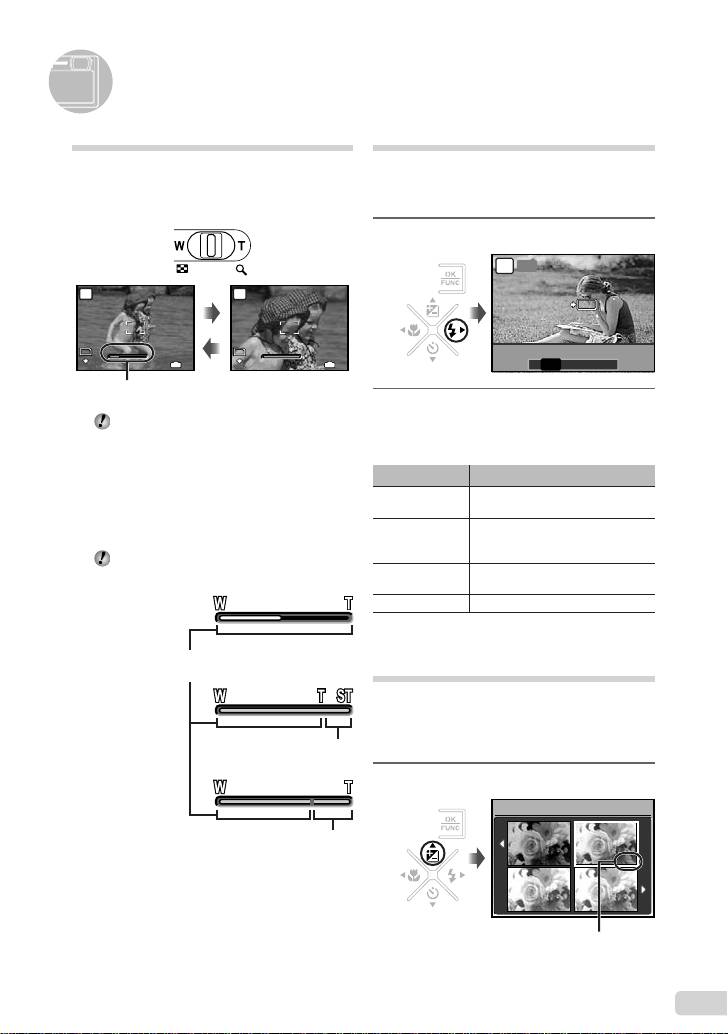
Using the optical zoom
Using the fl ash
Pressing the zoom lever adjusts the shooting
The fl ash functions can be selected to best
range.
match the shooting conditions and render the
desired image.
Press toward W (Wide)
Press toward T (Telephoto)
1
Press the # button.
2
Use FD to select the setting
Optical zoom: 3×, digital zoom: 5×
option, and press the x button to
set.
To take larger images without reducing
image quality
Item Description
[FINE ZOOM] (p. 26)
The fl ash fi res automatically in
FLASH AUTO
low-light or backlight conditions.
To take larger images
This emits pre-fl ashes to reduce
[DIGITAL ZOOM] (p. 27)
REDEYE
the occurrence of red eye in your
photos.
The zoom bar appearance identifi es the
status of the fi ne zoom/digital zoom.
The fl ash fi res regardless of the
FILL IN
available light.
FLASH OFF The fl ash does not fi re.
Adjusting the brightness
(Exposure compensation)
The exposure value automatically set by the
camera can be adjusted brighter or darker
to obtain a desired shot. This function is not
available in the G shooting mode.
1
Press the F button.
EN
13
12
M
P
12
M
4
IN
4
N
ORM
N
ORM
W
W
T
T
12
M
P
12
M
4
IN
4
N
ORM
N
ORM
W
W
T
T
W
W
T
P
T
Zoom bar
When using
optical zoom
Optical zoom range
When using
fi ne zoom
Fine zoom
range
When using
digital zoom
Digital zoom
range
OK
AUTO
OK
SET
SET
FLASH AUTO
FLASH AUTO
AUTO
! # $
0.0
0.0
+0.3
+0.3
+0.7
+0.7
+1.0
EXPOSURE COMP.
+1.0
Exposure compensation value
d4399_e_basic_000_book_cs2e.indb13 13d4399_e_basic_000_book_cs2e.indb13 13 11/14/2008 9:50:58 AM11/14/2008 9:50:58 AM
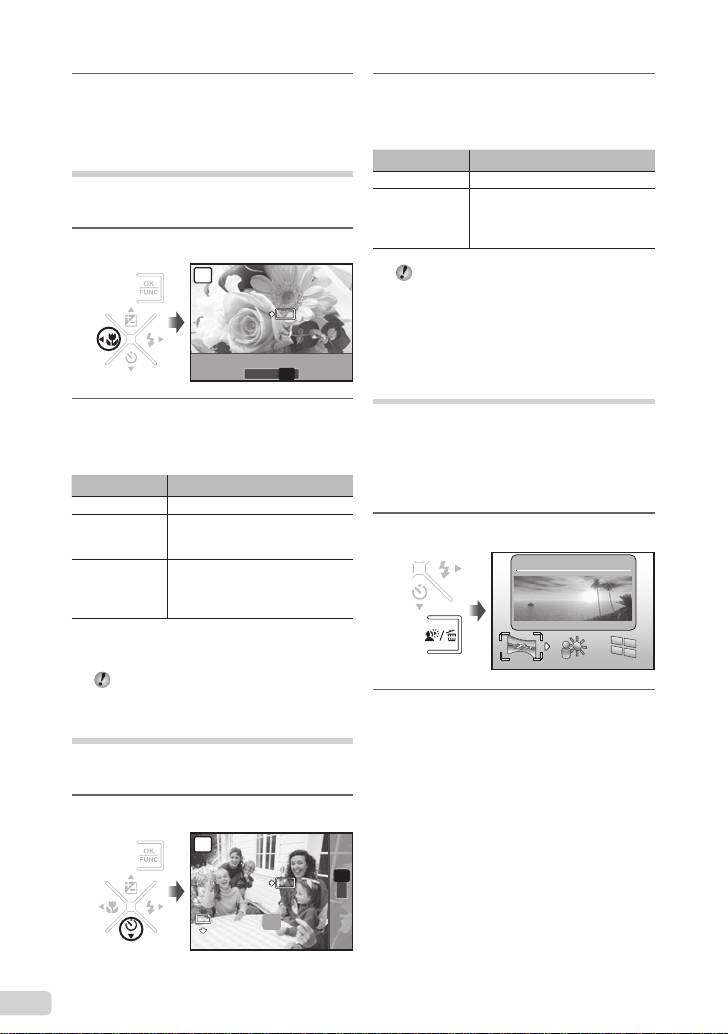
2
Use CEFD to select the desired
2
Use CE to select the setting
brightness image, and press the x
option, and press the x button to
button.
set.
Item Description
Shooting closeups (Macro shooting)
OFF This cancels the self-timer.
This function enables the camera to focus and
The self-timer lamp turns on for
shoot subjects at close distances.
approx. 10 seconds, and then
ON
blinks for approx. 2 seconds, and
then the picture is taken.
1
Press the & button.
Self-timer shooting is automatically canceled
after one shot.
To cancel the self-timer after it starts
Press the Y button again.
Quickly calling and using
shooting functions
2
Use FD to select the setting
The following menu functions can be quickly
option, and press the x button to
called and used.
set.
●
[PANORAMA] (p. 28)
●
[SHADOW ADJ] (p. 28)
Item Description
●
[MULTI WINDOW] (p. 22)
OFF Macro mode is deactivated.
This enables shooting as close as
*1
*2
1
Press the f button.
MACRO
20 cm/7.9 in.
(30 cm/11.8 in.
) to
the subject.
This enables shooting as close as
SUPER
7 cm/2.8 in to the subject. Subjects
*3
MACRO
at 50 cm/19.7 in. or farther cannot
be brought into focus.
*1
When the zoom is at the widest (W) position.
*2
When the zoom is at the most telephoto (T) position.
*3
The zoom is automatically fi xed.
The fl ash (p. 20) and zoom (p. 20) cannot
be set during super macro shooting.
2
Use FD to select the menu
function, and press the x button to
Using the self-timer
set.
After the shutter button is pressed all the way
To use the effects preview screen
down, the picture is taken after a time delay.
(Multi window)
Selecting an option from [ZOOM],
1
Press the Y button.
[EXPOSURE COMP.], [WB] or [ESP/n]
shows 4 preview images that refl ect the
adjusted values of the selected shooting
function. Use CEFD to select the
desired image, and press the x button.
14
EN
OFF
P
OFF
OK
OK
12
M
12
M
N
ORM
N
ORM
SET
SET
SELFTIMER
OFF
ON
SELFTIMER
Y
Y
OFF
P
OFF
OK
OK
SET
SET
OFF
OFF
% &
OFF
PANORAMA
d4399_e_basic_000_book_cs2e.indb14 14d4399_e_basic_000_book_cs2e.indb14 14 11/14/2008 9:50:59 AM11/14/2008 9:50:59 AM
Оглавление
- Preparing the Camera
- Shooting, Playback, and Erasing
- Using Shooting Modes
- Using Shooting Functions
- Printing
- Using OLYMPUS Master 2
- Appendix
- Préparer l’appareil photo
- Prise de vue, lecture et effacement
- Utiliser les modes prise de vue
- Utiliser les fonctions de prise de vue
- Imprimer
- Utiliser OLYMPUS Master 2
- Appendice
- Preparación de la cámara
- Toma, reproducción y borrado
- Uso de los modos de toma
- Uso de las funciones de toma
- Impresión
- Uso del programa OLYMPUS Master 2
- Apéndice
- Vorbereiten der Kamera
- Aufnahme, Wiedergabe und Löschen von Bildern
- Verwenden der verschiedenen Aufnahmemodi
- Verwenden der Aufnahmefunktionen
- Verwenden der Software OLYMPUS Master 2
- Anhang
- Подготовка фотокамеры
- Съемка, воспроизведение и удаление
- Использование режимов съемки
- Использование функций съемки
- Печать
- Использование OLYMPUS Master 2
- Приложение
