Aiptek MobileCinema i55: инструкция

Aiptek
MobileCinema i55

Раздел: Видео Аудио Фото Оборудование

Тип: Проектор

Инструкция к Проектору Aiptek MobileCinema i55

Users Manual

Care and Safety Information

1. Keep the device and packaging materials out of the reach of infants and

children.

2. Avoid subjecting the power adapter and other contacts to dripping or splashing

water and dry your hands before you use it. Do not place objects filled with

liquids such as vases, etc. on or near the device.

3. Make sure that the used power outlet is always readily available and never

hidden. In case of emergency, use the power adapter to separate the device

from the power network.

4. Keep your device away from all flames such as candles and do not set them up

in the vicinity of the device.

5. Keep the unit at least 10 cm away from other objects. Make sure the ventilation

is not covered by newspapers, tablecloths, curtains, etc.

6. For your own safety, do not use the projector during thunderstorms or lightning.

7. Relative Humidity is 5~35°C, 80% (Max.), non-condensing.

8. The battery is integrated with the device. Do not dissemble and modify. The battery

should be replaced by qualified service staff only.

9. Ensure that the ambient room temperature is within -10~55°C

10. During the operation, this product may heat lightly, which is normal.

11. Wait before using if the device has been moved from a cold location into a

warm one. Any condensation that has formed may in certain circumstances

destroy the device. As soon as the device has reached room temperature it can

be used without risk.

12. Handle the product with care. Avoid contact with sharp objects. Keep device

away from metallic objects.

13. Place the projector on a flat surface. Any collision or falling to the ground is

likely to damage the product.

14. Do not drop or disassemble the product otherwise the warranty voids. Opening

or removing covers may expose you to dangerous voltage or other hazards.

Refer all servicing to qualified service personnel.

15. Use only the accessories supplied by the

manufacturer.

16. Both product and user’s manual are subject to

further improvement or supplement without

further notice.

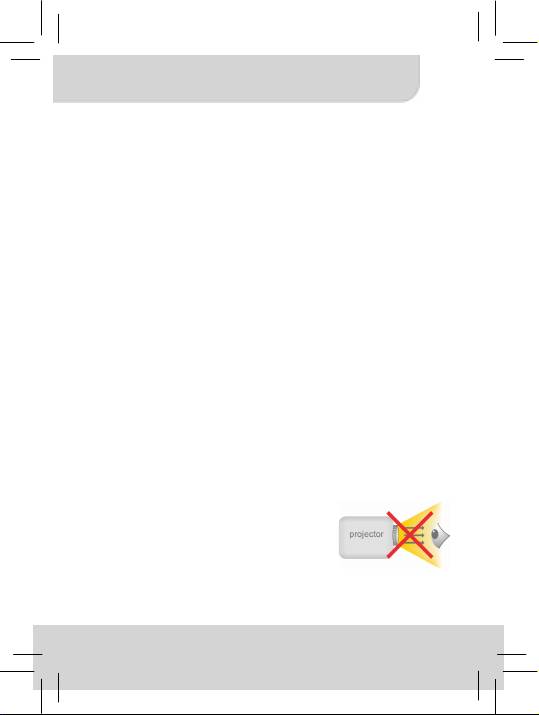
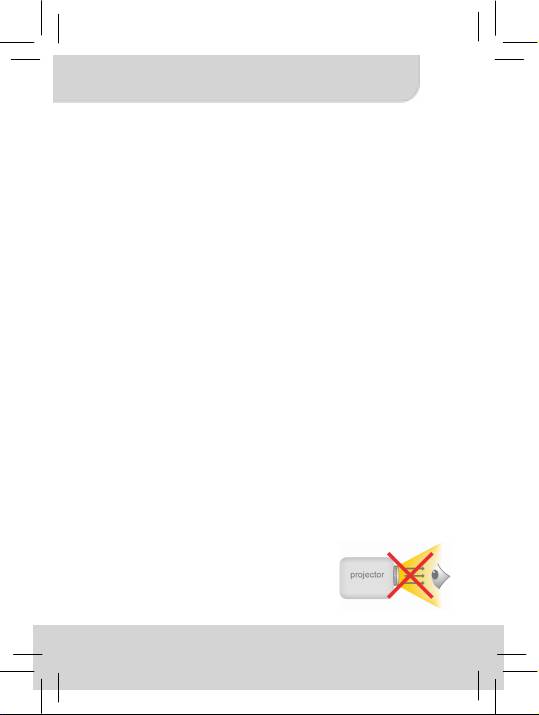
17. Avoid facing directly into the projector’s lens.

I

Users Manual

Sicherheitshinweise:

1. Das Gerät und das Verpackungsmaterial außerhalb der Reichweite von

Kindern halten.

2. Das Netzteil nicht in Kontakt mit tropfendem oder fließendem Wasser kommen

lassen und Hände vor der Benutzung abtrocknen. Keine mit Flüssigkeiten

gefüllte Gegenstände, wie z.B. Vasen usw. auf oder in die Nähe des Gerätes

stellen.

3. Stellen Sie sicher, dass die verwendete Steckdose immer verfügbar und

niemals blockiert ist. Verwenden Sie im Notfall das Netzteil, um das Gerät vom

Stromnetz zu trennen.

4. Das Gerät von Flammen, wie z.B. Kerzen fernhalten und diese nicht in der

Nähe des Gerätes aufstellen.

5. Das Gerät mindestens 10 cm von anderen Gegenständen entfernt halten.

Stellen Sie sicher, dass die Lüftungsschlitze nicht durch Zeitungen,

Tischdecken, Vorhänge usw. blockiert werden.

6. Den Projektor zu Ihrer eigenen Sicherheit nicht während eines Gewitters oder

Blitzschlages verwenden.

7. Relative Luftfeuchtigkeit liegt bei 5 bis 35°C, 80% (max.), nicht kondensierend.

8. Der Akku ist im Gerät integriert. Nicht auseinander nehmen oder ändern. Der

Akku sollte nur von einer Fachkraft ausgetauscht werden.

9. Stellen Sie sicher, dass die Raumtemperatur innerhalb von -10 ist ~ 55°C liegt.

10. Dieses Produkt kann während des Betriebes etwas warm werden, was normal ist.

11. Warten Sie mit der Verwendung des Geräts etwas, wenn das es von einem

kalten an einen warmen Ort gebracht wurde. Kondenswasser kann das Gerät

unter bestimmten Umständen zerstören. Sobald das Gerät Raumtemperatur

erreicht hat, kann es ohne Risiko verwendet werden.

12. Produkt mit Vorsicht handhaben. Kontakt mit scharfen Gegenständen

vermeiden. Von Gegenständen aus Metall fernhalten.

13. Den Projektor auf eine flache Unterlage stellen. Stöße oder ein Herunterfallen auf den

Boden führt wahrscheinlich zu Schäden des Produktes.

14. Das Produkt nicht fallen lassen oder auseinander nehmen, da sonst die

Gewährleistung erlischt. Das Öffnen oder Entfernen von Abdeckungen kann sie

gefährlichen Spannungen und anderen Risiken aussetzen. Alle

Wartungsarbeiten von Fachpersonal durchführen lassen.

15. Nur vom Hersteller empfohlenes Zubehör verwenden.

16. Sowohl das Produkt als auch das

Benutzerhandbuch unterliegen fortlaufenden

Verbesserungen oder Ergänzungen ohne

vorherige Mitteilung.

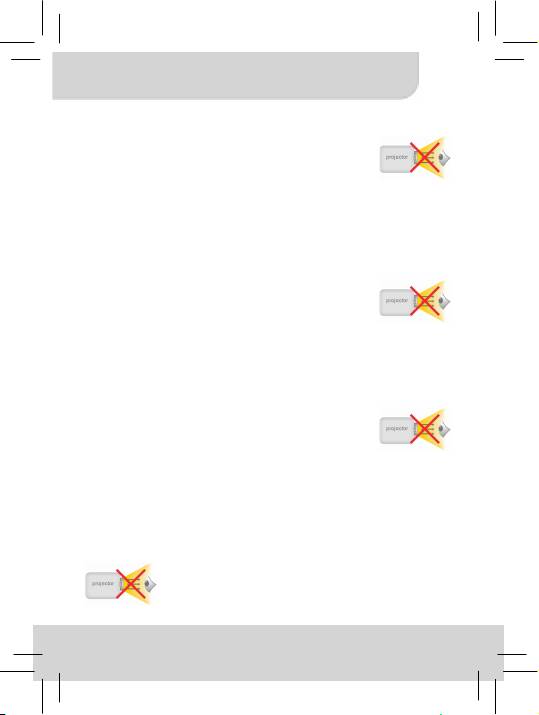
17. Nicht direkt in das Objektiv des Projektors sehen.

II

Users Manual

Entretien et précaustion d’emploi (FR)

1. Attention - Evitez de vous placer en face de la lentille du

vidéo projecteur.

2. Evitez tout contact avec de l’eau, et gardez vos mains

sèches lors de l’utilisation.

3. Assurez-vous que la température de la pièce est comprise entre -10 et 55°C

4. Le taux d’humidité relative doit être de 80% au maximum entre 5 et 35°C, sans

condensation.

5. Ne pas faire tomber, frapper ou démonter cet appareil ; sinon la garantie sera

annulée.

Informazioni sulla cura e sulla sicurezza (IT)

1. Attenzione - Non guardare l’obiettivo in modo diretto.

2. Evitare il contatto con liquidi e utilizzare con mani asciutte.

3. Assicurarsi che la temperatura ambiente della stanza sia

compresa tra -10 e 55°C

°

4. L’umidità relativa deve essere compresa tra 5 e 35

C,

all’80% (max.), senza condensazione.

5. Non far cadere, non colpire e non smontare il dispositivo; in caso contrario la

garanzia verrà annullata.

    (RU)

1.      .

2.     , 

   .

3. ,    

 -10 ~ 55°C.

4.      5% ~ 35°C, 

 (. 80%).

5.   ,     ,

   

 .

  (AR)

1. -       .

2.          .

3.         10  55  .

80) % ( 

4.     5  35   

.

5.           .

III

Users Manual

FCC Compliance Statement:

This device complies with Part 15 of the FCC Rules.

Operation is subjected to the following two conditions: (1)

this device may not cause harmful interference, and (2) this

device must accept any interference received, including

interference that may cause undesired operation.

This equipment has been tested and found to comply with limits for a Class B

digital device, pursuant to Part 15 of the FCC rules. These limits are designed to

provide reasonable protection against harmful interference in residential

installations. This equipment generates, uses, and can radiate radio frequency

energy, and if not installed and used in accordance with the instructions, may

cause harmful interference to radio communications.

However, there is no guarantee that interference will not occur in a particular

installation. If this equipment does cause interference to radio or television

equipment reception, which can be determined by turning the equipment off and on,

the user is encouraged to try to correct the interference by one or more of the

following measures:

- Reorient or relocate the receiving antenna.

- Move the equipment away from the receiver.

- Plug the equipment into an outlet on a circuit different from that to which the

receiver is connected.

- Consult the dealer or an experienced radio/television technician for additional

suggestions.

You are cautioned that any change or modifications to the equipment not expressly

approved by the party responsible for compliance could void your authority to

operate such equipment.

(EN)

If the time arises to throw away your

product, please recycle all the

components possible.

Batteries and rechargeable batteries are

not to be disposed in your domestic

waste! Please recycle them at your local

recycling point.

Together we can help to protect the

environment.

IV

Users Manual

(DE)

Wenn die Lebensdauer des Produkts zu Ende

kommt, lassen Sie bitte möglichst alle

Komponenten recyceln. Bitte recyceln Sie

dieses Produkt ordnungsgemäß, wenn es

nicht mehr verwendet werden kann. Es kann

nicht als Haushaltsmüll behandelt werden. Es

muss separat über die verfügbaren

Rücknahme- und Sammelsysteme entsorgt

werden.

(FR)

Si il est temps de jeter votre produit, veuillez recycler tous les composants possibles. Si ce

produit est arrivé en fin de vie, veuillez s’il vous plait le recycler correctement. Il ne peut pas

être traité comme les ordures ménagères. Il doit être être apporté à un point de collecte

approprié pour le recyclage.

(IT)

Al momento di buttare via il prodotto, riciclare il maggior numero di componenti. Se questo

prodotto giunge alla fine del suo ciclo di vita, lo ricicli correttamente. Non può essere trattato

come rifiuto urbano. Deve essere smaltito separatamente attraverso l’appropriato sistema di

reso e di raccolta.

(AR)

           .

       

  !      

  .

    .



(RU)



        

.

     

 !     . 

    .

(TR)

Ürününüzü atma zamanı geldiinde, lütfen mümkün olan tüm bileenleri geri dönütürün.

Piller ve arj edilebilir piller ev atıklarına atılmamalıdır! Lütfen bunları yerel geri dönütürme

noktanızda geri dönütürün. Birlikte çevreyi korumaya yardımc

ı olabiliriz.

V

Users Manual

Product Overview

EN

Projector Lens Charging Mode Button

Projection On/Off Button LED Indicator

Focus Wheel HDMI Male Plug

Volume/Up & Down Button Micro USB Charging Port

Menu Button HDMI port

Top holder* Type A USB Port

* You can press both side

buttons to switch the top holder

to hold iPhone 5 or be a stand

while placing the projector on

the table.

1

Users Manual

Charging the product

EN

Connect one end of the bundled USB cable

to the Micro USB port of the product and the

other end to iPhone power adapter for

charging.

* After 3 hours the projector is fully

charged, the LED light will be turned off.

* iPhone 5 power adapter is not included.

Connecting iPhone 5 or HDMI-out Devices

Connecting iPhone 5

1. Take out the HDMI compartment cover from the projector.

2. Insert the HDMI port end of Apple Lightning Digital AV Adapter into the HDMI

connector of the projector.

3. Press both top side buttons of the front holder to switch it down.

4. Slide the iPhone 5 into the top side of the projector.

5. Press the top side buttons to switch back the front holder

6. Insert the lightning end of Apple Lightning Digital AV Adapter into the iPhone

through the hole tightly as below illustrations indicates.

* Apple Lightning Digital AV Adapter is not included.

Connecting HDMI devices

Use the optional HDMI cable to connect your HDMI-out device with the HDMI

port of the projector.

* HDMI cables are not included in the package.

2

1

2

Users Manual

Turning on/off the projector

EN

Press the Projection On/Off button for 3 seconds to

turn ON or turn OFF the projector.

* It’s normal that the device will get warm due to it’s high

performance.

* Projector time different as source differences.

Adjusting the focus

Adjust the focus by using the focus wheel to get a

sharp and clear picture.

Volume control

Please use Up/Down button to adjust the

volume.

ECO Mode

To save power for extending projection time, please press Menu Button (M) for

one second till menu is displayed on the screen. And press Up button to enter

Eco Mode, then use Up/Down button to turn on/off the Eco Mode.

Adjust Aspect Ratio

If the picture is stretched or not display in correct

format the output format of your playback device is

different from the input settings of the projector.

Please press Menu Button (M) for one second till

menu is displayed on the screen. And press down

button to enter Aspect Ratio, then use Up/Down

button to switch between following Aspect ratios:

(1) 4:3 Pan and Scan: Image ratio is 4:3, it will cut the both side edge to

enlarge central image.

(2) 4: 3 Theme: Image ratio is 4:3, it will keep central ratio and compress the

image ratio for both side edge.

(3) 16: 9 Letterbox: Image ration is 16:9, it will be scaled down, to display

completed 16:9 original image.

3

Users Manual

Illustration for the three kinds of Projection mode:

Smartphone (Source) Screen Projection Screen

EN

Pan & Scan (4:3)

Letterbox (16:9)

16:9 Aspect Ratio

Theme mode (4:3)

4

Users Manual

Charging your iPhone 5/iOS Device

EN

The internal battery of the projector can not only be used for projection, but

also charge your iPhone 5/iOS devices.

1. Please turn off projector before charging the iPhone 5/iOS device.

2. Plug the iPhone 5 lightning USB cable into lightning port of your iPhone

5 and USB port (Type A) of projector.

3. Press the charging mode button to start charging.

* Apple lightning USB cable is not in the package.

LED indicators

LED Status Indication

3 white LEDs stay on Power capacity is between 80% to 100%

2 white LEDs stay on Power capacity is between 45% to 80%

1 white LED stays on Power capacity is between 10% to 45%

1 white LED blinks Power capacity is below 10%

LED Marquee Projector is being charged

3 white LEDs blink Charging iPhone 5/ iOS device

5

Users Manual

Product specifications

EN

Item Description

Optical Technology DLP

Light Source RGB LED

Resolution 640 x 480 Pixels (VGA)

Luminous Flux ANSI 50 lumens

Projection Image Size 152 mm ~ 1524 mm (6” ~ 60” Diagonal)

Projection Source

iPhone 5 with Apple lightning digital AV

adapter and home entertainment devices

support HDMI out, ex Notebook/Tablet/DVD

Player/Game Player Device

Power Input 5V / 2A

Power Output 5V / 1A

Battery Type

Embedded 3000 mAh, Li-polymer

rechargeable battery

Battery Life Projection mode: up to 120 min

Charging mode: 100% recharge of the

iPhone 5 battery

Power Consumption Projection mode: 7.5W

Charging mode: 3.3W

Operation Temperature 5 °C ~ 35 °C

Dimension (L x W x H) 139 mm x 67 mm x 30 mm

Weight 160 g

Package Content

Pico Projector, USB cable, Pouch, User’s

Manual

* We reserve the right for technical changes and mistakes.

6

Users Manual

Troubleshooting

EN

Symptom Check Point

The projector can not be turned on. Ensure the battery is fully charged.

The projecting image is too dark.

* Use the Projector in a darker

environment.

* Decrease the size of projecting

image.

The projecting image is too blurry. Adjust the focus by using focus wheel.

The temperature of the projector’s

It is normal that this projector to

surface is warm.

generate moderate heat during

operation.

The projector is turned on, but the

Please check your Apple Lightning

video can not be projected via

Digital AV Adapter is fixed well

iPhone 5.

between iPhone 5 and projector.

The projector is no audio via

Please check your iPhone 5’s voice is

iPhone 5.

turn on.

When plug earphone into iPhone

Please plug Apple Lightning Digital AV

5, and no audio output.

adapter first and plug the earphone

after then the audio will be outputted.

The projector is turned on, but the

Please check your device if it supports

video can not be projected via

HDMI interface. If yes, please check

HDMI interface.

the source resolution of your device

output. Please refer the supporting

resolution as below and modify your

device output resolution.

640x480p 60fps 720x576p 50fps

720x480p 60fps 1280x720p 50fps

1280x720p 60fps 1920x1080i 50fps

1920x1080i 60fps 1920x1080p 50fps

1920x1080p 60fps

7

Benutzerhandbuch

Produktübersicht

DE

Projektorobjektiv Lademodustaste

Projektion Ein/Aus-Taste LED Anzeige

Fokusrad HDMI-Stecker

Lautstärke/Oben & Unten-Taste Micro USB-Ladeanschluss

Menütaste HDMI-Anschluss

Bügel* Typ A USB-Anschluss

* Sie können die beiden

seitlichen Tasten drücken, um

mit dem Bügel das iPhone 5 zu

halten oder ihn als Ständer

verwenden, wenn Sie den

Projektor auf einen Tisch

stellen.

1

Benutzerhandbuch

Aufladen des Produktes

Verbinden Sie ein Ende des beigelegten

USB-Kabels mit dem Micro USB-Anschluss

am Produkt und das andere Ende mit

DE

einem iPhone Netzteil zum Aufladen.

* Der Projektor ist nach 3 Stunden

vollständig aufgeladen und das LED-Licht

wird ausgeschaltet.

* Das iPhone 5 Netzteil ist nicht im

Lieferumfang enthalten.

Anschluss des iPhone 5 oder von Geräten mit HDMI-Ausgang

Anschluss des iPhone 5

1. Nehmen Sie die HDMI-Abdeckung aus dem Projektor.

2. Stecken Sie den HDMI-Anschluss des Apple Lightning Digital AV Adapters an

den HDMI-Anschluss des Projektors.

3. Drücken Sie auf die beiden oberen Tasten der vorderen Halterung, um sie

nach unten zu schieben.

4. Schieben Sie das iPhone 5 an der Oberseite des Projektors ein.

5. Drücken Sie auf die oberen Tasten, um die vordere Halterung zurückzuschieben.

6. Fügen Sie das Lightning Ende des Apple Lightning Digital AV Adapters in das

iPhone durch die Öffnung wie unten abgebildet ein.

* Apple Lightning Digital AV Adapter ist nicht inbegriffen.

Anschluss von HDMI-Geräten

Verwenden Sie das optionale HDMI-Kabel, um das Gerät mit HDMI-Ausgang

mit dem HDMI-Anschluss des Projektors zu verbinden.

* HDMI-Kabel sind nicht im Lieferumfang enthalten.

2

1

2

Benutzerhandbuch

Projektor ein- und ausschalten

Drücken Sie 3 Sekunden lang auf die Projektion

Ein/Aus-Taste, um den Projektor EIN oder AUS zu

schalten.

* Es ist normal, dass das Gerät aufgrund seiner

hohen Leistung warm wird.

DE

* Zeit des Projektors und der Signalquelle können

voneinander abweichen.

Scharfstellen

Stellen Sie den Fokus über das Fokusrad ein, um

ein scharfes und klares Bild zu erhalten.

Lautstärketasten

Bitte benutzen Sie die Oben/Unten-Taste,

um die Lautstärke einzustellen.

ECO Modus

Um Strom für eine längere Projektionsdauer zu sparen, drücken Sie bitte eine

Sekunde lang die Menü-Taste (M), bis das Menü auf dem Bildschirm angezeigt

wird. Drücken Sie die Oben-Taste zum Aufruf des Eco-Modus und drücken Sie

anschließend auf die Oben/Unten-Taste, um den Eco-Modus

ein/auszuschalten.

Seitenverhältnis anpassen

Wenn das Bild gestreckt ist oder nicht im richtigen

Format angezeigt wird, unterscheidet sich das

Ausgabeformat Ihres Wiedergabegerätes von den

Eingangseinstellungen des Projektors. Bitte drücken

Sie eine Sekunde lang auf die Menütaste (M), bis das

Menü auf dem Bildschirm angezeigt wird. Drücken

Sie auf die Taste Seitenverhältnis und anschließend

die Oben/Unten-Taste, um zwischen den folgenden

Bildschirmdiagonalen zu wechseln:

(1) 4:3 Pan and Scan: Seitenverhältnis ist 4:3, beide seitlichen Ränder

werden abgeschnitten, um das zentrale Bild zu vergrößern.

(2) 4:3 Thema: das zentrale Verhältnis wird beibehalten und das

Seitenverhältnis an beiden seitlichen Rändern gestaucht.

(3) 16:9 Letterbox: Seitenverhältnis ist 16:9, wird herunterskaliert, um das 16:9

Originalbild anzuzeigen.

3

Benutzerhandbuch

DE

4

A

bbildung der drei unterschiedlichen Projektionsmodi:

Smartphone (Quelle) Anzeige Projektionsanzeige

Pan & Scan (4:3)

Letterbox (16:9)

16:9 Anzeigeformat

Themenmodus (4:3)

Benutzerhandbuch

iPhone 5/iOS Gerät aufladen

Der interne Akku des Projektors kann nicht nur für die Projektion verwendet

werden, sondern auch um Ihr iPhone 5/iOS Gerät aufzuladen.

1. Bitte schalten Sie Projektor vor dem Aufladen des iPhone 5/iOS

Gerätes aus.

DE

2. Stecken Sie das iPhone 5 Lightning USB-Kabel in den

Lightning-Anschluss Ihres iPhone 5 und den USB-Anschluss (Typ A) des

Projektors.

3. Drücken Sie auf die Lademodustaste, um den Ladevorgang zu starten.

* Apple-Lightning USB-Kabel ist nicht im Lieferumfang enthalten.

LED Anzeigen

LED Status Anzeige

3 weiße LEDs leuchten Stromkapazität von 80% bis 100%

2 weiße LEDs leuchten Stromkapazität von 45% bis 80%

1 weiße LED leuchtet Stromkapazität von 10% bis 45%

1 weiße LED blinkt Stromkapazität unter 10%

LED Verlauf

Projektor wird geladen

3 weiße LEDs blinken iPhone 5/iOS Gerät wird geladen

5

Benutzerhandbuch

Produktbeschreibung

Element Beschreibung

Optische Technologie DLP

DE

Lichtquelle RGB LED

Auflösung 640 x 480 Pixel (VGA)

Lichtstärke ANSI 50 Lumen

Projizierte Bildgröße 152 mm ~ 1524 mm (6” ~ 60” Diagonale)

Projektionsquelle

iPhone 5 mit Apple Lightning Digital AV

Adapter und Home-Entertainment-

Geräte mit HDMI Ausgang, z.B. Notebook/

Tablet/DVD-Player/Spielkonsole

Leistungsaufnahme 5 V/2 A

Ausgangsleistung 5 V/1 A

Akkutyp Integrierter 3000 mAh, Li-Polymer Akku

Akku Betriebszeit Projektionsmodus: bis zu 120 Min

Lademodus: 100% Aufladung des iPhone 5

Akkus

Stromverbrauch Projektionsmodus: 7,5 W

Lademodus: 3,3 W

Betriebstemperatur 5°C bis 35°C

Abmessungen (L x B x H) 139 mm x 67 mm x 30 mm

Gewicht 160 g

Paketinhalt

Pico-Projektor, USB-Kabel, Tasche,

Bedienungsanleitung

* Technische Änderungen und Irrtümer vorbehalten.

6

Benutzerhandbuch

Fehlerbehebung

Symptom Zu prüfende Punkte

Der Projektor kann nicht

Stellen Sie sicher, dass der Akku

eingeschaltet werden.

vollständig aufgeladen ist.

DE

Das projizierte Bild ist zu dunkel.

* Nutzen Sie den Projektor in einer

dunkleren Umgebung.

* Verringern Sie die Größe des

projizierten Bildes.

Das projizierte Bild ist zu dunkel.

Stellen Sie den Fokus mithilfe des

Fokusrades ein.

Die Oberfläche des Projektors ist

Es ist normal, dass dieser Projektor

warm.

während des Betriebs generieren

mäßig warm wird.

Der Projektor ist eingeschaltet,

Bitte prüfen Sie, ob der Apple

aber das Video kann nicht über

Lightning Digital AV Adapter zwischen

iPhone 5 projiziert werden.

iPhone 5 und Projektor befestigt ist.

Der Projektor gibt keinen Ton über

Bitte prüfen Sie, ob der Ton Ihres

iPhone 5 wieder.

iPhone 5 eingeschaltet ist.

Wenn Kopfhörer in das iPhone 5

Bitte stecken Sie zuerst den Apple

eingesteckt sind, wird kein Ton

Lightning Digital AV Adapter ein und

ausgegeben.

anschließend den Kopfhörer. Der Ton

wird anschließend ausgegeben.

Der Projektor ist eingeschaltet,

Bitte prüfen Sie, ob Ihr Gerät die

aber das Video kann nicht über die

HDMI-Schnittstelle unterstützt. Falls ja,

HDMI-Schnittstelle projiziert

überprüfen Sie bitte die

werden.

Quellauflösung des Geräteausgangs.

Bitte beachten Sie die unten

angegebenen unterstützten Auflösung

ändern Sie die Ausgangsauflösung

des Gerätes.

640x480p 60 fps 720x576p 50 fps

720x480p 60 fps 1280x720p 50 fps

1280x720p 60 fps 1920x1080i 50 fps

1920x1080i 60 fps 1920x1080p 50 fps

1920x1080p 60 fps

7

Оглавление

    Аннотация для Проектора Aiptek MobileCinema i55 в формате PDF