Klipsch ROOMGROOVE: инструкция
Раздел: Бытовая, кухонная техника, электроника и оборудование
Тип: Акустика
Инструкция к Акустику Klipsch ROOMGROOVE

RoomGroove
Owner's Manual
Important Safety Information
Important Safety Information
1. READ these instructions.
The exclamation point, within an equilateral triangle, is
2. KEEP these instructions.
intended to alert the user to the presence of important
3. HEED all warnings.
operating and maintenance (servicing) instructions in
the literature accompanying the product.
4. FOLLOW all instructions.
5. DO NOT use this apparatus near water.
The lightning flash with arrowhead symbol within an
6. CLEAN ONLY with dry cloth.
equilateral triangle, is intended to alert the user to the
7. DO NOT block any ventilation openings. Install in
presence of uninsulated “dangerous voltage” within
accordance with the manufacturer’s instructions.
the product’s enclosure that may be of sufficient
8. DO NOT install near any heat sources such as radiators,
magnitude to constitute a risk of electrical shock to
heat registers, stoves, or other apparatus (including
persons.
amplifiers) that produce heat.
9. DO NOT defeat the safety purpose of the polarized or
WARNING:
To reduce the risk of fire or electrical shock, do not expose
grounding type plug. A polarized plug has two blades with
this apparatus to rain or moisture.
one wider than the other. A grounding type plug has two
blades and a third grounding prong. The wider blade or the
WARNING: Batteries (battery pack or batteries installed) shall not be
third prong is provided for your safety. If the provided
exposed to excessive heat such as sunshine, fire or the like.
plug does not fit into your outlet, consult an electrician for
replacement of the obsolete outlet.
WARNING: No naked flame sources – such as candles – should be
10. PROTECT the power cord from being walked on or
placed on the product.
pinched, particularly at plugs, convenience receptacles,
and the point where they exit from the apparatus.
WARNING
11. ONLY USE attachments/accessories specified by the
RISK OF ELECTRIC SHOCK.
manufacturer.
DO NOT OPEN.
12. USE only with a cart, stand, tripod, bracket,
or table specified by the manufacturer, or sold
WARNING: Do Not Open! Risk of Electrical Shock. Voltages in this
with the apparatus. When a cart is used,
equipment are hazardous to life. No user-serviceable parts inside.
use caution when moving the cart/apparatus
Refer all servicing to qualified service personnel.
combination to avoid injury from tip-over.
13. UNPLUG this apparatus during lightning storms
WARNING: This product is intended to be operated ONLY from the
or when unused for long periods of time.
AC Voltages listed on the back panel or included power supply of the
14. REFER all servicing to qualified service personnel.
product. Operation from voltages other than those indicated may cause
Servicing is required when the apparatus has been
irreversible damage to the product and void the products warranty. The
damaged in any way, such as power-supply cord or plug is
use of AC Plug Adapters is cautioned because it can allow the product
damaged, liquid has been spilled, objects have fallen
to be plugged into voltages in which the product was not designed to
into the apparatus, the apparatus has been exposed to rain
operate. If the product is equipped with a detachable power cord, use
or moisture, does not operate normally, or has been
only the type provided with your product or by your local distributor
dropped.
and/or retailer. If you are unsure of the correct operational voltage,
please contact your local distributor and/or retailer.
For Your Safety: The AC power plug is polarized
(one blade is wider than the other) and only fits
CAUTION: Place the equipment near a main power supply outlet and
into an AC power outlet one way. If the plug won’t
make sure that you can easily access the power breaker switch.
go into the outlet completely, turn the plug over
and try to insert it the other way. If it still won’t fit,
This picture is for
contact a qualified electrician to change the outlet,
# ADS-48R-12-2-1545
illustration, the plug
may differ from country
or use a different one. Do not attempt to bypass
Adaptor I/P: 100-240VAC, 50/60Hz
to country
this safety feature.
Unit I/P: 15VDC, 3A
o
Ambient Temperature: 35
C
15. DO NOT expose this apparatus to dripping or splashing and
ensure that no objects filled with liquids, such as vases,
are placed on the apparatus.
16. To completely disconnect this apparatus from the AC
Mains, disconnect the power supply cord plug from the AC
receptacle.
17. The mains plug of the power supply cord shall remain readily
operable.
English
Thank You
Congratulations on your purchase of the Klipsch RoomGroove music
The RoomGroove is designed to work with Apple universal well
center. The RoomGroove is a wireless transceiver utilizing Wireless
inserts. Several inserts are supplied with your RoomGroove
TM
KlipschCast
Technology to transmit and receive CD-quality audio
system. If your iPod came with an insert, it can also be used in the
signals to and from other KlipschCast components. The RoomGroove
RoomGroove. To configure the RoomGroove for your specific iPod,
®
features an iPod
dock and auxiliary input for connecting your
select the appropriate well insert and place it in the universal well
favorite components and enjoying them locally or transmitting them
as shown in the diagram. Now you are ready to dock your iPod.
throughout your home.
While your iPod is docked, its battery is charging (until it is fully
charged).
The RoomGroove is a true two-way, stereo sound system incorporating
TM
two long-throw woofers and two MicroTractrix
Horn-loaded tweeters
in a ported enclosure. This system provides the accuracy, detail and
output that will bring your music to life as only Klipsch can.
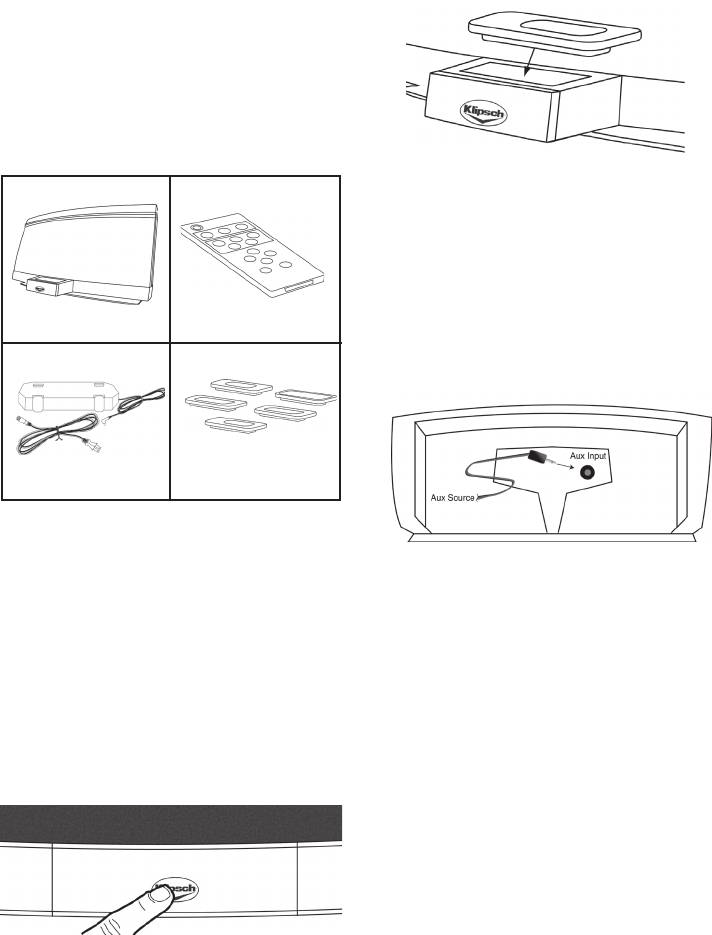
Unpack the Box
Unpack the entire contents of the shipping box and make sure you
have the following items.
To listen to the docked iPod, press the “Listen” button on the
0
0
RoomGroove or the remote until the “Listen” light becomes blue
and you hear the iPod. The iPod can be directly accessed by
pressing the “iPod” button on the RoomGroove’s remote control.
Connecting an Auxiliary Source
The RoomGroove offers a 3.5mm stereo auxiliary input on the
RoomGroove
Remote Control
rear of the device. To connect an auxiliary device, simply plug the
audio output of the device into the “Aux Input” on the rear of the
0
0
RoomGroove. You must use a 3.5mm stereo cable.
Power Supply
Universal Well Inserts
Place the RoomGroove on a sturdy surface. Plug the power cord into
the rear of the RoomGroove and then into a standard wall outlet. The
RoomGroove is now ready to listen to any source being transmitted
with wireless KlipschCast Technology.
To listen to the auxiliary source, press the “Listen” button on
the RoomGroove or the remote until the “Listen” light becomes
blue and you hear the auxiliary device. This can also be done by
Docking and Listening to an iPod
pressing the “Aux” button on the RoomGroove’s remote control.
The RoomGroove is intelligently designed to easily accommodate
all iPods. Touching the Klipsch logo on the front of the RoomGroove
Note: The “Listen” light will be blue when listening to either a
will reveal the retractable iPod dock. The RoomGroove must be
local iPod or a device connected to the local auxiliary input. If
powered on for the drawer to open and close. When the dock is
both inputs are in use, the “Listen” button will go from the Aux
extended, touching the dock again will cause it to retract. The dock
to the iPod in that order.
will not move when an iPod is docked. The dock will automatically
retract when no iPod is present and the RoomGroove is in standby
mode (the power LED will be red).
2

Transmitting Audio from the RoomGroove
Transmitting Audio from Two RoomGrooves
The RoomGroove is designed to allow you to transmit the iPod
In systems not incorporating a CS-700 system (or if the cinema
or the auxiliary source so that it can be received and played by
system in not intended to be part of the wireless multi-room
other KlipschCast components. To transmit from the RoomGroove,
system), two RoomGrooves can transmit simultaneously. To enable
simply select the source you wish to transmit by pressing the
this feature, all components of the wireless multi-room system
“Listen” button, or the desired source on the remote (iPod or Aux),
must be assigned to a home code from 5 to 9. Selecting a home
and then press the “Transmit” button. The selected source is now
code from 5 to 9 will allow a second RoomGroove to occupy the
being transmitted throughout your home and is available to other
wireless channel which was previously assigned to the CS-700.
KlipschCast-enabled products.
(See “Setting the Home Code” for more detailed information.)
Note: If a RoomGroove is transmitting and a second Room-
If two RoomGrooves are transmitting and you wish to transmit
Groove is told to transmit, the second RoomGroove will bump
from a third and control which wireless channel will be used for the
the first RoomGroove and occupy that wireless channel. If you
new transmission, you must first select the broadcast you wish to
wish to configure your wireless multi-room system to allow two
terminate by pressing the “Listen” button until that source is heard.
RoomGrooves to simultaneously transmit, see the “Transmitting
Then press transmit and the new source will occupy that wireless
Audio from Two RoomGrooves” section of this manual.
channel and stop the transmission of the other source. You should
now hear the new source in all the locations in which the previous
Listening to Other KlipschCast Devices with Your
source was playing. The new source should now be available to all
RoomGroove
active listeners.
The RoomGroove is designed to allow you to listen to sources
Note: All devices in the wireless multi-room system must be set
connected to, or integrated into, other KlipschCast components
to the same home code in order for transmissions to take place.
such as another RoomGroove or the CS-700 DVD Entertainment
System.
Setting the Home Code
The home code dial on the rear of your RoomGroove allows you
To listen to a source being transmitted by another KlipschCast
to select a code specific to all of your KlipschCast components
device, simply press the “Listen” button to access the transmitted
to avoid interference from neighboring systems. The home code
source. The “Listen” light becomes red (or purple for a second
numbers range from 0 to 9 with 0 set as the default. All of your
wireless source) when a wireless source is received and played. A
KlipschCast components will initially be set to 0 and allow one
flashing color indicates no source is available on that channel.
wireless channel to broadcast audio from a cinema system and
the second wireless channel to broadcast wireless audio from a
Sources and Colors of the “Listen” Light
RoomGroove. The home code number should only be changed for
one of two reasons:
Blue always indicates a local source. Red and purple indicate
wireless channels. If the color is flashing, the source or wireless
1) There is interference from a neighboring system – If a
channel is not available.
neighboring system in interfering with your wireless system,
simply change all KlipschCast components to another home code.
For systems transmitting from a CS-700 system
KlipschCast components will only transmit and receive audio from
and RoomGroove
components on the same home code. Home codes 0 through 4
can be used for systems transmitting audio from a cinema system
and a RoomGroove (home codes 5 through 9 are reserved for
Local source (iPod or Aux) = blue
systems transmitting from two separate RoomGrooves and no
cinema system).
Transmitted Cinema System source = red
Transmitted RoomGroove source = purple
2) You wish to transmit audio from two RoomGrooves (not a
cinema system) – If you wish to transmit audio from two separate
RoomGrooves and not a cinema system, simply choose a home
For systems transmitting from two RoomGrooves
code from 5 to 9 and change all KlipschCast components to that
home code. KlipschCast components will only transmit and receive
Local source (iPod or Aux) = blue
audio from components on the same home code.
1st Transmitted RoomGroove source = red
Once the home code has been changed, you must disconnect and
reconnect the power cord from the wall outlet for the change to be
2nd Transmitted RoomGroove source = purple
made. This will change the home code and allow the component to
talk to other KlipschCast components set to the same home code.
Transmitting Audio from the CS-700
In a multi-room system incorporating a CS-700 cinema system
(sold separately), the RoomGroove remote can be used to directly
select sources from the CS-700 once the CS-700 has been
selected by the RoomGroove’s “Listen” button. The CS-700
will default to transmit its local source (the source selected for
listening/viewing on the CS-700 system) until another source is
selected. See the “Remote Control” section of this manual for
Note: All devices in the wireless multi-room system must be set
details on the remote’s functionality.
3
to the same home code in order for transmissions to take place.

Remote Control
The wireless remote control allows interaction with the RoomGroove and iPod as well as other transmitting devices such as other RoomGrooves
and Klipsch cinema systems such as the CS-700.
Buttons
Power
Press to turn the RoomGroove “On”. Press again to put the RoomGroove
into “Standby” mode.
RoomGroove
iPod Selects the iPod docked in the local RoomGroove.
Aux Selects the audio device connected to the local RoomGroove (the audio
device must be playing to be heard).
Listen Toggles through available sources both local and wireless.
Cinema System Sources
CD/DVD Accesses the CD/DVD drive of the cinema system connected to the
KlipschCast network.
AM/FM Accesses the AM/FM tuner of the cinema system connected to the
KlipschCast network.
Cab/Sat Accesses audio from the device connected to the cinema system’s
Cab/Sat input connected to the KlipschCast network. The device must be
delivering audio to the cinema system to be heard on the RoomGroove.
Aux 1 Accesses audio from the device connected to the cinema system’s Aux 1
input connected to the KlipschCast network. The device must be
delivering audio to the cinema system to be heard on the RoomGroove.
Aux 2 Accesses audio from the device connected to the cinema system’s Aux 2
input connected to the KlipschCast network. The device must be
delivering audio to the cinema system to be heard on the RoomGroove.
Note: This remote must be pointed at
the RoomGroove for proper interaction.
Track Selection ( |7and8| ) These buttons enable control of several different sources:
•WhencontrollingthelocaliPod,press|7and8| to move to the previous or next track;
press and hold to reverse or fast-forward through the current track.
•WhencontrollingatransmittediPoddockedinanotherRoomGroove,press|7and8|
to move to the previous or next track.
•WhencontrollingtheCD/DVDcinemasystemsource,press|7and8| to move to the
previous or next track/chapter.
•WhencontrollingtheAM/FMcinemasystemsource,press|7and8| to move to the
previous or next preset station (if no stations have been preset, these buttons will not
function).
•WhencontrollingtheCab/Satcinemasystemsource,press|7and8| to move to the
previous or next channel.
•Thesebuttonsarenon-functionalwhenlisteningtothetransmittedAux1orAux2
sources of a cinema system.
Play/Pause Press once to “Pause” play; press again to resume play.
Volume Press + or - to increase or decrease the RoomGroove volume level
(local RoomGroove only).
Mute Decreases the volume of the local RoomGroove to a zero level
(no sound).
4
Changing the Remote Control Battery
We Klipsch Group Incorporated
The remote control battery will need to be changed when it stops
Of 3502 Woodview Trace, Suite 200
working or when its performance is noticeably reduced. To remove
Indianapolis, IN 46268 USA
the battery, simply pull the battery housing tab from the remote
control (as shown in the diagram) and remove the battery. Replace
Declare that
only with a 3-volt CR2025 lithium battery.
Equipment:
iPOD Audio System with Wireless Transmitter / Receiver
Model Name: Klipsch RoomGroove
In accordance with the following Directives:
1999/5/EC R&TTE Directive : Radio Equipment and
Telecommunications Terminal Equipment
2004/108/EC The Electromagnetic Compatibility Directive
and its amending Directives
has been designed and manufactured to comply with the following specifications:
EN300440-1 V1.3.1 EN300440-2 V1.1.2
Note: Lighting and other room conditions can reduce remote
performance.
EN301489-1 V1.5.1 EN301489-3 V1.4.1
EN50371
Cable Management System and Mounting the
I hereby declare that the equipment named above has been
Power Supply
designed to comply with the relative sections of the above
The RoomGroove’s power supply has an integrated cable
reference specifications. The unit complies with all essential
management system. Excess cable length can be wrapped around
requirements of the Directives.
the power supply and secured with the rubber straps as shown in
the diagram.
Signature:
Name: Clinton Bradley
Position: Certification Engineer
Klipsch Audio Technologies
3502 Woodview Trace, Suite 200
Done At: Indianapolis, IN 46268 USA
On date: 12/12/07
The RoomGroove’s power supply can be convieniently mounted
KLIPSCH GROUP INCORPORATED
on the rear of the RoomGroove. To mount the power supply simply
3502 WOODVIEW TRACE
position the hooks on the side of the power supply into the slots on
INDIANAPOLIS, IN 46268 USA
the rear of the RoomGroove as show in the diagram.
KLIPSCH EUROPEBV
Slots
INDUSTRIESTRAAT 1
7041 GD ‘s-HEERENBERG, NETHERLANDS
Hooks
Optional Wall Mount Bracket
Your RoomGroove can be wall mounted with the optional wall
mount bracket available at Klipsch.com. Visit Klipsch.com or call
1.800.KLIPSCH (554.7724) for more details.
5

Warranty – U.S. and Canada
Warranty Outside the United States and Canada
Klipsch warrants to the original retail purchaser that this product is
The Warranty on this product if it is sold to a consumer outside of the
United States and Canada shall comply with applicable law. To obtain any
to be free from defective materials and workmanship for a period
applicable warranty service, please contact the dealer from which you
of one (1) year, from the date of purchase, if it is properly used and
purchased this product, or the distributor that supplied this product.
maintained. If this product proves defective in either material or
workmanship, Klipsch, at its option, will (a) repair the product, or (b)
FCC Information
replace the product, at no charge for parts or labor. If the product
This device complies with Part 15 of the FCC Rules. Operation is subject
model is no longer available and cannot be repaired effectively or
to the following two: (1) This device may not cause harmful interference,
and (2) this device must accept any interference received, including
replaced with an identical model, Klipsch at its sole option may
interference that may cause undesired operation.
replace the unit with a current model of equal or greater value. In
some cases, modification to the mounting surface may be required
This equipment has been tested and found to comply with the limits for
where a new model is substituted. Klipsch assumes no responsibility
a Class B digital device, pursuant to Part 15 of the FCC Rules. These
or liability for such modification. To obtain a repair or replacement
limits are designed to provide reasonable protection against harmful
interference in a residential installation. This equipment generates, uses
under the terms of this warranty, please contact our customer
and radiates radio frequency energy and, if not installed and used in
service group at 1-800-KLIPSCH. You will be required to submit a
accordance with the instruction, may cause harmful interference to radio
copy of the original receipt via fax or email. The receipt must reflect
communications. However, there is no guarantee that interference will not
that you are the original purchaser, the product was bought from an
occur in a particular installation.
authorized Klipsch retailer, and the product is still within warranty.
In accordance with FCC requirements, changes or modifications not
You will be issued a return authorization number (RA#) and asked to
expressly approved by Klipsch could void the user’s authority to operate
this product.
ship the defective product, together with proof of purchase and RA#,
prepaid insured to the address set forth Klipsch 137 Heampstead
This device generates and uses radio frequency (RF) energy, and if not
#278 Hope, AR 71801. Freight collect shipments will be refused.
installed and used properly, this equipment may cause interference to
Risk of loss or damage in transit is to be borne by the purchaser.
radio and television reception.
Once Klipsch receives the defective product, a repair or replacement
order will be initiated.
If this equipment does cause interference to radio or television reception
(which you can determine by unplugging the unit), try to correct the
interference by one or more of the following measures:
Limitations:
•Re-orient the receiving antenna (that is, the antenna for the
•Thislimitedwarrantydoesnotcoverfailureoftheproduct
radio or television that is “receiving” the interference).
resulting from improper installation, misuse, abuse, accident,
•Move the unit away from the equipment that is receiving
neglect, mishandling, or wear from ordinary use or environmen-
interference.
tal deterioration.
•Plug the unit into a different wall outlet so that the unit and the
equipment receiving interference are on different branch circuits.
•Thislimitedwarrantydoesnotcovercosmeticdamage,
including paint damage, or consequential damage to other
If these measures do not eliminate the interference, please consult
components or premises which may result for any reason
your dealer or an experienced radio/television technician for additional
from the failure of the product.
suggestions.
•Thislimitedwarrantyisnullandvoidforproductsnotusedin
accordance with Klipsch’s instructions.
Also, the Federal Communications Commission has prepared a helpful
booklet, “How To Identify and Resolve Radio TV Interference Problems.”
•Thislimitedwarrantyisnullandvoidforproductswithalteredor
This booklet is available from the U.S. Government Printing Office,
missing serial numbers and for products not purchased from an
Washington, DC 20402. Please specify stock number 004-000-00345-4
authorized dealer.
when ordering copies.
•Thislimitedwarrantyterminatesifyousellorotherwisetransfer
this product to another party.
This product complies with DHHS Rules 21 CFR Subchapter J. Applicable
at the date of manufacture.
THIS WARRANTY GIVES YOU SPECIFIC LEGAL RIGHTS, AND YOU
This Class B digital apparatus complies with Canadian ICES-003. Cet
MAY ALSO HAVE OTHER RIGHTS WHICH VARY FROM STATE
appareil numérique de la classe B est conforme à la norme NMB-003
TO STATE, JURISDICTION TO JURISDICTION OR COUNTRY TO
du Canada.
COUNTRY. KLIPSCH’S RESPONSIBILITY FOR MALFUNCTIONS AND
DEFECTS IN HARDWARE IS LIMITED TO REPLACEMENT OR REPAIR
FCC Declaration Of Conformity
AS SET FORTH IN THIS WARRANTY STATEMENT. FOR CANADIAN
CUSTOMERS, KLIPSCH DISCLAIMS ALL OTHER WARRANTIES AND
Trade Name: Klipsch Audio Technologies
CONDITIONS, EXPRESS OR IMPLIED, STATUTORY OR OTHERWISE,
Product Name: Audio Speaker System
FOR THE PRODUCT. FOR U.S. CUSTOMERS, ALL EXPRESS AND
Model Number: RoomGroove
IMPLIED WARRANTIES FOR THE PRODUCT, INCLUDING BUT NOT
Responsible Party
LIMITED TO ANY IMPLIED WARRANTIES OF MERCHANTABILITY
Manufacturer: Klipsch Audio Technologies
AND FITNESS FOR A PARTICULAR PURPOSE ARE LIMITED IN TIME
Address: 3502 Woodview Trace, Suite 200
TO THE TERM OF THIS WARRANTY. SOME STATES, JURISDICTIONS
Indianapolis, IN 46268
OR COUNTRIES DO NOT ALLOW THE EXCLUSION OF CERTAIN
Telephone: 317-860-8100
IMPLIED WARRANTIES OR CONDITIONS, OR LIMITATIONS ON HOW
Date: 1/15/2006
LONG AN IMPLIED WARRANTY OR CONDITIONS LASTS, SO THIS
LIMITATION MAY NOT APPLY TO YOU. KLIPSCH DOES NOT ACCEPT
These devices were tested and found to comply with Part 15 of
LIABILITY FOR SPECIAL, INDIRECT, CONSEQUENTIAL OR INCIDENTAL
the FCC Rules. Operation is subject to the following conditions: The
DAMAGES, INCLUDING WITHOUT LIMITATION, ANY LIABILITY FOR
devices may not cause harmful interference, and the devices must
THIRD PARTY CLAIMS AGAINST YOU FOR DAMAGES OR FOR
accept any interference received, including interference that may
PRODUCTS NOT BEING AVAILABLE FOR USE. THE MAXIMUM
cause undesired operation.
LIABILITY FOR WHICH KLIPSCH MAY BE RESPONSIBLE WILL BE NO
MORE THAN THE AMOUNT YOU PAID FOR THE PRODUCT THAT IS
RoomGroove
THE SUBJECT OF THE CLAIM. SOME STATES, JURISDICTIONS OR
COUNTRIES DO NOT ALLOW THE EXCLUSION OR LIMITATION OF
SPECIAL, INDIRECT, INCIDENTAL OR CONSEQUENTIAL DAMAGES,
SO THE ABOVE LIMITATION OR EXCLUSION MAY NOT APPLY TO YOU.
6
Important Safety Information
Consignes de sécurité importantes
1. LIRE ces instructions.
Le point d’exclamation contenu dans un triangle
2. CONSERVER ces instructions.
équilatéral avertit l’utilisateur de la présence, dans la
3. RESPECTER tous les avertissements.
documentation qui accompagne l’appareil, de consi-
gnes d’utilisation et de maintenance importantes.
4. SUIVRE toutes les instructions.
5. NE PAS utiliser cet appareil à proximité de l’eau.
L’éclair fléché dans un triangle équilatéral avertit
6. NETTOYER UNIQUEMENT avec un chiffon sec.
l’utilisateur de la présence d’une « tension dangereuse »
7. NE PAS OBSTRUER les orifices de ventilation. Installer
non isolée à l’intérieur de l’appareil et d’une valeur
conformément aux instructions du constructeur.
suffisante pour constituer un risque de choc
8. NE PAS installer à proximité de sources de chaleur telles
électrique.
que les radiateurs, les grilles de chauffage, les cuisinières
et les autres appareils (notamment les amplificateurs)
AVERTISSEMENT : Pour réduire les risques d’incendie et d’électrocu-
dégageant de la chaleur.
tion, ne pas exposer cet appareil à la pluie ni à l’humidité
.
9. NE PAS neutraliser le dispositif de sécurité que constitue
la fiche polarisée ou à broche de terre. Une fiche polarisée
AVERTISSEMENT : Ne pas soumettre les piles ou batteries (mises en
a une lame plus large que l’autre. Une fiche à broche de
place par l’utilisateur ou bloc intégré) à une température excessive
terre est munie de deux lames et d’une troisième broche
telle que celle du rayonnement solaire, d’un incendie, etc.
pour la terre. La lame large ou la troisième broche est
prévue pour la sécurité de l’utilisateur. Si la fiche fournie
AVERTISSEMENT : Ne pas poser sur ce produit de sources de
ne rentre pas dans la prise de courant, demander à un
flammes nues telles que des bougies.
électricien de remplacer cette prise d’un type ancien.
10. PROTÉGER le cordon d’alimentation en s’assurant qu’il
WARNING
ne risque pas d’être piétiné ou écrasé, en particulier près
RISK OF ELECTRIC SHOCK.
des fiches, des blocs multiprises et de son point de sortie
DO NOT OPEN.
de l’appareil.
11. UTILISER UNIQUEMENT les accessoires préconisés par le
AVERTISSEMENT : Ne pas ouvrir ! Risque d’électrocution.
constructeur.
Les tensions présentes dans cet appareil peuvent être mortelles.
12. UTILISER exclusivement avec un chariot,
Cet appareil ne contient pas de pièces pouvant être remplacées
un support, un trépied, une console ou un bâti
par l’utilisateur. Tout travail de dépannage doit être confié à un
recommandé par le fabricant ou vendu avec
réparateur professionnel compétent.
l’appareil. Lorsqu’un chariot est utilisé,
faire preuve de prudence pour déplacer
AVERTISSEMENT : Ce produit a été conçu pour être alimenté
l’ensemble chariot/appareil afin d’éviter un renversement
EXCLUSIVEMENT par une source d’alimentation secteur conforme
pouvant causer des blessures.
aux valeurs indiquées en face arrière ou par le bloc d’alimentation du
13. DÉBRANCHER cet appareil en cas d’orage ou lorsqu’il
produit. L’alimentation à partir d’autres sources que celles indiquées
reste inutilisé pendant une longue durée.
risque d’endommager le produit de façon irréversible et d’annuler
14. CONFIER tout travail de dépannage à un réparateur
sa garantie. L’utilisation d’adaptateurs de fiches secteur doit se faire
professionnel compétent. Faire réparer l’appareil en cas
avec prudence, car elle peut permettre le branchement du produit sur
de dommages, par exemple : fiche ou cordon d’alimenta-
des sources de tension pour lesquelles le produit n’a pas été conçu.
tion endommagé, liquide renversé sur l’appareil, objet
Si le produit est pourvu d’un cordon d’alimentation amovible, utiliser
inséré dans l’appareil, appareil exposé à la pluie ou à
uniquement un cordon du même type que celui fourni avec l’appareil,
l’humidité, mauvais fonctionnement ou après une chute.
ou un cordon fourni par un distributeur ou revendeur local. En cas
de doute quant à la tension d’alimentation acceptable, s’adresser au
Pour la sécurité d’utilisation : La fiche d’alimentation
distributeur ou au revendeur local.
secteur est polarisée (une broche est plus large que
l’autre) et ne peut être introduite dans la prise de
ATTENTION : Placer l’équipement à proximité d’une prise de courant
courant que dans un seul sens. Si la fiche ne rentre pas
et veiller à faciliter l’accès au disjoncteur.
complètement dans la prise, la retourner et essayer de
Cette illustration est
l’insérer dans l’autre sens. Si elle ne peut toujours pas
fournie à titre indicatif ; la
être insérée, faire changer la prise par un électricien
# ADS-48R-12-2-1545
fiche peut être différente
compétent, ou en utiliser une autre. Ne pas essayer de
Alimentation adaptateur : 100 à 240 V~, 50/60 Hz
d’un pays à l’autre.
contourner ce dispositif de sécurité.
Alimentation appareil : 15 V=, 3 A
o
Température ambiante : 35
C
15. NE PAS exposer cet appareil à des éclaboussures ou des
égouttements et veiller à ce qu’aucun récipient rempli de
liquide, tel qu’un vase, ne soit posé dessus.
16. Pour isoler complètement cet appareil de l’alimentation
secteur, débrancher son cordon d’alimentation de la prise de
courant.
17. La fiche secteur du cordon d’alimentation doit rester
accessible.
French

Merci
Toutes nos félicitations pour l’achat du système de sonorisation
Le RoomGroove a été conçu pour fonctionner avec les adaptateurs
RoomGroove de Klipsch. Le système RoomGroove est un ensemble
Apple pour support universel. Plusieurs adaptateurs sont
émetteur-récepteur qui utilise la technologie KlipschCast™ pour
fournis avec le système RoomGroove. Le RoomGroove permet
émettre et recevoir des signaux audio de qualité CD vers et depuis
aussi d’utiliser les adaptateurs accompagnant les iPod. La
les autres éléments KlipschCast. Avec sa station d’accueil iPod® et
configuration du RoomGroove pour un iPod donné se fait en
son entrée auxiliaire pour le raccordement de l’un de vos appareils
sélectionnant l’adaptateur adéquat et en plaçant celui-ci dans le
préférés, le système RoomGroove permet l’écoute locale ou la
support universel, comme le montre la figure. L’iPod peut alors
diffusion de la musique dans toute la maison.
être placé dans la station d’accueil. Lorsque l’iPod est dans la
station d’accueil, sa batterie se charge (jusqu’à ce qu’elle soit
Il s’agit d’un véritable système stéréophonique intégrant deux haut-
complètement chargée).
parleurs de graves à longue course et deux haut-parleurs d’aigus
à pavillon MicroTractrix™ dans un coffret résonant. La précision, le
détail et la puissance acoustique qu’offre ce système donnent vie à
votre musique comme seul Klipsch sait le faire.
Déballage du carton
Déballez la totalité du contenu du carton et vérifiez que vous avez les
éléments ci-dessous.
Pour écouter la musique de l’iPod présent dans la station
0
0
d’accueil, appuyez sur la touche « Listen » du RoomGroove ou de la
télécommande jusqu’à ce que le voyant « Listen » devienne bleu et
que vous entendiez la musique. Vous pouvez accéder directement
à l’iPod en appuyant sur la touche « iPod » de la télécommande du
RoomGroove.
Raccordement d’une source auxiliaire
RoomGroove
Remote Control
Le RoomGroove offre une prise d’entrée auxiliaire stéréo de 3,5 mm
à l’arrière de l’appareil. Pour raccorder un appareil auxiliaire, il suffit
d’en raccorder la sortie audio à cette prise, repérée « Aux Input ».
0
0
Vous devez utiliser un câble stéréo à connecteur de 3,5 mm.
Power Supply
Universal Well Inserts
Posez le RoomGroove sur une surface plane. Branchez l’autre cordon
d’alimentation à l’arrière du RoomGroove, puis dans une prise de
courant. Le RoomGroove est maintenant prêt à permettre l’écoute de
toute source transmise sans fil à l’aide de la technologie KlipschCast.
Pour écouter la musique de la source auxiliaire, appuyez sur la
touche « Listen » du RoomGroove ou de la télécommande jusqu’à
Mise en place et écoute d’un iPod
ce que le voyant « Listen » devienne bleu et que vous entendiez la
musique. Vous pouvez également appuyer sur la touche « Aux » de
La conception astucieuse du système RoomGroove lui permet de
la télécommande du RoomGroove.
recevoir tous les modèles d’iPod. En touchant le logo Klipsch à
l’avant du RoomGroove, on fait apparaître la station d’accueil iPod
rétractable. Le RoomGroove doit être alimenté pour permettre la
Remarque : Le voyant « Listen » s’allume en bleu lors de
fermeture et l’ouverture du tiroir. Lorsque la station d’accueil est
l’écoute de la musique provenant de l’iPod local ou d’un appareil
sortie, il suffit de la toucher à nouveau pour la faire rentrer. Elle ne
raccordé à l’entrée auxiliaire locale. Si les deux sources sont
bouge pas si un iPod y est présent. En l’absence d’iPod ou lorsque
utilisées, la touche « Listen » permet de passer de la source
le RoomGroove est en veille (le voyant d’alimentation est rouge), la
auxiliaire à l’iPod dans cet ordre.
station d’accueil rentre automatiquement.
2
Émission du signal sonore du RoomGroove
Émission des signaux sonores de deux appareils RoomGroove
Le RoomGroove a été conçu pour permettre l’émission du son de
Dans les systèmes ne comprenant pas de système CS-700 (ou
l’iPod ou de la source auxiliaire vers d’autres appareils KlipschCast
si le système de cinéma n’a pas été prévu pour faire partie d’un
capables de le recevoir et de le lire. Pour émettre à partir du
système multi-pièces sans fil), deux appareils RoomGroove
RoomGroove, il suffit de sélectionner la source à transmettre
peuvent émettre simultanément. Pour activer cette fonction, tous
en appuyant sur la touche « Listen », ou sur la touche de la
les appareils du système multi-pièces sans fil doivent être réglés
télécommande correspondant à la source choisie, puis d’appuyer
sur le même code local (Home Code). Si vous sélectionnez un code
sur la touche « Transmit ». Le signal de la source sélectionnée
local de 5 de 9, un deuxième RoomGroove peut occuper le canal
est alors diffusé dans toute la maison et il peut être utilisé par les
sans fil qui avait été affecté au CS-700. (Consultez la section «
autres appareils compatibles KlipschCast.
Réglage du code local » pour plus de renseignements.)
Remarque : Si un RoomGroove est en train d’émettre et qu’un
Si deux appareils RoomGroove émettent et que vous souhaitez
autre RoomGroove reçoit un ordre d’émission, ce dernier
émettre à partir d’un troisième, en choisissant le canal sans
sera prioritaire et il prendra la place du premier sur ce canal
fil à utiliser pour cette nouvelle émission, vous devez d’abord
sans fil. Pour configurer un système multi-pièces sans fil de
sélectionner l’émission à interrompre en appuyant sur la touche
façon à permettre l’émission simultanée par deux appareils
« Listen » jusqu’à ce que vous entendiez le son de cette source.
RoomGroove, consultez la section « Émission des signaux
Appuyez alors sur « Transmit » pour que la nouvelle source occupe
sonores de deux appareil RoomGroove » dans ce manuel.
ce canal sans fil et arrête l’émission par l’autre source. À présent,
vous devez entendre la nouvelle source dans toutes les pièces
Écoute des autres appareils KlipschCast à l’aide du
où la source précédente pouvait être entendue auparavant. La
RoomGroove
nouvelle source doit maintenant être disponible pour tous les
auditeurs actifs.
Le RoomGroove a été conçu pour permettre l’écoute de sources
raccordées ou intégrées à d’autres appareils KlipschCast, par
Remarque : Tous les appareils du système multi-pièces sans fil
exemple un autre RoomGroove ou le système audiovisuel à DVD
doivent être réglés sur le même code local pour permettre les
CS-700.
transmissions.
Pour écouter une source émise par un autre appareil KlipschCast,
Réglage du code local
il suffit d’appuyez sur la touche « Listen » afin de permettre l’accès
à cette source. La réception et la lecture d’une source sans fil sont
La molette du code local à l’arrière du RoomGroove permet de
indiquées par le voyant « Listen », qui devient rouge (ou violet pour
sélectionner un code propre à tous vos appareils KlipschCast
une deuxième source sans fil). Une couleur clignotante indique
afin d’éviter les interférences avec les systèmes voisins. Les
qu’aucune source n’est disponible sur ce canal.
numéros de codes locaux vont de 0 (valeur par défaut) à 9. Tous
les appareils KlipschCast sont initialement réglés à 0 et permettent
Sources et couleurs du voyant « Listen »
la diffusion du son d’un système de cinéma par un canal sans fil,
et celle du son d’un RoomGroove par un second canal. Le numéro
Le bleu indique toujours une source locale. Le rouge et le violet
de code local ne doit être modifié que dans l’un des deux cas
indiquent des canaux sans fil. Une couleur clignotante indique
suivants :
qu’aucune source ni canal sans fil n’est disponible.
Pour les émissions à partir d’un système CS-700
1) Présence d’interférences dues à un système voisin perturbant
votre système sans fil – Dans ce cas, il suffit de régler tous les
ou RoomGroove
appareils KlipschCast sur un autre code local. Les appareils
KlipschCast ne reçoivent que les signaux sonores des appareils
Source locale (iPod ou Aux) = bleu
réglés sur le même code local. Les codes locaux de 0 à 4 peuvent
être utilisés pour les systèmes dans lesquels le son est émis par
Émission source de système de cinéma = rouge
un système de cinéma et un RoomGroove (les codes 5 à 9 sont
réservés à la transmission à partir de deux appareils RoomGroove,
Émission source RoomGroove = violet
sans système de cinéma).
Pour les émissions de systèmes à deux appareils
2) Transmission des signaux sonores de deux appareils
RoomGroove
RoomGroove (sans système de cinéma) – Dans ce cas, il suffit
de choisir un code local de 5 à 9 et de régler tous les appareils
KlipschCast sur ce code. Les appareils KlipschCast ne reçoivent
Source locale (iPod ou Aux) = bleu
que les signaux sonores des appareils réglés sur le même code
local.
Émission 1e source RoomGroove = rouge
Émission 2e source RoomGroove = violet
Une fois le code local modifié, il faut débrancher et rebrancher
le cordon d’alimentation de la prise pour activer la modification.
Le code local est alors modifié, ce qui permet à l’appareil de
Émission du signal sonore du CS-700
communiquer avec les autres appareils KlipschCast réglés sur le
Dans un système multi-pièces comprenant un système de cinéma
même code.
CS-700 (vendu séparément), la télécommande du RoomGroove
peut servir à sélectionner directement les sources du CS-700 une
fois celui-ci sélectionné par la touche « Listen » du RoomGroove.
Par défaut, le CS-700 émet le signal de sa source locale (celle
sélectionnée pour l’écoute ou le visionnage sur le système CS-700)
jusqu’à ce qu’une autre source soit sélectionnée. Vous trouverez
Remarque : Tous les appareils du système multi-pièces sans fil
dans la section « Télécommande » de ce manuel des détails sur le
doivent être réglés sur le même code local pour permettre les
fonctionnement de la télécommande.
3
transmissions.
Télécommande
La télécommande sans fil permet l’interaction avec le RoomGroove et l’iPod ainsi que d’autres appareils émetteurs, par exemple d’autres
appareils RoomGroove et les systèmes de cinéma tels que le CS-700.
Touches
MISE SOUS
Appuyez sur pour mettre le RoomGroove sous tension. Appuyez une
TENSION
nouvelle fois pour mettre le RoomGroove en veille.
RoomGroove
iPod Sélection de l’iPod présent dans la station d’accueil du RoomGroove local.
Aux Sélection de l’appareil audio raccordé au RoomGroove local (il faut mettre
cet appareil en lecture pour entendre le son).
Listen Choix entre les sources locales et sans fil disponibles.
Cinema System Sources (Sources de systèmes de cinéma)
CD/DVD Accès au lecteur de CD/DVD du système de cinéma raccordé au réseau KlipschCast.
AM/FM Accès au tuner AM/FM du système de cinéma raccordé au réseau KlipschCast.
Cab/Sat Accès au signal sonore de l’appareil raccordé à l’entrée Cab/Sat du système de
cinéma raccordé au réseau KlipschCast. L’appareil doit fournir le signal sonore au
système de cinéma pour que le son puisse être entendu à partir du RoomGroove.
Aux 1 Accès au signal sonore de l’appareil raccordé à l’entrée Aux 1 du système de
cinéma raccordé au réseau KlipschCast. L’appareil doit fournir le signal sonore au
système de cinéma pour que le son puisse être entendu à partir du RoomGroove.
Aux 2 Accès au signal sonore de l’appareil raccordé à l’entrée Aux 2 du système de
cinéma raccordé au réseau KlipschCast. L’appareil doit fournir le signal sonore au
système de cinéma pour que le son puisse être entendu à partir du RoomGroove.
Sélection de morceau ( |7et8|) Ces touches permettent la commande de plusieurs
Remarque : Cette télécommande doit
sources :
être dirigée vers le RoomGroove afin de
permettre une bonne interaction.
•Pourcommanderl’iPodlocal,appuyezsur|7ou8| pour passer au morceau précédent
ou suivant ; si vous maintenez le bouton enfoncé, vous effectuez un retour ou une
avance rapide dans le morceau en cours.
•PourcommanderuniPodprésentdansunautreRoomGroove,appuyezsur|7ou8|
pour passer au morceau précédent ou suivant.
•PourcommanderunesourceCD/DVDdesystèmedecinéma,appuyezsur|7ou8|
pour passer au morceau/chapitre précédent ou suivant.
•PourcommanderunesourceAM/FMdesystèmedecinéma,appuyezsur|7ou8|
pour passer à la station préréglée précédente ou suivante (si aucune station n’a été
préréglée, ces touches sont inactives).
•PourcommanderunesourceCab/Satdesystèmedecinéma,appuyezsur|7ou8|
pour passer au canal précédent ou suivant.
•Cestouchessontinactiveslorsdel’écoutedusignalsonoretransmisparlasourceAux
1 ou Aux 2 d’un système de cinéma.
Lecture/Pause Appuyez une fois sur ce bouton pour suspendre la lecture ; appuyez
à nouveau pour la reprendre.
Volume Appuyez sur + ou sur – pour augmenter ou diminuer le volume du
RoomGroove (RoomGroove local uniquement).
Mute Suppression du son du RoomGroove local.
4
Remplacement de la pile de la télécommande
La pile de la télécommande doit être remplacée lorsque la
télécommande fonctionne moins bien ou plus du tout. Pour
remplacer la pile, tirez simplement la languette support de pile
de la télécommande (comme le montre la figure) et retirez la pile.
Remplacez-la uniquement par une pile 3 volts au lithium CR2025.
Remarque : L’éclairage et les conditions ambiantes peuvent
affecter le fonctionnement de la télécommande.
Dispositif d’enroulement du câble et montage de
l’alimentation
L’alimentation du RoomGroove comporte un dispositif
d’enroulement du câble. L’excédent de longueur du câble peut
être enroulé autour de l’alimentation et attaché par des sangles en
caoutchouc, comme le montre la figure.
L’alimentation du RoomGroove peut être facilement montée à
l’arrière de l’appareil. Il suffit pour cela de mettre les crochets
latéraux de l’alimentation dans les encoches à l’arrière du
RoomGroove, comme le montre la figure.
Slots
Hooks
Support de montage mural en option
Le RoomGroove peut se monter au mur à l’aide du support de
montage mural en option disponible sur le site Klipsch.com. Pour
plus de détails, visitez le site Klipsch.com ou téléphonez au +1 800
KLIPSCH (554 7724).
5
