HEIDENHAIN ND 2100G Quick Start: Setup
Setup: HEIDENHAIN ND 2100G Quick Start
Setup
LCD Screens
Histograms
Initial power up
The LCD displays a variety of screens
Press the HISTOGRAM soft key to show
• Press the POWER SWITCH to power
selected by the user to show current
graphs of dimension values.
the ND 2100 G. The startup screen is
dimension values, pass/fail test results,
displayed.
dimension value graphs, statistical
process control graphs or data tables,
and setup options. Navigate from one
screen to another using the soft keys
under the LCD.
Current value screen
The Current Value screen is displayed
after power is applied and the startup
screen is shown. Current values of up
to 4 dimensions are shown. The unit of
measure, current datum and current part
Bar and dial displays
number or part name are displayed in
The choice of a bar or dial display is
• Press the FINISH key to display the
the upper right corner of the screen.
made in the Display setup screen.
current dimension values on the
Current Value screen.
Press the BAR soft key to show a bar
graph of dimension values.
Software setup
The operating parameters of the
ND 2100 G must be configured prior
to using it for the first time, and any
time part measurement, reporting or
communication requirements change.
Settings will be retained until:
• The data-backup battery is changed
• The data and settings are cleared
Use the CURSOR ARROW keys to
• Software upgrades are performed
scroll dimensions when more than 4
dimensions are active. Press the DRO
soft key to display the Current Value
Press the DIAL soft key to show a dial of
Caution
screen from other screens.
dimension values.
Setup parameters control the operation
of the ND 2100 G and are password-
View screens
protected. Only qualified personnel
Press the View soft key to display:
should be given password access to
• Graphs of dimension value history
setup screens.
• Histograms dimension values
• Bar or dial displays of current values
1. Display the setup menu
• Data tables and statistics
• Press the MENU soft key to display
menu items above the soft keys.
Graphs
Press the GRAPH soft key to show
graphs of dimension values.
Data tables and statistics
Press the DATA soft key to show a data
table with SPC statistics.
• Press the SETUP soft key to display
the setup menu on the left side of the
LCD screen.
2
Setup
• Use the CURSOR ARROW KEYS
• Highlight the first dimension of the
to Navigate the setup menu and to
part.
highlight selections.
• Retain the default dimension name or
press the LABEL soft key to rename
the dimension.
• Highlight and rename remaining
dimensions as desired.
To create a formula:
• Navigate to the FORMULAS screen
2. Select the language
and select the desired DIMENSION
Highlight the desired language and then
using the DEC or INC soft keys.
press the YES soft key.
3. Enter the Supervisor Password
6. Configure the LCD display
Navigate to the SUPERVISOR screen
Navigate to the DISPLAY screen
and enter the supervisor PASSWORD.
and select the desired display
characteristics.
4. Configure encoders
• Navigate to the CHANNELS screen
7. Configure display formats
and highlight the desired encoder
• Navigate to the FORMATS screen
CHANNEL.
and highlight the DIMENSION field.
• Enter all the required encoder
• Enter the desired display parameters
parameters.
for the dimension.
• Repeat setup for all encoder channels.
• Repeat setup for all dimensions.
Select other channels using the DEC
Select individual dimensions using the
• Navigate down to the formula
or INC soft keys. If desired, apply
DEC or INC soft keys or apply settings
line and enter a formula using the
settings from the current channel to
from the current dimension to all
functions displayed on the right side
all others using the APPLY ALL soft
others using the APPLY ALL soft key.
of the screen. Formula functions are
key.
changed using the soft keys at the
8. Create dimension formulas
bottom of the screen.
5. Name parts and dimensions
The ND 2100 G uses formulas to
• Navigate to the DIMENSIONS screen
convert encoder channel inputs to the
and highlight the PART field.
dimension values shown on the screen.
• Select other parts using the DEC or
INC soft keys. Press the NEW soft
Default dimension formulas shipped
key to add a new part.
with the ND 2100 G simply show the
input encoder channel values as in this
example of dimension A, which is given
the value of encoder channel C1:
A = C1
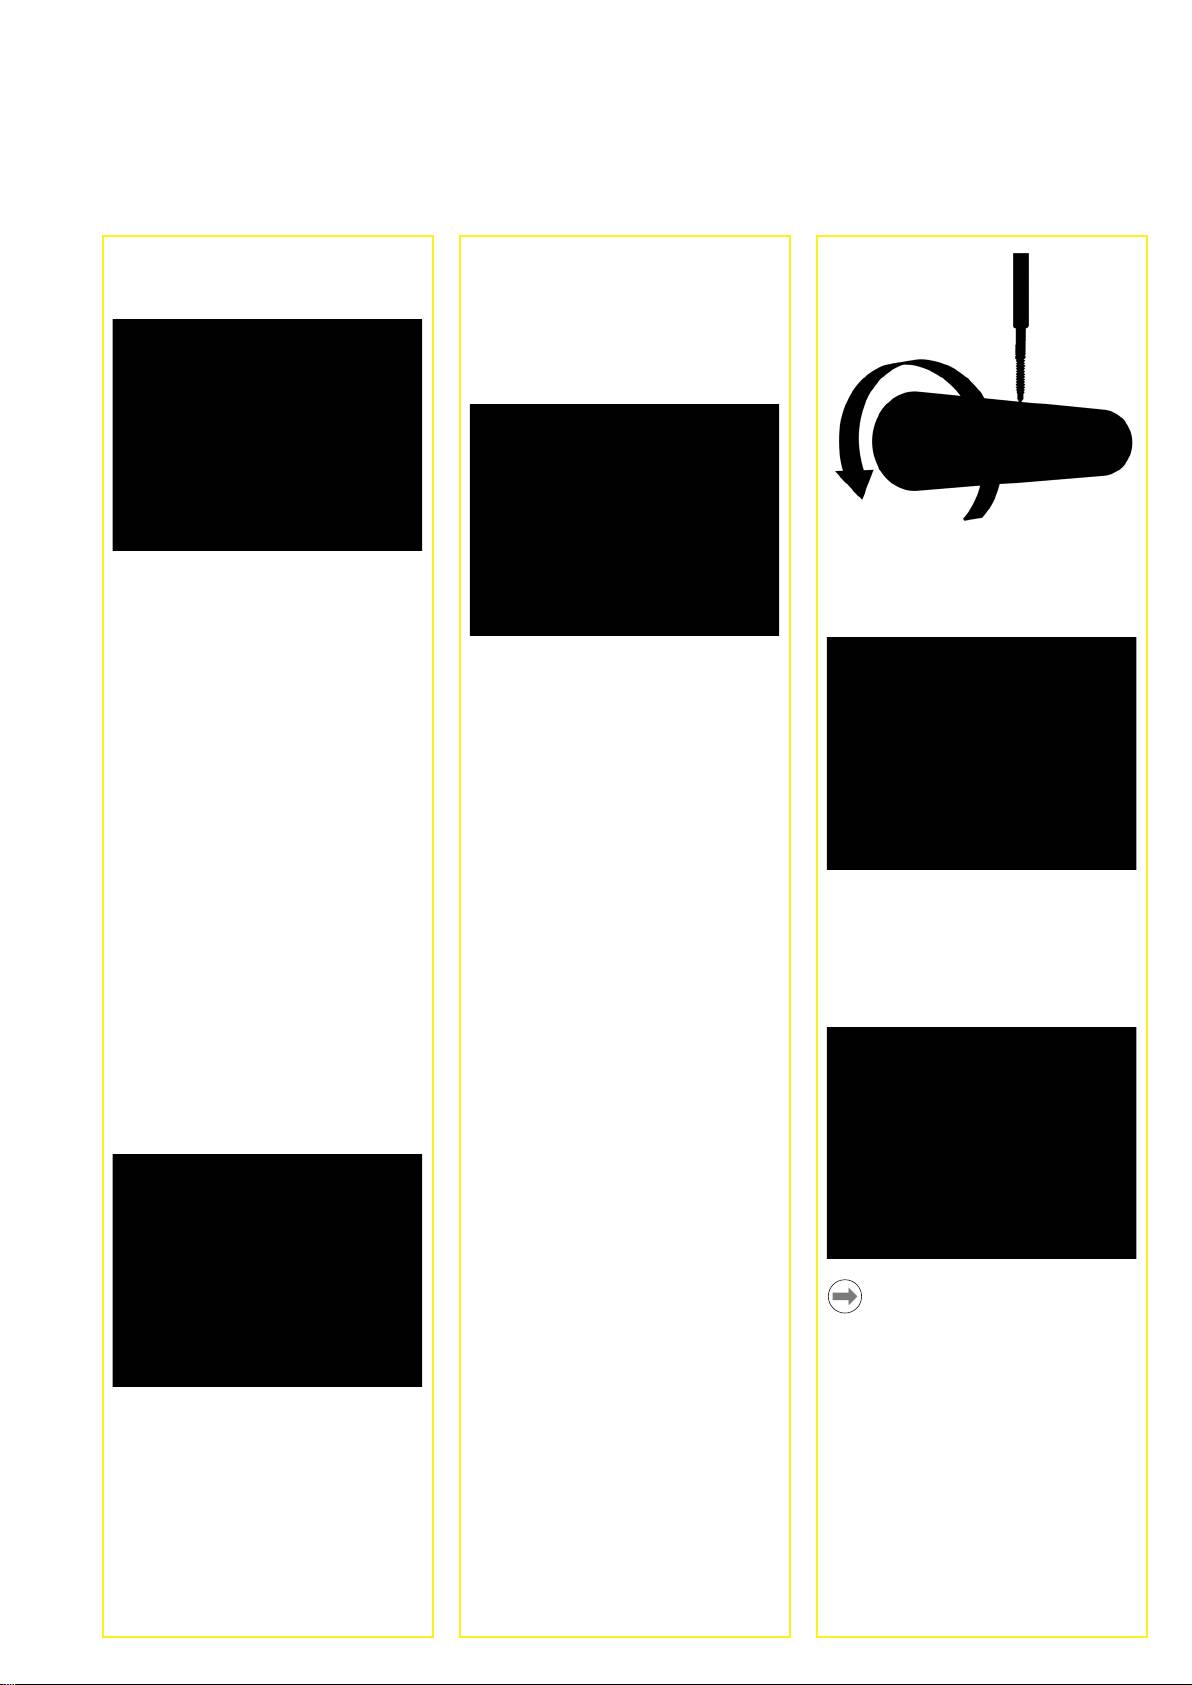
More complex formulas are created
in the FORMULAS setup screen that
Note:
process one or more encoder input
The ND 2100 G includes a wide range of
channels to produce sophisticated
basic and advanced formula functions.
measurements. In this example,
Refer to the User’s Guide for detailed
encoder channel C1 is used in max
information.
and min functions to produce a runout
• Highlight the NAME field.
measurement of a rotating rod:
• Parts can be referenced by number
or name. If desired, press the LABEL
A = max(C1) - min(C1)
soft key to name the current part
3
Оглавление
- ND 2100 G GAGE-CHEK
- ND 2100 G GAGE-CHEK English Setup
- Setup
- Operation
- ND 2100 G GAGE-CHEK Deutsch Setup
- Setup
- Bedienung
- ND 2100 G GAGE-CHEK Français Paramétrage
- Paramétrage
- Présentation
- ND 2100 G GAGE-CHEK Italiano Configurazione
- Configurazione
- Funzionamento
- ND 2100 G GAGE-CHEK Español Ajustes
- Ajustes
- Operación
- ND 2100 G GAGE-CHEK Nederlands Instellen
- Instellen
- Bediening
- ND 2100 G GAGE-CHEK Česky Nastavení
- Nastavení
-
- ND 2100 G GAGE-CHEK Português Configurar
- Configurar
- Funcionamento
- ND 2100 G GAGE-CHEK Język polski Setup
- Setup
-
- ND 2100 G GAGE-CHEK Русский
-
-
- ND 2100 G GAGE-CHEK Türkçe Ayar
- Ayar
-
- ND 2100 G GAGE-CHEK Nihongo
-
-
- ND 2100 G GAGE-CHEK Zhongwen (zh-TW)
-
-
- ND 2100 G GAGE-CHEK
