Aver Media F33 On-screen Display: инструкция
Раздел: Видео Аудио Фото Оборудование
Тип: Экшн Камера
Инструкция к Экшн Камере Aver Media F33 On-screen Display

T
T
a
a
b
b
l
l
e
e
o
o
f
f
C
C
o
o
n
n
t
t
e
e
n
n
t
t
s
s
OSD MENU ............................................................................................ 1
OSD ............................................................................................. 12
OSD ...................................................................................... 23
OSD ............................................................................................... 34
OSD- ........................................................................................... 47
MENU OSD .......................................................................................... 59
MENU OSD .......................................................................................... 71
............................................................................................ 82
..................................................................................... 94
MENU OSD ........................................................................................ 106
................................................................................. 118
MENU OSD ........................................................................................ 130
OSD-valikko ....................................................................................... 142
....................................................................... 153
Ekrano meniu ..................................................................................... 165
MENU OSD ........................................................................................ 177
1
ENGLISH
OSD MENU
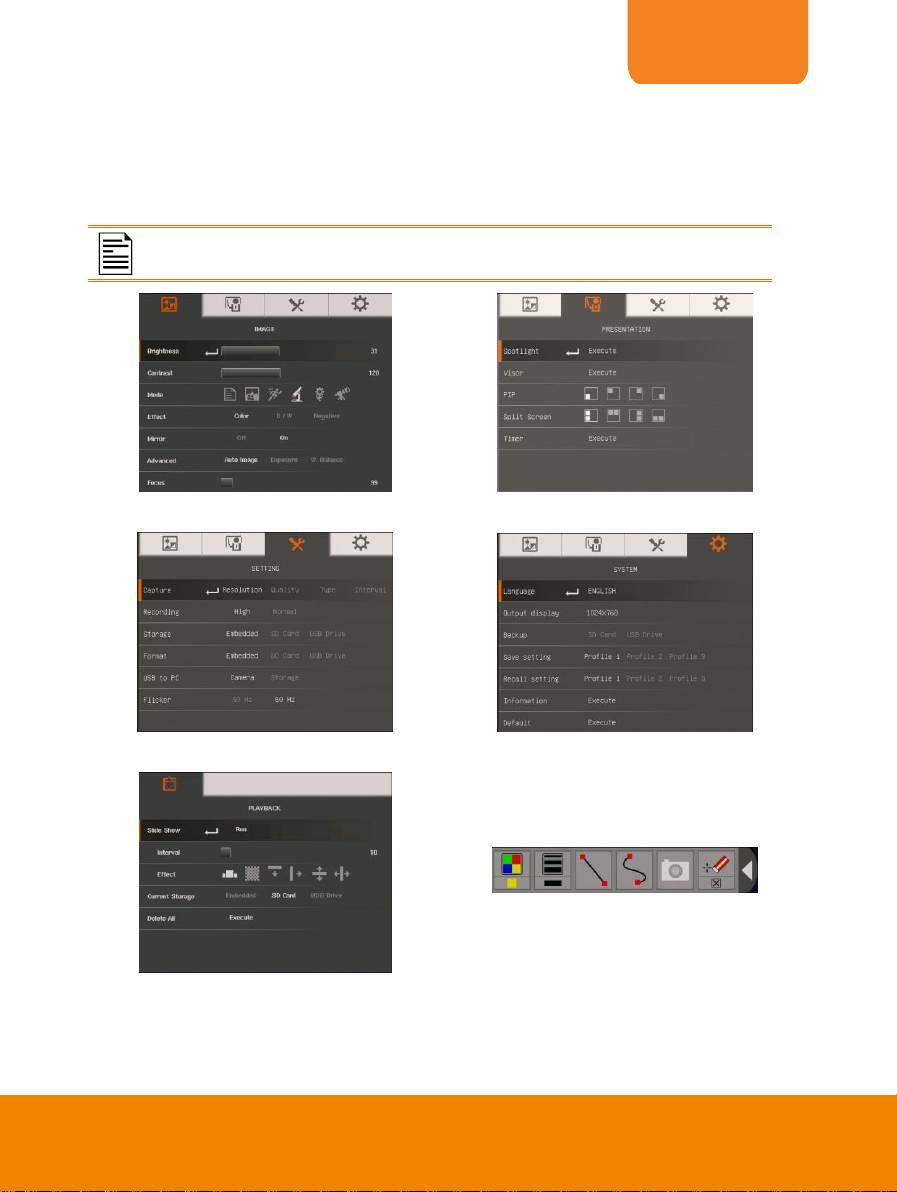
There are 4 tabs on the OSD menu: IMAGE, PRESENTATION, SETTING and SYSTEM.
In Playback mode, you can access PLAYBACK OSD menu to enable the Slide Show
feature and modify Slide Show interval and transition setting if desire.
For TV output, the RESOLUTION will be disabled in SETTING menu list.
IMAGE
PRESENTATION
SETTING
SYSTEM
PLAYBACK
ANNOTATION
N
N
a
a
v
v
i
i
g
g
a
a
t
t
e
e
t
t
h
h
e
e
M
M
e
e
n
n
u
u
a
a
n
n
d
d
S
S
u
u
b
b
m
m
e
e
n
n
u
u
2
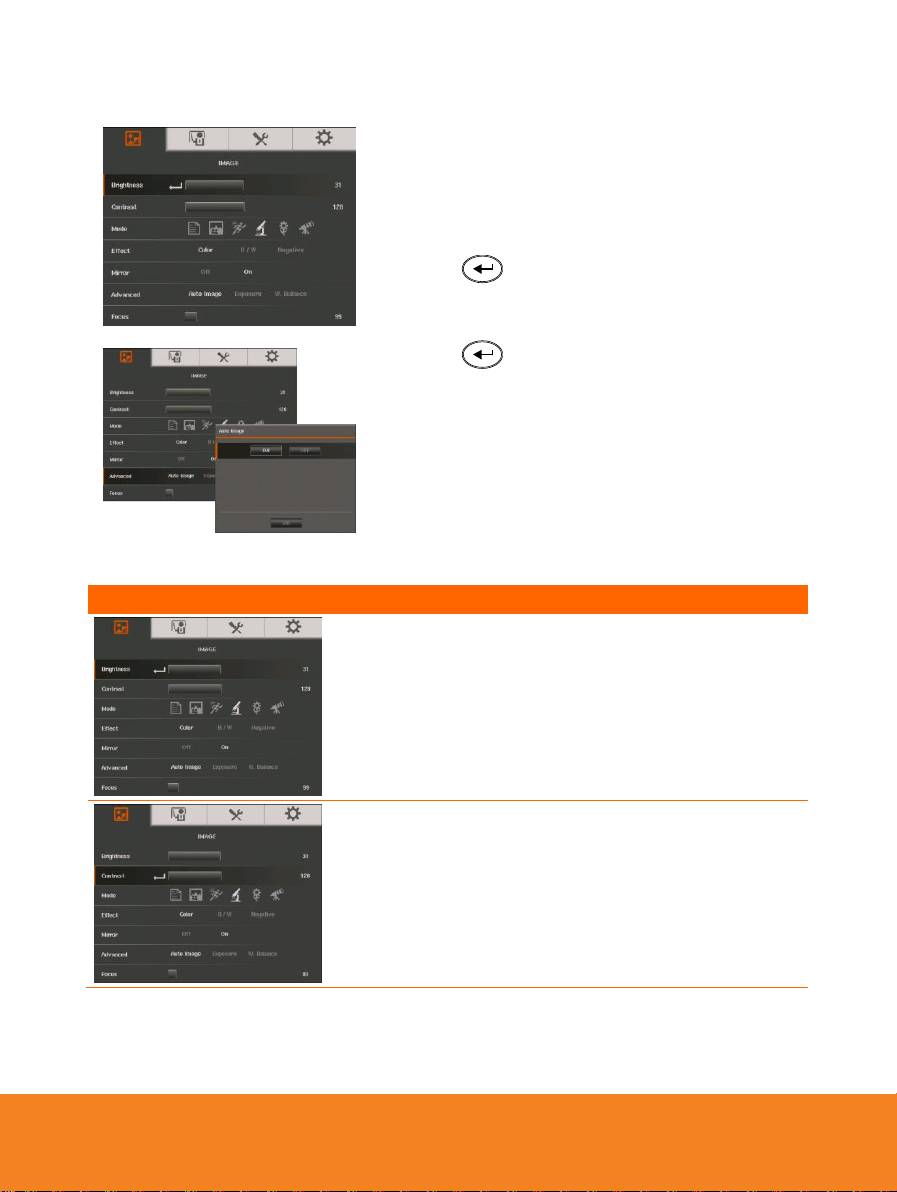
1. Press MENU button on the remote or control
panel.
2. Press ► and ◄ to toggle between tabs
3. Press ▼ and ▲ to choose a selection in the
menu list.
4. Press to make a selection.
5. Use ► and ◄ to adjust the setting or make a
selection.
6. Press to enter submenu.
7. Press MENU to close the OSD menu.
I
I
m
m
a
a
g
g
e
e
Menu Screen
Function
Brightness
Adjust brightness level manually between 0 and 63.
Contrast
Adjust the contrast level manually between 0 and 255
under bright and dark environments.
3
Menu Screen
Function
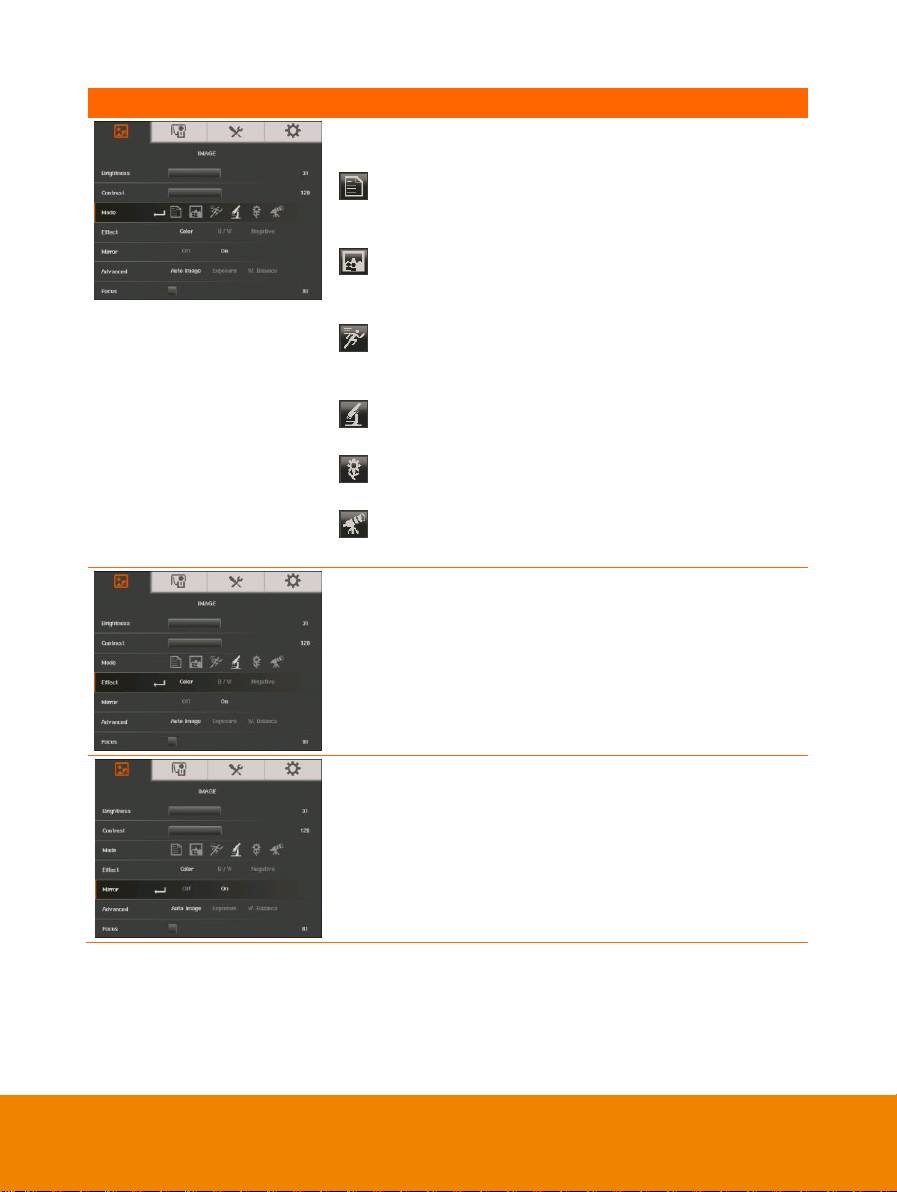
Mode
Select from the various image display settings.
Sharp - adjust the contrast along the edges making
text appear more visible. Viewing the subject from 32-36
cm (16X zoom) away from the camera.
Graphics - adjust the gradient of image. Viewing the
subject from 32-36 cm (16X zoom) away from the
camera.
Motion - increase frame rate. Sufficient lighting is
required when using this mode. Viewing the subject from
32-36 cm (16X zoom) away from the camera.
Microscope - automatically adjust optical zoom for
microscopic viewing.
Macro - set to view when object is only 10-32cm (5X
zoom) away from the camera.
Infinite - set to view when subject is from 36 cm to
infinity (Max.16X) and further away from the camera.
Effect
Convert the image into positive (true color), monochrome
(black and white) or negative.
Mirror
Select to flip the image in Camera mode.
4
Menu Screen
Function
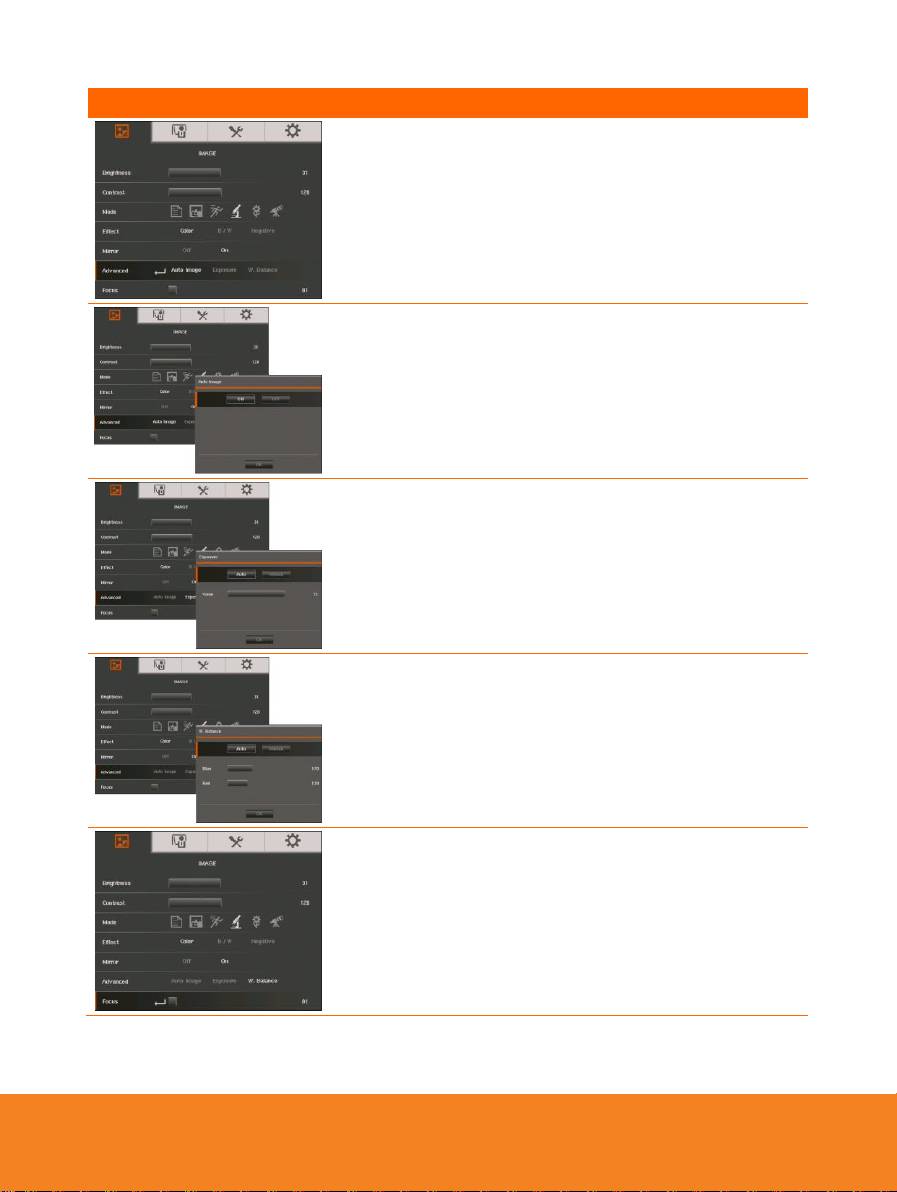
Advanced
Select to set the Auto Image, Exposure, and White
Balance settings.
Auto Image
Select ON or OFF to automatically adjust the white
balance and exposure setting, and correct the color and
exposure compensation.
Exposure
Select the exposure setting.
AUTO - automatically adjust the camera exposure and
the amount of light required.
MANUAL - manually adjust the exposure level. The
exposure can be adjusted up to 99.
White Balance
Select the White Balance setting for various light
conditions or color temperature.
AUTO - automatically adjust the white balance.
MANUAL - manually adjust the red and blue color level.
The color level can be adjusted up to 255.
Focus
Manually adjust the focus.
P
P
r
r
e
e
s
s
e
e
n
n
t
t
a
a
t
t
i
i
o
o
n
n
5
Menu Screen
Function
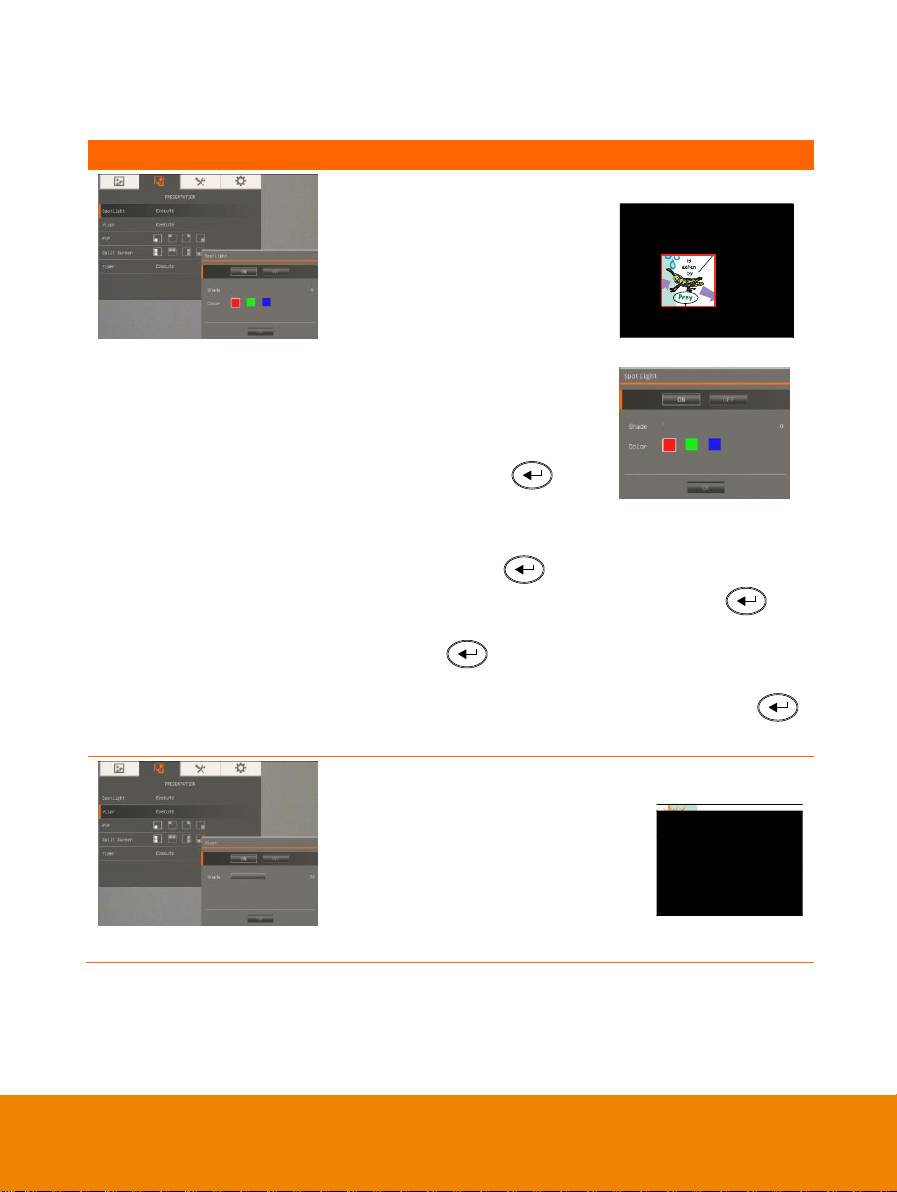
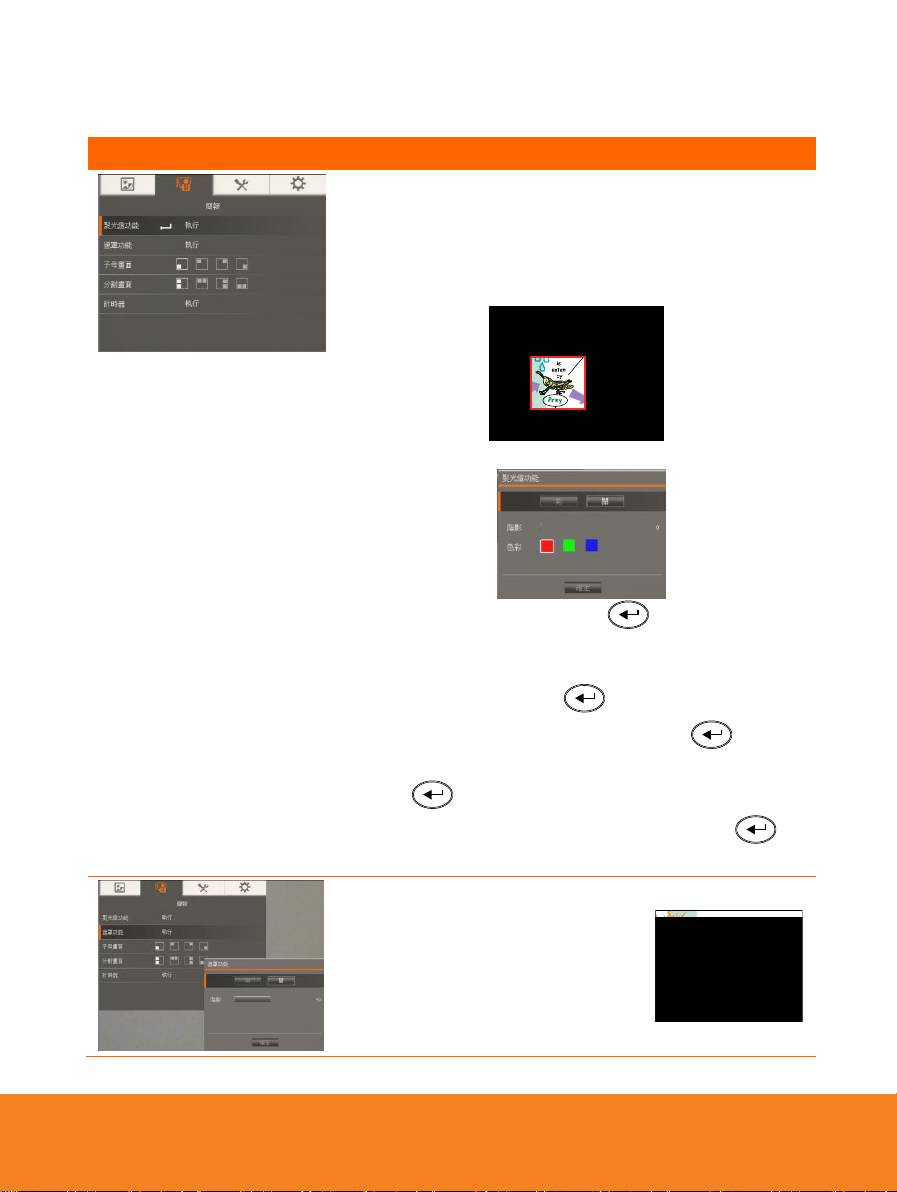
Spotlight
Spotlight overlays a frame on
the presentation screen. You
can move the Spotlight around
the presentation screen using
the ▲, ▼, ◄, & ► buttons.
Select Execute to call the
Spotlight submenu.
In the Spotlight submenu, the
following options are available.
ON/OFF – select to run/cancel
the Spotlight. Press to
move to the next selection.
Shade – set the opacity level of the area outside the box.
The shaded area will completely turns black when it is set
to level 100. Press to move to the next selection.
Color – select the Spotlight frame color. Press to
move to the next selection.
OK – press for the setting to take effect. If you
select ON, the frame will appear and blink, use the ▲, ▼,
◄, & ► buttons to adjust the frame size and press
to set the desired size; and OFF will close the submenu.
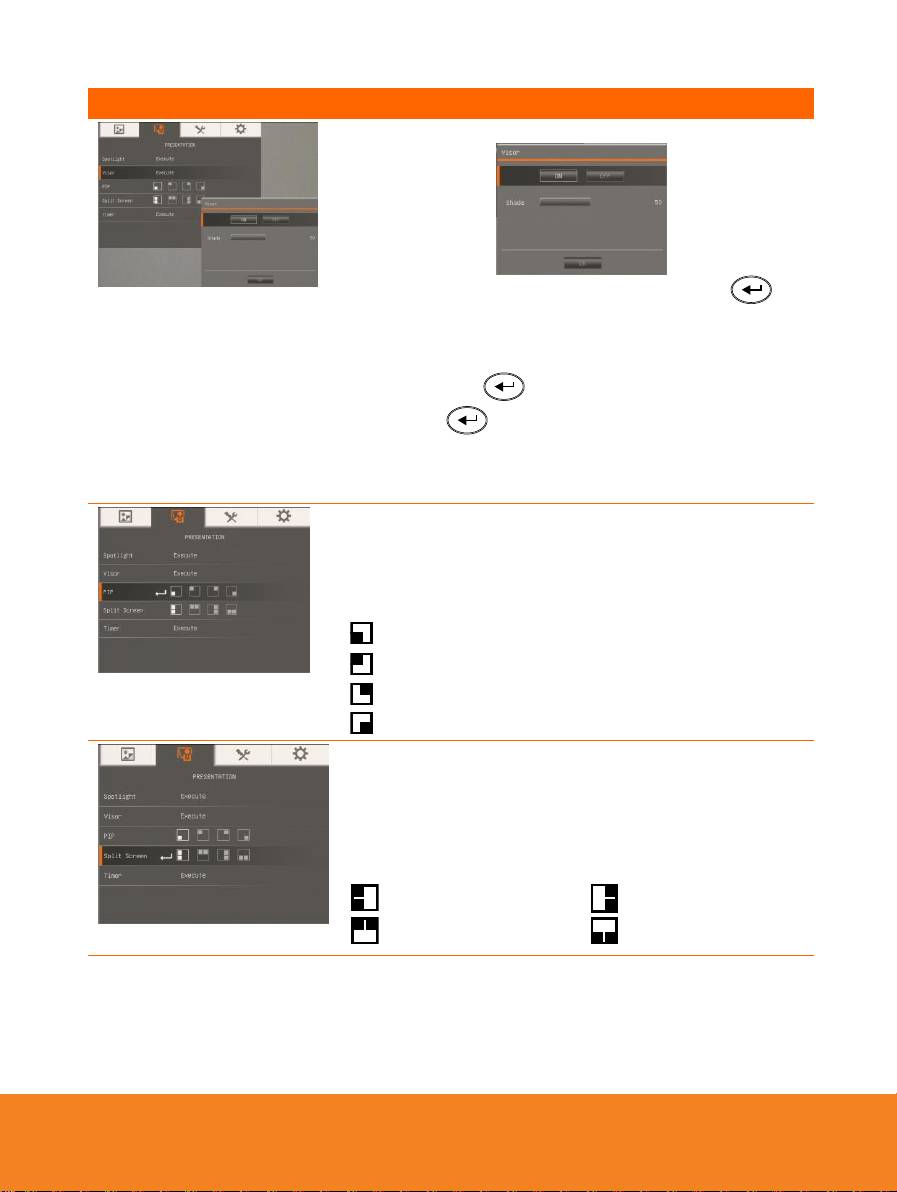
Visor
Visor covers the presentation
screen. The upper part of the
presentation screen is slightly
exposed. Use the ▲, ▼, ◄, & ►
buttons to reveal more of the
covered area. Select Execute to call
the Visor submenu.
6
Menu Screen
Function
In the Visor submenu, the following options are available.
ON/OFF – select to run/cancel the Visor. Press to
move to the next selection.
Shade – set the opacity level of the covered area. The
shaded area will completely turns black when it is set to
level 100. Press to move to the next selection.
OK – press for the setting to take effect. If you
select ON, upper part of the presentation screen is slightly
exposed. Use the ▲, ▼, ◄, & ► buttons to reveal more
of the covered area; and OFF will close the submenu.
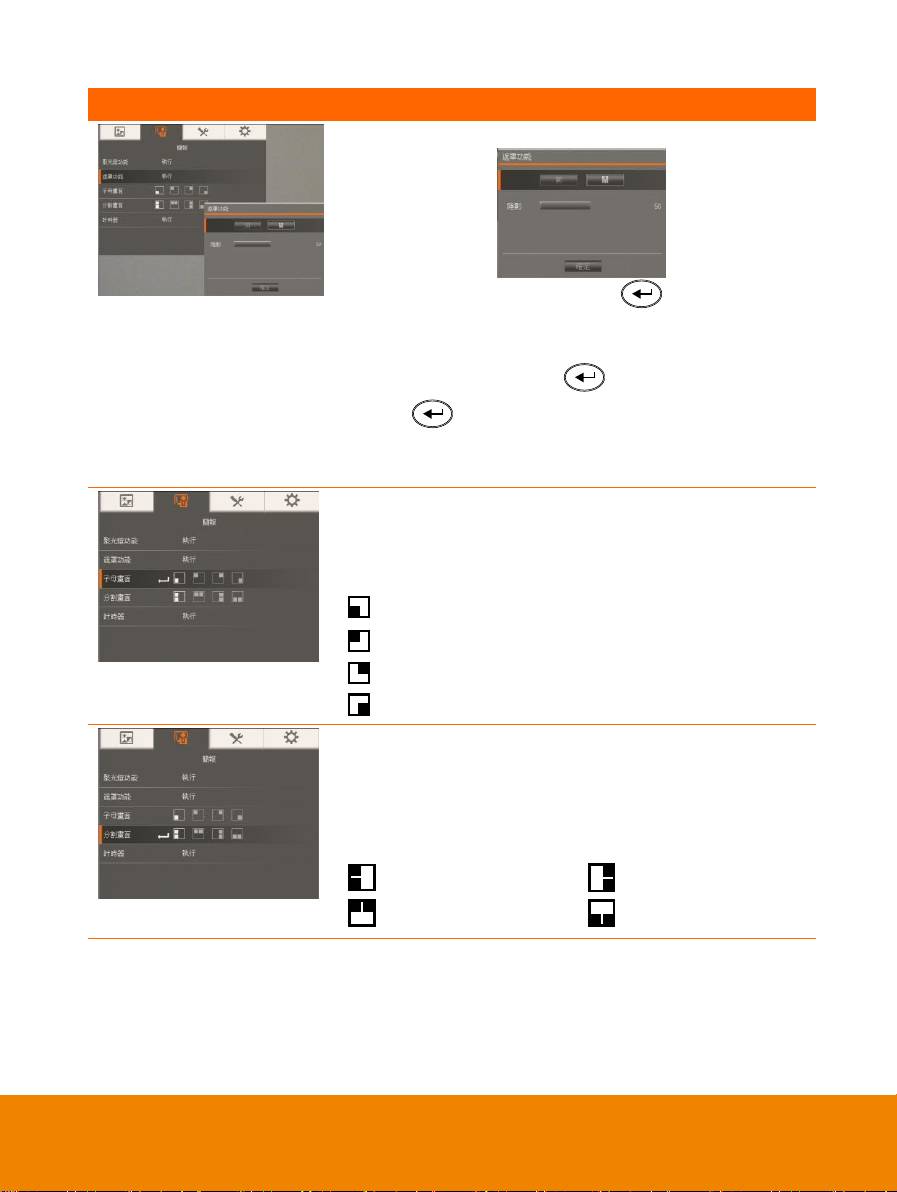
PIP
Select the thumbnail playback screen location and show
the thumbnail playback screen at the corner of the
screen to recall the captured image from the memory in
Camera mode. Select OFF to cancel PIP.
Lower Left
Upper Left
Upper Right
Lower Right
Split Screen
Divide the screen into two parts. Half of the screen
displays the 8-thumbnail images and the other half
display the image from the AVerVision PL50 camera.
Select the display location of the 8- thumbnail playback
images. Select OFF to cancel Split Screen.
Left
Right
Top
Below

7
Menu Screen
Function
Timer
Start/Pause/Stop the timer and set the timer duration.
The timer automatically counts up after the count down
reaches zero to show the elapsed time. Even when you
switch between Playback, PC or Camera modes, the
timer will continue.
S
S
e
e
t
t
t
t
i
i
n
n
g
g
Menu Screen
Function
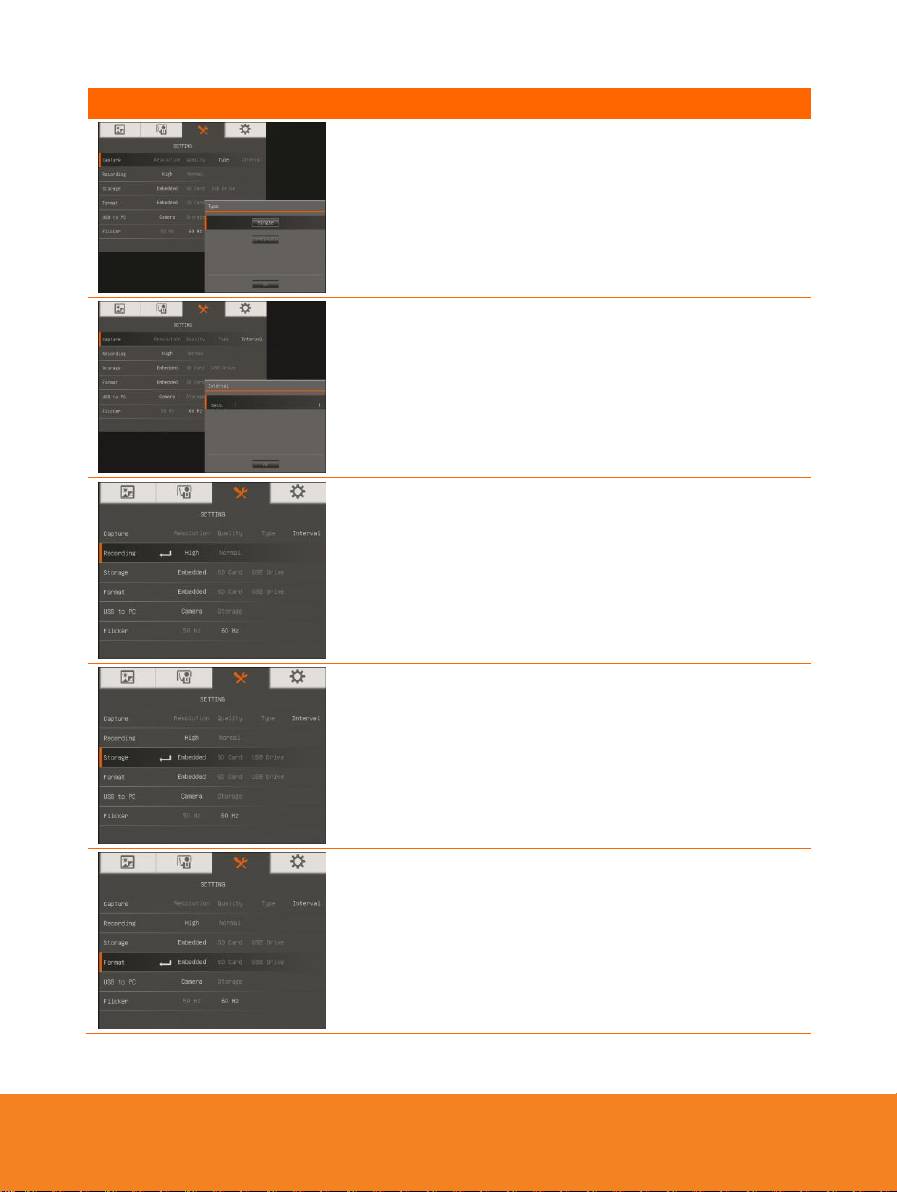
Capture
Select to set the capture resolution, quality, type and
interval settings.
Resolution
Select the capture size. In 5M setting, the capture
resolution size is 2560 X 1920.
If the output display setting is in 1280 x 720 or 1920
x1080, the capture resolution size will be 2560 x 1440
and as for 1280 x 800 output display the capture size will
be 2560 x 1600.
Quality
Select the capture compression setting.
8
Menu Screen
Function
Type
Select the capture type.
Single - capture one picture only.
Continuous - capture successive pictures.
Interval
Set the time interval for continuous capture. The length
can be set up to 600 sec (10 min).
Recording
Select the video recording compression setting.
Storage
Change the storage location. Audio & video recording
can only be saved in SD memory card or USB flash
drive.
Format
Format to delete all the data in the selected memory.
9
Menu Screen
Function
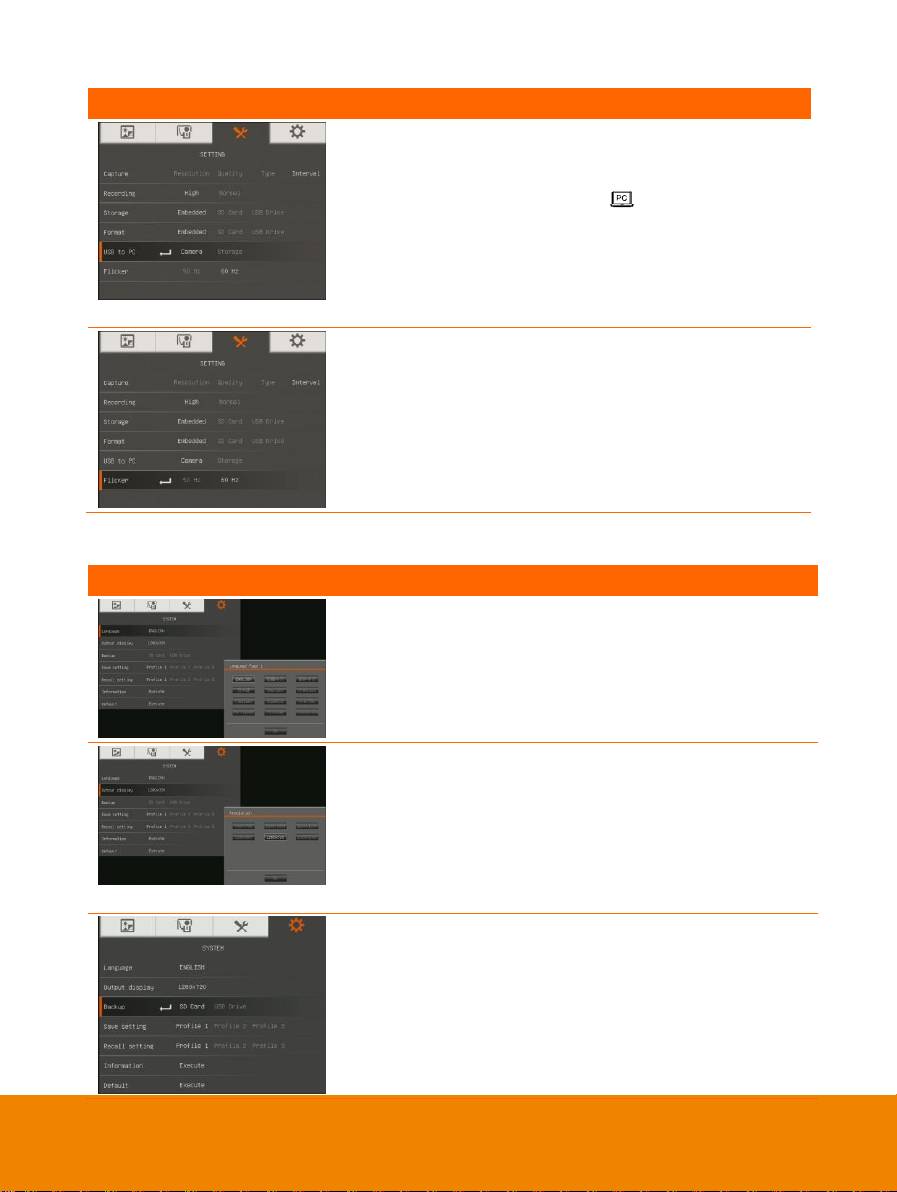
USB to PC
Select the status of the AVerVision PL50 when it is
connected to the computer via USB. Make sure the USB
switch on the rear panel is set to .
Camera - can be used as a computer webcam or with
our bundled software to record video and capture still
image.
Storage - transfer the captured pictures/videos from the
memory to computer hard disk.
Flicker
Select between 50Hz or 60Hz. Some display devices
cannot handle high refresh rates. The image will flicker a
couple of times as the output is switched to another
refresh rate.
S
S
y
y
s
s
t
t
e
e
m
m
Menu Screen
Function
Language
Change and select different language.
Output Display
Set the resolution to display the image on screen. This
selection will be disabled in TV output mode.
Backup
Copy the image from the built-in memory to SD card or
USB flash drive.
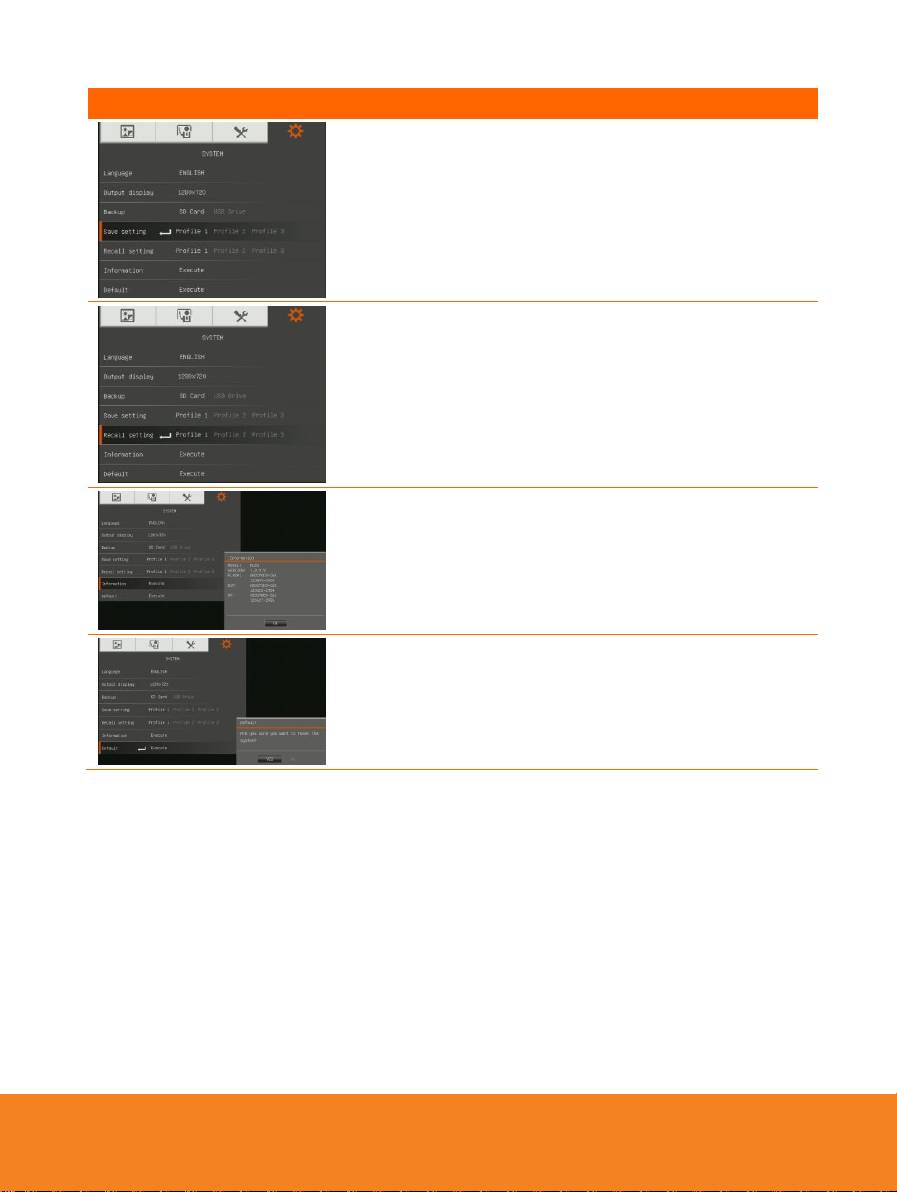
10
Menu Screen
Function
Save Setting
Save the current setting in the selected profile number.
Only brightness, contrast, image mode, effect, auto
image setting, flicker, recording quality, capture
resolution, and capture quality can be saved.
Recall Setting
Restore the setting back to the selected profile number.
Information
Display the product information.
Default
Restore all the settings into original factory default
setting.
P
P
l
l
a
a
y
y
b
b
a
a
c
c
k
k
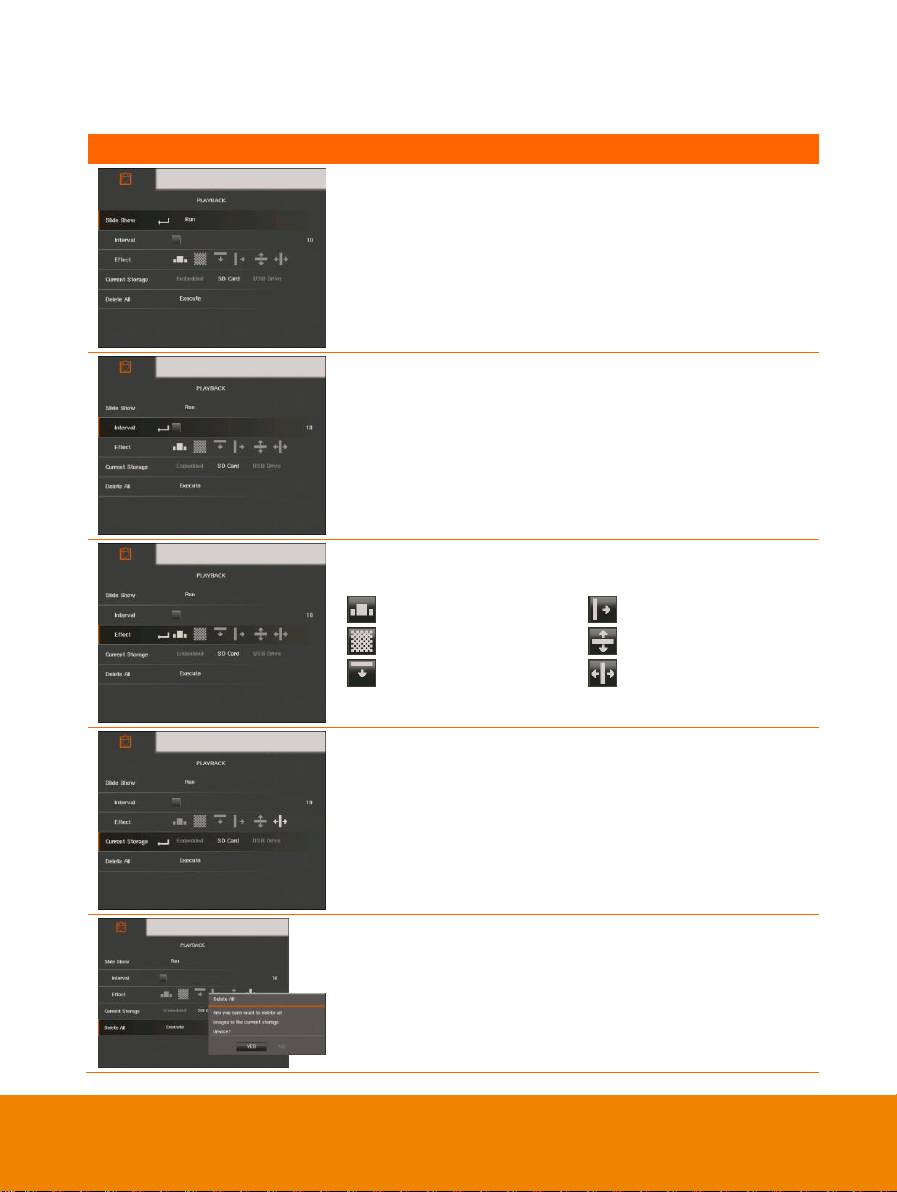
11
Menu Screen
Function
Slide Show
Display all captured still pictures in an automated slide
show. The video file will be skipped.
Interval
Set the interval before displaying the next picture. The
length can be set up to 100 sec.
Slide Show Effect
Select the slide show transition effect.
Slide image
Wipe right
Checker down
Split Vertical Out
Wipe down
Split Horizontal Out
Current Storage
Select the source of the images.
Delete All
Permanently delete all the data in selected memory
source. A Warning Message will appear. Select YES to
continue and NO to stop formatting the storage.
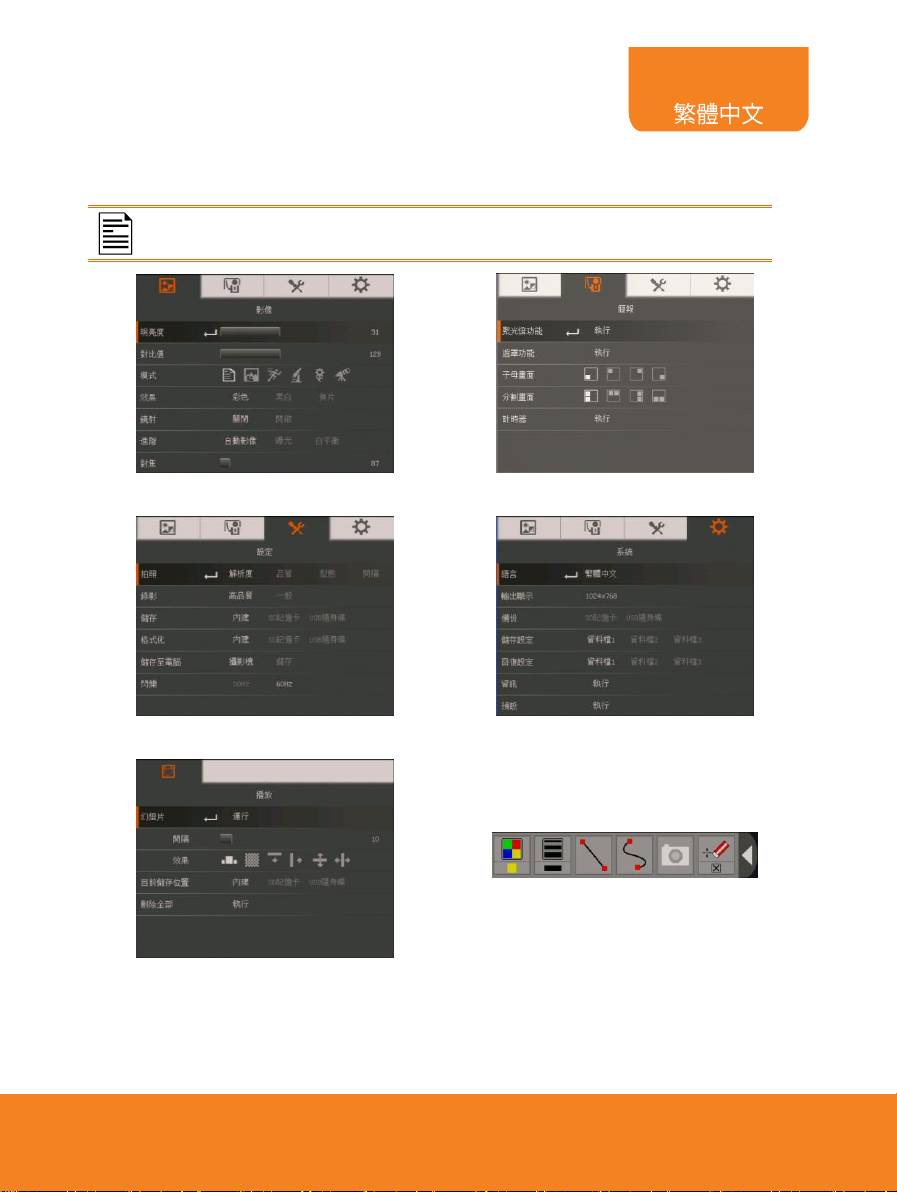
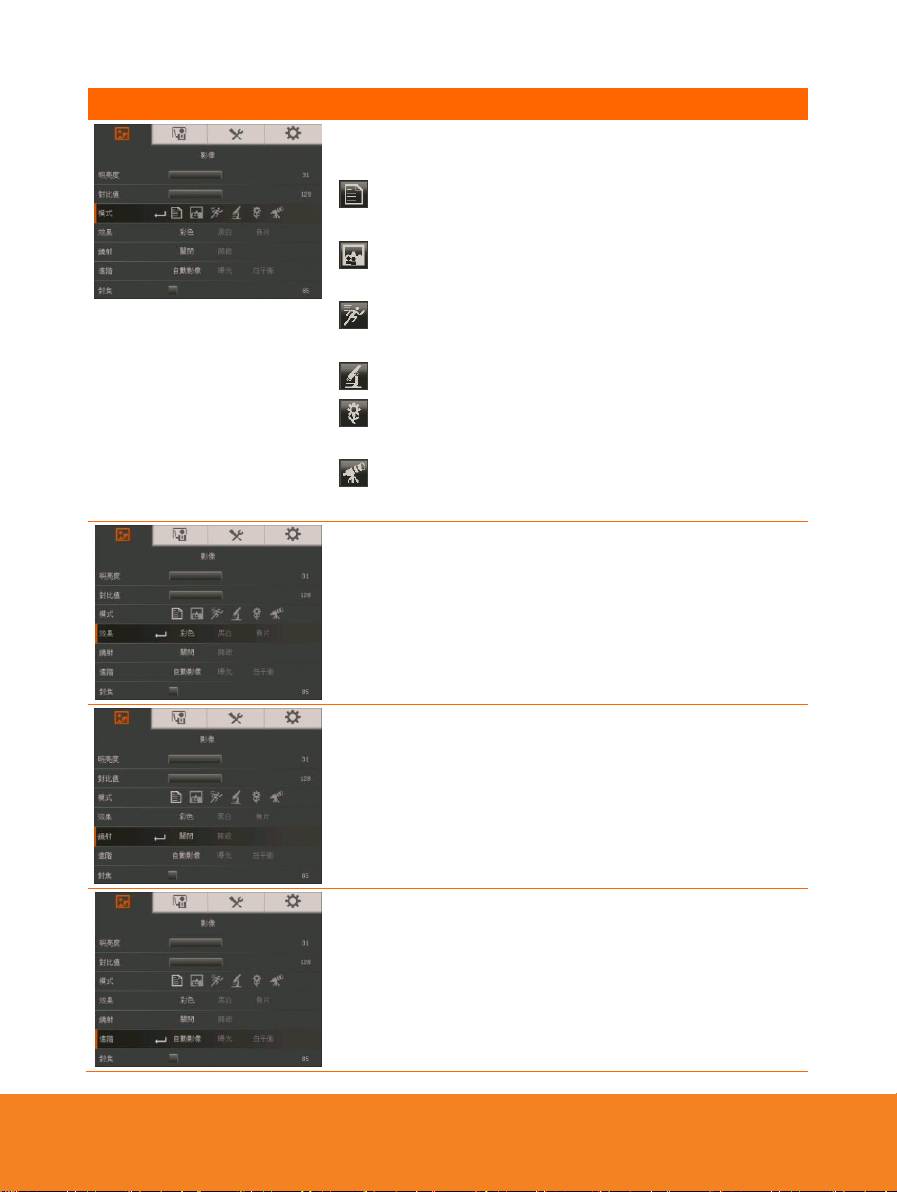
OSD 選單
OSD 選單上有 4個索引標籤:影像、簡報、設定和系統。在播放模式中,您可以使用播放
OSD 選單來啟用投影片功能,並在需要時修改投影片間隔時間與轉場設定。
12
電視輸出時,設定選單清單中的解析度功能無法使用。
影像
簡報選單
設定選單
系統選單
播放選單
加註
瀏
瀏
覽
覽
選
選
單
單
和
和
子
子
選
選
單
單
13
1. 按下遙控器或控制面板
上的選單(MENU)
鈕。
2. 按 ► 和 ◄ 可瀏覽選
項標籤。
3. 按▼ 和▲ 可在選單上
進行選取。
4. 按 確認選項。
5. 按 ► 和 ◄ 可調整設
定或進行選取。
6. 按 進入子選單。
7. 按選單(MENU)鍵關
閉 OSD 選單。
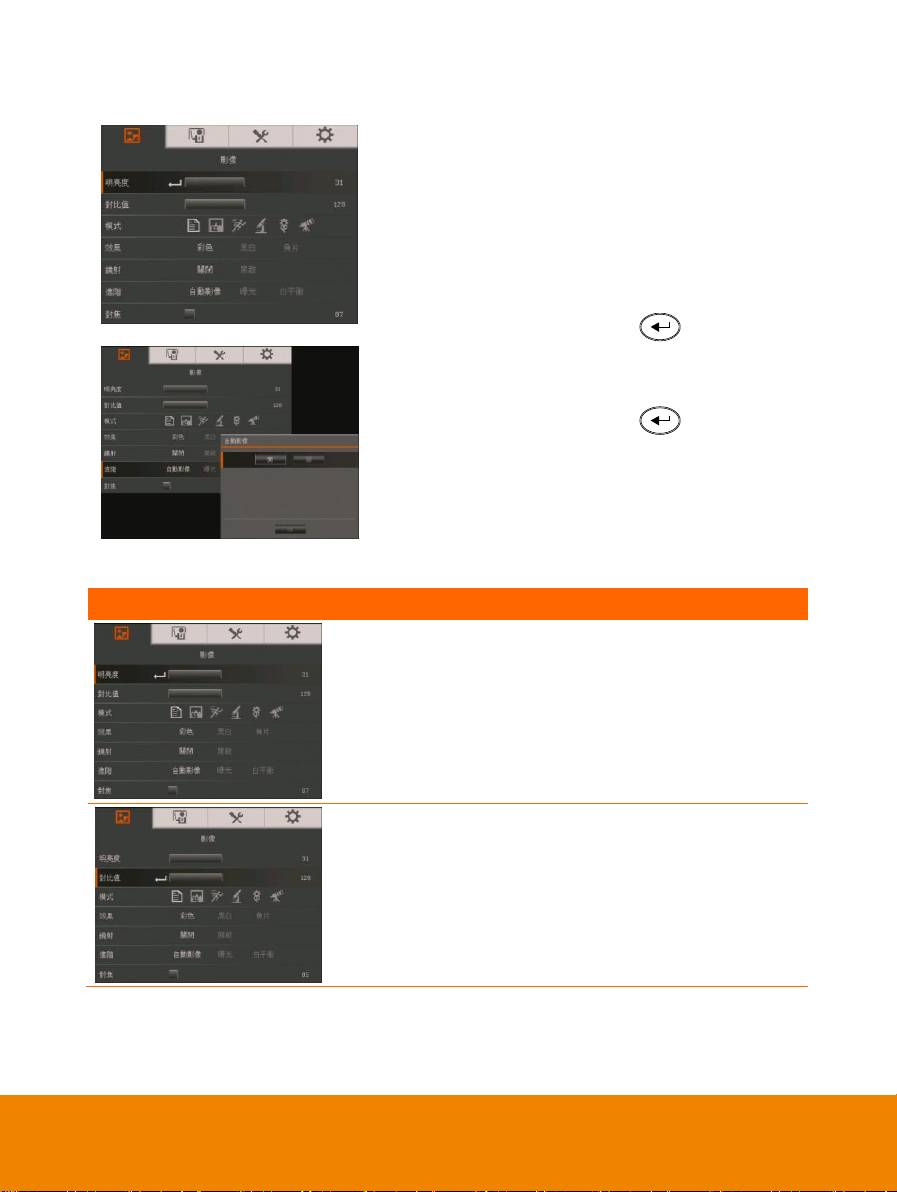
影
影
像
像
選單畫面
功能
亮度
手動調整亮度等級,範圍從 0 到 63。
對比
在明亮或黑暗的環境下,手動調整對比度等級,範圍從 0
到 255。
14
選單畫面
功能
模式
進行不同的影像顯示設定。
銳利-沿邊緣調整對比度,使用字更清晰。觀看距攝影
機 32-36 公分(16 倍縮放)的物體。
圖片模式-調整影像的漸層。觀看距攝影機 32-36 公分
(16 倍縮放)的物體。
動態-增加畫格速率,使用此模式時需要有足夠的燈
光。觀看距攝影機 32-36 公分(16 倍縮放)的物體。
顯微鏡模式-自動調整用顯微鏡觀看時的光學變焦。
近拍模式-設定觀看距攝影機只有 10-32 公分(5 倍縮
放)的物體。
遠拍模式-設定觀看距攝影機 36 公分(最大 16 倍)
以上的物體。
特效
將影像轉換為正片(真實色彩)、單色(黑白)或負片。
鏡射
於攝相機(Camera)模式下,選擇翻轉影像。
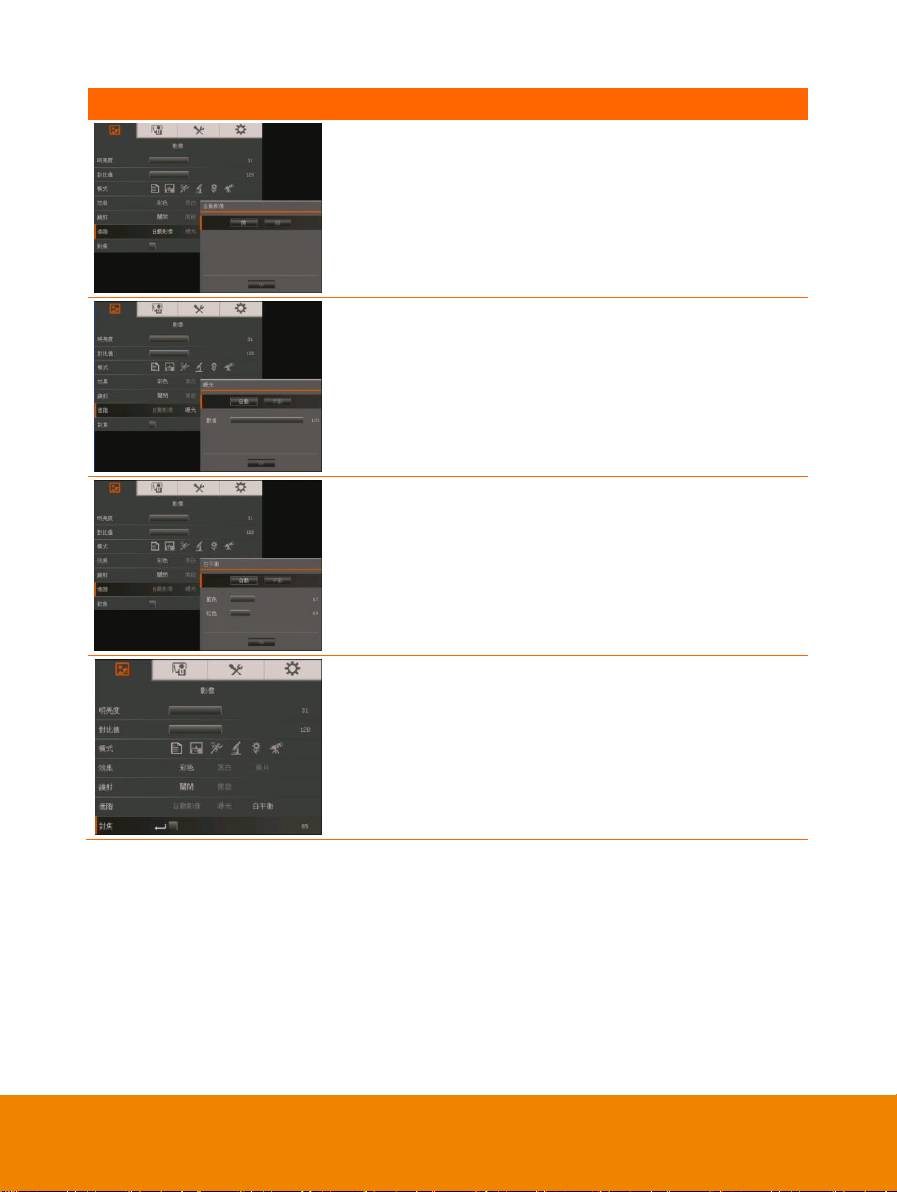
進階
可設定自動影像(Auto Image)、曝光(Exposure)、和白
平衡(White Balance)設定。
15
選單畫面
功能
自動影像
選擇開啟或關閉本功能,以曆自動調整白平衡和曝光設
定、並自動校正顏色和曝光補償。
曝光
選擇曝光設定
自動- 自動調整所需的攝影機曝光與光線量。
手動- 手動調整曝光等級。曝光可調整至最高達 99。
白平衡
選擇用於多種光線條件或色溫的白平衡設定。
自動- 自動調整白平衡。
手動- 手動調整紅色與藍色色階。色階可調整至最高達
255。
對焦
手動調整焦距。
簡
簡
報
報
16
選單畫面
功能
聚光灯
聚光灯在簡報螢幕上顯示加疊了方框。您可以按▲、▼、
◄、 ►調整聚光灯方框位置。選執行(Execute)可以呼叫
聚光灯子選單。
聚光灯 子選單有以下選項。
聚光灯 子選單有以下選項。
ON/OFF – 啟動/取消聚光灯。 按 可跳至下一個選
項。
陰影(Shade) –設定方框外模糊度。數值設為 100 時,方
框外區域將會變為全黑。按 可跳至下一個選項。
顏色(Color)– 選擇 聚光灯 方框顏色。 按 可跳至下
一個選項。
OK – 按 確定,使選項生效。 選 ON,方框會跳出並
閃動,按▲、▼、◄、和 ► 可調整外框大小,按 確
認; 再按 OFF 可關閉子選單。
屏幕幕布
屏幕幕布遮於簡報螢幕上。螢幕上方
露出部分。按▲、▼、◄和 ► 可調
整露出區域範圍。選取執行
(Execute) 可呼叫 the 屏幕幕布 子
選單。
17
選單畫面
功能
屏幕幕布 子選單具備以下選項。
ON/OFF –啟動/取消屏幕幕布。 按 可跳至下一個選
項。
陰影 (Shade)–設定方框外模糊度。數值設為 100 時,方
框外區域將會變為全黑。按 可跳至下一個選項。
OK – 按 確認,使選項生效。 選 ON 時,螢幕上方會
略為露出。按 ▲、▼、◄、 ► 鈕可以顯示更多遮蔽區域,
按 OFF 將會關閉子選單。
子母畫面 (PIP)
在 Camera(攝影機)模式中,選擇縮圖播放畫面位置,
然後在畫面角落顯示縮圖播放畫面,從記憶體中叫出拍攝
的影像。選取 OFF,取消子母畫面。
左下方
左上方
右上方
右下方
分割畫面
將畫面切分成兩個部分。其中一半畫面顯示 8 個縮圖影
像,另一半顯示來自 AVerVision PL50 攝影機的影像。
選擇 8 個縮圖播放影像的顯示位置。 選取 OFF,取消切
割畫面。
左
右
上
下
18
選單畫面
功能
計時器
開始/暫停/停止計時和設定計時長度。計時器會自動計
時,到數計時至 0 後會顯示經過的時間。每次切換
Playback(播放)、PC(電腦)或 Camera(攝影機)模
式時,計時器會繼續計時。
設
設
定
定
選單畫面
功能
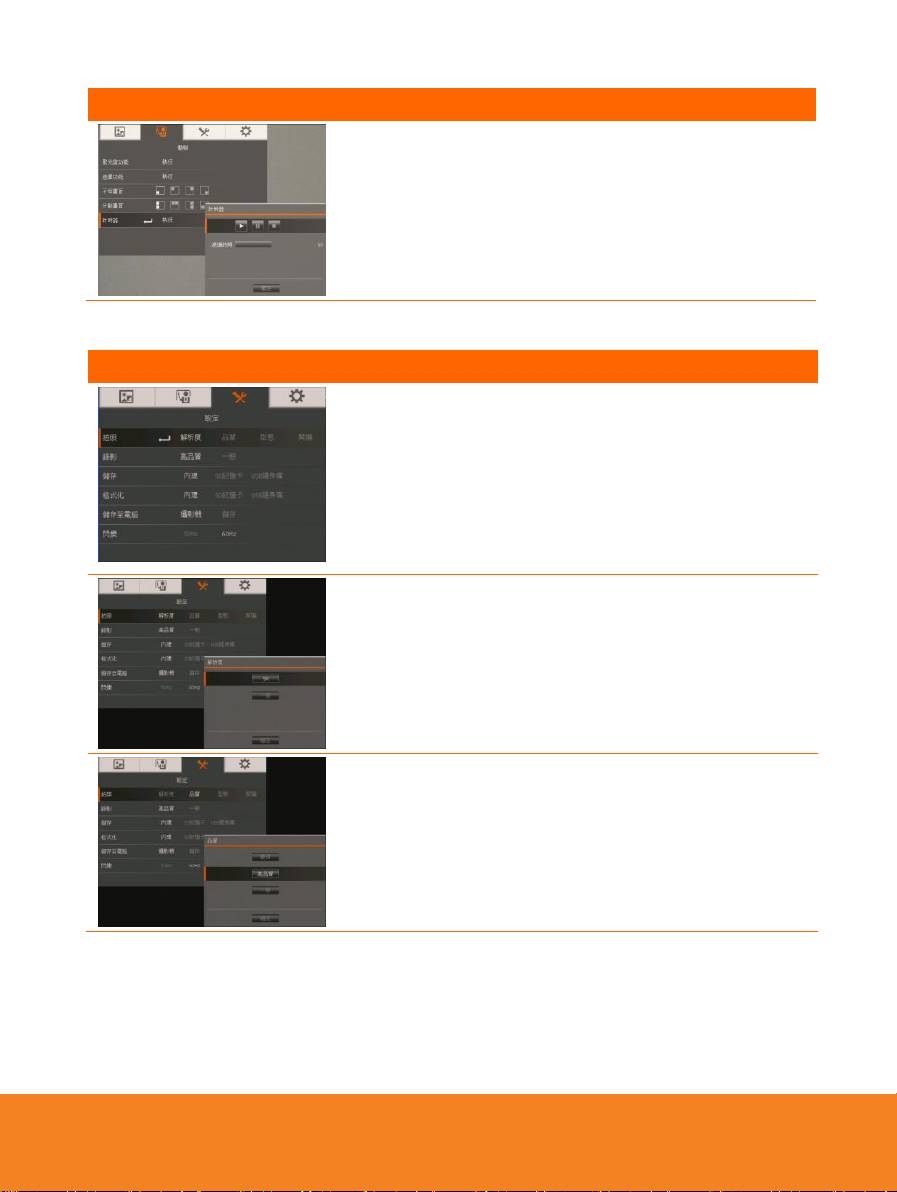
擷取
針對擷取影像之解析度、畫質、類型和拍攝時間間隔進行
設定。
解析度
選擇擷取之影像尺寸。若為 500 萬畫素,擷取影像解析度
則為 2560 X 1920。
如果輸出顯示設定為 1280 x 720 或 1920 x 1080,擷取影
像的解析度大小將為 2560 x 1440,如果是 1280 x 800 的
輸出顯示設定,則擷取影像的解析度大小將為 2560 x
1600。
畫質
選擇拍攝壓縮設定。
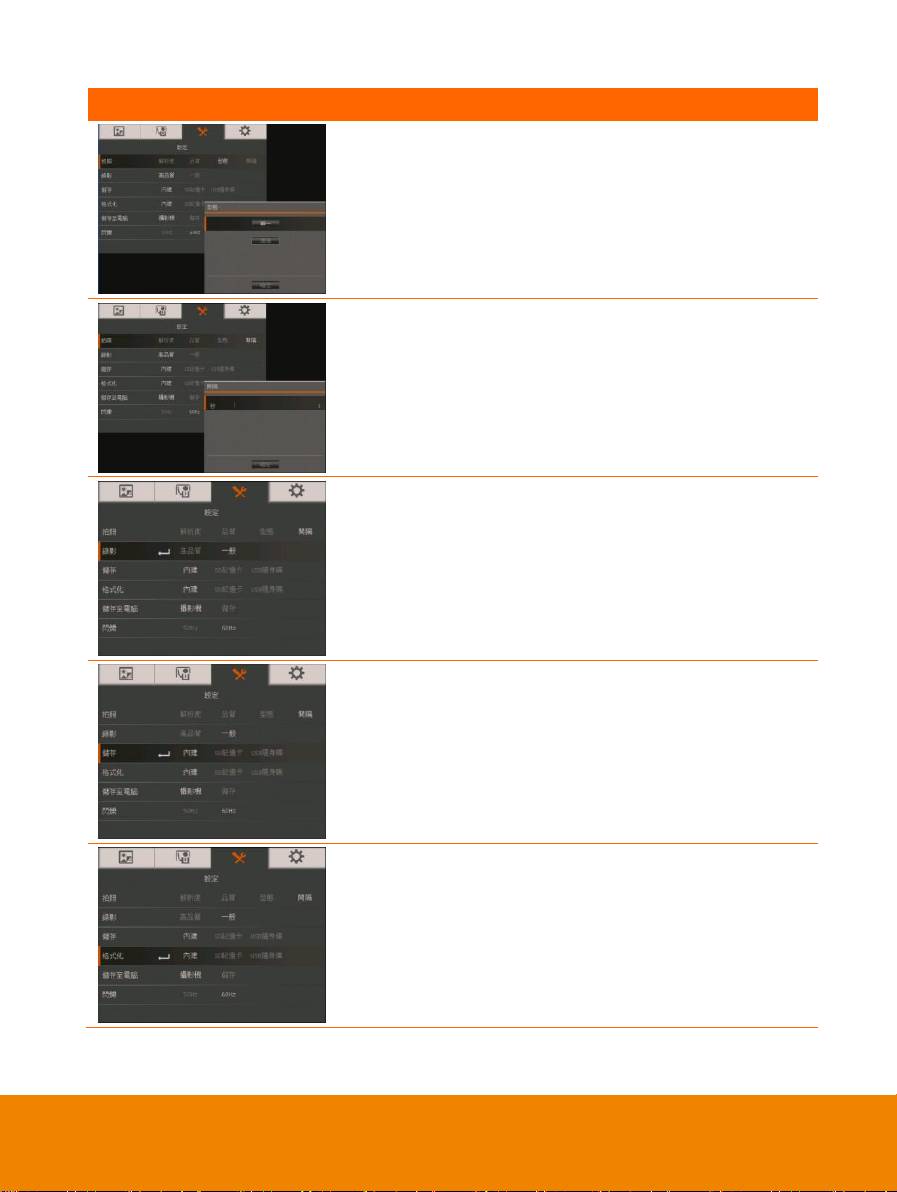
19
選單畫面
功能
類型
選擇拍攝類型。
Single(單張)- 僅拍攝一張圖片。
Continuous(連拍)- 拍攝連續圖片。
時間間隔
設定連拍的時間間隔。間隔長度最高可達 600 秒(10 分
鐘)。
錄影
選擇視訊錄製壓縮設定。
儲存記憶體
變更儲存位置。錄製的影音只能儲存在 SD 記憶卡或 USB
隨身碟中。
格式化
格式化會刪除所選擇記憶體中的所有資料。
