Konig Electronic Wireless weather station: инструкция
Раздел: Аудиотехника и DJ оборудование
Тип:
Инструкция к Konig Electronic Wireless weather station
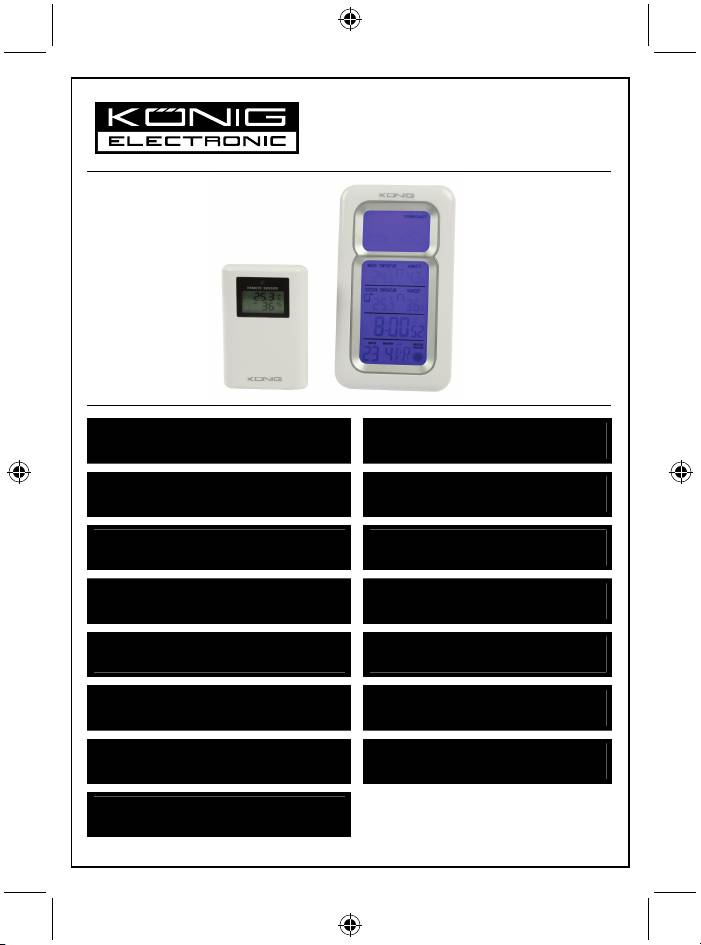
KN-WS210
MANUAL (p. 2)
ANLEITUNG (S. 4)
Weather station
Wetterstation
MODE D’EMPLOI (p. 6)
GEBRUIKSAANWIJZING (p. 9)
Station météorologique
Weerstation
MANUALE (p. 12)
MANUAL DE USO (p. 14)
Stazione meteorologica
Estación meteorológica
HASZNÁLATI ÚTMUTATÓ (o. 17.)
KÄYTTÖOHJE (s. 19)
Időjárásjelző állomás
Sääasema
BRUKSANVISNING (s. 22)
NÁVOD K POUŽITÍ (s. 24)
Väderstation
Meteorologická stanice
MANUAL DE UTILIZARE (p. 27)
ΕΓΧΕΙΡΙΔΙΟ XPHΣHΣ (σελ. 29)
Staţie meteo
Μετεωρολογικός σταθμός
BRUGERVEJLEDNING (s. 32)
VEILEDNING (s. 34)
Vejrstation
Værstasjon
ИНСТРУКЦИЯ (стр. 37)
Метеостанция
2013-05-17
ENGLISH
Weather station
• We recommend that you read this manual before installing/using this product.
• Keep this manual in a safe place for future reference.
FEATURES
1. Calendar: 2000 – 2099.
2. Time display: month, day, hour, minute, second, week, moon phase; 12/24 hour switch.
3. Days of the Week: 7 language display.
4. Indoor and outdoor temperature and humidity display.
5. Three kinds of environment indicators: dry, comfortable and damp.
Dry
• Temperature: N/A
• Humidity: less than 40%
Comfortable
• Temperature: 20 – 28°C
• Humidity: 40 – 70%
Damp
• Temperature: N/A
• Humidity: >70%
A temperature of less or more than 20 – 28°C and a humidity between 40 – 79% has not been taken
into consideration.
6. Four kinds of weather forecast: sunny, semi-sunny, cloudy, and rainy. The weather forecast
measures the weather condition trends for the next 24 hours. The weather station will give a more
accurate forecast in a naturally ventilated room. It will be more inaccurate in an air-conditioned
room.
7. Alarm and snooze function.
8. Sound control will turn on the backlight.
USAGE:
The weather station has 6 different buttons: TIME, AL, ▲, ▼, CH, SNZ/L. These buttons are used for
the following functions:
1. Adjusting the year, month, date, day and time.
* Press and hold the TIME button for 3 seconds. When the beep signal goes off, the YEAR digit will
flash. Use ▲ or ▼ on the back of the weather station to adjust the YEAR.
* Press TIME twice. The MONTH digit will flash. Use ▲ or ▼ to adjust the MONTH.
* Press the TIME button again. The DATE digit will flash. Use ▲ or ▼ to adjust the DATE.
* Press the TIME button again. The DAY digits will flash. Use ▲ or ▼ to set the DAY.
* Press the TIME button again. The HOUR digits will flash. Use ▲ or ▼ to set the HOUR.
* Press the TIME button again. The MINUTE digits will flash. Use ▲ or ▼ to set the MINUTE.
* Press the TIME button again. The TIME ZONE 00 digits will flash. Use ▲ or ▼ to set the TIME
ZONE.
* Press the TIME button again to resume to normal display mode.
2. Alarm setup
* Press and hold the AL button for 3 seconds. When the beep signal goes off, the hour digits will
flash. Use ▲ or ▼ on the back of the weather station to adjust the hour.
* Press the AL button again. The minute digits will flash. Use ▲ or ▼ to set the minutes.
* Press the AL button again to save the setting and to return to normal time display mode.
2
3. Activate/Deactivate the Alarm Function
In normal display mode, press the “AL” to activate or deactivate the alarm function. The alarm bell sign
(ALM) will appear or disappear accordingly. When the alarm is set, the backlight will turn on.
4. SNZ/L Button
When the alarm goes off, press SNZ/L to stop the snooze. The alarm will go off again after 5 minutes.
Press SNZ/L in normal display mode to turn on the backlight for about 5 seconds.
5. ▲ button
Press the ▲ button in normal time display mode to switch between 12/24 hour format. AM or PM will
be displayed if you have chosen for the 12 hour format.
6. ▼ Button
Press this button in normal display mode to toggle between degrees Celsius and Fahrenheit.
7. Volume Control
The backlight will go on for about 5 seconds when there is a sound above 80 dB within 1 metre.
Touching the product or pressing the button will also turn on the backlight.
8. MOON PHASE
The weather station automatically calculates the moon phase. The moon phase has been divided into
8 phases.
Temperature and Humidity:
1. Temperature range indoors: 0°C – 50°C (32°F – 122°F). Temperature range outdoors: -20°C –
50°C (-4°F – 122°F).
2. Range of humidity: 20% – 90%.
3. Tendency of temperature change: one check per hour. The arrow will be flat if the temperature
changes more than 1°C compared to previous data.
Transmitter Usage:
* Each weather station has a transmitter.
* The maximum distance between the station and the transmitter is 20 m in open area. A larger
distance or buildings standing between the station and the transmitter will affect the signal
transmission and reception.
* The transmitter should be kept away from rain or water.
Remarks:
1. 3X AAA batteries are needed to operate the weather station (not incl.).
2. 2X AAA batteries are needed to operate the transmitter (not incl.).
3. The transmitter distance: 20.
4. Transmits once every second. The light will flash at the same time.
5. All functions will reset when the batteries are replaced.
Safety precautions:
To reduce risk of electric shock, this product should ONLY be
opened by an authorized technician when service is
required. Disconnect the product from mains and other
equipment if a problem should occur. Do not expose the
product to water or moisture.
Maintenance:
Clean only with a dry cloth. Do not use cleaning solvents or abrasives.
3
Warranty:
Any changes and/or modifications to the product will void the warranty. We cannot accept any liability
for damage caused by incorrect use of this product.
Disclaimer:
Designs and specifications are subject to change without prior notice. All logos, brands and product
names are trademarks or registered trademarks of their respective holders and are hereby recognised
as such.
Disposal:
• This product is designated for separate collection at an appropriate collection point. Do not
dispose of this product with household waste.
• For more information, contact the retailer or the local authority responsible for waste
management.
DEUTSCH
Wetterstation
• Bitte lesen Sie diese Anleitung vor der Installation/dem Gebrauch des Geräts.
• Bewahren Sie die Anleitung für ein späteres Nachschlagen gut auf.
FUNKTIONEN
1. Kalender: 2000 – 2099.
2. Zeitanzeigen: Monat, Tag, Stunde, Minute, Sekunde, Woche, Mondphase; 12/24-Stundenformat.
3. Wochentage: 7-sprachiges Display.
4. Anzeige der Innen- und Außentemperatur und Luftfeuchtigkeit.
5. Drei Umgebungsindikatoren: trocken, angenehm und feucht.
Trocken
• Temperatur: k.A.
• Luftfeuchtigkeit: unter 40%
Angenehm
• Temperatur: 20 – 28°C
• Luftfeuchtigkeit: 40 – 70%
Feucht
• Temperatur: k.A.
• Luftfeuchtigkeit: >70%
Eine Temperatur von weniger oder mehr als 20 – 28°C und eine Luftfeuchtigkeit zwischen 40 – 79%
werden nicht berücksichtigt.
6. Vier Wettervorhersagen: sonnig, teils sonnig, bewölkt und regnerisch. Die Wettervorhersage
ermittelt den Wettertrend für die nächsten 24 Stunden. In natürlich belüfteten Räumen sind die
Wettervorhersagen der Wetterstation akkurater. In klimatisierten Räumen sind die Angaben
weniger akkurat.
7. Wecker und Schlummerfunktion.
8. Die Geräuschsteuerung schaltet die Hintergrundbeleuchtung ein.
GEBRAUCH:
Die Wetterstation verfügt über 6 Tasten: TIME, AL, ▲, ▼, CH, SNZ/L. Diese Tasten werden für die
folgenden Funktionen verwendet:
4
1. Einstellung von Jahr, Monat, Datum, Tag und Uhrzeit.
* Halten Sie die Taste TIME 3 Sekunden lang gedrückt. Nach dem Signalton blinkt die
Jahresanzeige. Das Jahr stellen Sie mit den Tasten ▲ oder ▼ an der Rückseite des Geräts ein.
* Drücken Sie TIME zweimal. Die Monatsanzeige blinkt. Stellen Sie den Monat mit ▲ oder ▼ ein.
* Drücken Sie TIME erneut. Die Datumsanzeige blinkt. Stellen Sie das Datum mit ▲ oder ▼ ein.
* Drücken Sie TIME erneut. Die Tagesanzeige blinkt. Stellen Sie den Tag mit ▲ oder ▼ ein.
* Drücken Sie TIME erneut. Die Stundenanzeige blinkt. Stellen Sie die Stunde mit ▲ oder ▼ ein.
* Drücken Sie TIME erneut. Die Minutenanzeige blinkt. Stellen Sie die Minute mit ▲ oder ▼ ein.
* Drücken Sie TIME erneut. Die Zeitzonenanzeige 00 blinkt. Stellen Sie die Zeitzone mit ▲ oder ▼
ein.
* Drücken Sie TIME erneut, um zum normalen Anzeigemodus zurückzukehren.
2. Wecker einstellen
* Halten Sie die Taste AL 3 Sekunden lang gedrückt. Nach dem Signalton blinkt die Stundenanzeige.
Stellen Sie die Stunden mit den Tasten ▲ oder ▼ an der Rückseite des Geräts ein.
* Drücken Sie AL erneut. Die Minutenanzeige blinkt. Stellen Sie die Minute mit ▲ oder ▼ ein.
* Drücken Sie AL erneut, um die Einstellungen zu speichern und zum normalen Anzeigemodus
zurückzukehren.
3. Wecker aktivieren/deaktivieren
Drücken Sie während der normalen Anzeige die Taste „AL“, um den Wecker zu aktivieren/deaktivieren.
Die Weckeranzeige (ALM) erscheint oder verschwindet entsprechend der Einstellung. Nach der
Einstellung des Weckers wird die Hintergrundbeleuchtung eingeschaltet.
4. SNZ/L-Taste
Wenn der Wecker ertönt, drücken Sie SNZ/L, um die Schlummerfunktion zu starten. Der Weckruf
ertönt erneut nach 5 Minuten. Drücken Sie SNZ/L während der normalen Anzeige, um die
Hintergrundbeleuchtung für ungefähr 5 Sekunden einzuschalten.
5. ▲-Taste
Drücken Sie während der normalen Anzeige die Taste ▲, um zwischen dem 12- oder
24-Stundenformat umzuschalten. Im 12-Stundenformat erscheint im Display die Anzeige AM oder PM.
6. ▼-Taste
Drücken Sie diese Taste während der normalen Anzeige, um zwischen den Einheiten Grad Celsius
und Fahrenheit umzuschalten.
7. Geräuschsteuerung
Falls ein Geräusch von über 80dB in einem Radius von 1 Meter ertönt, wird die
Hintergrundbeleuchtung ungefähr 5 Sekunden lang eingeschaltet. Die Beleuchtung lässt sich auch
durch Berührung des Geräts oder durch Drücken der Taste einschalten.
8. MONDPHASE
Die Wetterstation berechnet die Mondphase automatisch. Die Mondphase ist in 8 Abschnitte unterteilt.
Temperatur und Luftfeuchtigkeit:
1. Innentemperaturbereich: 0°C – 50°C (32°F – 122°F). Außentemperaturbereich: -20°C – 50°C
(-4°F – 122°F).
2. Bereich Luftfeuchtigkeit: 20% – 90%.
3. Tendenz der Temperaturveränderung: eine Prüfung pro Stunde. Der Pfeil ist flach, falls sich die
Temperatur im Vergleich zum vorhergehenden Wert um mehr als 1°C verändert.
5
