Arcam HANDBOOK Blu-ray Disc player BDP300: инструкция
Раздел: Бытовая, кухонная техника, электроника и оборудование
Тип: Blu-Ray Плеер
Инструкция к Blu-Ray Плееру Arcam HANDBOOK Blu-ray Disc player BDP300
BDP300
HANDBOOK
Blu-ray Disc player
MANUEL
Lecteur disque Blu-ray
HANDBUCH
Blu-ray Disk-Player
HANDLEIDING
Blu-ray DVD-speler
MANUAL
Reproductor de discos Blu-ray
РУКОВОДС ТВО
Проигрыватель Blu-ray дисков
ULTRA HIGH PERFORMANCE 24-BIT DAC
POWER

BDP300
HANDBOOK
Blu-ray Disc player
ULTRA HIGH PERFORMANCE 24-BIT DAC
POWER
English
E-2
safety guidelines
Important safety instructions
1. Read these instructions.
2. Keep these instructions.
3. Heed all warnings.
4. Follow all instructions.
5. Do not use this apparatus near water.
6. Clean only with dry cloth.
7. Do not block any ventilation openings. Install in
accordance with the manufacturer’s
instructions.
8. Do not install near any heat sources such as
radiators, heat registers, stoves, or other apparatus
(including amplifiers) that produce heat.
9. Do not defeat the safety purpose of the polarized or
grounding-type plug.
A polarized plug has two blades with one wider than the
other. A grounding type plug has two blades and a third
grounding prong. The wide blade or the third prong are
provided for your safety. If the provided plug does not fit
into your outlet, consult an electrician for replacement
of the obsolete outlet.
10. Protect the power cord from being walked
on or pinched particularly at plugs, convenience
receptacles, and the point where they exit from the
apparatus.
11. Only use attachments/accessories specified by the
manufacturer.
12. Use only with the cart, stand, tripod, bracket, or
table specified by the manufacturer, or sold with the
apparatus.
When a cart is used, use caution
when moving the cart/apparatus
combination to avoid injury from
tip-over.
13. Unplug this apparatus during lightning storms or
when unused for long periods of time.
14. Refer all servicing to qualified service personnel.
Servicing is required when the apparatus has been
damaged in any way, such as power-supply cord or plug
is damaged, liquid has been spilled or objects have fallen
into the apparatus, the apparatus has been exposed to
rain or moisture, does not operate normally, or has been
dropped.
15. Object or liquid entry
WARNING – Take care that objects do not fall and
liquids are not spilled into the enclosure through any
openings. The equipment shall not be exposed to
dripping or splashing. Liquid-filled objects such as vases
should not be placed on the equipment.
16. Climate
The equipment has been designed for use in moderate
climates and in domestic situations.
17. Cleaning
Unplug the unit from the mains supply before cleaning.
The case should normally only require a wipe with a
soft, lint-free cloth. Do not use chemical solvents for
cleaning.
We do not advise the use of furniture cleaning sprays or
polishes as they can cause permanent white marks.
18. Power sources
Only connect the equipment to a power supply of
the type described in the operating instructions or as
marked on the equipment.
The primary method of isolating the equipment from
the mains supply is to remove the mains plug. The
equipment must be installed in a manner that makes
disconnection possible.
19. Abnormal smell
If an abnormal smell or smoke is detected from the
equipment, turn the power off immediately and unplug
the equipment from the wall outlet. Contact your dealer
and do not reconnect the equipment.
20. Damage requiring service
The equipment should be serviced by qualified service
personnel when:
A. the power-supply cord or the plug has been
damaged, or
B. objects have fallen, or liquid has spilled into the
equipment, or
C. the equipment has been exposed to rain, or
D. the equipment does not appear to operate
normally or exhibits a marked change in
performance, or
E. the equipment has been dropped or the enclosure
damaged.
WARNING - The mains plug is used as a disconnect
device, the disconnect device shall remain readily
operable.
WARNING - The batteries shall not be exposed to
excessive heat, such as sunshine or fire.
CAUTION - Danger of explosion if batteries are
incorrectly replaced. Replace only with the same or
equivalent type.
Safety compliance
This equipment has been designed to meet the IEC/EN
60065 international electrical safety standard.
This device complies with Part 15 of the FCC Rules.
Operation is subject to the following two conditions:
(1) This device may not cause harmful interference, and
(2) this device must accept any interference received,
including interference that may cause undesired
operation.
CAUTION: To reduce the risk of electric shock, do not remove cover (or back). No user serviceable parts inside. Refer
servicing to qualified service personnel.
WARNING: To reduce the risk of fire or electric shock, do not expose this apparatus to rain or moisture.
The lightning flash with an arrowhead symbol within an equilateral triangle is intended to alert the user to the
presence of uninsulated ‘dangerous voltage’ within the product’s enclosure that may be of sufficient magnitude to
constitute a risk of electric shock to persons.
The exclamation point within an equilateral triangle is intended to alert the user to the presence of important
operating and maintenance (servicing) instructions in the literature accompanying the product.
CAUTION: In Canada and the USA, to prevent electric shock, match the wide blade of the plug to the wide slot in the socket
and insert the plug fully into the socket.
CAUTION: Use of any controls, adjustments or procedures other than those specified herein may result in hazardous
radiation exposure.

E-3
English
welcome
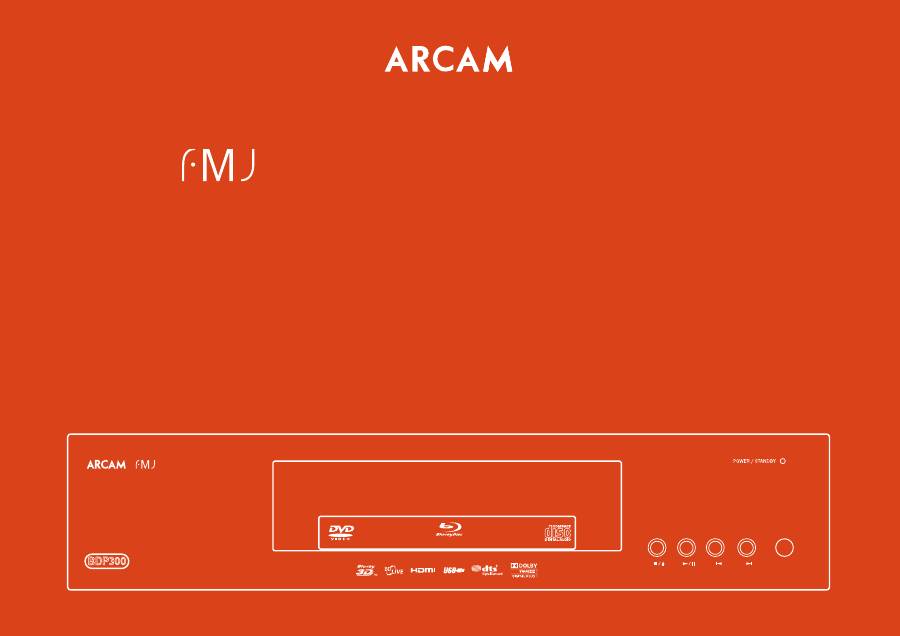
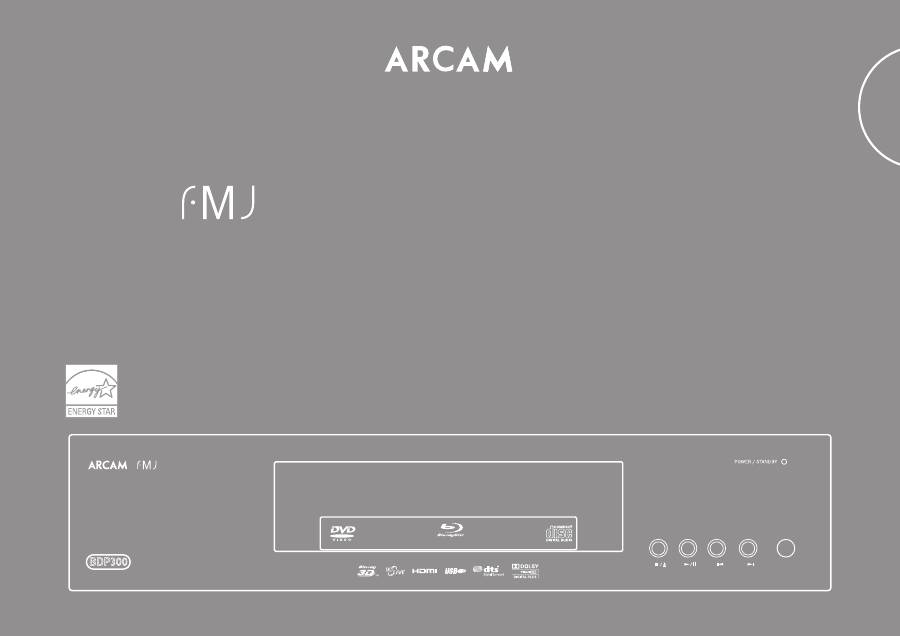
Thank you and congratulations for purchasing your Arcam FMJ Blu-ray Disc player.
Arcam has been producing specialist hi-fi and home cinema products of remarkable quality
for over three decades and the BDP300 – which plays Blu-ray Discs, DVD-Video discs and
Audio CDs – is the latest in a long line of award winning home cinema equipment. The design
of the FMJ range draws upon all of Arcam’s experience as one of the UK’s most respected audio
companies and is built to give you years of trouble-free listening enjoyment.
This handbook has been designed to give you all the information you need to install, connect
and use the Arcam BDP300 Blu-ray Disc player. The CR104 remote control handset supplied
with this equipment is also described. Use the contents list shown on this page to guide you to
the section of interest.
We hope that your FMJ Blu-ray Disc player will give you years of trouble-free operation. In the
unlikely event of any fault, or if you simply require further information about Arcam products,
our network of dealers will be happy to help you. Further information can also be found on the
Arcam website at
www.arcam.co.uk
.
The FMJ development team
Contents
safety guidelines .......................................E-2
Important safety instructions........................... E-2
Safety compliance ................................................ E-2
welcome ......................................................E-3
installation .................................................E-4
Placing the unit ..................................................... E-4
Power ......................................................................... E-4
The remote control and trigger inputs ......... E-4
Interconnect cables.............................................. E-4
Making video connections ................................ E-6
Making audio connections ............................... E-6
The HDMI interface .............................................. E-7
Troubleshooting HDMI ....................................... E-7
disc & file formats .....................................E-8
Playable discs ......................................................... E-8
Video file requirements (USB/Disc) ................ E-8
MP3/WMA audio file requirements (USB/Disc)
...................................................................................... E-8
Photo file requirements (USB/Disc) ............... E-8
Region coding ........................................................ E-8
Network connection ............................................ E-9
basic operation ....................................... E-10
remote control ........................................ E-11
The CR104 remote ..............................................E-12
remote control ........................................ E-12
Playback and advanced controls ..................E-13
Useful information ..............................................E-14
Device Mode / Source keys .............................E-14
Controlling other devices ...............................E-14
Code blink-back ...................................................E-15
advanced operation .............................. E-16
Disc information ..................................................E-16
Search ......................................................................E-16
Menus ......................................................................E-16
Soundtrack selection .........................................E-16
Subtitles ..................................................................E-16
Bonusview and BD-Live ....................................E-16
Playing media files ..............................................E-17
Advanced playback controls ..........................E-18
settings menus ....................................... E-19
Display .....................................................................E-19
Audio .......................................................................E-20
Language ...............................................................E-21
Network ..................................................................E-21
System .....................................................................E-22
Security/Parental Control ................................E-22
trouble shooting ..................................... E-24
Audio output format .........................................E-25
audio & video output formats ............. E-25
customising the CR104 ......................... E-26
Code learning .......................................................E-26
Creating Macros ..................................................E-27
Volume punch-through ...................................E-27
Key mover ..............................................................E-27
Mode mover .........................................................E-28
Locking/unlocking a specific Device Mode E-28
Mode key IR punch-through ..........................E-29
Resetting the CR104 ..........................................E-29
Command summary ..........................................E-29
Device codes .........................................................E-29
specifications .......................................... E-30
Radio interference ..............................................E-30
Laser radiation......................................................E-30
software licencing ................................. E-31
product guarantee ................................ E-33
device code tables ................................. E-34

E-4
installation
Arcam’s BDP300 provides class-leading sound quality from Blu-ray
Discs, DVD-Video discs and compact discs.
The BDP300 has a state-of-the-art Delta-Sigma DAC (Digital-to-
Analogue Converter) which provides audiophile sound quality for video
and audio discs.
The BDP300 is supplied with the CR104 ‘universal’ remote control, which
is simple to use and can control up to eight audio devices – such as an
amplifer, television or Personal Video Recorder.
The high performance BDP300 Blu-ray Disc player is designed to truly
bring your movies and music to life.
Placing the unit
<
Place the BD player on a level, firm surface,
avoiding direct sunlight and sources of heat or
damp.
<
Do not place the BD player on top of an amplifier
or other source of heat.
<
Do not place the BD player in an enclosed space
such as a bookcase or closed cabinet unless there
is good provision for ventilation. The BD player
is designed to run warm during normal operation.
<
Do not place any other component or item on
top of the BD player as this may obstruct airflow
around the unit, causing the BD player to run hot.
<
Make sure the remote-control receiver (next to
the display on the front panel) is unobstructed, or
remote control will be impaired.
<
Do not place your record deck on top of this
unit. Record decks are very sensitive to the noise
generated by mains power supplies which will be
heard as a background ‘hum’ if the record deck is
too close.
Power
The BD player is supplied with a moulded mains plug
already fitted to the lead. Check that the plug supplied
fits your supply – should you require a new mains lead,
please contact your Arcam dealer.
If your mains supply voltage or mains plug is different,
please contact your Arcam dealer immediately
Push the IEC plug end of the power cable into the
socket on the back of the BD player, making sure that it
is pushed in firmly. Plug the other end of the cable into
your mains socket and, if necessary, switch the socket
on.
The remote control and trigger
inputs
The
REMOTE IN
input can be used to pass RC5 codes to
the BDP300 if it is installed in a position, or a system,
where infrared cannot be used. If this is required, please
contact your dealer for further information.
The
TRIGGER IN
input can be used to switch the BDP300
in and out of standby. Connecting the trigger output of
your Arcam amplifier (or other compatible device), will
cause the BDP300 to come out of standby automatically
when the amplifier is switched on, returning to standby
when the amplifier is switched off. Please see your
amplifier handbook for further information.
In normal use there is no need to make any connections
to these inputs.
The
RS232
input is for optional connection to a home
automation system or a computer. Various third-party
systems are available providing sophisticated control
over all your entertainment devices using touch screens
etc. Contact your dealer or installer for further details.
The technical details of the remote control protocol
are available from Arcam on request (email
support@
arcam.co.uk
).
Interconnect cables
We recommend the use of high-quality screened cables
that are designed for the particular application. Other
cables will have different impedance characteristics
that will degrade the performance of your system (for
example, do not use cabling intended for video use to
carry audio signals). All cables should be kept as short as
is practically possible.
It is good practice when connecting your equipment to
make sure that the mains power-supply cabling is kept
as far away as possible from your audio cables. Failure to
do so may result in unwanted noise in the audio signals.
NOTE
The remote control input requires a mono 3.5mm
jack, with the tip active and the sleeve grounded.
The remote control signals must be in modulated
RC5 format (at 36kHz), with a voltage level of
between 5V and 12V.

E-5
English
VIDEO OUT / AUDIO OUT
VIDEO
Y
Cb/Pb
Cr/Pr
L
USB
R
Coaxial digital output
Use this socket if you are using an AV receiver
with a coaxial digital input. Connect to the
digital input using a suitable 75
Ω
screened cable.
CAUTION: Never connect the digital output
socket to a conventional audio input.
Composite video output
Connect this output to your display
if the display does not support any
other connection types.
USB connection
Insert USB flash memory devices
here. USB memory can be used
to save downloaded content. The
BDP300 can also play certain digital
files stored on USB memory drives:
see page E-8.
HDMI digital video output
Connect this output to your display or AV
receiver if available for the best digital video
and audio connection: see page E-7 .
Network connection
Connect this socket to a port on your network
router using an Ethernet patch cable: see
page E-9. An internet connection enables
interactive content for BD-Live discs. For
setup details, see ‘Network’ on page E-21.
Zone 1 audio output
Connect these to your amplifier’s CD (or other
line-level) input using suitable high quality
interconnect cables. Ensure that the left and
right audio outputs from the BD player are
connected to the same left and right inputs on
your amplifier.
Component video output
If your display does not support
HDMI but has a component
input (Y, Pb, Pr), connect it to
this video output.
Power inlet
Connect the correct
mains cable here.
Optical digital output
Use this socket if you are using an AV
receiver with an optical digital audio input.
Remote in
This allows remote-control signals to be received
by the BDP300 if the remote sensor is covered
(or otherwise not ‘visible’ to the remote-control:
see page E-4 for more information.
RS232
This connection allows for remote
control from a third-party home
automation system or computer: see
page E-4 for more information.
12V trigger input
This socket allows the BDP300 to be switched
in and out of standby mode by an amplifier
(or another item of AV equipment) with a
12V TRIG OUT
function: see page E-4.
L, R audio output
Use this analogue output (L, R),
to provide audio for use in your
AV receiver’s Zone 2. It can also be
used to connect a recording device
or headphone amplifier.

E-6
Making video connections
To view the pictures from the BD player you need to connect one of its video outputs to your display device (TV,
monitor, projector, etc.) or AV receiver (such as the Arcam AVR600).
The BDP300 has three video output options, described below. You need only use one type of video from the list;
choose a type that your display device or AV receiver supports. If your equipment does not support any of the above
connection types then you will be unable to use it directly with the BDP300 and a video converter device may be
required. In this case, please contact your dealer for further assistance.
AV receivers and other video processing devices may be connected between the BDP300 and your display. Ensure
that all the equipment supports the type of video signal you intend to use. For instructions on how to connect AV
equipment, consult the manual for that equipment.
HDMI DIGITAL VIDEO
The HDMI connector offers uncompressed digital video and audio transmission between
the BDP300 and the display device, and provides the highest quality output. Generally, it
is also the easiest connection type to configure.
To use this video connection, you will require a HDMI or HDMI/DVI cable between the
BDP300 and your display device or receiver. See page E-7 for further details.
COMPONENT VIDEO
Use three 75Ω phono cables to connect the Component Y, Pb, Pr outputs of the BD
player to the Y, Pb, Pr inputs of the display device. Ensure that the cables are suitable for
video use and that they are approximately the same length.
If your television is capable of accepting a progressively scanned (de-interlaced) video
signal, you may wish to use the progressive video output from the BDP300. If you are
unsure whether your display device can accept progressive video, please refer to its
instruction manual or consult your dealer.
COMPOSITE VIDEO
If your display device offers only a composite input (sometimes labelled CVBS or just
‘video’), connect this to the
COMPOSITE
video output of the BD player using a 75Ω phono
cable suitable for video use. Note that a composite video connection gives the lowest-
quality output; if your display device supports other video connection types, we advise
that those are used instead.
Making audio connections
The BDP300 offers a number of alternatives for connecting audio. The connection type to use depends on the rest of
your system; chose the type most appropriate to your amplifier.
If you want to listen to
audio through…
… we recommend the following:
Your television
How you listen to audio through your TV depends on the inputs it has and your
video connection:
<
HDMI: If you are using an HDMI connection (not DVI), this will carry both
audio and video. No further connection is required.
<
Digital Audio (Coaxial or Optical): If your TV has Digital Audio
inputs
on
Coaxial or Optical connectors, connect the appropriate digital audio lead
between the TV input and the appropriate BDP300 digital output. Do not
make a connection between the BDP300 and a TV’s Digital Audio
output.
<
Stereo phono: If your TV has stereo phono inputs, follow the instructions
below for a stereo amplifier.
Your stereo amplifier
If you wish to listen to audio from your player through a stereo amplifier, then use
the stereo analogue outputs. These outputs provide a stereo down-mix of the source
material.
Using a stereo phono cable of a suitable length, connect the outputs labeled
ZONE 1 AUDIO
to the left and right inputs (respectively) for DVD or CD on your
amplifier.
Your surround-sound receiver
Connect the HDMI output to your receiver (for audio and video) if the receiver
supports audio over HDMI. The HDMI connection supports all possible audio
formats including Dolby TrueHD, DTS Master Audio and multichannel PCM.
If your receiver does not support HDMI audio, connect one of the Digital Audio
outputs (Optical or Coaxial) to the ‘Blu-ray’, ‘BD’ or ‘DVD’ input of your receiver.
These digital outputs provide PCM, Dolby Digital, DTS or MPEG multi-channel
audio, depending on the source material. The BDP300 can also be set to re-encode
all audio to DTS (‘Bitstream Mixed’) (see ‘Audio’ on page E-21). This option
provides the best surround sound quality for Digital Audio connections.
You may also wish to connect the stereo analogue audio outputs to the CD input on
your receiver, for listening to CDs. This will allow the BDP300’s audiophile digital-
to-analogue circuitry to be utilised, for the best stereo sound quality.
E-7
English
The HDMI interface
If you have a HDMI- or DVI-equipped monitor or
display, you can connect it to the BDP300 using a HDMI
cable. The HDMI connector carries uncompressed
digital video, as well as digital audio.
About HDMI
HDMI (High Definition Multimedia Interface) supports
both video and audio on a single digital connection
for use with Blu-ray Disc players, digital TV, set-top
boxes, and other AV devices. HDMI was developed to
combine the technologies of High-bandwidth Digital
Content Protection (HDCP) and the Digital Visual
Interface (DVI) in one specification, with the addition of
transmission of digital audio information; HDCP is used
to protect digital content transmitted to DVI-compliant
displays.
HDMI has the capability to support standard or
high-definition video, together with stereo or multi-
channel surround-sound audio. HDMI features include
uncompressed digital video, one connector (instead of
several cables and connectors), and communication
between the AV source and AV devices.
Connecting using HDMI
Use a HDMI cable to connect the
HDMI
socket on
this player to a HDMI socket on a compatible display
device or receiver. The arrow on the cable connector
body should be face up for correct alignment with
the connector on the BDP300. If the BDP300 video
resolution has been configured to ‘HDMI Auto’, then the
BDP300 will configure its video output automatically to
match the capabilities of the attached HDMI device.
NOTE
<
A HDMI connection can be made only
with HDMI or DVI-equipped components
compatible with both DVI and HDCP. Note
that if you choose to connect to a DVI device,
you will need an adaptor (HDMI to DVI) to
do so; a DVI/HDCP connection, however,
does not support audio signals.
<
If you require further information on the
possibilities for connecting your BDP300 to
your DVI/HDMI equipped display device,
please contact your Arcam dealer.
Problems with audio
The type of audio provided by the HDMI connector
depends on the configuration of the BDP300 (see
‘Audio’ on page E-20). Choose a setting according
to the capabilities of your audio system. Note that
pure DVI devices (connections requiring a HDMI to
DVI converter cable) do not support audio via this
connection.
Troubleshooting HDMI
Problems with video
No video (blank screen)
<
Check that the HDMI cable is connected correctly
at both ends. If an HDMI-equipped A/V receiver
is in use, try connecting the BDP300 directly to
the display device, in order to isolate where the
fault may lie.
<
Check that the display device is set to display the
HDMI input (i.e., has not been set to some other
video input, instead).
<
Check that the HDMI input of the receiver and/or
display device is enabled. See the user handbook
of the connected device for details on doing this.
<
Using an alternative video display device (e.g.,
connected via the composite video out), check
that video is output.
<
Consult the user handbook of the display device
to ensure that it can handle the output formats
provided by the BDP300. The BDP300 can
provide the following:
720 x 480p (NTSC progressive scan) 1280 x 720p
720(1440) x 480i (NTSC interlaced)
1920 x 1080i
720 x 576p (PAL progressive scan)
1920 x 1080p
720(1440) x 576i (PAL interlaced)
At least one of these standards must be supported by
the connected device in order for it to work with the
BDP300.
No video (random noise)
Random noise will be displayed if the content-
protection algorithm fails to authenticate the attached
device. This will occur, for example, if a DVI device that
does not support HDCP (such as a computer monitor)
is connected to the BDP300.
To attempt to isolate this problem, remove all discs from
the BDP300, then power-off both the BDP300 and the
connected display device. Switch the display device on,
then the BDP300 – at this point, the idle logo of the
BDP300 should be shown on the display device. If this
is not the case, please check the items listed above for a
blank screen.
If the noise appears when a copy-protected disc
(Blu-ray/DVD) is played, then it is the authentication
that is failing. Please contact your dealer for further
information.
E-8
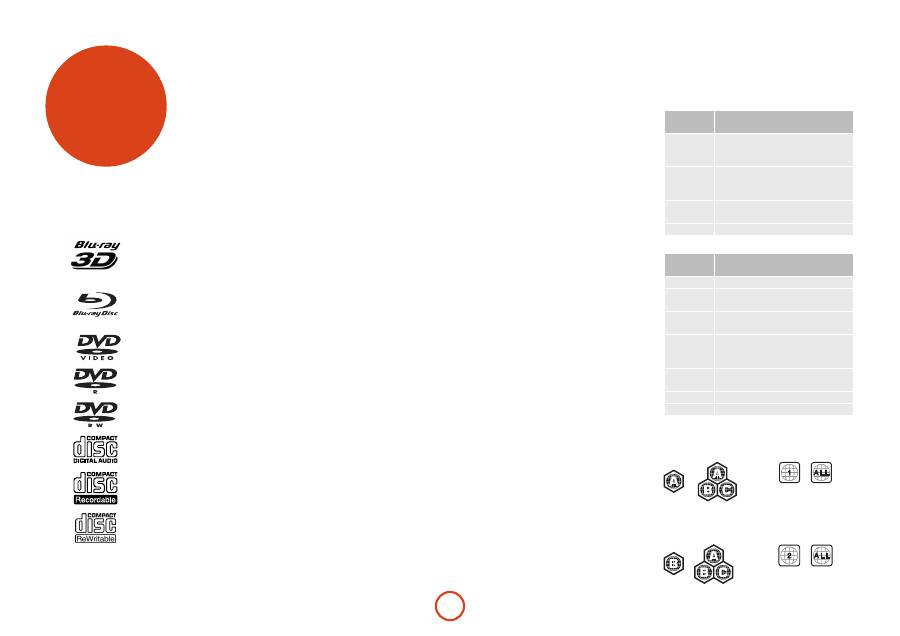
Region coding
Blu-ray Disc players and Blu-ray or DVD Video discs
are assigned region codes according to the region in
which they are sold. If the region codes do not match,
the disc will not play.
Blu-ray Disc
region code
Area
A
North America, Central America,
South America, Korea, Japan, Taiwan,
Hong Kong and South East Asia
B
Europe, Greenland, French territories,
Middle East, Africa, Australia and New
Zealand
C
India, China, Russia, Central and South
Asia
A + B + C All areas
DVD region
code
Area
1
North America
2
Europe, Japan, Middle East, Egypt,
South Africa, Greenland
3
Taiwan, Korea, the Philippines,
Indonesia, Hong Kong
4
Mexico, South America, Central
America, Australia, New Zealand,
Pacific Islands, Caribbean
5
Russia, Eastern Europe, India, most of
Africa, North Korea, Mongolia
6
China
All
All areas
Symbols indicating disc will play in North America:
Blu-ray Discs:
DVDs:
Symbols indicating disc will play in Europe:
Blu-ray Discs:
DVDs:
Video file requirements (USB/Disc)
<
Video file compatibility with your player is limited
as follows:
• Maximum resolution size: 1920x1080 (W x H)
pixels
• File extensions: .wmv, .avi, .mp4, .mpeg, .mpg,
.vob, .mkv (Note: Files encoded by Divx cannot be
played on this player)
• Playable Audio format: Dolby Digital, DTS,
MP3, WMA, AAC, AC3
• Sampling frequency: within 32 to 48kHz
(WMA), within 8 to 48kHz (Mp3)
• Bit rate: within 32 to 192kbps (WMA), within 32
to 320kbps (Mp3)
<
CD-R/RW, DVD R/RW, BD-R/RE Format: ISO
9660+JOLIET, UDF and UDF Bridge format
<
Maximum Files/Folder: Less than 1000. The
movie file name and subtitle are limited to 180
characters.
<
Not all of the WMA and AAC Audio formats are
compatible with your player.
<
HD WMA movie files contained on a USB 1.0/1.1
flash drive may not play correctly.
<
Blu-ray, DVD, or USB 2.0 are recommended to
play back HD WMA movie files.
<
Your player does not support files that
are recorded with GMC (Global Motion
Compensation) or Qpel (Quarter pixel). Those are
video encoding techniques in MPEG4 standard,
like DivX.
MP3/WMA audio file
requirements (USB/Disc)
<
File extensions: .mp3, .wma
<
Sampling frequency: Within 32 to 48kHz (WMA),
within 8 to 48kHz (Mp3)
<
Bit rate: Within 32 to 192kbps (WMA) 32 to
320kbps (MP3)
<
CD-R/RW, DVD R/RW, BD-R/RE Format: ISO
9660+JOLIET, UDF and UDF Bridge format
<
Maximum Files/Folder: Less than 2000 (total
number of files and folders)
<
Depending on the size and number of the MP3/
WMA files, it may take several minutes to read
the contents of the media.
<
HD WMA movie files contained on a USB 1.0/1.1
flash drive may not play correctly. Blu-ray, DVD,
or USB 2.0 are recommended to play back HD
WMA movie files.
Photo file requirements (USB/Disc)
<
File extensions: .jpg, .jpeg, .png, .gif
<
Recommended size:
• PNG: 5120 × 5120 pixels
• GIF: 10000 × 10000 pixels
• JPEG/JPG: 8192 × 8192 pixels, 32MB
<
CD-R/RW, DVD R/RW, BD-R/RE Format: ISO
9660+JOLIET, UDF, and UDF Bridge format
<
Maximum Files/Folder: Less than 1000 (total
number of files and folders)
<
Progressive and lossless compression photo image
files are not supported.
<
Depending on the size and number of the photo
files, it may take several minutes to read the
contents of the media.
disc & file formats
Playable discs
The player supports the following disc types:
Blu-ray 3D
Blu-ray Disc
DVD-Video
DVD-R
DVD-RW
CD-Audio
CD-R
CD-RW
E-9
English
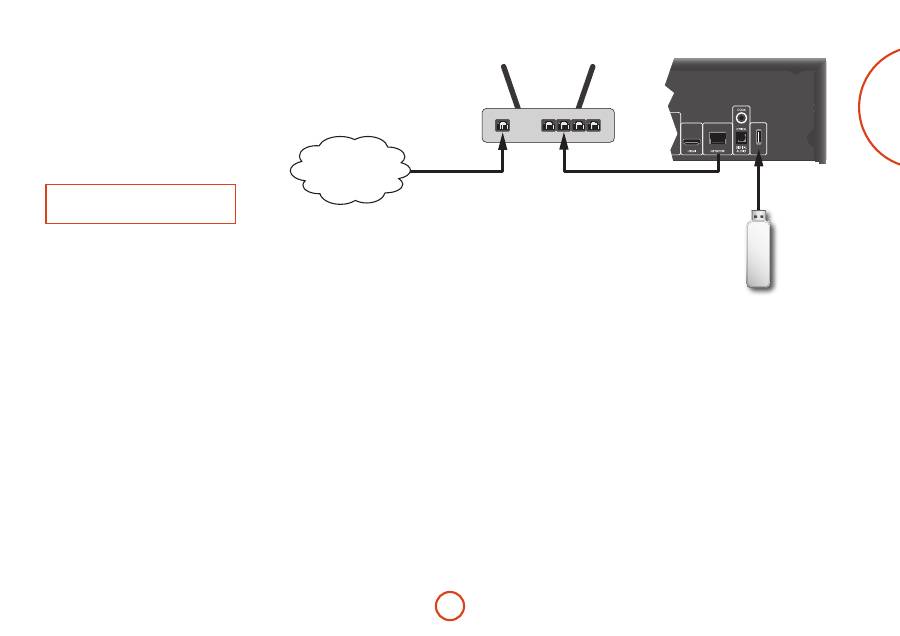
Network connection
BD-Live discs can enable the downloading of extra
content from the Internet. To enjoy on-line content,
connect the Network socket of the BDP300 to a LAN
port on your network router using an Ethernet patch
cable (available from a computer supplies retailer).
A local network with Internet connection is required. If
you do not connect to the Internet through a router (e.g.
you connect a single computer directly), please contact
your Internet Service Provider or an IT professional
regarding setting up a home network.
NOTE
When the player is powered on with no network
configured, a pop-up is shown on-screen.
USB connection
USB memory devices (flash drives) can be used for
media playback and are necessary for storage of
downloaded BD-Live content. To enjoy BD-Live
content, the following specification is recommended:
<
Capacity 2GB
<
Formatted FAT32
<
USB2.0 high speed (480Mbps).
Connect the USB device to the USB socket on the rear
of the unit.
USB
LAN
Internet
USB Flash Drive
Arcam BDP300
Router
E-10
basic operation
Introduction
‘Basic operation’ explains how to play a Blu-ray Disc
(BD), DVD, CD or other type of disc. Note that it may
be necessary to configure your player correctly for your
system before optimum – or any – playback can be
achieved. Player configuration is described beginning
on page E-19.
More sophisticated features – such as special playback
modes, programming jumps and playback sequences –
are described in ‘advanced operation’ on page E-16.
Switching on
Switch the unit on by pressing the
POWER
button. The
status LED glows green when the unit is powered up and
red when in standby mode. The remote control is used
to enter and exit standby mode. If the
POWER
button is
pressed (or power is removed) whilst in standby, the
unit will enter standby mode when power is re-applied.
Note that the remote control sensor is located on the
right-hand side of the display window. Do not obstruct
this or the remote control will not work.
Loading a disc
Press
<
/
1
on the front panel (or
1
on the handset)
and place the disc on the tray, with the playback side
facing down (some discs are double sided, in which case
the side labelled ‘side A’ should face up to play side A).
Press
<
/
1
on the front panel to close the tray. The disc
loads after a pause of a few seconds.
Playing a disc
A disc may take some time to load once the tray is
closed. When the ‘Optical Disc Autoplay’ setting is set to
On (the default setting), playback starts automatically.
(For details, refer to ‘Optical Disc AutoPlay’ on page
E-21).
If Autoplay is set to Off, the player’s Main Menu will
appear on your TV. Use the cursor keys to select the disc
in
MY MEDIA
, then press
O
to start playback.
Some titles begin by displaying a menu. Select the menu
item ‘Play movie’ (or similar) using the cursor pad, then
press
O
to start playback.
For discs that do not play automatically, press
4
/
;
on
the front panel or press
4
on the remote control.
ULTRA HIGH PERFORMANCE 24-BIT DAC
Fast play
Press
8
or
7
on the front-panel or remote control to
play fast forwards or backwards. The following speeds
for fast playback are available: x2, x4, x8, x16 and x32
(depending on disc type). Press the button repeatedly
to cycle through the different speeds. To resume normal
playback speed, press
PLAY
.
Skipping chapters/tracks
To skip chapters (or tracks on a CD), press
/
or
0
.
When skipping back, the first button press takes you to
the beginning of the current chapter. Pressing the button
again takes you to the start of the previous chapter.
Pausing playback
Press
4
/
;
on the front panel or
;
on the remote
control to pause playback. To resume playback, press
4
/
;
on the front panel or
4
on the handset.
Stopping playback
Press the
<
/
1
button on the front panel or
<
on the
remote control to stop playback.
When playing a BD/DVD, pressing
<
once performs
a ‘resume stop’. If you now press
4
, playback resumes
from the point it was stopped.
If you press
<
/
1
on the front panel or
<
on the remote
control twice, this is a ‘complete stop’, and playback
resumes from the beginning of the disc.
NOTE
When you press a button, if the unit does not accept
its operation,
appears on the TV screen.
Invalid operation may also occur if :
<
The region codes of the unit differs from that
of the disc, so playback is not allowed.
<
The parental control is set to prevent
operation: see ‘Security/Parental Control’ on
page E-22.
<
Some operations may be prohibited due to disc
manufacturer’s settings.
E-11
English
The BDP300 may be supplied with the CR104 universal
remote control.
Using the remote control
Please keep in mind the following when using the
remote control:
<
Ensure there are no obstacles between the
remote control and the remote sensor on the
front panel. The remote has a range of about 7
metres. (If the remote sensor is obscured, the IR
in remote control input jack on the rear panel is
available. Please consult your dealer for further
information.)
<
Remote operation may become unreliable if
strong sunlight or fluorescent light is shining on
the remote sensor of the unit.
<
Replace the batteries when you notice a reduction
in the operating range of the remote control.
Notes on batteries:
<
Incorrect use of batteries can result in hazards
such as leakage and bursting.
<
Do not mix old and new batteries together.
<
Do not use non-identical batteries together –
although they may look similar, different batteries
may have different voltages.
<
Ensure the plus (+) and minus (-) ends of each
battery match the indications in the battery
compartment.
<
Remove batteries from equipment that is not
going to be used for a month or more.
<
When disposing of used batteries, please comply
with governmental or local regulations that apply
in your country or area.
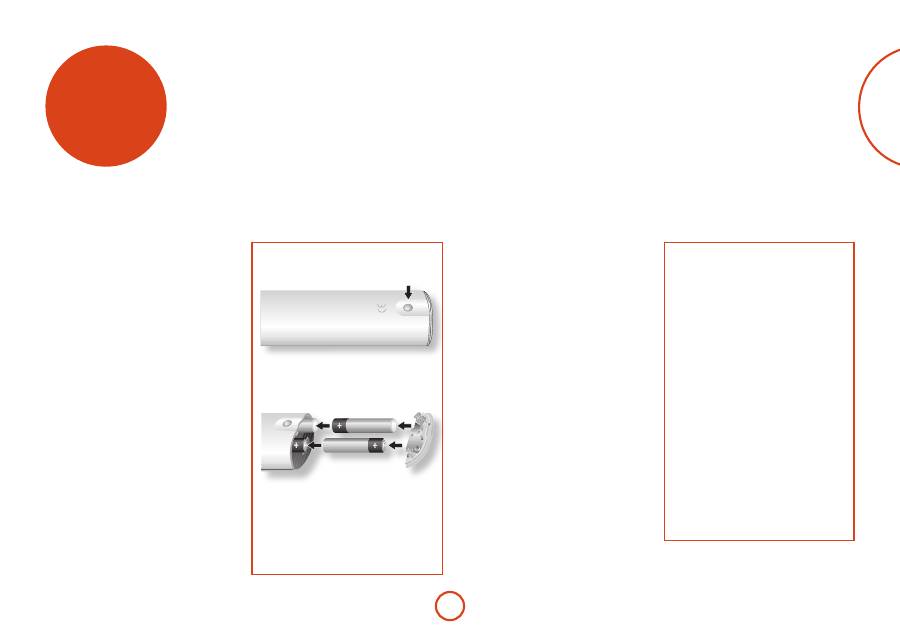
remote control
Inserting batteries into the
remote control
2. Insert four ‘AAA’ batteries into the battery
compartment – two facing the top of the unit,
and two facing the end, as in the diagram.
3. Lower the end cap onto the plastic locating
plate in the handset. This acts as a hinge, and
you can now push the end cap firmly into its
locked position with a click.
1. Open the battery compartment by pressing the
button on the back of the handset.
The CR104 complies with Part 15 of the
FCC rules
This equipment has been tested and found to comply
with the limits for a class B digital device, pursuant to
part 15 of the FCC Rules. These limits are designed
to provide a reasonable protection against harmful
interference in a residential installation. This
equipment generates, uses, and can radiated radio
frequency energy and if not installed and used in
accordance with the instructions, may cause harmful
interference to radio communications. However,
there is no guarantee that interference will not occur
in a particular installation. If this equipment does
cause harmful interference to radio or television
reception, which can be determined by turning the
equipment off and on, the user is encouraged to try
to correct the interference by one or more of the
following measures:
Reorient or relocate the receiving antenna.
Increase the separation between the equipment and
receiver.
Connect the equipment into an outlet or a circuit
different from that to which the receiver is
connected.
Consult the dealer or an experienced radio/TV
technician for help.
E-12
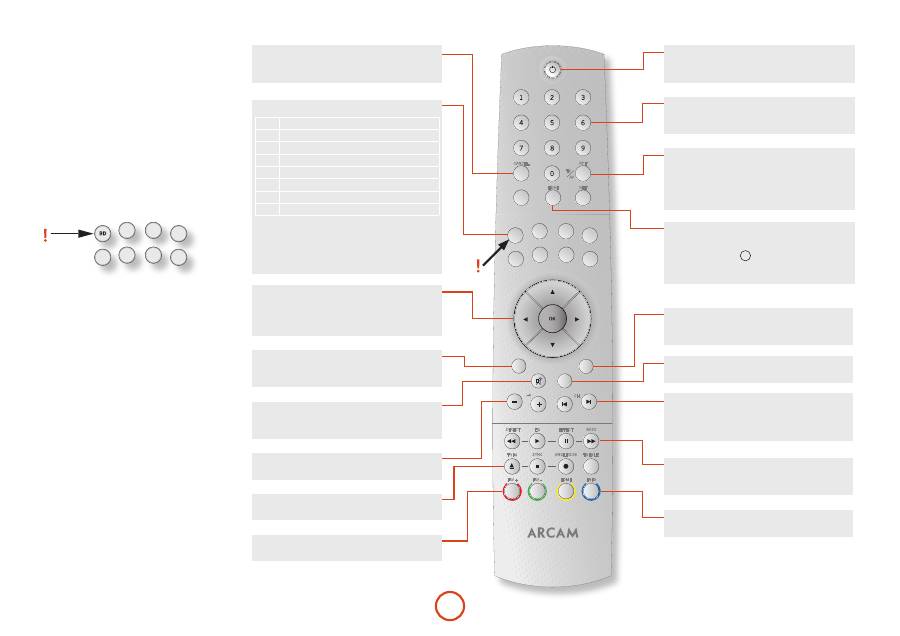
CR104
SHIFT
CANCEL
TV
AV
RND
CH
STATUS
iPOD
HDMI
NET
RPT
BD
CD
AV
TUN
PVR
VCR
SAT
AMP
MODE
MENU
RTN
BASS
EFFECT
EQ
DIRECT
TRIM
TREBLE
ANGLE/SUB
SYNC
SRCH
SETUP
TITLE
AUDIO
SUBT
INFO
FAV +
FAV -
HOME
DISP
remote control
The CR104 remote
The CR104 is a sophisticated ‘universal’ remote control
that can control up to eight devices – including the
BDP300. As it’s a ‘learning’ remote, it can copy almost
any function from an existing single-device remote.
You can also program the CR104 to issue a sequence of
commands (‘macros’) from a single button press.
Select the source key first
Remember to select a source key
before
pressing
command buttons – commands vary depending on the
source selected.
To operate the BDP300 from the remote, first press the
BD
source button.
TUN
AV
SAT
CD
PVR
VCR
AMP
BD
On/Standby
This allows the BDP300 to be put into and taken out of
standby remotely.
Navigation buttons
Arrow buttons allow navigation around the settings
menus on the BDP300 and disc menus.
Confirm a selection by pressing
O
.
Numeric keys, 0–9
Used for data entry. Also gives direct access to
individual tracks on audio CDs.
VOLUME +/–
Adjusts the volume of an Arcam amplifier.
MODE
This button activates the Picture-in-Picture Secondary
Video function, where available.
DISP (display)
Press to cycle through the front panel display’s
brightness options (dim to bright, off).
0
/
Press to skip backwards to the previous track(
0
) or
forwards to the next track (
/
).
MENU
Activates the BD ‘popup’ menu or the DVD Video
menu.
RTN
Navigates to the previous menu.
RND
Toggles random (‘shuffle’) play of chapters/tracks on
and off.
Press
S
followed by
r
to cycle through repeat play
options (chapter, title, disc, etc.).
Source selection and handset configuration
BD
BD input/BD controls
SAT
Satellite decoder input/SAT controls
AV
Television (sound) input/AV controls
TUN
Radio tuner input/TUN controls
AMP
Arcam amplifier
PVR
Personal Video Recorder input/controls
VCR
Video Cassette Recorder input/controls
CD
CD player input/CD controls
Press the relevant button once to select input and
reconfigure the handset.
Press and hold the button until the power LED blinks
once if you wish to reconfigure the handset without
changing the input.
Advanced controls
These buttons are described on the next page.
MUTE
Press once to mute an Arcam amplifier. Press again (or
use
+/–
volume) to un-mute.
OPEN
Opens and closes the disc tray.
SETUP
Press
SETUP
to access the system settings menu.
Playback control
Play (
4
), Pause (
;
) and Stop (
<
).
SHIFT
+
;
activates slow playback.
STATUS
Toggles the disc information display.
Press
s
followed by
STATUS
to cycle through the HDMI
output resolutions (only available from the Home
screen).
E-13
English
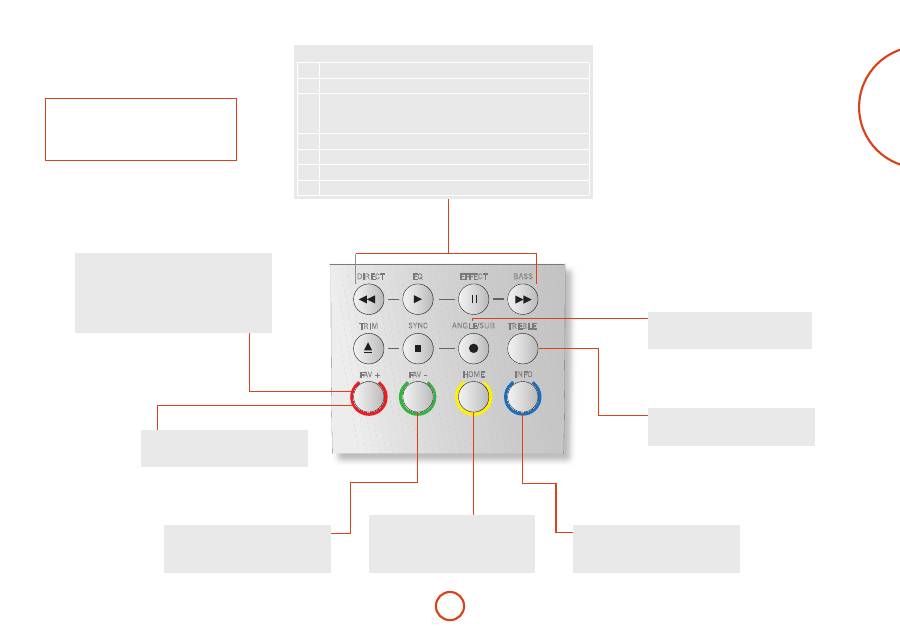
CR104
SHIFT
CANCEL
TV
AV
RND
CH
STATUS
iPOD
HDMI
NET
RPT
BD
CD
AV
TUN
PVR
VCR
SAT
AMP
MODE
MENU
RTN
BASS
EFFECT
EQ
DIRECT
TRIM
TREBLE
ANGLE/SUB
SYNC
SRCH
SETUP
TITLE
AUDIO
SUBT
INFO
FAV +
FAV -
HOME
DISP
SETUP
Ensure no disc is playing and press
SETUP
to
access the ‘Settings’ menu.
NOTE
Many of these controls are labelled according to
the functions assigned to other device modes. For
example, the
8
key activates the Bass control of an
A/V receiver when the remote is in
AMP
mode.
SUBT
Cycles through the available subtitle languages,
including ‘Off’. Some discs force subtitles on,
overriding any set up preferences.
AUDIO
Some discs offer the facility to select different
audio tracks. Press
AUDIO
to access a menu
that allows selection of the available tracks. See
‘Soundtrack selection’ on page E-16.
Transport control buttons
7
Fast rewind.
4
Starts playback.
;
Pause playback. Press
4
to resume playback.
When paused, pressing
;
advances one frame.
SHIFT
+
;
activates slow motion playback.
8
Fast forward.
1
Open / Close the disc tray.
<
Stop playback
=
Cycles through different camera angles, if present on the disc.
Playback and advanced
controls
TITLE
Press
TITLE
to access the DVD’s ‘Title’ menu (a
feature that only applies to multi-title discs) or
to access the main menu if a Blu-ray Disc.
RED/GREEN/YELLOW/BLUE
The colour-coded buttons
RED
,
GREEN
,
YELLOW
and
BLUE
provide interactive controls for Blu-ray Discs and some
player functions and will be displayed on-screen. They
are accessed by first pressing
SHIFT
followed immediately
by the button required. Their function depends on the
disc and the part of the disc being viewed.
ANGLE
Displays Angle menu, to allow selection of
different camera angles, if present on the disc.
SRCH
Displays Search menu with Time, Title and
Track options.
E-14
In
AV
mode
0
issues the TV ‘channel down’ command.
The CR104 remains in the last selected Device Mode
so it is not necessary to press a Device Mode key before
every command key if all you are doing is playing or
skipping tracks on a CD, for example.
Navigation keys
The Navigation keys steer the cursor in
Setup menus or on-screen menus. They
also replicate the navigation functions of
original remotes supplied with other home
entertainment devices in your system.
O
confirms a setting.
Volume control
By default, the CR104 is set up so that the volume
control buttons always control the volume of an Arcam
amplifier or receiver, regardless of which Device Mode
the remote is currently set for. This is known as volume
‘punch through’.
For example, if you are listening to a CD, you will
probably have the CR104 in
CD
Device Mode to control
the CD player. You can use the volume controls on
the remote directly to adjust the volume of an Arcam
amplifier without first having to press
A
to put the
remote into
AMP
Device Mode. The volume buttons
‘punch through’ the
CD
Device Mode on the remote to
the
AMP
Device Mode. Volume ‘punch through’ can be
disabled individually for any Device Mode if desired.
Useful information
Backlight
A blue backlight comes on for five seconds whenever
a key is pressed. This helps you use the handset in
subdued lighting conditions. It may be possible to hear a
quiet tone being emitted from the remote control when
the backlight is on. This is perfectly normal.
Power LED blinks
Short blinks indicate a valid key press.
Multiple short blinks convey information (such as a
device code) or signal the beginning and successful
completion of a programming sequence.
Long blinks indicate an invalid key press or entry.
The symbol ‘
*
’ is used in the manual to indicate a
power LED blink.
Timeouts and unassigned keys
Time out – After 10 seconds the CR104 exits the
programming state and returns to normal operation.
Stuck key timeout – After any key is pressed
continuously for 30 seconds, the CR104 stops sending
IR transmission to conserve battery life. The CR104
remains off until all keys are released.
Unassigned keys – the CR104 ignores any unassigned
key presses for a particular Device Mode and does not
transmit IR.
Low voltage indicator
When the batteries are running down, the IR transmit
indicator on the CR104 (the LED under the Power
button) flashes five times whenever you press a button:
*
*
*
*
*
If this happens, please fit four new AAA alkaline
batteries as soon as possible.
Device Mode / Source keys
As the CR104 can control your BDP300, AVR500,
AVR600 or AV888 as well as a range of other equipment,
many of the buttons have more than one function
depending on the ‘device mode’ selected on the remote
control.
The Device Mode keys (shown below) select the source
on the AVR500/AVR600/AV888. If one of these keys is
pressed briefly, a command is transmitted to change the
source on the unit. Also the functionality of the remote
control changes to operate the selected source device. It’s
like having eight different remotes in your hand!
TUN
AV
SAT
CD
PVR
VCR
AMP
BD
BD
BDP300 Blu-ray player
SAT
Satellite set-top box
AV
Audio-visual sound input (use with TV)
TUN
DAB, Sirius, FM or AM tuner
AMP
Controls the amplifier and setup features
of the AVR500/AVR600 and AV888
PVR
Personal Video Recorder (or Digital
Video Recorder)
VCR
Video Cassette Recorder
CD
Compact Disc player
If you press and hold a Device Mode key for about four
seconds, you change the Device Mode of the CR104
without
changing the signal source on the AVR500/
AVR600/AV888. This can also be done by pressing
S
followed by a Device Mode key (within two seconds).
These two methods allow you to change which device
the CR104 controls without also changing the AVR500/
AVR600/AV888 source, allowing uninterrupted
listening.
Each Device Mode changes the behaviour of many
of the CR104 keys to control the source device
appropriately. For example:
In
CD
mode
0
plays the previous CD track.
Controlling other devices
Method 1 (Direct code setup)
This section describes the simplest (preferred) way to
program the CR104’s Device Mode keys to control the
non-Arcam devices in your system.
TUN
AV
SAT
CD
PVR
VCR
AMP
BD
<
Some of the modes are locked to Arcam operation
but can be unlocked if required: see ‘Locking/
unlocking a specific Device Mode’ on page E-28).
<
A
mode
only
controls Arcam equipment.
BD mode
Locked
SAT mode
Unlocked
AV mode
Unlocked
TUN mode
Locked
AUX mode
Locked
VCR mode
Unlocked
CD mode
Locked
Here is a specific example of how to program the
a
key to control an Addison television. The principles for
controlling other devices are exactly the same.
1. Make sure your device is switched on (not just on
standby).
2. Find the correct Device Code table (e.g. TV) for
the type of device you want to control from the
CR104.
3. Find the row containing the codes for the
manufacturer of your device. The most popular
code is listed first.
4. Press the appropriate Device Mode key (e.g.
a
)
on the CR104.
5. Press and hold
S
until the red Power LED
blinks twice:
* *
(It actually blinks once when
you press the key, then twice after about three
seconds).
6. Enter the first four-digit device code using the
number keys. The power key blinks twice:
* *
.
7. Aim the CR104 at the device and press
P
. If the
device switches off, the setup is complete.
8. Turn your device back on and test all the CR104’s
functions to ensure they are working properly.
E-15
English
9.
Important!
Write your device code down on the
right hand side of the page so you can remember
it if you ever reset the CR104.
What if I still can’t control my device?
<
If your device doesn’t respond, repeat the above
steps until one of the device codes listed for your
brand works.
<
If none of the codes listed for your brand operates
your device, or if your brand is not listed at all, try
the Library Search Method described in the next
section.
Notes:
<
Some codes are quite similar. If your device does
not respond or is not functioning properly with
one of the codes, try another code listed under
your brand.
<
If your device’s original remote control does not
have a
P
(POWER) key, press
$
instead of
P
when setting up your device.
<
Remember to press the corresponding device key
before operating your device.
<
Many TVs do not switch on pressing
P
. Please
try pressing a number key (‘channel select’) to
switch your TV back on.
<
To search for the code for another device follow
the instructions above, but press the appropriate
device key instead of
a
during step 2.
Method 2 (Library search)
This section describes another way to program the
CR104 to control third-party equipment.
Library Search allows you to scan through all the
codes contained in the CR104’s memory. It can take a
lot longer than the previous method, so only use this
method if:
<
Your device does not respond to the CR104 after
you have tried all the codes listed for your brand.
<
Your brand is not listed at all in the Device Code
tables.
Example: To search for a TV code
1. Switch your TV on (not standby) and aim the
CR104 at it.
2. Press
a
on your CR104.
3. Press and hold
S
until the power LED blinks
twice.
4. Press
9
9
1
. The power LED key blinks
twice:
*
*
.
5. Press
P
.
6. Aim the CR104 at your Television and press
[
repeatedly until your Television turns off.
Every time you press
[
the CR104 sends out a
POWER signal from the next code contained in its
memory. In the worst case, you may have to press this
key up to 150 times, so patience is required! If you
skip past a code, step back by pressing
]
. Remember
to keep pointing the CR104 at your Television while
pressing this key.
7. As soon as your television turns off, press
S
to
store the code.
Notes:
<
Many TVs do not switch on by pressing
P
. Try
pressing a number key (‘channel select’) to switch
your TV back on.
<
If you cannot control your Television properly,
please continue the Search Method: you may be
using the wrong code.
<
To search for the code for another device follow
the instructions above, but press the appropriate
Device Mode key instead of
a
during step 2.
<
If your device’s original remote control does not
have a
P
(
STANDBY
) key, press
$
instead during
step 5.
Code blink-back
Once you have set up your CR104, you can blink back
your device set-up codes for future reference.
Example: To blink back your Television code
1. Press the appropriate Device Mode key (e.g.
a
)
once.
2. Press and hold
S
until the red Power LED
blinks twice
*
*
(It actually blinks once when
you press the key, then twice after about three
seconds).
3. Press
9
9
0
. The
P
key blinks twice.
4. For the first digit of your four-digit code, press
1
and count all the red blinks. If there are no blinks,
the digit is ‘0’.
5. For the second, third and fourth digits, repeat the
previous step, pressing
2
,
3
, or
4
in order.
Now you have the four-digit code.
Make a note of the codes
Write down the codes for your devices in the boxes
below for future reference.
Device
Code
1
2
3
4
5
6
7
8
E-16
Bonusview and BD-Live
Bonusview and BD-Live are features of the Blu-ray Disc
format.
Bonusview provides Picture in Picture and Virtual
Package functions for compatible discs. BD-Live discs
additionally provide a variety of features via the Internet.
Virtual Package/BD-LIVE data must be saved to
a USB memory device connected to the BDP300.
To enjoy these functions, connect a USB memory
device (minimum 1 GB capacity; 2 GB or more is
recommended) supporting FAT 32 and USB 2.0 High
Speed (480 Mbit/s) to the USB connector. (For details,
refer to ‘USB Connection’ on page E-9.)
<
If there is insufficient storage space, the data is not
copied/downloaded. Delete unneeded contents or
use a new USB memory device.
<
If a USB memory device containing other
contents (previously recorded) is used, the video
and audio may not play back properly.
<
If the USB memory device is disconnected from
this unit during playback of Virtual Package/
BD-LIVE contents, playback of the disc will stop.
<
Some time may be required for the contents to
load (read/write).
NOTE
<
It may not be possible to use the BD-LIVE
functions if there is insufficient space on
the USB memory device. In this case, refer
to ‘Erase Blu-ray Storage?’ on page E-21 for
erasing the Virtual Package contents and the
BD-LIVE contents in the USB memory device.
<
Operation of all USB memory devices is not
guaranteed.
<
Plug the USB memory device directly into the
USB connector – do not use an extension cable
or multiple connector socket.
advanced operation
Disc information
Press
STATUS
to display the ‘Information bar’ at the top of
your TV screen. An example is given above, but the
information shown depends on the disc type. It usually
includes the disc type, the current track, the total
number of tracks and the elapsed track time.
For Audio CDs, press
STATUS
again to turn this display off.
Search
The
h
button allows you to search for a specific title,
chapter or track on the medium. Press
h
to display the
search box. Press
h
repeatedly to select the search type:
Video Discs
Audio Discs
Media Files
Go to Title
Go to Track
Go to File No.
Go to Chapter
Go to Time
Go to Time
Use the remote control number buttons to enter the
search data. Press
O
to start playback from the selected
location.
Menus
Many BD Video and DVD Video discs contain a disc
menu, top menu or popup menu which guides you
through the available functions in the disc.
The contents of menus and corresponding menu
operations depend on the disc.
<
Disc Menu:
Press
t
to display the disc menu
(‘Top Menu’) on the TV.
<
Popup Menu:
Press
U
to display the ‘Popup’
menu on the TV.
Use the remote control cursor keys to navigate the
menus. Highlight an item and press
O
to select it,
otherwise, press the relevant menu key to exit the menu.
Soundtrack selection
Some discs contain multiple audio streams, such as
a standard Dolby Digital 5.1 soundtrack and a high
definition Dolby TrueHD 7.1 surround soundtrack.
The audio stream can be changed during playback. The
secondary audio (e.g. director’s commentary) of Blu-Ray
Discs (if present) can also be changed if alternatives are
available.
Note: Audio language is changed using the Language
menu: see page E-21.
Press
o
to display the current audio stream
information.
Highlight either the Primary (Audio) or the Secondary
(PIP) audio stream selection using the
'
/
,
buttons.
Press
>
to show alternate audio streams. Press
'
/
,
to highlight the desired audio stream then press
O
to
select it.
Subtitles
Some discs contain multiple subtitles. The subtitles can
be changed during playback. Subtitles for the secondary
video (e.g. director’s commentary) of Blu-Ray Discs
(if present) can also be changed (if alternatives are
available).
Note: Subtitle language is changed using the Language
menu: see page E-21.
Press
b
to display the current subtitle information:
Highlight either the Primary (Subtitle) or the Secondary
(PIP Subtitle) subtitle selection using the
'
/
,
buttons.
Press
>
to show alternate subtitles. Press
'
/
,
to
highlight the desired subtitle then press
O
to select it.
E-17
English
Picture in Picture (secondary video)
Some Blu-ray discs include secondary video screens
that can be played back as a small video overlaid in the
corner of the screen. Press the
M
button on the remote
control to display the PiP menu:
Press
>
to enter the PiP menu. Select a secondary video
stream using the remote control cursor keys
'
/
,
.
Press
O
to view the secondary video in PiP mode.
NOTE
<
To listen to secondary audio or to display
secondary subtitles, refer to ‘Soundtrack
selection’ or ‘Subtitles’ on page E-16.
<
Secondary video may not be present for every
scene of a disc. The feature is disc-dependant,
please consult the disc manual for further
details.
Virtual Package
Blu-ray discs supporting Virtual Package allow for extra
content to be automatically transferred from the disc or
from the Internet to USB storage for interactive viewing.
Features available include secondary video and audio,
subtitles and movie trailers.
NOTE
<
Playback methods are disc-dependant — refer
to the disc manual.
<
Playback operations may require use of the
colour-coded keys on the remote control. To
access the colour key functions on the CR104
remote control, press
S
first.
BD-Live
The BDP300 is compatible with BD-Live, allowing for a
variety of functions when used with BD-Live compatible
discs. BD-Live allows content such as the latest movie
trailers and BD-J interactive games to be downloaded
from the Internet to USB storage.
Available BD-Live functions are entirely dependant on
the Blu-ray disc being played. Consult the disc manual
for operational information.
NOTE
<
The BDP300 must have an active Internet
connection to use BD-Live functions. Refer
to ‘Network connection’ on page E-9 and
‘Network’ on page E-21
<
BD-Live Internet access can be disabled using
the
BD-Live Internet access
setting in the
System
menu: see ‘Network’ on page E-21
<
Playback operations may require use of the
colour-coded keys on the remote control. To
access the colour key functions on the CR104
remote control, press
S
first.
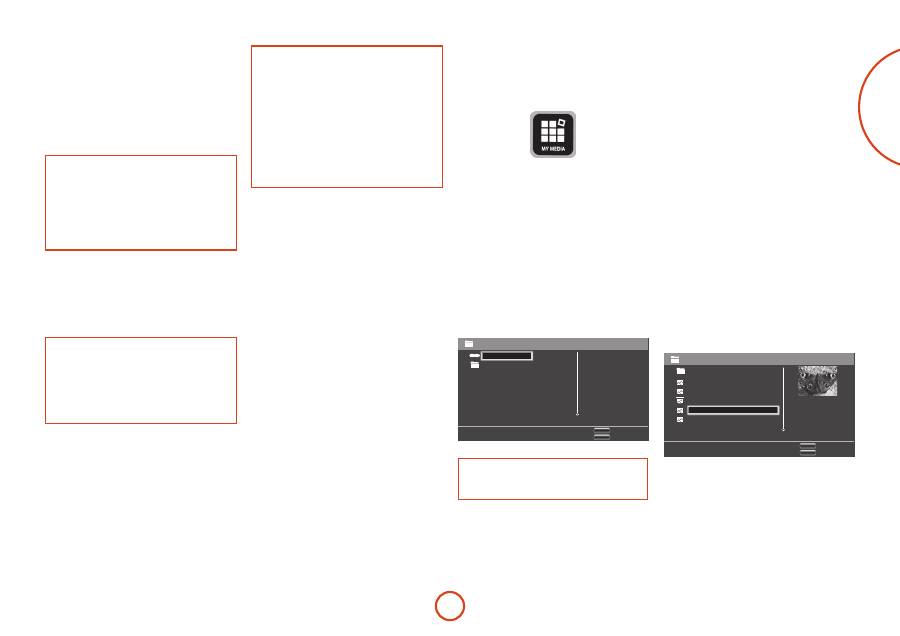
Playing media files
The
MYMEDIA
icon is shown on screen when the BDP300
is first switched on. To play video, image files (e.g.
photographic slideshows) or audio files, highlight the
MYMEDIA
icon and press
O
.
Video and audio files can be played from USB media or
CD-R/RW discs. The following formats are supported:
<
Video:
AVI, MPEG4
<
Image:
JPG
<
Audio:
WMA, MP3
To play media files, insert the USB device or data disc
into the player. The MY MEDIA menu is displayed with
music, video and/or picture file symbols:
To play all available files without making any selection,
press
<
to go to the Play menu, described below.
To select particular files, use the
'
/
,
cursor keys
on the remote control to highlight the media device to
navigate the MY MEDIA menu. Press
O
to select the
media device and display the file and folder contents.
MENU
SETUP
Exit
Edit Menu
USB
Playlist
Type: USB
Size: 272.344M
FS: FAT32
NOTE
When there are no playable files or folders within the
selected media or folder, ‘Empty’ is displayed.
You can play a single file or playlist (containing up to
100 selected files). Use the
'
/
,
cursor keys on the
remote control to highlight a file or playlist and press
O
to select it.
The Edit menu
Press
POPUP MENU
to select the Edit menu, from which
the following operations are available:
<
Add to Playlist
: Add the folder/file to the Playlist.
<
Select All
: Select all folders/files in the current
directory (up to a maximum of 100 files); all
selected files/folders are marked with a check
mark.
<
Clear All
: Deselect all selected files/folders.
<
Cancel
: Cancel and exit the Edit menu.
Select ‘Play (file)’ to play a single file, or select ‘Add to
Playlist’ to add the file to the playlist. When the desired
files have been added to the playlist, press
<
on the
remote control to go back to the Play menu.
Play a music file
Use the
'
/
,
cursor keys to highlight a WMA or
MP3 file and press
O
or
$
to start playback.
Play a video file
Use the
'
/
,
cursor keys to highlight an AVI or
MPEG4 file and press
O
or
$
to start playback. Press
D
to view relevant video file playback information.
Play a picture file
Use the
'
/
,
cursor keys to highlight a JPEG (photo)
file and press
O
to confirm selection. Its preview and
file information is shown on the right of the panel.
MENU
SETUP
Exit
Edit Menu
..
P0078
P0079
P0080
P0083
P0085
Type: JPG
Size: 0.518M
Resolution: 1024x768
USB3/Photos/july
If you have selected a playlist (created using the Edit
menu), you can press
$
to start viewing the pictures as
a slideshow.
You can use the remote cursor keys (up, down, right,
left) to rotate the picture. The
R
button cycles through
the repeat options (repeat one, repeat all, repeat off).
The
)
and
(
keys can be used to change the picture
playback speed: fast (1 second), medium (2 seconds)
and slow (3 seconds). Press
D
to view relevant picture
file playback information.

E-18
Advanced playback controls
The following advanced controls are available during
disc or file playback (depending on media type):
Slow playback
Press
S
followed by
&
to activate slow motion
playback. Press this button combination again to
change the playback speed. Speeds of 1/2, 1/4 and 1/8 are
available.
Rapid Playback
Press
)
or
(
during playback to activate rapid reverse
or forward playback. Further button presses change
the playback speed. Speeds of 2x, 4x, 8x, 16x or 32x
normal speed are available. Press
$
to resume normal
playback.
Displaying File Information
Press the
STATUS
button to display the file information
panel. The information displayed depends on the type
of file playing, but may include the file type, elapsed and
total playing time and a progress bar, and the playback
mode (e.g. repeat, random play).
Press
STATUS
again to hide the file information panel. Note
that the file information panel is always shown when
playing music files.
E-19
English
settings menus
The Settings menus allow you to configure all aspects
of your BDP300. The next few pages will go through
the menu items and explain their function. The Settings
menus may look daunting if you are new to setting up
home cinema, but the majority of them need only be
configured once when you first install the system.
The only way to view the Settings menus is on your
display device (TV or projector) using the on-screen
display (OSD) capability of the BDP300. To view the
OSD for the initial setting up, connect any of the video
outputs to your display device (or AV receiver connected
to your display).
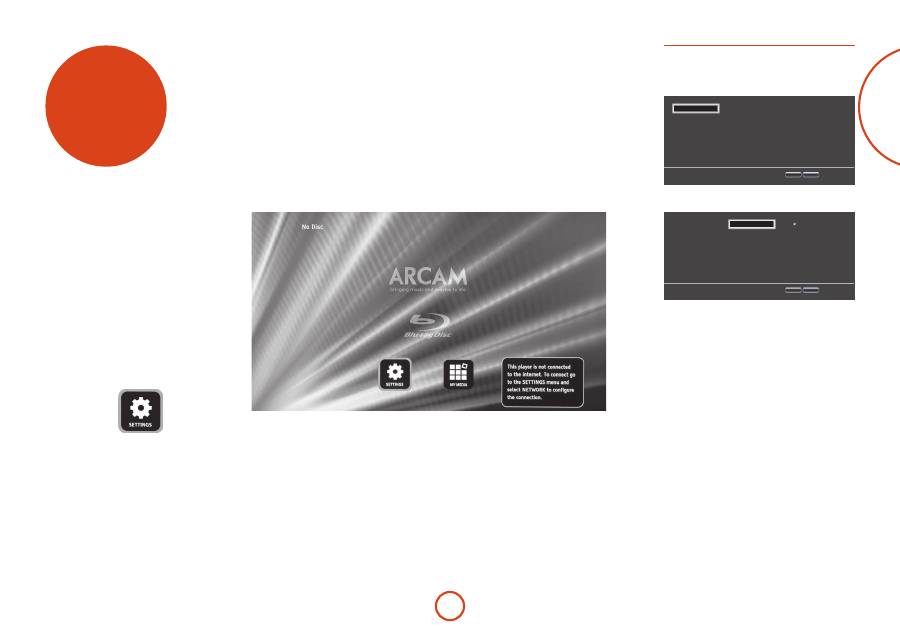
Entering the settings menu
The
SETTINGS
icon is shown on screen when the BDP300
is first switched on.
If the main menu is not currently displayed, press
u
on the remote control to display it. Note that during the
playback of music, video or JPEG files, further button
presses may be required to exit the folder structure.
With the
SETTINGS
icon highlighted, press
O
to enter
the Settings menu.
Unstable OSD menu or picture display?
The default BDP300 output video resolution when first
powered up out of the box has been chosen according to
the national standard in the country of purchase.
If the output resolution and frame rate is at a setting
your display device does not support, the picture
may become unstable or may not display at all. If this
happens, connect the BDP300 directly to your display
using the composite video connection in order to see
the menus. Once the correct video settings have been
entered, a higher-quality connection can be used.
Navigating the menus
The BDP300 menus can be navigated by using the
cursor (up, down, left, right) keys on the remote control.
1. To display the main menu, press
u
.
2. Use the
B
and
C
keys to navigate up and
down the main headings in the left-hand panel.
3. With the main section you require highlighted,
use the
E
key to enter the middle column.
4. Use the
B
and
C
keys to navigate up and
down the options in the middle column. Some
options may be greyed out because they are not
currently selectable (e.g. network IP address when
DHCP is used).
5. Pressing
E
selects a setting: use the
B
and
C
keys to change the setting.
6. Press
O
to confirm the setting. Go back to step 4
to adjust any other settings in the current section.
7. Press
<
to return to the previous screen if you
want to select another section.
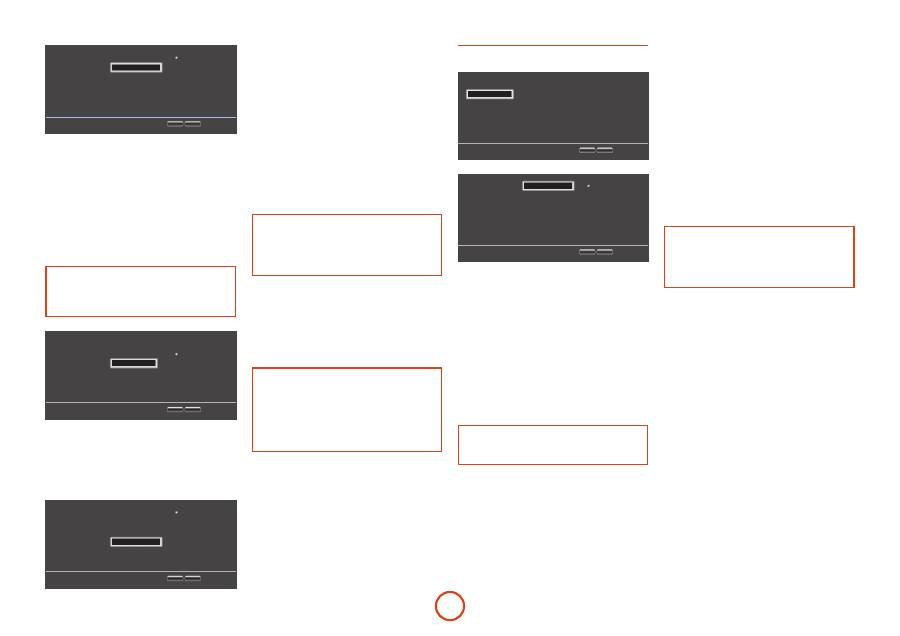
Display
With the
SETTINGS
icon highlighted on your display,
press
O
to show the ‘Display’ options.
Use cursor keys to highlight menu and
OK key to select
4
TV Aspect Ratio
Resolution
TV System
HDMI Color Space
HDMI Deep Color
HDMI 1080p 24Hz
16:9 Normal
1080p
PAL
Auto
Auto
Off
Display
Audio
Language
Network
System
Security
RTN
SETUP
Exit
Press
E
to move to the options in the second column.
Use cursor keys to highlight menu and
OK key to select
16:9 Normal
16:9 Full
4:3 Pan&Scan
4:3 Letterbox
4
3
Display
Audio
Language
Network
System
Security
RTN
SETUP
Exit
TV Aspect Ratio
Resolution
TV System
HDMI Color Space
HDMI Deep Color
HDMI 1080p 24Hz
6
TV Aspect Ratio
– Set the aspect ratio (shape) of your
display. Press
E
to move to the options in the third
column.
<
16:9 Normal:
Use with widescreen TVs. 4:3
material is zoomed to fit the wide screen.
<
16:9 Full:
Use with widescreen TVs. 4:3 material
is displayed in its original aspect ratio, with
vertical black bars at the sides.
<
4:3 Pan and Scan:
Use with 4:3 non-widescreen
TVs. 16:9 widescreen content is displayed with the
left- and right-hand sides of the image cropped to
fit the screen (no black bars). The aspect ratio is
maintained (the image is not stretched).
<
4:3 Letterbox:
Use with 4:3 non-widescreen TVs.
16:9 widescreen content is displayed with black
bars at the top and bottom.
E-20
Use cursor keys to highlight menu and
OK key to select
Auto
1080p
1080i
720p
576p
576i
4
3
Display
Audio
Language
Network
System
Security
RTN
SETUP
Exit
TV Aspect Ratio
Resolution
TV System
HDMI Color Space
HDMI Deep Color
HDMI 1080p 24Hz
6
5
Resolution
– Set the video resolution of the
HDMI
and
COMPONENT VIDEO
outputs.
<
Auto:
Sets the TV’s preferred resolution.
<
1080p:
Full HD progressive video.
<
1080i:
interlaced HD video.
<
720p:
progressive HD video.
<
480p/576p:
480 lines (NTSC) or 576 lines (PAL)
progressive video
<
480i/576i:
480 lines (NTSC) or 576 lines (PAL)
Standard Definition interlaced video.
NOTE
The HDMI Auto setting may not set the best possible
resolution. If you have a 1080p Full HD display, set
the resolution to 1080p.
Use cursor keys to highlight menu and
OK key to select
NTSC
PAL
4
3
Display
Audio
Language
Network
System
Security
RTN
SETUP
Exit
TV Aspect Ratio
Resolution
TV System
HDMI Color Space
HDMI Deep Color
HDMI 1080p 24Hz
6
5
TV System
– Set the video signal format. If the colour
or picture quality of analogue video appears incorrect,
change this setting. It should not need to be adjusted in
normal use. You can select NTSC (the USA and Canada
video standard), or PAL (the Europe, Australia and
China video standard).
Use cursor keys to highlight menu and
OK key to select
Auto
YCbCr
YCbCr422
Full RGB
RGB
4
3
Display
Audio
Language
Network
System
Security
RTN
SETUP
Exit
TV Aspect Ratio
Resolution
TV System
HDMI Color Space
HDMI Deep Color
HDMI 1080p 24Hz
6
5
HDMI Color Space
– ‘Color Space’ refers to the number
of individual colors that can be displayed on the screen.
If you know the color space capability for the connected
TV, you can match it by selecting one of these options.
We recommend you select ‘Auto’.
HDMI Deep Color
– sets the level of Deep Color
processing applied to the HDMI video output. You can
select ‘Auto’ or ‘Off’. If this option is set to Auto and
your TV supports Deep Color, the screen displays colors
at 30-, 36- or 48-bit accuracy (compared to the 24-bit
accuracy of standard color). Check the documentation
that came with your TV to see if your TV supports Deep
Color. All system HDMI interconnect cables must be
Deep Color compatible in order to use 30/36-bit Deep
Color signals.
NOTE
If you experience a flickering or abnormal picture
after changing the Deep Color setting, connect the
unit using a Composite video cable and change the
setting to a value supported by the display.
HDMI 1080p 24Hz
– You can select ‘Auto’ or ‘Off’.
Movies are recorded on film at a rate of 24 pictures
(frames) per second. Many of the movies on Blu-ray
Discs are placed on the discs at this frame rate. If your
TV supports 24 frames per second, but you would prefer
to view the video at a higher frame rate, you should turn
off HDMI 1080p 24Hz.
NOTE
<
1080/24p video signals can only be output
using the
HDMI
connection.
<
The connected equipment (AV receiver, TV/
projector) must be 1080/24p compatible.
<
The output resolution must be set to
1080p
or
HDMI Auto
.
HDMI 3D
– To turn the 3D feature (if available) on or
off. You can select ‘Auto’ or ‘Off’.
Audio
Use cursor keys to highlight menu and
OK key to select
4
Digital Out
HDMI Out
Down Sampling
Dynamic Range
PCM
PCM
48kHz
Off
Display
Audio
Language
Network
System
Security
RTN
SETUP
Exit
Use cursor keys to highlight menu and
OK key to select
PCM
Bitstream
Bitstream Re-e…
4
3
Display
Audio
Language
Network
System
Security
RTN
SETUP
Exit
Digital Out
HDMI Out
Down Sampling
Dynamic Range
Digital Out
– Sets the audio format output from the
OPTICAL
or
COAXIAL
DIGITAL OUT
connections
.
You can select:
<
PCM
– Outputs the signal as processed audio
ready for any receiver. Use this when your receiver
cannot decode the movie soundtrack on the disc.
<
Bitstream
– Outputs the movie soundtrack
without any processing. This option requires
a receiver that supports the movie soundtrack
format.
<
Bitstream Re-encode
– Combines all audio
signals and outputs as DTS, Dolby, or PCM
depending on the audio stream on the disc.
NOTE
The signal at the
HDMI
output is also determined by
the formats supported by the connected equipment.
HDMI Out
– Sets the audio format output from the
HDMI
connection
.
You can select:
<
PCM
– (as above).
<
Bitstream
– (as above).
<
Bitstream Re-encode
–Automatically selects the
HDMI digital signal type according to the audio
stream on the disc.
Down Sampling
– Set the maximum sample rate of
audio output from the
OPTICAL
or
COAXIAL
DIGITAL OUT.
<
48kHz
– (most compatible) Select this option if
the TV speakers, amplifier, or home theater is not
capable of handling signals over 48kHz sampling
rate. If you do not have an audio receiver or TV
connected to your player through one of the
digital audio jacks (optical or coaxial), select
48kHz. See the documentation that came with the
receiver or TV.
<
96kHz
– Select this option if the TV speakers,
amplifier, or home theater is capable of handling a
digital sampling rate of 96kHz
<
192kHz
– (best quality) Select this option if the
TV speakers, amplifier, or home theater is capable
of handling a digital sampling rate of 192kHz.
NOTE
If the connected equipment (e.g. AV receiver) does
not support 96kHz or 192kHz audio, silence or loud
noise may result from this setting. If this happens, set
Down Sampling
to 48kHz.
Dynamic Range
– Selects the Dynamic Range Control
mode to ‘Off’ or ‘On’.
Dynamic Range is the range between the loudest sounds
and the quietest ones. If set to ‘On’ you can listen to a
movie at a lower volume without losing sound clarity.
<
Off
– No dynamic range compression
<
On
– Dynamic range compression.
E-21
English
Language
Use cursor keys to highlight menu and
OK key to select
OSD
Disc Menu
Disc Audio
Disc Subtitle
English
Auto
Auto
None
4
Display
Audio
Language
Network
System
Security
RTN
SETUP
Exit
Use cursor keys to highlight menu and
OK key to select
English
Français
Español
Nederlands
Deutsch
4
3
Display
Audio
Language
Network
System
Security
RTN
SETUP
Exit
OSD
Disc Menu
Disc Audio
Disc Subtitle
OSD
– Select one language to be used for the On Screen
Display (OSD).
Disc Menu
– Set the language used for the Disc Menu
and Pop-up Menu. The available languages depend on
the disc. ‘Auto’ sets the priority language of the disc.
Disc Audio
– Set the language for the soundtrack. The
available languages depend on the disc. ‘Auto’ sets the
priority language of the disc.
Disc Subtitle
– Set the language used for the subtitles.
The available languages depend on the disc. ‘Off’
prevents the display of subtitles.
Network
Use cursor keys to highlight menu and
OK key to select
Connection Type
Information
Connection Test
IP Setting
BD-Live Connection
Wired
More…
More…
Auto
Permitted
4
Display
Audio
Language
Network
System
Security
RTN
SETUP
Exit
An active, configured Internet connection is required
if you wish to use BD-Live websites and downloaded
content. See page E-9 for physical connections.
Connection Type
– ‘Wired’. Connect a network cable to
the Ethernet jack and into a wired router. The BDP300
does not support wireless connections.
Information
– Select and press
O
to view or set the
network connection parameters:
Network Information
00-22-84-FF-FF-00
Auto
Network Information
Display
Audio
Language
Network
System
Security
RTN
SETUP
Exit
MAC Address :
Address Type
IP Address
Subnet Mask
Default Gateway
DNS1
DNS2
0.
0.
0.
0.
0.
0.
0.
0.
0.
0.
0.
0.
0.
0.
0.
0.
0.
0.
0.
0.
MAC Address
– Information only
Address Type
– Set whether the network settings are
automatic or set manually.
<
Auto:
Allows the connected router or modem
to configure the network settings automatically,
using the network’s DHCP server. This setting
should be used for the majority of home networks.
<
Manual:
Enter settings manually, for expert users.
The following settings are only available when
IP Setting
is set to Manual:
IP Address –
Use the cursors to navigate between
segments and use the
0
to
9
keys to enter the
IP address assigned to your player by your network
administrator. Press
O
to save the setting.
Subnet Mask –
Use the cursors to navigate between
segments and use the
0
to
9
keys to enter the subnet
mask of your network. Press
O
to save the setting.
Default Gateway –
Use the cursors to navigate between
segments and use the
0
to
9
keys to enter the
Internet gateway address. Press
O
to save the setting.
DNS1 –
Use the cursors to navigate between segments
and use the
0
to
9
keys to enter the IP address of
your Primary DNS server. Press
O
to save the setting.
DNS2 –
Use the cursors to navigate between segments
and use the
0
to
9
keys to enter the IP address
of your Secondary DNS server. Press
O
to save the
setting..
Connection Test
– When your player tests your Internet
connection, it sends (pings) an IP address.
Use cursor keys to highlight menu and
OK key to select
More…
4
3
Display
Audio
Language
Network
System
Security
RTN
SETUP
Exit
Connection Type
Information
Connection Test
IP Setting
BD-Live Connection
Press
O
to run a network test. This will also configure
the network settings automatically if they have not been
configured and if automatic configuration (DHCP) is
supported by the network.
If this test fails, check the connections to your home
network. Make sure your network cable is securely
attached to your router and the BDP300. Check that
your router is connected to your cable or DSL modem
correctly. There may be an issue with your router or
Internet Service Provider (ISP): contact your ISP for
more help.
IP Setting
– You can set your player to automatically
obtain an IP address when it connect to your ISP. Some
providers require that you enter a fixed IP address that
does not change: this must be entered using the ‘Manual’
setting.
Use cursor keys to highlight menu and
OK key to select
Auto
Manual
4
3
Display
Audio
Language
Network
System
Security
RTN
SETUP
Exit
Connection Type
Information
Connection Test
IP Setting
BD-Live Connection
Highlight ‘Auto’ or ‘Manual’, then press
O
.
If you selected Manual, the Network Information screen
opens with the IP Address row highlighted. Press a
number button to enter the first digit of the IP address,
then press
E
to move to the next digit. Continue using
the number buttons and the
B
or
C
keys to enter
the rest of the IP address. When you have finished, press
O
. If you need to remove a number you entered, press
C
.
BD-Live Connection
– To set the BD-Live Internet
access level.
Use cursor keys to highlight menu and
OK key to select
Permitted
Partial Permitted
Prohibited
4
3
Display
Audio
Language
Network
System
Security
RTN
SETUP
Exit
Connection Type
Information
Connection Test
IP Setting
BD-Live Connection
The access levels are:
<
Permitted:
All BD-Live discs are allowed access to
BD-Live websites.
<
Partial Permitted
: Allows Internet access to
BD-Live content with valid certificates only.
<
Prohibited
: Prohibit all BD-Live discs from
accessing BD-Live websites.
NOTE
<
The available on-line functions are disc-
dependent.
<
Refer to the BD-Live disc instructions for
information about accessing on-line content.
<
The BDP300 must be connected to the
Internet and set up correctly to allow access
to on-line content. See page E-9 for network
connections and page E-21 for network
settings.
E-22
System
Use cursor keys to highlight menu and
OK key to select
Screen Saver
Disc Auto Playback
CEC
Firmware Update
Load Defaults
System Information
5 Minutes
On
Off
Network
Load
More…
4
Display
Audio
Language
Network
System
Security
RTN
SETUP
Exit
Screen Saver
–sets the duration of a static image display
before the screen saver is shown. The options are:
5/10/15/20 Minutes
. Pressing any button on the unit or
remote deactivates the screen saver.
Use cursor keys to highlight menu and
OK key to select
5 Minutes
10 Minutes
15 Minutes
20 Minutes
4
3
Display
Audio
Language
Network
System
Security
RTN
SETUP
Exit
Screen Saver
Disc Auto Playback
CEC
Firmware Update
Load Defaults
System Information
6
Disc Auto Playback
– controls whether an optical disc
(e.g. Blu-ray Disc, DVD, CD) will play automatically
after it has loaded.
Use cursor keys to highlight menu and
OK key to select
On
Off
3
4
Display
Audio
Language
Network
System
Security
RTN
SETUP
Exit
Screen Saver
Disc Auto Playback
CEC
Firmware Update
Load Defaults
System Information
6
5
<
On:
Optical discs will play automatically.
<
Off:
PLAY
must be pressed to play a disc.
CEC
– The Consumer Electronics Control (CEC) option
is used to allow all supported devices connected by
HDMI to work together as a single system.
Use cursor keys to highlight menu and
OK key to select
On
Off
3
4
Display
Audio
Language
Network
System
Security
RTN
SETUP
Exit
Screen Saver
Disc Auto Playback
CEC
Firmware Update
Load Defaults
System Information
6
5
CEC may be turned ‘On’ or ‘Off’, to link or unlink the
remotes.
Firmware Update
– You can check for an upgrade to
your player’s firmware by selecting this menu item and
pressing
O
to highlight ‘Network’, then press
O
again.
Use cursor keys to highlight menu and
OK key to select
Network
3
4
Display
Audio
Language
Network
System
Security
RTN
SETUP
Exit
Screen Saver
Disc Auto Playback
CEC
Firmware Update
Load Defaults
System Information
6
5
A message appears if no new firmware is available,
otherwise follow the on-screen instructions. A message
tells you when the upgrade is complete. Press
O
.
Load Defaults
– Press
O
with this item highlighted to
reset all settings to factory defaults (including parental
controls).
Use cursor keys to highlight menu and
OK key to select
Load
3
4
Display
Audio
Language
Network
System
Security
RTN
SETUP
Exit
Screen Saver
Disc Auto Playback
CEC
Firmware Update
Load Defaults
System Information
6
5
You are asked to confirm that you want to load the
default settings. For ‘No’ press
O
; for ‘Yes’ press
<
then
O
.
System Information
– Highlight this option and press
O
twice to display system information.
Use cursor keys to highlight menu and
OK key to select
More…
3
4
Display
Audio
Language
Network
System
Security
RTN
SETUP
Exit
Screen Saver
Disc Auto Playback
CEC
Firmware Update
Load Defaults
System Information
6
5
The System Information panel shows information about
your player, such as the serial number and firmware
version.
BD-Live Storage
– This last System option allows you
to review or delete BD-Live data stored on an external
USB drive.
Use cursor keys to highlight menu and
OK key to select
Information
Erase data
3
4
Display
Audio
Language
Network
System
Security
RTN
SETUP
Exit
Disc Auto Playback
CEC
Firmware Update
Load Defaults
System Information
BD-Live Storage
5
The options are:
<
Information
: Highlight and press
O
to show file
information on the BD-Live data.
<
Erase data
: Highlight and follow the on-screen
instruction to erase BD-Live storage data.
Security/Parental Control
Use cursor keys to highlight menu and
OK key to select
More…
Off
3
4
Display
Audio
Language
Network
System
Security
RTN
SETUP
Exit
Change Password
Parental Control
Change Password
– Sets or changes the 4-digit
password. Press the number buttons for the current
password (the default PIN is
0000
), then press
O
. Enter
the new password again, then press
O
.
Use cursor keys to highlight menu and
OK key to select
Display
Audio
Language
Network
System
Security
RTN
SETUP
Exit
Change Password
Please enter current password :
Parental Control
– Parental control settings can be
used to prevent the viewing of material inappropriate
for children. According to the level set, a disc may be
stopped or have certain scenes cut or substituted with
alternative scenes, depending on the disc.
To set the parental control level:
1. Select ‘Settings’
>
‘Parental Control’
>
2. If Parental Control is set to ‘On’, enter your PIN
using the remote control number buttons. The
default PIN is
0000
.
Use cursor keys to highlight menu and
OK key to select
Display
Audio
Language
Network
System
Security
RTN
SETUP
Exit
Parental Control
Enter Password:
3. Once the Parental Control menu is accessed, press
the
'
/
,
cursor buttons on the remote to
select from the following items. Press
>
to select
an item.

E-23
English
Parental Control
– Set whether Parental Control is ‘On’
or ‘Off’.
<
Off:
All discs are played back.
<
On:
Disc playback is restricted according to the
Parental Level set in the following menu item.
Parental Level
– Set the degree of disc restriction. The
lower the value, the stricter the limitation.
1
Kid Safe
: Suitable for children.
2
G
: All children and general audience.
3
PG
: Parental guidance suggested.
4
PG-13
: Unsuitable for children under 13.
5
PG-R
: Parental guidance recommended.
6
R
: Restricted; cinemas require children under
the age of 17 to have an accompanying adult
parent or guardian.
7
NC-17
: Cinemas do not admit anyone
younger than 17 years old.
8
Adult
: Adult rating; discs of any rating
(Adult/General/Children) can be played back.
NOTE
<
If the parental control level is set and you
try to play a disc with a level higher than the
current parental level, a password panel opens.
<
If an attempt to change the parental control or
parental level is made, a password panel opens.

E-24
Problem
Possible cause
Remedy
No power
<
The AC input cord is disconnected.
<
Poor connection at AC wall outlet or the outlet is inactive.
<
Connect cord securely.
<
Check the outlet using a lamp or another appliance.
No playback
<
The disc is loaded upside down.
<
The disc is not playable.
<
The disc is dirty.
<
The recorded disc is not correctly finalized.
<
The parental level is not set correctly.
<
The symbol about invalid operation is displayed.
<
Reload the disc with the printed side up.
<
Use a playable disc.
<
Clean the disc.
<
Load a disc that is correctly finalized.
<
Set the parental level setting correctly: see page E-22.
<
Adjust the setting correctly.
Malfunction
<
The disc is scratched, dirty, poorly recorded or unplayable.
<
Press the POWER switch to switch the power off, press the
POWER switch again and then unload the disc.
No picture
<
The video cords are disconnected.
<
The incorrect selection of input source on the TV.
<
The disc is not playable.
<
Connect the cords correctly.
<
Select the input source correctly.
<
Use a playable disc.
Noisy or distorted
picture
<
The unit is connected to a recording device directly and the copyguard
function is activated.
<
The disc is dirty.
<
It is in rapid advance or reverse playback, or in frame advance playback.
<
Connect the unit so that the picture signal is
<
transferred directly to the TV.
<
Clean the disc.
<
Sometimes a small amount of picture distortion may
<
appear. This is not a malfunction.
Abnormal picture or no
picture
<
The resolution is not set correctly for video signals to be output from the
COMPONENT and HDMI OUT sockets.
<
The TV does not support HDCP.
<
The TV type of this unit is different from that of your TV or the disc.
<
Set the resolution correctly: see page E-19.
<
This unit will not transfer the video signals via the HDMI
connector to TV that does not support HDCP. This is not a
malfunction.
<
Set the TV type correctly: see page E-19.
Slight pause of picture
<
The layer transition occurs during playback of DVD Videos, etc. in dual-
layer format.
<
Sometimes a slight pause may occur. This is not a
malfunction.
No sound
<
The audio cords are disconnected.
<
The speakers are disconnected to the amplifier.
<
The incorrect selection of input source on the amplifier.
<
Connect the cords correctly.
<
Connect the speakers correctly.
<
Select the input source correctly.
Noisy or distorted sound
<
The disc is dirty.
<
Poor connections.
<
Clean the disc.
<
Check the connections and connect all cords securely.
BD-LIVE contents
cannot be loaded
<
Poor connections between this unit and broadband router and/or modem.
<
The USB memory device is disconnected.
<
The BD-Live Internet Access is set to ‘Prohibit Access’.
<
The BD disc does not support BD-LIVE.
<
The network settings are not set correctly.
<
Check the connections and connect all cords securely.
<
Connect the USB memory device to this unit.
<
Set it to ‘Always Allow Access’: see page E-21.
<
Load a disc that supports BD-LIVE.
<
Set the network settings correctly: see page E-21.
Remote control unit does
not operate.
<
Batteries are not loaded or exhausted.
<
The remote sensor is obstructed.
<
Replace the batteries.
<
Remove the obstacle.
trouble- shooting
If a fault occurs, check this troubleshooting table before
taking your unit for repair.
If the fault persists, attempt to solve it by switching the
unit off and on again.
If this fails to resolve the situation, consult your dealer.
Under no circumstances should you repair the unit
yourself as this will invalidate the guarantee!
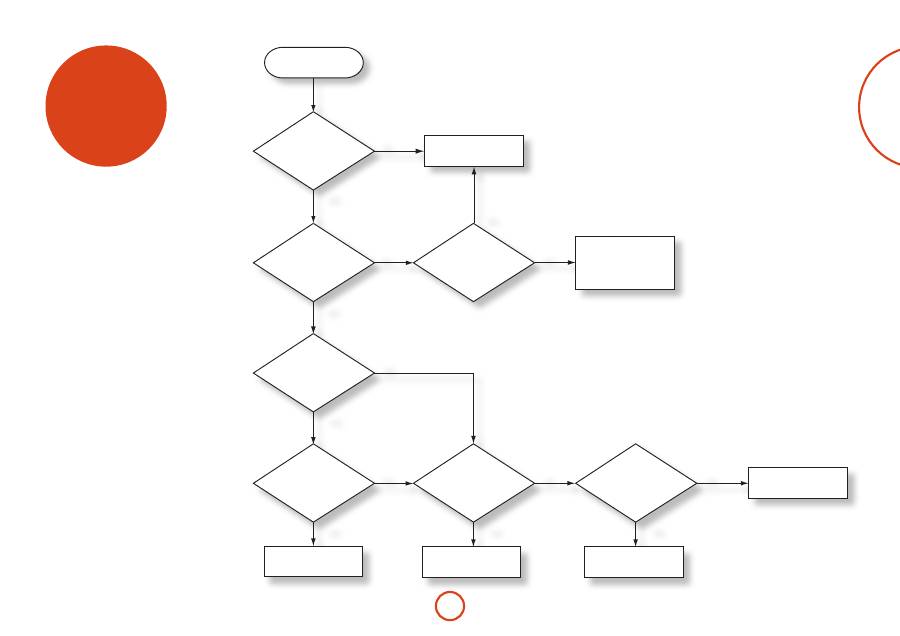
E-25
English
audio & video output formats
Audio output format
The audio output format available from the digital audio
outputs depends on the soundtrack format being played,
the audio output in use and the
Digital Output
setting
in the
Audio
settings menu: see ‘Audio’ on page E-20.
Use the flowchart on this page to guide you to the
correct setting for your home cinema setup.
Do you use an AV receiver?
Do you connect audio using
HDMI?
Do you connect audio using
Optical or Coaxial Digital?
Is your receiver HDMI1.3
compatible (Dolby TrueHD/
DTS HD)?
NO
YES
NO
NO
YES
YES
NO
YES
Do you have a 7.1-format
surround sound
speaker system?
NO
YES
Use “PCM Stereo”
Use “Bitstream Re-encode”
START
Use “PCM 5.1”
Use “PCM 7.1”
Do you have a
surround sound
speaker system?
NO
YES
Use “PCM Stereo”
Use “Bitstream HD”
Use “PCM 5.1”
Do you want to play back
Secondary Audio from
Blu-ray Discs?
YES
NO

E-26
Code learning
The CR104 comes with a complete library of
preprogrammed codes. After you have set up the CR104
for your device, you may find that there are one or more
functions on your original remote which do not have a
place on the CR104 keypad. For convenience, the CR104
offers a Code Learning feature that allows you to copy
up to 16 functions from an original remote control onto
the CR104 keypad.
Before you start, make sure that:
<
The original remote control is working correctly.
<
The remotes are not pointing at your device.
<
The remotes have new batteries.
<
The remotes are not in direct sunlight or under
strong fluorescent lights.
NOTE
Learned functions are mode-dependent: You could
theoretically assign up to eight different functions
to a single key (the CR104 can handle a total of 16
learned functions).
Example: To copy the ‘text hold’ function
from a TV remote onto the
(
key of your
CR104
1. Place both remotes on a flat surface, 2 to 5cm
apart, with the IR ports facing each other.
2. On the CR104, press and hold
S
until the power
LED blinks twice:
*
*
.
3. Press
9
7
5
. The power LED blinks twice:
*
*
.
4. On the CR104, press the device key that matches
the ‘source’ device (e.g. if you’re learning a TV
function, press
a
).
5. On the CR104, press the key to which you want to
assign the learned function (e.g.
(
). The device
key blinks rapidly.
6. On the original remote, press and hold the
function key that you want to learn (e.g.
TEXT
HOLD
) until the CR104 device key blinks twice:
*
*
.
7. If you want to learn other functions from the
same source device, simply repeat steps 5 and 6
pressing the next key you want to learn.
8. To exit Code Learning mode, press and hold
S
until the device key blinks twice:
*
*
.
9. To use the learned function on the CR104, press
the Device Mode key, followed by the function
key.
In this example, you’d press
a
followed by
(
Shifted Learning
You can assign a learned function to a CR104 key
without sacrificing its original function.
You can assign Shifted Learning functions to any key
except
for: Device Mode keys (e.g.
a
),
S
, or number
keys (
0
to
9
).
1. To assign a Shifted Learning function, simply
follow Code Learning steps in the previous
section. During step 5, press
S
once before you
press the key to which you want to assign the
learned function.
2. To access the shifted function, press
S
and then
the target key.
Important notes
<
Once you start a Code Learning session, you have
approximately 10 seconds to conduct each step.
Any longer, and a timeout means that you’ll have
to start the process again.
<
The Learning feature is mode-specific – you can
copy one feature
per mode
onto a key.
<
The CR104 can learn approximately 16 functions
in total.
<
To replace a learned function, simply assign a new
one to the same key.
<
Learned functions
are
retained when you change
batteries.
<
If Code Learning fails, try altering the distance
between the two remotes; make sure that the light
in the area is not too bright.
To delete a learned function
1. Press and hold
S
until the power LED blinks
twice:
*
*
.
2. Press
9
7
6
. The power LED blinks twice:
*
*
.
3. Press a Device Mode key once. For example, if you
want to delete one of your learned TV functions,
press
a
.
4. Press twice on the key you want to deassign. The
handset blinks twice:
*
*
to confirm.
The original function of the CR104 is restored.
To delete a Shifted Learned function:
To delete a Shifted Learned function, press
S
before
you press the key to be deassigned (during step 4 above).
To delete ALL learned functions within a
given Device Mode
1. Press and hold
S
until the power LED blinks
twice:
* *
.
2. Press
9
7
6
– the power LED blinks twice:
* *
.
3. Press the appropriate Device Mode key twice.
customising the CR104

E-27
English
Example: To deassign the Macro associated
with the
h
key
1. Press and hold
S
until the power LED blinks
twice:
*
*
.
2. Press
9
9
5
.
3. Press
h
.
4. Press and hold
S
until the power LED blinks
twice:
*
*
.
Volume punch-through
Volume punch-through means that, no matter which
Device Mode is selected, the CR104 controls the
AVR500, AVR600 or AV888 volume. You don’t need to
press
A
on your CR104; this feature is switched on by
default.
There are times, however, when you might want to
control a device’s volume directly when in a specific
Device Mode.
Example: To cancel volume punch-through
for a TV (AV mode)
1. Press
a
once.
2. Press and hold
S
until the power LED blinks
twice:
*
*
.
3. Press
9
9
3
.
4. Press
-
. The power LED blinks four times.
Now, while in TV (AV) mode, you will be able to control
the volume or mute functions of your TV directly.
To completely cancel all volume punch-
through settings
1. Press and hold
S
until the power LED blinks
twice:
*
*
.
2. Press
9
9
3
.
3. Press
+
. The power LED blinks four times
*
* *
*
.
Now, whichever mode you’re in, you will have direct
access to that device’s volume or mute functions,
assuming they are available. You would need to switch to
AMP
mode to alter the AVR500/AVR600/AV888 volume.
Example: To restore default volume punch-
through settings to all Device Modes
1. Press and hold
S
until the power LED blinks
twice:
* *
.
2. Press
9 9 3
.
3. Press
A
. The power key LED blinks twice:
*
*
.
Key mover
Sometimes you might find that a key you use a lot for
your system is in the ‘wrong’ place on the CR104 keypad
for your comfort. It’s quite easy to reassign a favourite
function to a more accessible key. It is even possible
to move a function from one Device Mode to another
Device Mode.
Example: To assign the
D
function to the
U
key in SAT mode
1. Press
z
.
2. Press and hold
S
until the power LED blinks
twice:
*
*
.
3. Press
9
9
4
.
4. Press the key you want to move (e.g.
D
)
5. Press the key you want to move the key to (e.g.
U
).
Now, pressing either
D
or
U
while in SAT Device
Mode makes the CR104 transmit the
D
function.
To completely swap over the functionality of the two
keys to put the
U
functionality on the
D
key, repeat
the above process again, but swap over the
D
and
U
key presses in the example.
Note that the function that is copied over to the new key
is always the original function of the old key.
Restore a moved key
To restore a key to its previous function, repeat the
example above, pressing the key to be restored twice
(copy it back to itself).
Restore all moved keys for a Device Mode
To restore all keys in a Device Mode to their original
functional positions, repeat the example above, but press
the relevant Device Mode key (e.g.
A
) at points 1, 4
and 5 in the example.
Creating Macros
You can program your CR104 to issue a sequence of
commands when you press a single key. Any sequence of
commands you regularly use can be reduced to a single
key press for your convenience.
For example, you might want to turn off your TV, VCR
and Satellite at the same time.
<
A key programmed with a Macro is available in all
modes; it will replace that key’s different functions
for all modes.
<
A Macro can consist of up to eight key presses.
Example: To assign a Macro to the
h
key
1. Press and hold
S
until the power LED blinks
twice:
*
*
.
2. Press
9
9
5
.
3. Press
h
(the Macro will be assigned to this key).
4. Press a,
P
,
w
,
P
,
z
,
P
. (These are the
Macro steps you wish to record.)
5. To store the Macro, press and hold
S
until the
power LED blinks twice:
*
*
.
Now, whenever you press
h
, the CR104 will toggle the
power to your TV, VCR and Satellite.
<
The important word here is ‘toggle’. For example,
if the TV and Satellite devices are currently on,
but the VCR is off, pressing
h
will switch off the
TV and Satellite and switch on the VCR (rather
than switching all three devices on or off).
<
When using Macros, remember that you may
need to change mode or use
S
, and that each
key press (including changing modes and pressing
S
) counts as one of the Macro steps. You cannot
use a Macro key within another Macro.
<
If the amount of memory storage for a particular
Macro is exceeded, the power LED comes on for
five seconds. You can, however, save the macro
steps up to that point by pressing
S
, or you can
cancel the Macro recording by pressing any other
key.
<
The delay between key presses is recorded as
part of the Macro. A delay of up to 30 seconds is
permitted.

E-28
Mode mover
If your home entertainment setup contains devices of
the same type (e.g. two TVs, perhaps from different
manufacturers) you can still control both those devices
with the CR104. You simply need to reassign an
unused
Device Mode key.
NOTE
Before using Mode Mover, make sure both the source
and destination Device Mode keys are unlocked (see
next section).
Example: To use the
z
key to control a
second TV
1. Press and hold
S
until the power LED blinks
twice:
*
*
.
2. Press
9
9
2
.
3. Press the Device Mode key for the type of device
you want to control (e.g. for a TV, press
a
).
4. Press the Device Mode key you want to use (e.g.
z
).
5. Don’t forget to set up the CR104 to control the
second device, using one of the methods from
‘Controlling other devices’ on page E-14.
Note that volume punch-through is not applied to a
Device Mode that has been copied using Mode Mover.
However, volume punch-through functionality can be
restored when you have used Mode Mover, by copying
-
,
+
and
@
from the AMP Device Mode to the
same physical buttons on the new moved Device Mode
using the last example shown in Key Mover.
To restore a moved Device Mode key to its
original state
1. Press and hold
S
until the power LED blinks
twice:
*
*
.
2. Press
9
9
2
.
3. Press the Device Mode key you want to restore
twice
.
Locking/unlocking a specific
Device Mode
When you first unpack your CR104 and insert the
batteries, for your convenience it is able to control
certain Arcam components automatically (e.g. DVD
players, Amplifiers, Tuners and CD Players). We achieve
this by preprogramming specific Arcam device codes
onto the relevant Device Mode keys, then locking
the Device Modes so you don’t reprogram them
inadvertently.
If you want to override these locked default settings – to
control a third-party CD player, for example – you will
first need to unlock CD Mode before setting up the
CR104 using one of the methods described at the start
of this guide.
Here are the factory default settings:
Device Mode
Default status
Default Arcam
codes
BD
Locked
0762
SAT
Unlocked
1205
AV
Unlocked
0586
TUN
Locked
2009
AMP
Locked
1242
PVR
Unlocked
1930
VCR
Unlocked
0111
CD
Locked
2010
Alternative codes are available for multi-room solutions,
or in the case of code clashes with other manufacturer’s
products.
For example:
AMP
(system code 19)
1954
You will need to change the system code on the product
you wish to control, as well as the CR104.
NOTE
The
AMP
Device Mode can only be used to control
Arcam amplifiers like the AVR500, AVR600 and
AV888, either on its default or alternative IR system
codes.
To toggle a Device Mode lock setting:
1. Press the Device Mode key you want to unlock
(e.g.
c
)
2. Press and hold
S
until the power LED blinks
twice:
*
*
.
3. Press
9
8
2
.
<
The power LED blinks twice when being locked,
and blinks four times when being unlocked.
<
If you enter an invalid key sequence, the power
LED gives one long blink and returns to normal
operation.
While the Device Mode key is locked, the Direct Code
Setup and Move Mode functions are not available.
Copy a key between Device Modes
It is possible to copy functions between Device Modes.
However, remember that button functions are Device
Mode specific and therefore effectively ‘punch-through’
to the original Device Mode when copied over.
The following example copies the AVR500/AVR600/
AV888
DIRECT
function from the CR104
AMP
device
mode to the shifted function of the
#
button on
AV
Device Mode.
1. Press and hold
S
until the power LED blinks
twice:
*
*
.
2. Press
9
9
4
.
3. Press the Device Mode key of the function you
want to move (e.g.
A
).
4. Press the function key you want to move (e.g.
)
/
DIRECT
)
5. Press the key of the Device Mode you want to
copy the function to (e.g.
a
)
6. Press the
S
button graphic
7. Press the key you want to copy the function to
(e.g.
#
)
If you prefer to copy the key to the main function of the
#
button instead of the ‘shifted’ function, omit point 6
in the above example.
E-29
English
Device codes
The tables that begin on page E-29 (in the final section
of this Handbook) list the four-figure codes for different
manufacturers’ devices.
Use these when setting your CR104 up to control your
devices, as described in Method 1 (see page E-14).
If more than one code number is listed, try the first
number. If the results are unsatisfactory, continue trying
the numbers for that manufacturer to get the best ‘fit’
with the functionality required.
If the manufacturer of your equipment is not listed, you
can try Method 2, the Library Search (see page E-14). This
allows you to scan through every set of codes contained
in the CR104’s memory.
Command summary
Key mover
(e.g. SAT mode, DISP key to MENU key)
z
S
*
*
9
9
4
D
U
Mode mover
(e.g. change SAT to TV(AV))
S
*
*
9
9
2
a
z
Restore device mode
(e.g. restore SAT)
S
*
*
9
9
2
z
z
Locking/unlocking a mode
(e.g. CD mode)
c
S
*
*
9
8
2
*
*
(i.e. two blinks for lock)
c
S
*
*
9
8
2
*
*
*
*
(i.e. four blinks for unlock)
Cancel all volume punch-through
S
*
*
9
9
3
+
*
*
*
*
Restore volume punch-through
S
*
*
9
9
3
A
*
*
Mode key IR punch-through
S
*
*
9
7
1
*
*
A
Cancel mode key IR punch-through
S
*
*
9
7
1
*
*
S
*
*
Mode key IR punch-through
The Mode key IR punch-through default is ‘on’.
Example: To set the Mode key IR punch-
through to AMP
1. Press and hold
S
until the power LED blinks
twice:
*
*
.
2. Press
9
7
1
. The power LED blinks twice:
* *
.
3. Press
A
to punch through IR from it.
Now, whenever you press and release a Mode key, the
IR data assigned to
AMP
is transmitted, no matter what
the current mode is (i.e. it ‘punches through’ any other
device).
To cancel Mode key IR punch-through
1. Press and hold
S
until the power LED blinks
twice:
*
*
.
2. Press
9
7
1
. The power LED blinks twice:
*
*
.
3. Press
S
until the power LED blinks twice:
*
*
.
Resetting the CR104
Resetting the CR104 will erase all learned functions
across all modes, as well as some other programmed
functions like Macros. It will not reset the Device Mode
keys; these will remain programmed to your choice of
component.
1. Press and hold
S
until the power LED blinks
twice:
*
*
.
2. Press
9
8
0
. The power LED blinks four
times:
*
*
*
*
.
3. Press and hold
S
until the power LED blinks
twice:
*
*
.
4. Press
9
9
3
.
5. Press
A
. The power key LED blinks twice:
*
*
.
6. Press and hold
S
until the power LED blinks
twice:
*
*
.
7. Press
9
7
1
. The power LED blinks twice:
*
*
.
8. Press
A
. The power key LED blinks twice:
*
*
.
Direct code setup
(e.g. AV mode, NNNN=code number)
a
S
*
*
NNNN
*
*
P
Library search
(e.g. AV mode)
a
S
9
9
1
*
*
P
[
until unit turns off
S
to save
Code blink back
a
S
9
9
0
**
1
count blinks for first
N
2
count blinks for second
N
3
count blinks for third
N
4
count blinks for fourth
N
Code learning
(e.g. AV mode fast forward key)
S
*
*
9
7
5
*
*
a
(
*
(many
rapid blinks)
(Press key on original remote that you wish to copy)
*
*
S
*
*
Delete a learned function
(e.g. AV mode fast forward key)
S
*
*
9
7
5
*
*
a
(
(
*
*
Delete all learned functions with a device
(e.g. AV mode)
S
*
*
9
7
5
a
a
Creating macros
(e.g. SRCH key)
S
*
*
9
9
5
h
a
P
w
P
z
P
S
*
*
Deassign macro
S
*
*
9
9
5
h
S
*
*
NOTE
As elsewhere in this Handbook, a single ‘blink’ of
the red LED behind the power button is indicated
by the symbol
*
.
E-30
Continual improvement policy
Arcam has a policy of continual improvement for its
products. This means that designs and specifications
are subject to change without notice.
specifications
Analogue Audio Output
Digital to Analogue conversion
24-bit 192kHz Delta-Sigma DAC
Signal to noise ratio
110dB CCIR
Harmonic distortion (1kHz)
0.002%
Frequency response (±0.5dB)
10Hz–20kHz
Output level (0dB)
2.2Vrms
Output impedance
47
Ω
Minimum recommended load
5k
Ω
Video Outputs
Composite video
1 x phono. 1V pk-pk in 75Ω
Component video
Interlaced or Progressive
3 phono sockets.
Y 1V pk-pk in 75Ω, Pb 0.7V pk-pk in 75Ω, Pr 0.7V pk-pk in 75Ω
HDMI
19-pin HDMI connector
Supported video formats are:
720 x 576p, 720(1440) x 576i, 720 x 480p, 720(1440) x 480i,
1280 x 720p, 1920 x 1080i, 1920 x 1080p
Audio to 8-channel/96kHz or 2-channel/192kHz (24-bit).
Digital interfaces
USB
USB 2.0 High Speed (480 Mbit/s)
Network
10 BASE-T / 100 BASE-TX
Physical
Dimensions
W433 x D400 x H100mm
Weight
6.2kg nett/8.5kg packed
Power consumption
17W maximum
Digital output connection
75
Ω
co-axial
optical TOSLINK
Supplied accessories
Mains lead
CR104 remote control
4 x AAA batteries
E&OE
NOTE
: All specification values are typical unless otherwise stated
Radio interference
The BDP300 Blu-ray Disc player is a digital device
which has been designed to very high standards of
electromagnetic compatibility.
All Blu-ray players generate, and can radiate RF
(radio frequency) energy. In some cases this can cause
interference with FM and AM radio reception. If this is
the case, keep the player and its connecting cables as far
from the tuner and its aerials as possible. Connecting
the player and the tuner to different mains sockets can
also help to reduce interference.
EC COUNTRIES – This products have been designed to
comply with EMC Directive 2004/108/EC.
USA – These products comply with FCC Part 15
Class B.
Laser radiation
If the BDP300 Blu-ray Disc
player is operated whilst
the outer casing is removed,
invisible laser radiation could
cause eye damage.
CLASS II
LASER PRODUCT

E-31
English
software licencing
GNU GENERAL PUBLIC LICENSE
Version 2, June 1991
Copyright (C) 1989, 1991 Free Software Foundation, Inc.
51 Franklin Street, Fifth Floor, Boston, MA 02110-1301, USA
Everyone is permitted to copy and distribute verbatim copies of
this license document, but changing it is not allowed.
Preamble
The licenses for most software are designed to take away your
freedom to share and change it. By contrast, the GNU General
Public License is intended to guarantee your freedom to share
and change free software--to make sure the software is free for
all its users. This General Public License applies to most of the
Free Software Foundation’s software and to any other program
whose authors commit to using it. (Some other Free Software
Foundation software is covered by the GNU Lesser General
Public License instead.) You can apply it to your programs, too.
When we speak of free software, we are referring to freedom,
not price. Our General Public Licenses are designed to make
sure that you have the freedom to distribute copies of free
software (and charge for this service if you wish), that you
receive source code or can get it if you want it, that you can
change the software or use pieces of it in new free programs;
and that you know you can do these things.
To protect your rights, we need to make restrictions that forbid
anyone to deny you these rights or to ask you to surrender the
rights. These restrictions translate to certain responsibilities for
you if you distribute copies of the software, or if you modify
it. For example, if you distribute copies of such a program,
whether gratis or for a fee, you must give the recipients all the
rights that you have. You must make sure that they, too, receive
or can get the source code. And you must show them these
terms so they know their rights.
We protect your rights with two steps: (1) copyright the
software, and (2) offer you this license which gives you legal
permission to copy, distribute and/or modify the software.
Also, for each author’s protection and ours, we want to make
certain that everyone understands that there is no warranty for
this free software. If the software is modified by someone else
and passed on, we want its recipients to know that what they
have is not the original, so that any problems introduced by
others will not reflect on the original authors’ reputations.
Finally, any free program is threatened constantly by software
patents. We wish to avoid the danger that redistributors of a
free program will individually obtain patent licenses, in effect
making the program proprietary. To prevent this, we have made
it clear that any patent must be licensed for everyone’s free use
or not licensed at all.
The precise terms and conditions for copying, distribution and
modification follow.
TERMS AND CONDITIONS FOR COPYING,
DISTRIBUTION AND MODIFICATION
This License applies to any program or other work which
contains a notice placed by the copyright holder saying it may
be distributed under the terms of this General Public License.
The ‘Program’, below, refers to any such program or work, and
a ‘work based on the Program’ means either the Program or
any derivative work under copyright law: that is to say, a work
containing the Program or a portion of it, either verbatim or
with modifications and/or translated into another language.
(Hereinafter, translation is included without limitation in the
term ‘modification’.) Each licensee is addressed as ‘you’.
Activities other than copying, distribution and modification are
not covered by this License; they are outside its scope. The act
of running the Program is not restricted, and the output from
the Program is covered only if its contents constitute a work
based on the Program (independent of having been made by
running the Program). Whether that is true depends on what
the Program does.
ENGLISH
1.You may copy and distribute verbatim copies of the Program’s
source code as you receive it, in any medium, provided that
you conspicuously and appropriately publish on each copy an
appropriate copyright notice and disclaimer of warranty; keep
intact all the notices that refer to this License and to the absence
of any warranty; and give any other recipients of the Program a
copy of this License along with the Program.
You may charge a fee for the physical act of transferring a
copy, and you may at your option offer warranty protection in
exchange for a fee.
2. You may modify your copy or copies of the Program or any
portion of it, thus forming a work based on the Program, and
copy and distribute such modifications or work under the terms
of Section 1 above, provided that you also meet all of these
conditions:
a) You must cause the modified files to carry prominent notices
stating that you changed the files and the date of any change.
b) You must cause any work that you distribute or publish, that
in whole or in part contains or is derived from the Program or
any part thereof, to be licensed as a whole at no charge to all
third parties under the terms of this License.
c) If the modified program normally reads commands
interactively when run, you must cause it, when started running
for such interactive use in the most ordinary way, to print or
display an announcement including an appropriate copyright
notice and a notice that there is no warranty (or else, saying
that you provide a warranty) and that users may redistribute
the program under these conditions, and telling the user how to
view a copy of this License. (Exception: if the Program itself is
interactive but does not normally print such an announcement,
your work based on the Program is not required to print an
announcement.)
These requirements apply to the modified work as a whole.
If identifiable sections of that work are not derived from the
Program, and can be reasonably considered independent and
separate works in themselves, then this License, and its terms,
do not apply to those sections when you distribute them as
separate works. But when you distribute the same sections
as part of a whole which is a work based on the Program, the
distribution of the whole must be on the terms of this License,
whose permissions for other licensees extend to the entire
whole, and thus to each and every part regardless of who wrote
it.
Thus, it is not the intent of this section to claim rights or contest
your rights to work written entirely by you; rather, the intent is
to exercise the right to control the distribution of derivative or
collective works based on the Program.
In addition, mere aggregation of another work not based on
the Program with the Program (or with a work based on the
Program) on a volume of a storage or distribution medium does
not bring the other work under the scope of this License.
3. You may copy and distribute the Program (or a work based
on it, under Section 2) in object code or executable form under
the terms of Sections 1 and 2 above provided that you also do
one of the following:
a) Accompany it with the complete corresponding machine-
readable source code, which must be distributed under the
terms of Sections 1 and 2 above on a medium customarily used
for software interchange; or,
b) Accompany it with a written offer, valid for at least three
years, to give any third party, for a charge no more than your
cost of physically performing source distribution, a complete
machine-readable copy of the corresponding source code, to
be distributed under the terms of Sections 1 and 2 above on a
medium customarily used for software interchange; or,
c) Accompany it with the information you received as to the
offer to distribute corresponding source code. (This alternative
is allowed only for noncommercial distribution and only if you
received the program in object code or executable form with
such an offer, in accord with Subsection b above.)
The source code for a work means the preferred form of the
work for making modifications to it. For an executable work,
complete source code means all the source code for all modules
it contains, plus any associated interface definition files, plus
the scripts used to control compilation and installation of
the executable. However, as a special exception, the source
code distributed need not include anything that is normally
distributed (in either source or binary form) with the major
components (compiler, kernel, and so on) of the operating
system on which the executable runs, unless that component
itself accompanies the executable.
If distribution of executable or object code is made by offering
access to copy from a designated place, then offering equivalent
access to copy the source code from the same place counts as
distribution of the source code, even though third parties are
not compelled to copy the source along with the object code.
4. You may not copy, modify, sublicense, or distribute the
Program except as expressly provided under this License.
Anyattempt otherwise to copy, modify, sublicense or distribute
the Program is void, and will automatically terminate your
rights under this License. However, parties who have received
copies, or rights, from you under this License will not have
their licenses terminated so long as such parties remain in full
compliance.
5. You are not required to accept this License, since you have
not signed it. However, nothing else grants you permission to
modify or distribute the Program or its derivative works. These
actions are prohibited by law if you do not accept this License.
Therefore, by modifying or distributing the Program (or any
work based on the Program), you indicate your acceptance
of this License to do so, and all its terms and conditions for
copying, distributing or modifying the Program or works based
on it.
6. Each time you redistribute the Program (or any work based
on the Program), the recipient automatically receives a license
from the original licensor to copy, distribute or modify the
Program subject to these terms and conditions. You may not
impose any further restrictions on the recipients’ exercise of
This item incorporates copy protection technology that is
protected by U.S. patents and other intellectual property rights
of Rovi Corporation. Reverse engineering and disassembly are
prohibited.
‘AVCHD’ and the ‘AVCHD’ logo are trademarks of Panasonic
Corporation and Sony Corporation.
Java and all Java-based trademarks and logos are trademarks or
registered trademarks of Sun Microsystems, Inc. in the U.S. and
other countries.
The ‘BD-LIVE’ logo is a trademark of Blu-ray Disc Association.
‘Blu-ray Disc’, ‘Blu-ray’ and the ‘Blu-ray Disc’ logo are
trademarks of Blu-ray Disc Association.
‘BONUSVIEW’ is a trademark of Blu-ray Disc Association.
Manufactured under license from Dolby Laboratories.
Dolby and the double-D symbol are trademarks of Dolby
Laboratories.
Manufactured under license under U.S. Patent #’s: 5,451,942;
5,956,674; 5,974,380; 5,978,762; 6,226,616; 6,487,535; 7,392,195;
7,272,567; 7,333,929; 7,212,872 & other U.S. and worldwide
patents issued & pending. DTS and the Symbol are registered
trademarks, & DTS-HD, DTS-HD Master Audio | Essential and
the DTS logos are trademarks of DTS, Inc. Product includes
software. © DTS, Inc. All Rights Reserved.
is a trademark of DVD format/Logo licensing
Corporation.
HDMI, the HDMI logo and High-Definition Multimedia
Interface are trademarks or registered trademarks of HDMI
Licensing LLC.
MPEG Layer-3 audio coding technology licensed from
Fraunhofer IIS and Thomson.
Windows Media and the Windows logo are trademarks or
registered trademarks of Microsoft Corporation in the United
States and/or other countries.
This product uses some software programs which are listributed
under the GPL license. Accordingly, the following GPL software
source codes that have been used in this product can be
provided after asking at http://www.sherwoodamerica.com.

E-32
the rights granted herein. You are not responsible for enforcing
compliance by third parties to this License.
7. If, as a consequence of a court judgment or allegation of
patent infringement or for any other reason (not limited to
patent issues), conditions are imposed on you (whether by
court order, agreement or otherwise) that contradict the
conditions of this License, they do not excuse you from the
conditions of this License. If you cannot distribute so as to
satisfy simultaneously your obligations under this License and
any other pertinent obligations, then as a consequence you
may not distribute the Program at all. For example, if a patent
license would not permit royalty-free redistribution of the
Program by all those who receive copies directly or indirectly
through you, then the only way you could satisfy both it and
this License would be to refrain entirely from distribution of
the Program. If any portion of this section is held invalid or
unenforceable under any particular circumstance, the balance
of the section is intended to apply and the section as a whole is
intended to apply in other circumstances. It is not the purpose
of this section to induce you to infringe any patents or other
property right claims or to contest validity of any such claims;
this section has the sole purpose of protecting the integrity of
the free software distribution system, which is implemented
by public license practices. Many people have made generous
contributions to the wide range of software distributed through
that system in reliance on consistent application of that system;
it is up to the author/donor to decide if he or she is willing to
distribute software through any other system and a licensee
cannot impose that choice. This section is intended to make
thoroughly clear what is believed to be a consequence of the
rest of this License.
8. If the distribution and/or use of the Program is restricted in
certain countries either by patents or by copyrighted interfaces,
the original copyright holder who places the Program under
this License may add an explicit geographical distribution
limitation excluding those countries, so that distribution is
permitted only in or among countries not thus excluded. In
such case, this License incorporates the limitation as if written
in the body of this License.
9. The Free Software Foundation may publish revised and/
or new versions of the General Public License from time to
time. Such new versions will be similar in spirit to the present
version, but may differ in detail to address new problems
or concerns. Each version is given a distinguishing version
number. If the Program specifies a version number of this
License which applies to it and ‘any later version’, you have the
option of following the terms and conditions either of that
version or of any later version published by the Free Software
Foundation. If the Program does not specify a version number
of this License, you may choose any version ever published by
the Free Software Foundation.
10. If you wish to incorporate parts of the Program into other
free programs whose distribution conditions are different,
write to the author to ask for permission. For software which
is copyrighted by the Free Software Foundation, write to the
Free Software Foundation; we sometimes make exceptions for
this. Our decision will be guided by the two goals of preserving
the free status of all derivatives of our free software and of
promoting the sharing and reuse of software generally.
NO WARRANTY
11. BECAUSE THE PROGRAM IS LICENSED FREE
OF CHARGE, THERE IS NO WARRANTY FOR THE
PROGRAM, TO THE EXTENT PERMITTED BY
APPLICABLE LAW. EXCEPT WHEN OTHERWISE
STATED IN WRITING THE COPYRIGHT HOLDERS
AND/OR OTHER PARTIES PROVIDE THE PROGRAM
‘AS IS’ WITHOUT WARRANTY OF ANY KIND,
EITHER EXPRESSED OR IMPLIED, INCLUDING, BUT
NOT LIMITED TO, THE IMPLIED WARRANTIES OF
MERCHANTABILITY AND FITNESS FOR A PARTICULAR
PURPOSE. THE ENTIRE RISK AS TO THE QUALITY AND
PERFORMANCE OF THE PROGRAM IS WITH YOU.
SHOULD THE PROGRAM PROVE DEFECTIVE, YOU
ASSUME THE COST OF ALL NECESSARY SERVICING,
REPAIR OR CORRECTION.
12. IN NO EVENT UNLESS REQUIRED BY APPLICABLE
LAW OR AGREED TO IN WRITING WILL ANY
COPYRIGHT HOLDER, OR ANY OTHER PARTY WHO
MAY MODIFY AND/OR REDISTRIBUTE THE PROGRAM
AS PERMITTED ABOVE, BE LIABLE TO YOU FOR
DAMAGES, INCLUDING ANY GENERAL, SPECIAL,
INCIDENTAL OR CONSEQUENTIAL DAMAGES ARISING
OUT OF THE USE OR INABILITY TO USE THE PROGRAM
(INCLUDING BUT NOT LIMITED TO LOSS OF DATA
OR DATA BEING RENDERED INACCURATE OR LOSSES
SUSTAINED BY YOU OR THIRD PARTIES OR A FAILURE
OF THE PROGRAM TO OPERATE WITH ANY OTHER
PROGRAMS), EVEN IF SUCH HOLDER OR OTHER PARTY
HAS BEEN ADVISED OF THE POSSIBILITY OF SUCH
DAMAGES.
END OF TERMS AND CONDITIONS
How to Apply These Terms to Your New Programs
If you develop a new program, and you want it to be of the
greatest possible use to the public, the best way to achieve this
is to make it free software which everyone can redistribute and
change under these terms.
To do so, attach the following notices to the program. It is safest
to attach them to the start of each source file to most effectively
convey the exclusion of warranty; and each file should have at
least the ‘copyright’ line and a pointer to where the full notice
is found.
One line to give the program’s name and a brief idea of what
it does.
Copyright (C) <year><name of author>
This program is free software; you can redistribute it and/or
modify it under the terms of the GNU General Public License
as published by the Free Software Foundation; either version 2
of the License, or (at your option) any later version.
This program is distributed in the hope that it will be useful,
but WITHOUT ANY WARRANTY; without even the implied
warranty of MERCHANTABILITY or FITNESS FOR A
PARTICULAR PURPOSE. See the GNU General Public
License for more details.
You should have received a copy of the GNU General Public
License along with this program; if not, write to the Free
Software Foundation, Inc., 59 Temple Place, Suite 330, Boston,
MA 02111-1307 USA
Also add information on how to contact you by electronic and
paper mail.
If the program is interactive, make it output a short notice like
this when it starts in an interactive mode:
Gnomovision version 69, Copyright (C) year name of author
Gnomovision comes with ABSOLUTELY NO WARRANTY; for
details type ‘show w’. This is free software, and you are welcome
to redistribute it under certain conditions; type ‘show c’ for
details.
The hypothetical commands ‘show w’ and ‘show c’ should show
the appropriate parts of the General Public License. Of course,
the commands you use may be called something other than
‘show w’ and ‘show c’; they could even be mouse-clicks or menu
items--whatever suits your program.
You should also get your employer (if you work as a
programmer) or your school, if any, to sign a ‘copyright
disclaimer’ for the program, if necessary. Here is a sample; alter
the names:
Yoyodyne, Inc., hereby disclaims all copyright interest in the
program ‘Gnomovision’ (which makes passes at compilers)
written by James Hacker.
signature of Ty Coon, 1 April 1989
Ty Coon, President of Vice
This General Public License does not permit incorporating
you program into proprietary programs. If your program is
subroutine library, you may consider it more useful to permit
linking proprietary applications with the library. If this is what
you want to do,
use the GNU Library General Public License instead of this
License.
The BDP300 Blu-Ray Disc player is an Energy Star® qualified
disc player. When is idle mode, this disc player draws less
than 1 Watt of idle current to help lower your electricity bills
and protect the environment. Products that earn the Energy
Star prevent greenhouse gas emission by meeting strict energy
efficiency guidelins set by the U.S,. Environmental Protection
Agency and the U.S. Department of Energy.

E-33
English
product guarantee
Worldwide Guarantee
This entitles you to have the unit repaired free of charge, during the first two years after
purchase, provided that it was originally purchased from an authorised Arcam dealer.
The Arcam dealer is responsible for all after-sales service. The manufacturer can take no
responsibility for defects arising from accident, misuse, abuse, wear and tear, neglect or
through unauthorised adjustment and/or repair, neither can they accept responsibility
for damage or loss occurring during transit to or from the person claiming under the
guarantee.
The warranty covers:
Parts and labour costs for two years from the purchase date. After two years you must pay
for both parts and labour costs.
The warranty does not cover transportation costs at any
time.
Claims under guarantee
This equipment should be packed in the original packing and returned to the dealer
from
whom it was purchased
. It should be sent carriage prepaid by a reputable carrier –
not
by post. No responsibility can be accepted for the unit whilst in transit to the dealer or
distributor and customers are therefore advised to insure the unit against loss or damage
whilst in transit.
For further details contact Arcam at:
Arcam Customer Support Department,
Pembroke Avenue, Waterbeach, CAMBRIDGE, CB25 9QR, England
or via
www.arcam.co.uk
.
Problems?
If your Arcam dealer is unable to answer any query regarding this or any other Arcam
product please contact Arcam Customer Support at the above address and we will do our
best to help you.
On-line registration
You can register your product on-line at
www.arcam.co.uk
.
Correct disposal of this product
This marking indicates that this
product should not be disposed with
other household waste throughout
the EU.
To prevent possible harm to the
environment or human health from
uncontrolled waste disposal and to
conserve material resources, this
product should be recycled responsibly.
To dispose of your product, please use your local
return and collection systems or contact the retailer
where the product was purchased.

