Zelmer 819 – page 5
Manual for Zelmer 819
Table of contents
- THE REMARKS ON OPERATION AND USAGE SAFETY
- VACUUM CLEANER CHARACTERISTICS VACUUM CLEANER TYPES 819 TECHNICAL DATA
- APPLICATION OF ACCESSORIES
- OPERATION WITH WATER FILTER SYSTEM
- HOW TO START UP VACUUM CLEANER 89BOPERATIONAL INSTRUCTIONS FOR VACUUMING WITH WATER FILTER
- AFTER OPERATION WITH WATER FILTER FILTERS CONTROL
- VACUUM CLEANER OPERATION WITH SAFBAG
- ECOLOGY – ENVIRONMENT PROTECTION
− Be careful to put the cutting of filter partition
2
shall be fitted on proper insertion of the tank.
1
− Cover the back tank with the lid, as
show in the figure beside.
1
− Insert the hose edge into top lid inlet
.
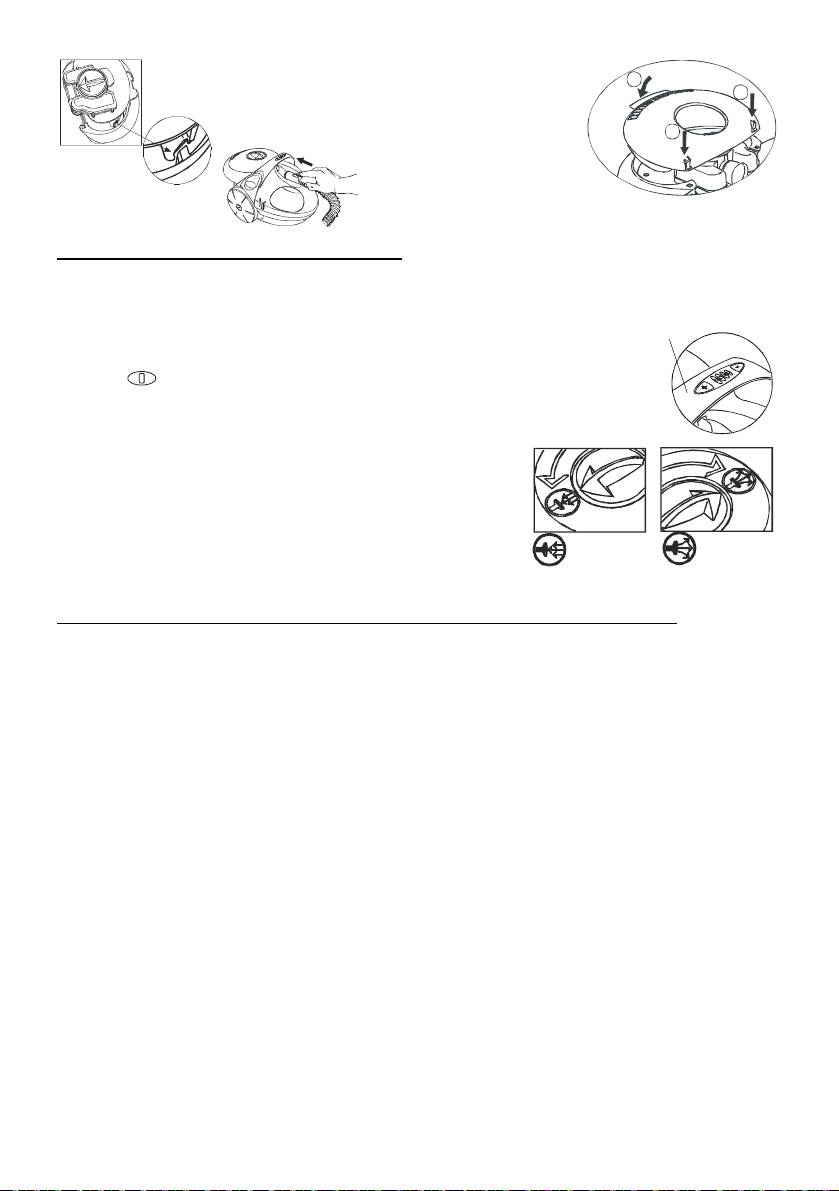
HOW TO START UP VACUUM CLEANER
− Take the plug and pull the cord out of the casing.
ATTENTION!!! Be careful during pulling the cord out, the yellow mark on the cord show the end
of the cord. Further trials (pulling) can lead to damage the cord.
Vacuum cleaner
− Insert the plug to the mains supply receptacle.
handle
− Switch the vacuum cleaner on pressing the on/off button marked with
symbol
− You can adjust the desired suction power for 819.0 vacuum cleaner by
special buttons on the handle:
„
+”increase power,
„–”reduce power
The currently set power level is indicated with one of four control
lamps. After each switching off, the power is reset as maximum,
despite the power set before
− When vacuuming with water filter unit, check the air
BlowingSuction
recirculation module knob position.
Place the knob in sucking position.
89BOPERATIONAL INSTRUCTIONS FOR VACUUMING WITH WATER FILTER
− Avoid vacuuming surface covered with foaming enhancing substances. If we can notice through the
tank walls, that the water is very foamy, it is necessary to add anti-foaming agent recommended by
vacuum cleaner manufacturer, i.e. “FOAM-FREE” or “G 478 Entschäumer D”, in amount indicated
on the package. You can buy such agent in ZELMER S.A. network shops or by mail-order.
ATTENTION!!! Vacuuming with exceeding indicated, permitted level of water amount can result
in overflow out of the vacuum cleaner. Such repeated situation can lead to fast
blocking of final filter.
− You should pull carefully the vacuum cleaner across the doorsteps and other rough areas, not to
cause extensive water waving inside the tank. It can cause splitting small amount of water out.
− During long or very intensive vacuuming big amount of rubbish, water in the tank, which is the first
stage of filtration, can be completely or in majority absorbed by dry dirtiness. In such case replace it
with fresh and continue vacuuming.
ATTENTION!!! Long term vacuuming with very dirty water can result in early blocking of final
filter (HEPA filter for type 819,*.***S). It can also lead to vacuuming and filtration
efficiency decreasing.
− It is forbidden to pick up the materials and dirtiness, which can be dangerous for people and can
damage the internal elements of the vacuum cleaner, especially:
− flammable, corrosive, malodorous materials, chemicals, etc.
− high temperature materials and liquids,
− materials which are difficult to make damp such as: gypsum, cement, stone dust, flour, etc.
− too big and too sharp objects, which can be blocked inside the tube, hose or air ducts.
− In order to do use blowing, please set the air recirculation module knob in blowing position.
You can use this function for different purposes, especially for:
− blowing leafs out of balcony or patios,
− drying with warm air the inner walls of tubes and hose and other damp objects.
81
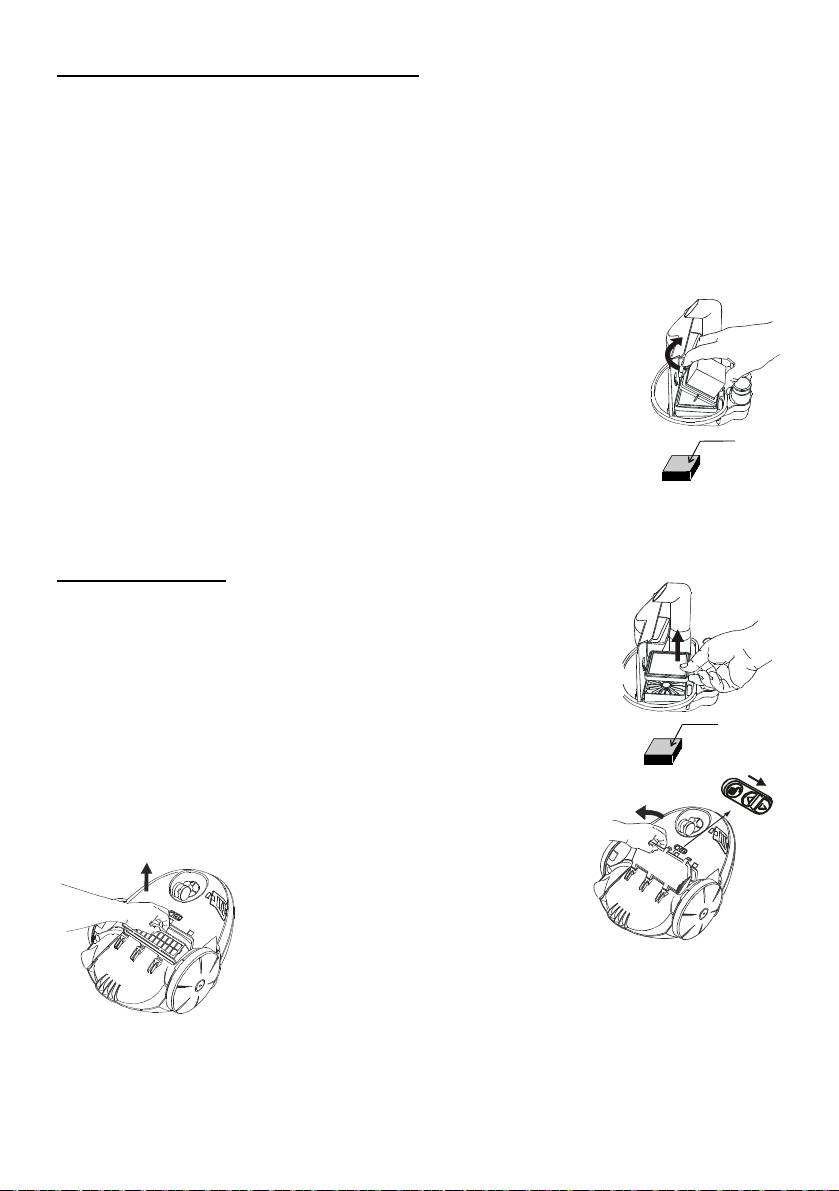
AFTER OPERATION WITH WATER FILTER
60BAfter operation with „water filter unit” it is necessary to perform proper activities in order to clean
inner elements of the tank and prepare it for storage.
− Switch the vacuum cleaner off and unplug it.
− Remove the hose ending.
− Black surface − remove the water filter unit from the vacuum cleaner.
− Remove the inner module from the tank.
− Press the flexible hook of the separator frame with your finger, disassemble the water separator and
remove initial filter.
− If it is necessary, remove the node, flush it and assemble again, taking care for proper assembling.
− Water filter unit - clean tank, separator and initial filter under running water. Clean the parts
thoroughly.
− Dry after cleaning. You can do it in two different ways:
1. Disassemble the parts and leave them until they get dry. Assemble
after drying and insert complete tank into the vacuum cleaner.
2. Assemble complete vacuum cleaner after cleaning (without water) and
switch it on for about 5 min. (Drying with airflow).
ATTENTION!!! Leaving not completely dried parts inside the assembled
vacuum cleaner can cause unpleasant smell.
Black
surface
In case of incidental getting the accessories wet (tubes, hose or nozzles inside)
you should stop the vacuuming switch the vacuum cleaner off and dry the wet
parts.
In order to do it, please set the air recirculation module knob in blowing position and switch the
vacuum cleaner on for about 2 min. The activity is performed to dry the hose, pipes and other
accessories in contact with water. It prevents bacteria development during storage.
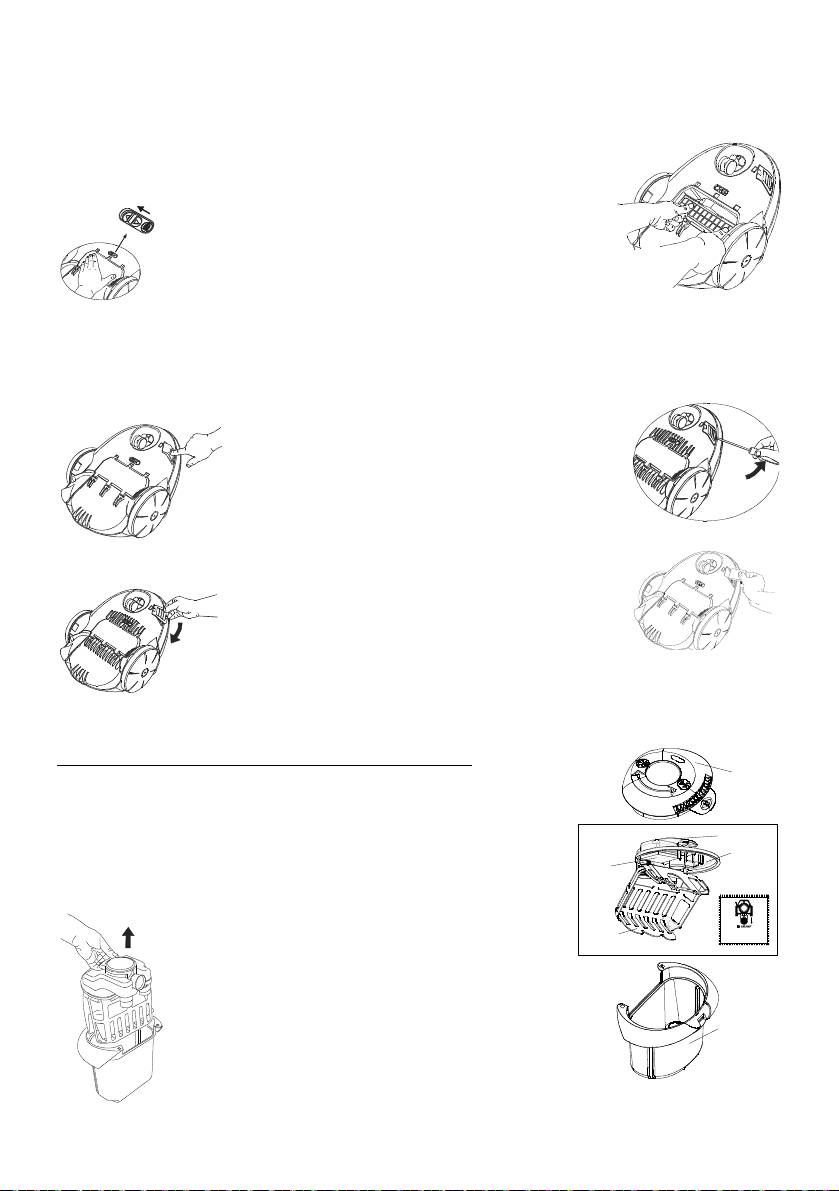
FILTERS CONTROL
The vacuum cleaner is equipped with the following filters:
1. Separator and initial filter
Activities connected with cleaning are described in part concerning after
operation activities.
− Washing of these parts shall be held after each vacuuming.
− Assemble the parts In reverse sequence to disassembling
− Be careful during assembling initial filter, so that black surface of the filter
Black
surface
was outside (up).
2. Final filter (HEPA filter for type 819.*.***S)
Final filter removing
O
− Remove the back tank from the housing and turn the vacuum cleaner
p
e
n
so that it was supported with upper, inclined surface and the handle
on the floor.
− Move the cursor into such position, that
the open mark was visible.
− Open the filter lid according to the figure
beside.
− Catch the fin to remove the final filter.
82
Further activities and recommendation concerning HEPA filter (for type 819.*.***S).
− The filter should be replaced with a new one once a year or after 100 working hours.
− Visual inspection is recommended especially, in case of water splitting out of the vacuum cleaner.
In case of filter surface damage or when it is all covered with dust, you should replace the filter with
a new one.
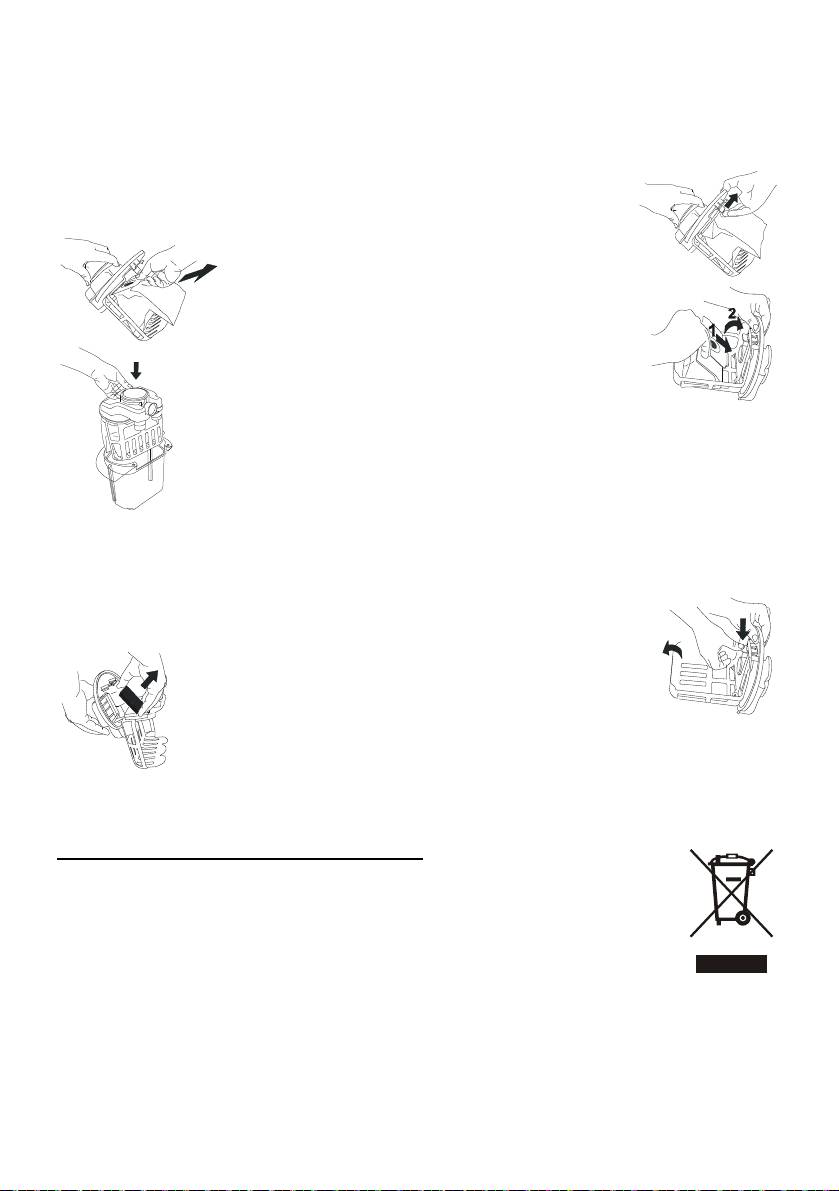
Final filter assembling.
− Insert the filter unit into the filter seating inside the vacuum cleaner housing
and press from the top its upper edge until you feel strong
C
l
o
resistance, which indicated proper assembling.
s
e
d
− Assemble the filter lid, press it strong to the seating and
move the cursor to „closed” position.
3. Engine filter (engine air cooling circulation).
Filtration unwoven fabric is placed in air cooling circulation, which is to stop the carbon dust generated
during natural utilization of engine brushes and commutator.
To exchange engine filter:
− remove the water filter unit,
− turn the vacuum cleaner upside down,
− put the flat tool, i.e. screw driver inside special
hole in filter lid ,
− move your hand up (lever rule) to move the hook
up, so that bending it releases the lid locker
− remove the filtrating insert.
−
− Install a new filtration insert according to the figure. Be careful not to leave
the edges of filtration unwoven fabric beyond the seating boarders .
− Lock the filter lid after inserting lower hook at first
and pressing it so that the upper hook caught the
housing edge.
ATTENTION!!! You mustn’t vacuum without or with improperly assembled initial filter and separator
frame. Operation without these filters shall cause fast usage of final filter.
VACUUM CLEANER OPERATION WITH SAFBAG
Tank lid
SAFBAG unit construction:
When using SAFBAG unit it is not allowed to pick up:
− liquids,
− hot ash
Tank lid
Board
− cigarettes and matches,
− sharp and hard objects,
SAFBAG
(bag)
− pieces of glass, cement, stone dust, flour, etc.
S
PA
C
F
E
A
C
I
LT
R
T
I
ON
A
T
I
O
N
S
P
A
C
E
A
LT
C
T
T
IO
N
F
I
R
A
I
ON
N
S
P
A
C
F
E
A
C
IL
T
R
T
I
O
A
T
IO
N
N
S
P
A
C
E
A
CT
I
O
N
FILTRA TION
S
P
A
C
FI
E
A
L
T
C
T
I
O
RA TI
O
N
N
S
P
A
C
F
E
A
CT
I
LT
R
I
O
A
T
I
O
N
SP
A
C
F
E
A
I
L
T
C
T
I
ON
I
O
N
RA
T
I
O
N
S
P
A
C
F
E
A
C
I
L
TR AT
T
I
O
N
SP
A
C
F
E
ACT
I
LTR
I
ON
A
T
I
O
N
Preparation for cleaning:
S
PA CE ACT
F
I
LT
R
I
O
A
T
IO
N
N
C
C
TI
O
N
SP
A
FIL
E A
T
C
T
ION
R
A
TI
O
N
S
P
A
C
FI
E A
L
TR AT I ON
S
P
A
C
E
A
FI
L
TR AT I O
C
T
I
ON
N
S
PACE
A
C
F
I
L
T
R
A
TIO
T
I
O
N
N
SPA CE ACTION
F
ILTR
A
T
I
ON
Internal
49. 4000
− Open the tank lid (as in case of water filter).
− Remove the inner module (board, basket, plug,
air-inlet filter and SAFBAG bag).
− Check if SAFBAG bag and air-inlet are properly
assembled (see air-inlet filter exchange).
− Insert the inner module into the tank and
assemble the lid.
− Remove the complete water filter unit.
− Replace the water filter unit with SAFBAG bag unit.
83
m
Inlet
filter
odule
Basket
Tank
ATTENTION!!! It is absolutely forbidden to vacuum without the bag and inlet filter or with
damaged bag. It can cause engine damage.
Bag and filters control
1. SAFBAG bag.
− As the bag is not equipped with full bag indicator, it is necessary to control that status. Replace it
with a new one, when it is completely full.
SAFBAG bag exchange:
− Open the tank lid and remove the inner module.
− Lean the flexible board hook and disassemble the bag board.
− Pulling the SAFBAG bard, remove it from the
basket.
− Replace full or damaged SAFBAG bag with a new
one.
− Hold the bag bard and put it between the fins in the
basket (sequence 1 and 2) according to assembling
direction, defined by arrows printed on the bag.
− Insert the inner module into back tank and close it with the lid.
2. Air-inlet filter
t is recommended to check periodically the filter condition. In case of extensive
dirtiness, it is required to replace it with a new one.
Air-inlet filter exchange
− Remove the bag (see the item „ SAFBAG” bag exchange).
− Open flexible hook of the bard, which shall cause opening of the basket.
− Remove the air-inlet filter from the seating in the board.
− Place the new air-inlet filter carefully in the seating in the board.
− Close the basket.
− Put the bag on (see the item „SAFBAG bag exchange).
− Insert the inner module to the back tank and close the lid (see the item SAFBAG
bag exchange)
− Switch the vacuum cleaner on, the way described for vacuuming with water filter.
ATTENTION!!! Never pour water to back tank while using “SAFBAG” unit.
ECOLOGY – ENVIRONMENT PROTECTION
Each user can protect the natural environment. It is neither difficult nor expensive.
In order to do it:
− Put the cardboard packing into recycling paper container.
− Put the polyethylene (PE) bags into container for plastic.
− When worn out, dispose the appliance to particular disposal centre, because of the
dangerous elements of this appliance, which can be hazardous for natural
environment.
Please do not dispose this vacuum cleaner into domestic waste disposal!!!
819-133
84
