Thomson ROC2411: инструкция
Раздел: Бытовая, кухонная техника, электроника и оборудование
Тип: Пульт Управления
Инструкция к Пульту Управления Thomson ROC2411

Compatible with more than 1000 brands
Universal remote control
Télécommande universelle
Universal Fernbedienung
Hama GmbH & Co KG
86651 Monheim/Bayern GERMANY
Manufactured and commercialised
by HAMA under THOMSON
Trademark license
Operating Instruction
Mode d'emploi
Bedienungsanleitung
ROC2411
00131897
ROC2411 00131897 Operating Instructions .......................................................... 01 Mode d‘emploi ....................................................................... 05 Bedienungsanleitung ............................................................. 09 Instrucciones de uso ............................................................. 17 Istruzioni per l‘uso ................................................................. 13 Manual de instruções ............................................................ 25 Руководство по эксплуатации ......................................... 33 Gebruiksaanwijzing ............................................................... 21 Instrukcja obsługi ................................................................... 37 Használati útmutató .............................................................. 45 Οδηγίες χρήσης ..................................................................... 29 Návod k použití ...................................................................... 41
S K
Návod na použitie .................................................................. 41
T R
Kullanma kılavuzu .................................................................. 41 Bruksanvisning ....................................................................... 49 Pistokelaturi ............................................................................ 61
R O
Manual de utilizare ................................................................ 41
1
GB
Testing the remote control before
you programme it
1. Turn on the product you want to control.
2. Press the Mode key that corresponds to the type
of product you want to control:
TV
: television set,
DVD
: DVD player, ,
SAT/STB
: satellite or cable
receiver.
3. Direct the remote control towards your equipment
and try to switch it off by simply pressing the key
G
.
If the device does not turn off, you must program the
remote control using one of the methods
A
,
B
,
C
or
D
described hereafter.
Note 1: Except for the
TV
key, the
DVD, SAT/STB
mode keys can be programmed to control a device
other than that indicated on the key. It is therefore
possible, for example, to allocate
SAT
mode to the
DVD
key. You must enter the code corresponding to
the manufacturer and the device by using one of the
methods indicated in this manual.
However, method
D
(automatic search for a code)
will greatly simplify the task for you. In this case it
is only necessary to enter a code from the list that
corresponds to the type of device, for example: 0603
for a Thomson satellite receiver) and then to run the
automatic search procedure. The remote control will
then test all the codes automatically until it fi nds those
that control the receiver.
Note 2: To control 2 devices of the same type and the
same brand (2 Thomson VCRs, 2 Thomson satellite
receivers, ...) ensure fi rst that these two devices are not
set to react to the same sub code, they will require one
sub code for one and a different sub code for the other
(i.e., codes A and B with Thomson devices). Once you
have checked this, successively program 2 separate
mode keys using method
D
.
Programming
the remote control
Method A – Fast programming
with 1-digit subcode
Before you start programming, you must fi nd the
subcode of the set to be controlled. Entering a subcode
lets the remote control test a predefi ned list of codes.
Refer to the list provided with these instructions, page
I of the subcodes.
1. Switch on the set you want to control.
2. Hold down the
SETUP
key until the indicator lamp
blinks and then remains lit (the indicator light
remains on for a few seconds to give you the time to
proceed with the following steps. The indicator lamp
fl ashes to signal that this time is almost up, and then
goes off).
3. Press the key that corresponds to the type of equipment
you want to control:
TV
: television set,
DVD
: DVD
player, ,
SAT/STB
: satellite receiver, cable, DVBT,
ADSL.
4. While the indicator is lit, type in the subcode
(example: 1 for THOMSON).
5. Direct the remote control towards the set and try to
switch it off by pressing the key
G
.
6. If the set you want to control switches off, press
OK
to memorise the code.
7. Should the set not switch off, press key
G
repeatedly,
until the set switches off. Between two key presses,
leave enough time for the indicator lamp to light up
again (about 1 second). Proceeding this way will
enable you to see whether the set responds or not.
8. Immediately upon the switching-off of the set to be
controlled, press
OK
to store the code.
3
15
5
1
7
9
11
13
17
19
2
4
18
6
8
12
14
20
21
Characteristics - Caractéristiques - Eigenschaften - Características
Caratteristiche - Características -
Технические характеристики
-
Eigenschappen -
Dane techniczne - Karakterisztika -
χαρακτηριστικά
Technické údaje
- Charakteristiký - Karakterisitik - Data -
Ominaisuudet - Caracteristic
ă
Dimensions - Dimensions - Abmessungen - Dimensiones - Dimensioni - Dimensões -
размеры
- Afmetingen - Wymiary - Méret -
Διαστάσεις
- Rozměry - Rozmery - Boyutlar - Mått - Mitat - Dimensiuni = 214 x 45 x 24 mm Weight = 86 grammes Poids = 86 grammes Gewicht = 86 Gramm Peso = 86 gramos Peso = 86 grammi Peso = 86 gramas вес = 86
грамм
Gewicht = 86 gram Ciężar = 86 g Súly = 86 gramm Βάρoς = 86
γραμμάρια
Hmotnost = 86 g Váha = 86 gram A ğ ırlık = 86 gram Vikt = 80 gram Paino = 86 grammaa Greutate = 86 gram
AAA
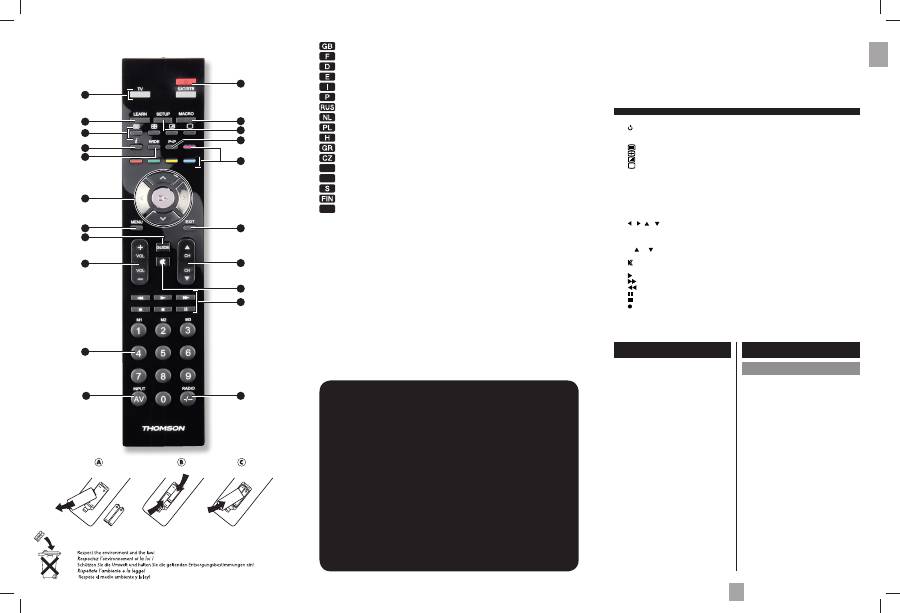
1 Mode
keys
:
Select the device to control (TV, DVD, …).
2
: On/Standby or Standby only, depending on the equipment being used.
3
Learn
: Used for the learning codes procedure (key copying) (see page 3).
4
Macro
: Macro selection (see page 4).
5
:
Teletext
On.
:
Teletext
hold.
:
Teletext
Mix.
:
Teletext
Off.
6
Setup
: Allows you to program your remote before the fi rst use. It also allows you
to access to secondary functions of certain A/V appliances (Shift). Press and
release the “Setup” key followed by the function key you want.
7
i
: Displays information of the selected appliance.
8 P<P
:
Previous
channel.
9
Wide
: Change the size of the image (4/3, 16/9, etc...).
10
Coloured keys
: Can be used to select categories when teletext is activated, and specifi c
functions depending on the make.
11
/ / /
: Allow you to navigate the menus horizontally and verticaly.
OK
:
Confi rms a selection.
12
Exit
: Turn off the menu of the selected product.
13
Menu
: Turns on the menu of the selected product.
14 CH /CH
: Channel Up and Channel Down buttons.
15
Guide
: Electronic Program Guide.
16
(Mute)
: Switches the selected appliance sound off.
17
Vol+/Vol-
: Increases (+) or decreases (-) the volume of the selected device.
18
(Play)
: Play a DVD disc (DVD, ...).
(FF)
: Fast forward (DVD, ...).
(RW)
: Goes backward (DVD, ...).
(Pause)
: Suspends play and stops on an image.
(Stop)
: Stop the disc (DVD, ...).
(Record)
: To record, press the RECORD key twice.
19
Numeric keys 0-9 : These keys have the same functions as those of your original remote and are
also used to enter the codes for different products. Selection of a macro (M1, M2, M3)
20
-/--
: Access to channel > 9 and Radio selection depending of the device.
21
AV
: For selecting an external source (SCART, HDMI, ...).
The keys
10
16
This universal remote control (2 in 1) is compatible with the majority of television
sets, DVD players, as well as digital boxes such as satellite or cable receivers,
DVBT receivers (Digital Video Broadcast Terrestrial), ADSL decoders, and so on.
This remote control was programmed in the factory, so that you can use it to control most
of the sets of the THOMSON group’s make. For this reason, we recommend that prior to
attempting to programme the remote control, you try it out by means of one of the methods
described in this user manual. However, fi rst of all, you must install 2 batteries (AAA) in the
remote control.
Please keep this guide along with the code list (provided separately), so that you can
subsequently programme your remote control for use with other sets.
2
3
GB
GB
Method C – Programming by means
of code retrieval
Should none of the codes work, you still have the
possibility of retrieving the appropriate code without
having to perform any input.
1. Switch on the set you want to control.
2. Hold down the SETUP key until the indicator lamp
blinks and then remains lit.
3. Press the key that corresponds to the type of
equipment you want to control:
TV
: television set,
DVD
: DVD player, ,
SAT/STB
:
satellite receiver, cable, DVBT, ADSL.
4. Direct the remote control towards the set and try to
switch it off by pressing the key
G
.
5. If the set you want to control switches off, press
OK
to memorise the code.
6. Should the set not switch off, press key
G
as many
times as required (up to 200 times), until the
set switches off. Between two key presses, leave
enough time for the key corresponding to the
indicator lamp to light up again (about 1 second).
Proceeding this way will enable you to see whether
the set responds or not.
7. Immediately upon the switching-off of the set to be
controlled, press
OK
to store the code.
Check of the programming:
In principle, your set is ready for receiving the remote
control commands.
Check your remote control for proper functioning by
performing the test described on page
3
.
Try out other remote control keys to fi nd out the range
of functions you can control. If you think that not all
of the keys are active, repeat the procedure of this
programming method to fi nd out the code supporting a
wider range of features.
Method D – Automatic
code search
With this method, the remote control scrolls through
the full code list by sending an IR signal to the set to be
controlled remotely. Proceed as follows:
1. Check that your equipment is on. If not, switch it on
manually.
2. Hold down the
SETUP
key until the indicator lamp
blinks and then remains lit (the indicator light
remains on for a few seconds to give you the time
to proceed with the following steps. The indicator
lamp fl ashes to signal that this time is almost up,
and then goes off).
3. Release the
SETUP
key.
4. Press the key corresponding to the type of
equipment (for example
TV
).
5. Press the
Prog
+ or standby
G
or
B
(
DVD
only)
key. After a few seconds, the remote control begins
to scroll through the whole code list included in the
library (at a rate of roughly 1 code per second).
Press the
Prog
+ key once again to slow down
the test speed (1 code every 3 seconds). As soon
as the set changes channels, you must press
OK
to save the code and stop the remote control
scrolling through the list. If you do not react quickly
enough, you can go back to the previous code by
pressing
Prog
- or
E
(
DVD
only) as many times
as necessary (you can go forward by pressing
G
,
Prog
+ or
B
(
DVD
only) if you have gone back
too far). As soon as the set responds again, press
OK
to save the code.
Method E – Programming for control of a
COMBO (combined TV- TV/DVD, DVD, … set)
Depending on the COMBO group (TV/ DVD, etc.)
and the make, you will be required to enter a single
code for both devices in the COMBO, or to enter two
codes, one code per device. Consult the separate list
to discover this.
Before you start programming, you must fi nd the
subcode or code of the subset to be controlled
(television or video recorder, ...). Refer to the list
supplied with this user manual (see page subcodes
or codes).
1. Switch on the COMBO you want to control.
2. Hold the
SETUP
key down until the indicator lamp
blinks and then remains lit.
3. Press the key of the fi rst device to control, and then
follow one of the programming methods A, B, C or
D previously described.
4. If a second code programming is required, then
repeat steps 2 and 3 above.
How to retrieve
a programmed code
It may be useful to retrieve the code programmed in
the remote control.
1. Hold down the
SETUP
key until the indicator lamp
blinks and then remains lit.
2. Press the key that corresponds to the type of
equipment you want to fi nd the code:
TV
: television set,
DVD
: DVD player, ,
SAT/STB
:
satellite receiver, cable, DVBT, ADSL.
3. Press the
SETUP
key briefl y, so that the indicator
lamp blinks once.
4. Press the numbered keys in ascending order (0 to
9) until the indicator lamp blinks once.
5. The number that caused the indicator lamp to blink
is the fi rst of the four numbers that make up your
code. Make a note of it below.
6. Repeat step 4 to fi nd out the other numbers of the
code.
7. When the fourth number has been found, the
indicator lamp goes out.
Check of
the programming
- For a television or a satellite receiver: switch on and,
for example, press 2 to change channels, etc...
- Video recorder: load a tape and then press
B
.
- DVD player: load a DVD and then press
B
.
Try other remote control keys to fi nd out the range of
functions you can control. If you think that not all of the
keys are active, try the programming
Method B
or
C
.
When you have retrieved the code of
Learning function
If the make of the device you wish to control is not in
the separate code list or if some functions are missing
in the code you have programmed, you can copy
the key functions of the original remote control of
the device into your
ROC2411
. Depending on the
format of the transmission codes of the original remote
control, your
ROC2411
remote control can memorise
up to 150 keys.
Global delete – Delete all the keys copied
(this is recommended the fi rst time you use
this function)
1. Hold down the
SETUP
key until the indicator lamp
remains lit.
2. Release the
SETUP
key.
3. Press twice on the
LEARN
key. The indicator lamp
goes out and then relights.
4. Press once on the
SETUP
key. The indicator lamp
goes out after several seconds.
5. All the copied keys are now deleted.
Before starting
• The batteries in the 2 remote controls must be in
good condition; change them if necessary.
• First copy 2 or 3 keys from the original remote
control in order to check the compatibility of the
codes of both remote controls. Then carry out a
global delete of these keys before starting the full
learning procedure.
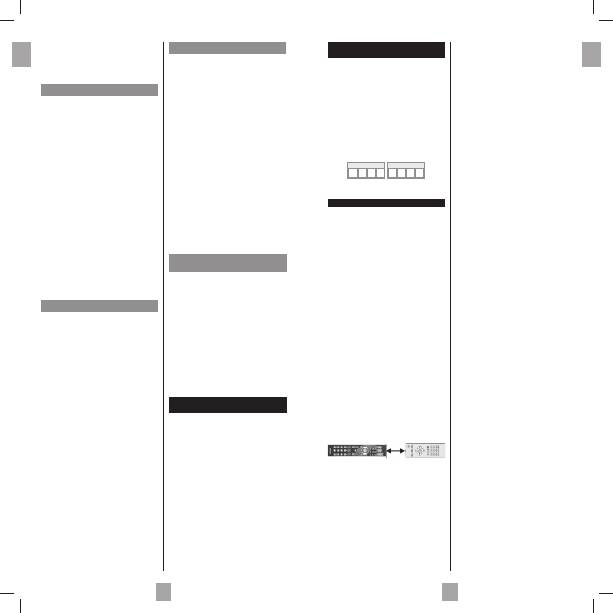
• Lay out the original remote control and your
ROC2411
end to end so as to align the LED
diodes on the 2 remote controls. Where necessary
adjust the height of both remote controls so that the
LED diodes are properly aligned.
• Place the remote controls with the infrared diodes
on a table so that they point each other at a
distance between 15 and 50 mm.
• Do not move the remote controls during the
learning procedure.
• Ensure that the room is not lit by fl uorescents tubes
or low consumption lamps since such light sources
can interfere with the copying.
• The 2 remote controls must be at least one metre
away from any light source.
• Avoid
copying
VOL
and keys codes and the play
keys since depending on the remote controls the
codes of these keys do not necessarily control the
same devices.
• When the memory of your
ROC2411
is full,
the mode key will blink for 3 seconds. It is then
not possible to copy any more codes without fi rst
carrying out a global delete.
• When you copy a key, it is possible that the mode
key will blink feebly. In this case, do not release the
key and wait until the blinking stops.
Note 1: if the learning procedure does not seem to
work correctly, try the following:
1. End the learning procedure by pressing
SETUP
.
2. Check that the LEDs of the two remote controls
are properly aligned. Carry out the alignment
procedure.
3. Modify the distance between the remote controls, in-
creasing or reducing the distance from 1.5 cm to 5 cm.
4. Restart the procedure from the beginning.
5. If the problem persists and always with the same
key, check that the original remote control is
actually operating: is it sending IR signals? (check
batteries; is it correctly aligned in relation to the
diode on your
ROC2411
?)
Note 2:
• You cannot copy keys to the
LEARN SETUP
and
MODE
keys.
• All the keys copied to a mode will be deleted if a 4
fi gure code is entered for this mode (and likewise
for direct entry of a code, search of a code or
make).
Identifying the position of the diode on the
original remote control (keys to copy)
If the Infrared LED of the original remote control is not
visible (for example, if hidden behind a dark plastic
plate), the instructions below will help you to locate
it precisely.
1. Place the front of the original remote control (the
part you point at the device to control) around
2.5 cm from the LED of your ROC2411 (see
LEARNING diagram above).
2. Hold down the
SETUP
key until the indicator lamp
remains lit.
3. Release the
SETUP
key.
4. Press once on a mode key (
TV
,
DVD
, …). The
indicator lamp goes out and then relights.
5. Press once on the
LEARN
key.
6. Hold down one of the keys on the original remote
control while moving the remote control from left
to right. As soon as the 2 remote controls are
correctly aligned, the indicator lamp blinks rapidly.
7. To copy the key functions from your original
remote control into your
ROC2411
, go to step 5
of “To copy keys”.
Note: Some original remote controls don’t transmit
continuous IR signals when a key is held down. If this is
the case, press several times on one of the keys while
moving the remote control from left to right.
To copy keys
1. Hold down the
SETUP
key until the indicator lamp
remains lit.
2. Release the
SETUP
key.
3. Press once on the mode key (
TV
,
DVD
, ...).The
indicator lamp goes out then relights.
4. Press the
LEARN
key once.
5. Press once on the key of your
ROC2411
to which
you want to copy one of the keys of your original
remote control.
6. Hold down the key of the original remote control
you wish to copy until the indicator lamp goes
out and then relights (2 to 3 seconds). In case
of problems, the indicator lamp will blink for 3
seconds but will remain in learning mode. Try
again or try another key.
7. For the other keys, repeat the procedure from step
5 onwards.
8. Press the
SETUP
key once when all the desired
keys have been copied. The mode key goes off.
To delete all keys copied under a mode
1. Hold down the
SETUP
key until the indicator lamp
remains lit
2. Release the
SETUP
key.
3. Press once on a mode key (
TV
,
DVD
,
SAT
,...).
The indicator lamp goes out then relights.
4. Press twice on the
LEARN
. key. The indicator lamp
goes out then relights.
5. Press once on the
SETUP
key. The indicator lamp
goes out. All the keys copied under this mode are
deleted.
SAT/STB CODE
TV CODE
Method B – 4-digit codes
programming
Before you start programming, you must fi nd the code
of the set to be controlled.
Refer to the list provided with these instructions, page
II of the codes.
1. Switch on the set you want to control.
2. Hold down the
SETUP
key until the indicator lamp
blinks and then remains lit (the indicator light
remains on for a few seconds to give you the time
to proceed with the following steps. The indicator
lamp fl ashes to signal that this time is almost up,
and then goes off).
3. Press the key that corresponds to the type of
equipment you want to control:
TV
: television set,
DVD
: DVD player, ,
SAT/STB
:
satellite receiver, cable, DVBT, ADSL.
4. While the indicator is lit, enter the fi rst digit of the
4-digit code proposed for the set to be controlled
(example: 0166 for a Thomson TV).
5. Direct the remote control towards the set and try to
switch it off by pressing the key
G
.
6. Should the set not switch off, repeat step 2. Then
type in the next 4-digit code. Try to switch off the
set by pressing key
G
once. Repeat this procedure
by trying out each of the 4-digit codes.
Check of the programming:
In principle, your set is ready for receiving the remote
control commands. Check your remote control for
proper functioning by performing the test described
on page
3
.
your set, jot it down so that you can use it
whenever needed.
After battery replacement, you may have to
programme the remote control again.
Check of the programming:
In principle, your set is ready for receiving the remote
control commands. Check your remote control for
proper functioning by performing the test described
on page
3
.

4
5
GB
Replacing the batteries
Replacing the batteries in the remote control
and in the base
Remote Control:
Use 2 AAA 1.5Volt batteries
1. Open the cover on the back of the remote control by
pushing down on the tab and lifting the cover off.
2. Check the +/– polarity on the batteries and inside
the compartment.
3. Insert the batteries.
4. Press the battery cover back into place.
When exchanging the batteries, it may be necessary to
reprogram the unit. Hence it is advisable to record the
codes needed for your devices.
Other functions
Placing all devices on standby
Press the
G
key twice in less than one second, keeping
it held down the second time. All the devices go on
standby one after the other (the devices which were
already on Standby may turn on).
Adjustment of ALL volume controls under a
specifi c mode
In its delivered state, the
ROC2411
is programmed
such that all modes will use their own Volume and
Mute functions if present.
You can allocate the volume control to one of the
modes of the remote control on condition that the
volume control exists on the corresponding device
(e.g. control of TV sound in TV mode, DVD mode,
Mode, etc.).
1. Hold the
SETUP
key down until the indicator lamp
blinks and then remains lit.
2. Release the
SETUP
key
3. Press the
H
key until the indicator lamp blinks
once.
4. Press once on the mode key (
TV
,
DVD
, …)
corresponding to the device whose volume will
always be controlled by the
VOL
and
H
keys.
5. Press the
H
key once. The indicator lamp goes off.
6. All other mode will now punch-through to your
chosen mode for Volume and Mute control.
Adjustment of the volume controls for EACH
mode.
You can decide that the volume control is functional
for each mode selected on condition that the volume
control exists on the corresponding device (e.g. control
of the television set sound in TV mode, the control of
the sound of the SAT receiver in SAT/STB mode, …).
1. Hold the
SETUP
key down until the indicator lamp
blinks and then remains lit.
2. Release the
SETUP
key
3. Press the
H
key until the indicator lamp blinks
once.
4. Press once on the mode key (
TV
,
DVD
, …)
corresponding to the device whose volume will
always be controlled by the
VOL
and
H
keys.
5. Press the
VOL-
key once.
6. Press the
H
key once. The indicator lamp goes off.
7. The chosen mode key will now use its own Volume
and Mute functions
Restoring the universal Volume/Mute
functions
If you have changed the universal volume and mute
functions, as described in the previous two sections,
you can reset the functions back to the factory settings:
1. Hold the
SETUP
key down until the indicator lamp
blinks and then remains lit.
2. Release the
SETUP
key
3. Press the
H
key until the indicator lamp blinks
once.
4. Press and release the
H
key. The indicator lamp
will go off completely. The volume and mute
functions are now restored to their factory defaults.
F
Description des touches
Essai de la télécommande sans
l’avoir programmée
1. Mettez en marche l’appareil que vous souhaitez
commander.
2. Appuyez sur la touche correspondant au type
d’appareil à commander :
TV
: Téléviseur,
DVD
: Lecteur DVD,
SAB
: Satellite, Câble,
Adaptateur TNT, boîtier ADSL, …
3. Dirigez la télécommande vers l’appareil à
commander et essayez de l’éteindre avec la
touche
G
. Si l’appareil ne s’éteint pas, vous devrez
programmer la télécommande en suivant une des
méthodes
A
,
B
,
C
ou
D
décrites ci-après.
Note 1: Exceptée la touche TV, chaque touche de
mode (DVD, SAT) est programmable pour commander
un appareil autre que celui indiqué sur la touche. Il
est donc possible d'attribuer, par exemple, le mode
SAT à la touche DVD. Vous devrez entrer le code
correspondant à la marque et à l'appareil désiré en
suivant une des méthodes indiquées dans ce manuel.
Cependant, la méthode D (recherche automatique d'un
code) vous simplifi era la tâche. Il vous suffi ra d'entrer
n'importe quel code de la liste correspondant au
type d'appareil (ex : 0603 pour un récepteur satellite
Thomson) puis de lancer la procédure de recherche
automatique. La télécommande testera ainsi tous les
codes jusqu'à trouver celui qui fera réagir le récepteur.
Note 2: Pour commander 2 appareils de mêmes types
et de mêmes marques (2 magnétoscopes Thomson,
2 récepteurs satellite Thomson, ...) assurez vous au
préalable, que ces deux appareils sont déjà paramétrés
pour ne réagir qu'à un sous code pour l'un et à un autre
sous code pour l'autre (code A et B pour les appareils
Thomson). Programmez ensuite et successivement 2
touches de mode en utilisant la méthode D.
Programmation
de la télécommande
Méthode A - Programmation rapide
avec un sous-code à 1 chiffre
Avant de commencer la programmation, recherchez
le sous-code de l’appareil que vous souhaitez
commander. L'entrée d'un sous-code permet à la
télécommande de tester une liste prédéfi nie de codes.
Reportez-vous à la liste jointe à cette notice, page I des
sous-codes
.
1. Mettez en marche l’appareil que vous souhaitez
commander.
2. Maintenez appuyée la touche
SETUP
jusqu'à ce que
le voyant clignote puis reste allumé (le voyant restera
allumé quelques secondes pour vous laissez le temps
de procéder AMP étapes suivantes. Le clignotement
du voyant indique la fi n du temps disponible, puis il
s’éteint).
3. Appuyez sur la touche correspondant au type
d’appareil à commander :
TV
: Téléviseur,
DVD
: Lecteur DVD,
SAB
: Satellite, Câble,
Adaptateur TNT, boîtier ADSL, …
4. Pendant que le voyant est allumé, tapez le sous-code
(ex : 1 pour Thomson).
5. Dirigez la télécommande vers l’appareil et essayez
de l’éteindre en appuyant une fois sur la touche
G
.
6. Si l’appareil à commander s’éteint, appuyez sur
OK
pour mémoriser le code.
7. Si l’appareil ne s’éteint pas, appuyez de nouveau
sur la touche
G
, plusieurs fois jusqu’à ce que
l’appareil s’éteigne. Entre deux appuis, laissez le
temps au voyant de s’éteindre puis de se rallumer
(environ 1 seconde). Ceci vous permet de vous
rendre compte de la réaction de l’appareil.
1 Mode
keys
:
Pour la sélection de l’appareil à commander (TV, DVD, etc.).
2
: Marche/Veille ou Veille uniquement, en fonction des appareils utilisés.
3 Learn
: Cette touche est utilisée pour la procédure d’apprentissage des codes (copie de touches) (voir page 7).
4 Macro
: Sélection de macros (voir page 8).
5
:
Télétexte
activé.
:
Télétexte
fi gé.
:
Télétexte
mixte.
:
Télétexte
désactivé.
6 Setup
: Cette touche vous permet de programmer votre télécommande avant la première utilisation. Elle vous
permet également d’accéder AMP fonctions secondaires de certains appareils A/V (Shift). Appuyez
brièvement sur la touche « Setup », suivie de la touche de fonction désirée.
7 i
: Affi che les informations de l’appareil sélectionné.
8 P<P
: Canal
précédent.
9 Wide
: Pour
modifi er la taille de l’image (4/3, 16/9, etc...).
10 Coloured keys
: Pour la sélection de rubriques lorsque le télétexte est activé, ainsi que de fonctions
spécifi ques en fonction de la marque.
11 / / /
: Pour naviguer horizontalement et verticalement dans les menus.
OK
:
Pour
confi rmer votre sélection.
12 Exit
: Pour désactiver le menu du produit sélectionné.
13 Menu
: Pour activer le menu du produit sélectionné.
14 CH /CH
: Chaîne suivante et chaîne précédente.
15 Guide
: Guide électronique des programmes.
16
(Mute)
: Coupe le son de l’appareil sélectionné.
17 Vol+/Vol-
: Augmente (+) ou diminue (-) le volume de l’appareil sélectionné.
18
(Play)
: Lecture (DVD, etc.).
(FF)
: Avance rapide (DVD, etc.).
(RW)
: Retour (DVD, etc.).
(Pause)
: Interrompt la lecture avec arrêt sur image.
(Stop)
: Stoppe la lecture (DVD, etc.).
(Record)
: Appuyez deux fois sur cette touche pour démarrer l’enregistrement.
19 Numeric keys 0-9 : Ces touches ont les mêmes fonctions que celles de votre télécommande d’origine et sont
également utilisées pour saisir les codes de différents appareils. Sélection d’une macro (M1, M2, M3)
20 -/--
: Accès AMP chaînes > 9 et sélection radio, en fonction de l’appareil.
21 AV
: Pour la sélection d’une source externe (SCART, HDMI, etc.).
Programming a sequence of commands (Macro)
The
MACRO
key in coordination with one of the keys
1
,
2
, or
3
, allows the programming and memorisation
of up to 3 command sequences (the automatic and
successive pressing of several keys of your choice). Thus
any sequence of key commands can be reduced to
merely 2 commands (
MACRO
key + key
1
,
2
, or
3
).
For example after programming, by pressing
MACRO
then key
1
you could turn on your television set, turn on
your satellite or cable receiver, zap to a preferred
channel, turn on your video cassette recorder and start
a recording session (providing a cassette was
previously loaded). You can memorise a sequence of
10 commands with each key
1
,
2
, or
3
.
Note:
during the programming of a macro, the time
between each step is limited to a few seconds. This
leaves little time for reading the instructions and then
carrying them out. If the mode indicator light blinks
and then goes out, it is because this time limit has
been exceeded, you must start again from step 1.
To record a MACRO
:
1. Press and hold down the
SETUP
key until a (
TV
,
DVD
, …) mode key blinks and remains lit (after 2
or 3 seconds).
2. Release the
SETUP
key.
3. Press the
MACRO
key once. The mode key blinks.
4. Press once the
1
,
2
or
3
key which you are going
to use to memorise the sequence.
5. Press once on the (
TV
,
DVD
, …) mode key of the
first device you wish to control (the first key must
always be a mode key.)
6. Successively press the keys corresponding to the
commands you wish to send to the device(s) (9 keys
maximum, including other mode keys). The mode
key blinks when each key is pressed.
7. Memorise your key sequences by pressing the
MACRO
key once. The mode key is no longer lit
and your Macro is complete.
Note:
a sequence will be automatically memorised
after the tenth key press (counted from the mode key)
and the mode key light will go out.
To use a MACRO
:
Press the
MACRO
key once and, within 20 seconds,
press the
1
,
2
or
3
key you used to memorise the
sequence.
Note:
when running a Macro (which takes a few
seconds), ensure that the remote control is aimed at
the device being controlled.
Remarks
:
• The default time between sending 2 commands when
using a macro is half a second.. However, it is
possible that you will need to add longer periods in
your sequence in order to allow enough time for
certain devices to turn themselves on. To lengthen the
time period between 2 commands, press once on the
K
key and then press one of the keys from
1
to
9
in
order to insert a pause from 1 to 9 seconds.
• The first key in a sequence must always be a mode
key (
TV
,
DVD
, …).
Note:
the indications
TV
,
DVD
,
STB
(below keys
1
,
2
,
3
) are only an aid to memory. You may decide, for
example, to memorise a
MACRO
for the television
set using key
1
, etc.
Deleting a MACRO
:
1. Press and hold down the
SETUP
key until the (
TV
,
DVD
…) mode key blinks and then remains lit (after
2 or 3 seconds).
2. Release the
SETUP
key.
3. Press once on the
MACRO
key. The mode key
begins to blink.
4. Press once the
1
,
2
or
3
key that represents the
sequence to delete.
5. Press and hold down the
SETUP
key. The mode key
light goes out and the sequence is now deleted.
B
Cette télécommande universelle (2 en 1) est compatible avec la plupart des téléviseurs,
lecteurs DVD, magnétoscopes, les amplifi cateurs et les systèmes Hi-Fi et Home Cinéma
ainsi que la plupart des boîtiers numériques tels que les récepteurs satellite ou câble, les
récepteurs TNT, les décodeurs ADSL, etc… La télécommande a été programmée en usine
pour vous permettre de l’utiliser immédiatement avec la plupart des appareils des marques
du groupe Thomson. Nous vous conseillons donc de l’essayer avant de la programmer en
suivant une des méthodes de cette notice. Mais avant tout, vous devez installer 2 piles (AAA)
dans la télécommande. Conservez cette notice et la liste des codes séparée afi n de pouvoir
reprogrammer ultérieurement la télécommande pour commander d’autres appareils.
6
7
F
F
8. Dès que l’appareil à commander s’éteint, appuyez
sur
OK
pour mémoriser le code.
Vérifi cation de la programmation :
Votre appareil est, en principe, prêt à recevoir les
ordres de la télécommande. Vérifi ez le fonctionnement
en procédant au test de la page 7.
Méthode C – Programmation
par recherche de code
Si aucun code ne fonctionne, il est possible de
retrouver le code sans avoir à le taper.
1. Mettez en marche l’appareil que vous souhaitez
commander.
2. Maintenez appuyée la touche
SETUP
jusqu'à ce
que le voyant clignote puis reste allumé (le voyant
restera allumé quelques secondes pour vous laissez
le temps de procéder AMP étapes suivantes. Le
clignotement du voyant indique la fi n du temps
disponible, puis il s’éteint).
3. Appuyez sur la touche correspondant au type
d’appareil à commander :
TV
: Téléviseur,
DVD
: Lecteur DVD,
SAB
: Satellite, Câble,
Adaptateur TNT, boîtier ADSL, …
4. Dirigez la télécommande vers l’appareil et essayez
de l’éteindre en appuyant une fois sur la touche
G
.
5. Si l’appareil à commander s’éteint, appuyez sur
OK
pour mémoriser le code.
6. Si l’appareil ne s’éteint pas, appuyez de nouveau
sur la touche
G
, autant de fois que nécessaire
(jusqu’à 200 fois) jusqu’à ce que l’appareil
s’éteigne. Entre deux appuis, laissez le temps au
voyant de s’éteindre puis de se rallumer (environ 1
seconde). Ceci vous permet de vous rendre compte
de la réaction de l’appareil.
7. Dès que l’appareil à commander s’éteint, appuyez
sur
OK
pour mémoriser le code.
Vérifi cation de la programmation :
Votre appareil est, en principe, prêt à recevoir les
ordres de la télécommande. Vérifi ez le fonctionnement
en procédant au test de la page
7
. Essayez d’autres
touches de la télécommande pour connaître l’étendue
des fonctions que votre télécommande peut commander.
Si vous pensez que toutes les touches ne sont pas
actives, renouvelez la procédure de cette méthode de
programmation afi n de trouver un code couvrant plus
de fonctions.
Méthode D – Recherche
automatique d’un code
Dans le cadre de cette méthode, la télécommande
déroule la liste complète des codes en envoyant un
signal IR à l’appareil à télécommander. Procédez ainsi :
1. Mettez en marche l’appareil que vous souhaitez
commander.
2. Maintenez appuyée la touche
SETUP
jusqu'à ce
que le voyant clignote puis reste allumé (le voyant
restera allumé quelques secondes pour vous laissez
le temps de procéder AMP étapes suivantes. Le
clignotement du voyant indique la fi n du temps
disponible, puis il s’éteint).
3. Relâchez la touche
SETUP
4. Appuyez sur la touche de l’équipement souhaité
(par exemple TV).
5. Appuyez une seule fois sur la touche
PROG
+
ou
G
ou
B
(
DVD
seulement). Après quelques
secondes la télécommande commence à dérouler
toute la liste de codes inclus dans la bibliothèque
(environ 1 code par seconde). Appuyer une
deuxième fois sur
PROG
+ pour réduire la vitesse
de test (1 code toutes les 3 secondes). Dès que
l’appareil change de chaîne, vous devez appuyer
immédiatement sur
OK
pour enregistrer le code et
stopper le déroulement de la liste. Si vous n’avez
pas réagi assez vite, vous avez la possibilité
de revenir au code précédent en appuyant sur
PROG
- ou
E
((
DVD
seulement) autant de fois que
nécessaire (vous pouvez réavancer en appuyant
sur
G
,
P+
ou
B
(
DVD
seulement) si vous êtes
allés trop en arrière). Dès que l’appareil répond
à nouveau, appuyez sur
OK
pour enregistrer le
code.
Méthode E - Programmation pour com-
mander un COMBO (combiné TV/TV/DVD,
DVD, …)
Selon la famille de combo (TV/DVD,…) et la marque,
vous serez amené à entrer un seul code pour les deux
appareils réunis dans le combo ou à entrer deux
codes, un code par appareil. Reportez-vous à la liste
séparée pour le savoir.
Avant de commencer la programmation, recherchez le
sous-code ou le code de l’appareil que vous souhaitez
commander (ex. : téléviseur puis magnétoscope ou
COMBO TV/VCR). Reportez-vous à la liste jointe à
cette notice, page des sous-codes ou page des codes.
1. Mettez en marche le COMBO que vous souhaitez
commander.
2. Maintenez appuyée la touche
SETUP
jusqu'à ce
que le voyant clignote puis reste allumé.
3. Appuyez sur la touche du premier appareil
à commander, puis suivez une des méthodes
de programmation A, B, C ou D décrites
précédemment.
4. Si un deuxième code est nécessaire, répétez les
étapes 2 et 3 ci-dessus.
Comment retrouver
un code programmé
Il peut être utile de retrouver le code programmé dans
la télécommande.
1. Maintenez appuyée la touche
SETUP
jusqu'à ce
que le voyant clignote puis reste allumé.
2. Appuyez sur la touche correspondant au type
d’appareil à commander :
TV
: Téléviseur,
DVD
: Lecteur DVD,
SAB
: Satellite, Câble,
Adaptateur TNT, boîtier ADSL, …
3. Appuyez à nouveau brièvement sur la touche
SETUP
, le voyant clignote 1 fois.
4. Appuyez sur les touches numériques dans l'ordre
croissant (0 à 9) jusqu'à ce que le voyant clignote
une fois.
5. Le chiffre qui a fait clignoter le voyant est le
premier des quatre chiffres composant votre code,
notez-le.
6. Répétez l'étape 4 pour retrouver les autres chiffres
du code.
7. Lorsque le quatrième chiffre est trouvé, le voyant
s’éteint.
Méthode B – Programmation
avec des codes à 4 chiffres
Avant de commencer la programmation, recherchez le
code de l’appareil que vous souhaitez commander.
Reportez-vous à la liste jointe à cette notice, page II
des codes.
1. Mettez en marche l’appareil que vous souhaitez
commander.
2. Maintenez appuyée la touche
SETUP
jusqu'à ce
que le voyant clignote puis reste allumé (le voyant
restera allumé quelques secondes pour vous laissez
le temps de procéder AMP étapes suivantes. Le
clignotement du voyant indique la fi n du temps
disponible, puis il s’éteint).
3. Appuyez sur la touche correspondant au type
d’appareil à commander :
TV
: Téléviseur,
DVD
: Lecteur DVD,
SAB
: Satellite, Câble,
Adaptateur TNT, boîtier ADSL, …
4. Pendant que le voyant est allumé, tapez un des
codes à 4 chiffres proposés pour la marque de
l’appareil à commander (ex : 0166 pour Thomson).
5. Dirigez la télécommande vers l’appareil et essayez
de l’éteindre en appuyant une fois sur la touche
G
.
6. Si l’appareil ne s’éteint pas, répétez l’étape 2.
Tapez ensuite, le code à 4 chiffres suivant. Essayez
d’éteindre l’appareil en appuyant une fois sur
la touche
G
. Renouveler l’opération en essayant
chacun des codes à 4 chiffres.
Vérifi cation de la programmation :
Votre appareil est, en principe, prêt à recevoir les
ordres de la télécommande.Vérifi ez le fonctionnement
en procédant au test de la page
7
.
Vérifi cation
de la programmation
- Pour un téléviseur ou un récepteur satellite :
allumez l’appareil et appuyez, par exemple, sur 2
pour changer de chaîne.
- Pour un magnétoscope: insérez une cassette puis
appuyez sur
B
.
- Pour un lecteur DVD: insérez un disque puis
appuyez sur
B
.
Essayez d’autres touches de la télécommande
pour connaître l’étendue des fonctions que votre
télécommande peut commander. Si vous pensez que
toutes les touches ne sont pas actives, essayez une
autre méthode de programmation,
Méthode
B
ou
C
.
Lorsque vous aurez trouvé le code de votre
appareil, notez-le afi n de vous y reporter
facilement en cas de besoin. Lorsque vous
changerez les piles, vous pourrez être
amené à reprogrammer la télécommande.
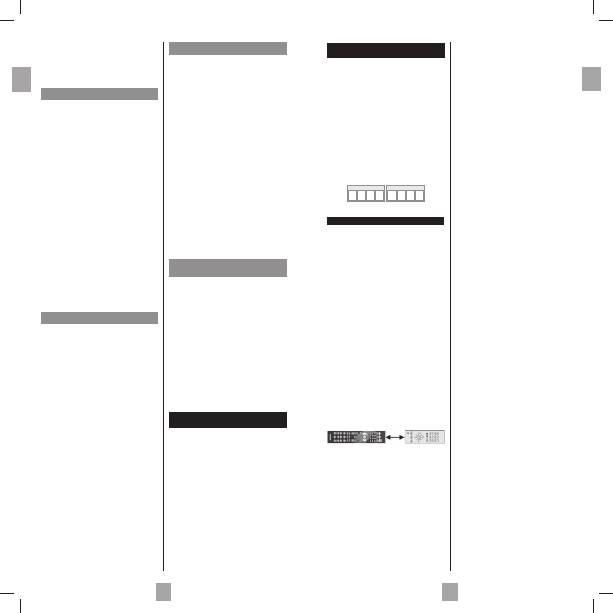
CODE SAT/STB
CODE TV
Fonction d’apprentissage (learning)
Si la marque de l’appareil à commander ne fi gure pas
dans la liste des codes livrée séparément ou si quelques
fonctions manquent, vous pouvez copier dans votre
ROC2411
les fonctions des touches de la télécomman-
ded’origine de cet appareil. Selon le format des codes
de transmission de la télécommande d’origine, votre
télécommande pourra mémoriser jusqu’à 150 touches.
Effacement général – Efface toutes les touches
copiées (recommandé la première fois)
1. Maintenez appuyée la touche
SETUP
jusqu'à ce
que le voyant clignote puis reste allumé.
2. Relâchez la touche
SETUP
.
3. Appuyez deux fois sur la touche
LEARN
. Le
voyant s’éteint puis se rallume.
4. Appuyez une fois sur la touche
SETUP
. Le voyant
s’éteint après quelques secondes.
5. Toutes les touches copiées sont effacées.
Avant de commencer
• Les piles des 2 télécommandes doivent être en bon
état ; éventuellement changez-les.
• Copiez au préalable 2 à 3 touches de la
télécommande d’origine afi n de vérifi er la
compatibilité des codes des deux télécommandes.
Procédez ensuite à une remise à zéro avant de
commencer la procédure d’apprentissage.
• Disposez la télécommande d’origine et votre
ROC2411
bout à bout de façon à aligner les
diodes LED des 2 télécommandes. Eventuellement
ajustez la hauteur des 2 télécommandes pour que
les diodes LED soient bien alignées.
• Vérifi ez que l’écartement entre les 2
télécommandes soit compris entre 15et 50mm.
• Ne déplacez pas les télécommandes pendant la
procédure d’apprentissage.
• Assurez-vous que l’éclairage de la pièce ne soit pas
produit par des tubes fl uorescents ou par une lampe à
basse consommation car ces sources lumineuses peuvent
provoquer des interférences et perturber la copie.
• Les 2 télécommandes doivent être à plus d’un mètre
de toute source lumineuse.
• Evitez de copier les codes des touches
VOL
et et
aussi ceux des touches de défi lement car selon
les télécommandes les codes de ces touches ne
commandent pas nécessairement les mêmes appareils.
• Lorsque la mémoire de votre
ROC2411
sera
pleine, la touche de mode clignotera pendant 3
secondes. Il ne sera alors plus possible de copier
d’autres codes sans effectuer une remise à zéro.
• Lorsque vous copiez une touche, il est possible que
la touche de mode clignote faiblement. Dans ce
cas ne relâchez pas la touche et attendez que le
clignotement cesse.
Note 1 : si la procédure d’apprentissage semble ne
pas se dérouler correctement, essayez ceci :
1. Terminez la procédure d’apprentissage en
appuyant sur
SETUP
.
2. Vérifi ez que les LED des deux télécommandes soient
bien alignées. Utilisez la procédure d’alignement.
3 Modifi ez l’écartement des télécommandes en
augmentant ou diminuant la distance de 1,5 cm à 5 cm.
4. Reprenez la procédure au début.
5. Si le problème persiste avec la même touche,
vérifi ez si la télécommande d’origine fonctionne :
transmet-elle les signAMP IR ? (voir piles) ; est-elle
correctement placée par rapport à la diode de
votre
ROC2411
?
Note 2 :
• Vous ne pouvez pas copier des touches sous les
touches
LEARN, SETUP
et les touches de
MODE
.
• Toutes les touches copiées pour un mode sont
effacées si un code à 4 chiffres est entré sous ce
mode (et aussi pour l’entrée directe d’un code, la
recherche de code ou de marque).
Identifi cation de la position de la diode sur
la télécommande originale (à copier)
Si la LED de la télécommande d’origine n’est pas
visible (cachée par exemple par un cache en plastique
de couleur foncée), les instructions ci-dessous vous
aideront à la localiser.
1. Placez l’avant de télécommande originale (la partie
que, d’habitude, vous dirigez vers l’appareil à
commander) à environ 2,5 cm de la LED de votre
ROC2411
(reportez-vous au schéma ci-dessus).
2. Maintenez appuyée la touche
SETUP
jusqu'à ce
que le voyant reste allumé.
3. Relâchez la touche
SETUP
.
4. Appuyez une fois sur une touche de mode (
TV,
DVD, SAT/CABLE, AUDIO
). Le voyant s’éteint
puis se rallume.
5. Appuyez une fois sur la touche
LEARN
.
6. Maintenez appuyée une des touches de la
télécommande originale tout en la déplaçant
vers la droite puis vers la gauche. Dès que les
2 télécommandes sont correctement alignées, le
voyant clignote rapidement.
7. Pour copier des touches de votre télécommande
originale dans votre
ROC2411
, continuez à
l’étape 5 du paragraphe «Pour copier les touches ».
Note : Certaines télécommandes originales ne
transmettent pas les signAMP IR de façon continue
lorsqu’une touche est pressée. Dans ce cas appuyez
plusieurs fois sur une des touches tout en déplaçant la
télécommande vers la droite et vers la gauche.
Pour copier des touches
1. Maintenez appuyée la touche
SETUP
jusqu'à ce
que le voyant reste allumé.
2. Relâchez la touche
SETUP
.
3. Appuyez une fois sur une touche de mode (TV,
DVD, …). Le voyant s’éteint puis se rallume.
4. Appuyez une fois sur la touche
LEARN
.
5. Appuyez une fois sur la touche de votre
ROC2411
sous laquelle vous souhaitez copier
une des touches de la télécommande originale.
6. Maintenez appuyée la touche de la télécommande
originale à copier jusqu’à ce que le voyant
s’éteigne et se rallume (2 à 3 secondes). En cas
de problème, le voyant clignotera pendant 3
secondes mais la télécommande restera en mode
apprentissage. Essayez à nouveau ou passez à
une autre touche.
7. Pour les autres touches, répétez la procédure à
partir de l’étape 5.
8. Appuyez une fois sur la touche
SETUP
lorsque
toutes les touches souhaitées sont copiées. Le
voyant s’éteint.
Pour effacer toutes les touches copiées sous
un mode
1. Maintenez appuyée la touche
SETUP
jusqu'à ce
que le voyant reste allumée.
2. Relâchez la touche
SETUP
.
3. Appuyez une fois sur une touche de mode (
TV,
DVD,
…). Le voyant s’éteint puis se rallume.
4. Appuyez deux fois sur la touche
LEARN
. Le
voyant s’éteint puis se rallume.
5. Appuyez une fois sur la touche
SETUP
. Le voyante
s’éteint. Toutes les touches copiées sous ce mode
sont effacées.
Оглавление
- Programming a sequence of commands (Macro)
- Programmation d’une séquence de commandes (Macro)
- Programmierung einer Schaltfolge (Macro)
- Programación de una secuencia de instrucciones (Macro)
- Programmazione di una sequenza di comandi (Macro)
- Programação de uma sequência de comandos (Macro)
- Определение запрограммированного кода
- Замена батарей
- Programmering van een reeks commando’s (Macro)
- Odczytywanie zaprogramowanego kodu
- Wymiana baterii
- Jak získat naprogramovaný kód
- Egy vezérléssor (Makro) programozása
- Πώς θα ανακτήσετε έναν προγραμματισμένο κωδικό
- Αντικατάσταση των μπαταριών
- Jak získat naprogramovaný kód
- Výměna baterií
- Ako znova nájsť naprogramovaný kód
- :
- Programlanmış olan bir kod nasıl bulunur
- Akülerin/pillerin değiştirilmesi
- Programmering av kommandosekvens (Makro)
- Komentosarjan ohjelmointi (Macro)
- Cum regăsiţi un cod programat
- Schimbarea bateriilor/acumulatorilor
