LG F2410: Messages
Messages: LG F2410
Messages
Menu-5
This menu includes functions related to SMS (Short
Insert
Message Service), MMS (Multimedia Message
] Symbol: You can add special characters.
Service), voice mail, as well as the network’s service
messages.
] Picture: You can insert the Default graphics or
graphics in My pictures that are available for short
Write text message Menu-5-1
messages.
You can write and edit text message, checking the
] Sound: You can insert sounds that are available for
number of message pages.
short messages.
1. Enter the Messages menu by pressing the left soft
] Text templates: You can use Text templates already
key [Select].
set in the phone.
2. If you want to write a new message, select Write
] Contacts: You can add phone numbers or e-mail
text message.
addresses in the Contacts.
3. To make text input easier, use T9.
] Signature: You can add your signature to the
4. Press [Insert] to attach the followings.
message.
5. If you want to set option for your text, or to finish
Options
your writing, press the left soft key [Options].
] Send: Sends text messages.
n Note The phone which supports EMS release 5 is
1. Enter numbers of recipient.
available to send colour pictures, sounds, text
styles, etc.. The other party may not receive
2. Press key to add more recipients.
pictures, sounds or text styles you sent properly if
the phone does not support such options.
3. Press the left soft key after entering numbers.
48
Messages
All messages will be automatically saved in the
provider. Only the devices that offer compatible
outbox folder, even after a sending failure.
multimedia message or e-mail features can receive
and send multimedia messages.
] Save: Stores messages in Drafts.
You can create a multimedia message up to 10 slides.
] Font: You can select Size and Style of fonts.
(approximately 100 KB)
] Colour: You can select Colour of foreground and
1. After entering the subject of the message, press the
background.
OK key.
] Alignment: You can make the message contents
2. Key in the text message. Using the right soft key
aligned Left, Center or Right.
[Insert], you can insert a symbol, a photo, a picture,
] Add T9 dictionary: You can add your own word.
a sound, a voice memo, text templates, phone
This menu can be shown only when edit mode is
numbers stored in the contacts or a signature.
Predictive (T9Abc/T9abc /T9ABC).
3. Press the left soft key [Options]. The following
] T9 languages: Select a T9 input mode.
options are available.
] Exit: If you press Exit while writing a message, you
] Send: You can send the multimedia message to
can end the writing message and back to the
multiple recipients at the same time.
Message menu. The message you have written is
1) Key in the phone number. You can also search the
not saved.
phone number from the recent number list or the
Contacts using the left soft key [Search].
Write multimedia message Menu-5-2
2) Press the right soft key [Settings]. You can set the
A multimedia message can contain text, images,
following options:
and/or sound clips. This feature can be used only if it
is supported by your network operator or service
- Priority: Set the priority of the MMS.
49
Messages
- Validity period: Set the duration for keeping the
] Delete slide: Deletes the current slide.
multimedia messages on the network server.
] Set slide format: You can set the following slide
Possible values are 1 hour, 12 hours, 1 day, 1 week
format.
and the maximum authorized by the network
operator.
- Set timer: Enter the timer in each field using the
numeric keypad.
- Delivery report: Select Yes to activate the report
function. When this function is activated, the
- Swap text and picture: Swaps the text and
network informs you whether or not your message
picture.
has been delivered.
] Remove media (shown when any media exists in
3) Press the left soft key [Send].
the message): You can remove picture, sound or
video in the slide.
] Preview: Select this option to check out the
multimedia message you've created. Each slide is
] Add T9 dictionary: When you didn’t find a desired
sequentially played back automatically. You can
word in the T9 text input mode, you can add a word
also move to another slide from the currently
in the T9 dictionary using this option. After typing a
played slide using the left/right navigation keys.
word, press the left soft key [Save].
To replay the message, press the left soft key
] T9 langauges: Select the T9 language for T9 input
[Replay].
mode. You can also deactivate the T9 input mode by
] Save: Saves the message in drafts or as a template.
selecting T9 off. For further details on the T9 mode,
refer to page 24 through 25.
] Add Slide: Add a slide before or after the current
slide.
] Exit: Exits from the Write multimedia message
menu.
] Move to slide: Select this option to move to another
slide from the current slide.
50
Messages
Write email message Menu-5-3
] Exit: If you select this while writing the message,
you can exit from writing message and go back to
To send/receive an email, you should set up the email
the previous screen. The message you have written
account. Refer to Email on page 59 first.
is not stored.
1. You can input up to 20 email addresses in the To and
4. You can attach files by pressing the right soft key
Cc field.
[Attach].
Tip: To input "@", press the and select "@".
n Note For each e-mail account you may save up to 40
2. Key in the subject of the mail and press OK.
messages (totally 120 for three accounts). In Inbox
folder you may save not more than 20 messages, in
3. After writing an email message, press the left soft
Drafts and Outbox folders - 5 messages, and in Sent
key [Options]. You can access the following option
folder up to 10 messages. In case Drafts Outbox or
Sent folder is full, and you try to save new message
menus.
to one of this folders, first saved message will be
] Send: Sends the email message.
automatically deleted.
n Note Maximum size for one sent message is 300 kb with
] Insert: You can insert text templates, phone
attachments, and maximum size for one received
numbers, symbols and/or the signature.
message is 100 kb.
] Edit recipients: You can edit recipients.
] Edit subject: You can edit the subject.
] Save: Select this to save the message in Drafts.
] T9 languages: Select the language for T9 input
mode. You can also deactivate the T9 input mode by
selecting 'T9 off'.
51
Messages
Inbox Menu-5-4
Each received message has the following options
available. Press the left soft key [Options].
You will be alerted when you have received messages.
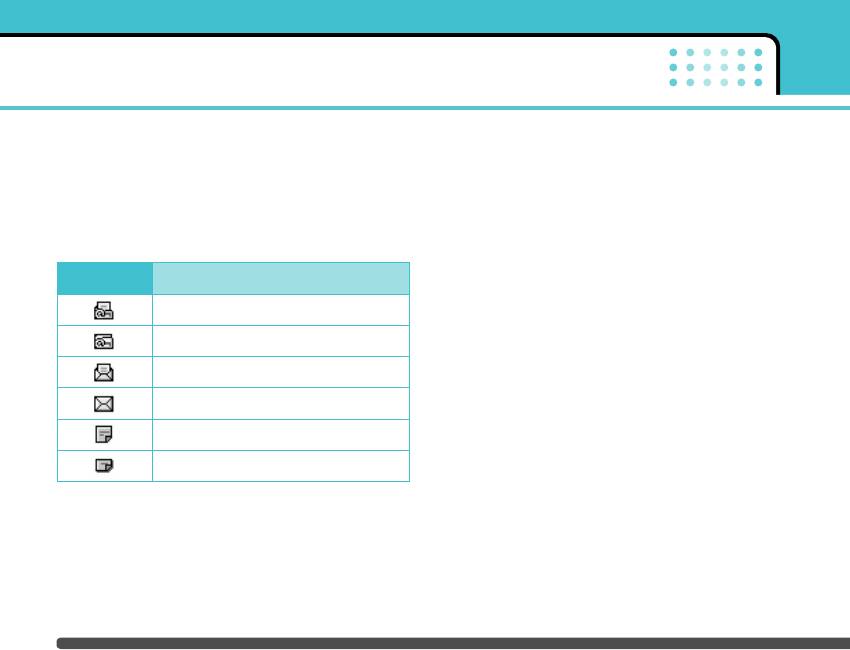
They will be saved in the Inbox. You can identify each
] View: You can view the selected message.
message by icons. For details, see the icon description
] Reply: Replies to the received message.
below.
] Forward: Forwards the received message to other
Icon Description
recipients.
Read SIM message
] Return call: Calls back to the sender.
Unread SIM message
] Extract: Extracts a picture, sound, text web page or
email address from the message. These will be
Read message
saved in My folder, Contacts, or bookmarks.
Unread message
] Delete: Deletes the selected message from the
Inbox.
Read delivery report
] View information: Displays information about the
Unread delivery report
received message.
If the phone has ‘No space for messages’, you can
make space by deleting messages, media and
applications.
n Note SIM message refers the message saved in the SIM
memory. And the network distinguishes an incoming
message into the SIM message or just message.
52
Messages
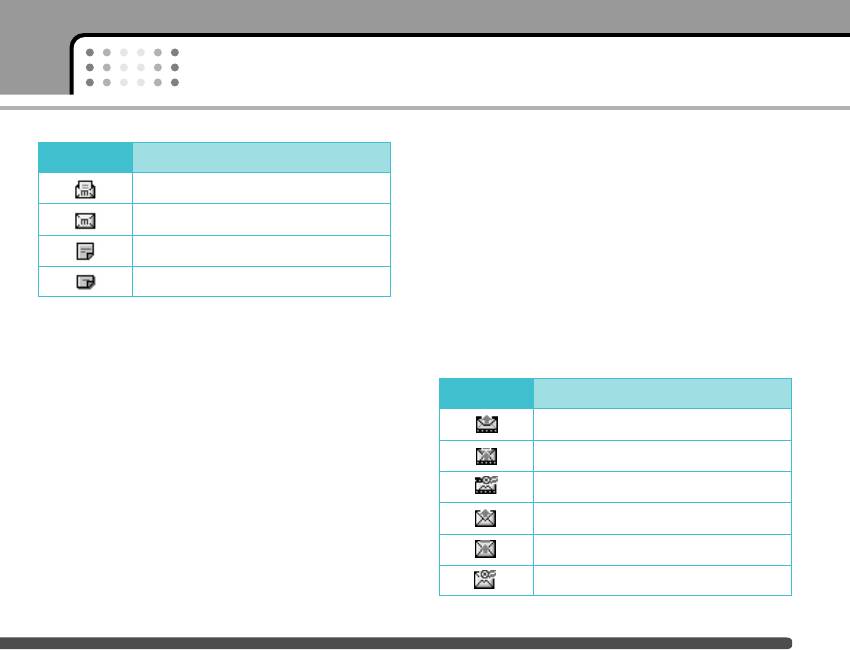
Icon Description
Mailbox Menu-5-5
Read multimedia messages
When you access this menu, you can either connect
to your remote mailbox to retrieve your new e-mail
Unread multimedia messages
messages, or you can view the previously retrieved
e-mail messages without logging in to the e-mail
Read notified multimedia messages
server.
Unread notified multimedia messages
Outbox Menu-5-6
Each received multimedia message has the following
You can view the list and contents of sent messages in
options available. Press the left soft key [Options].
this menu and can also verify if the transmission was
• Reply: Replies to the sender.
successful.
• Forward: Forwards the selected message to other
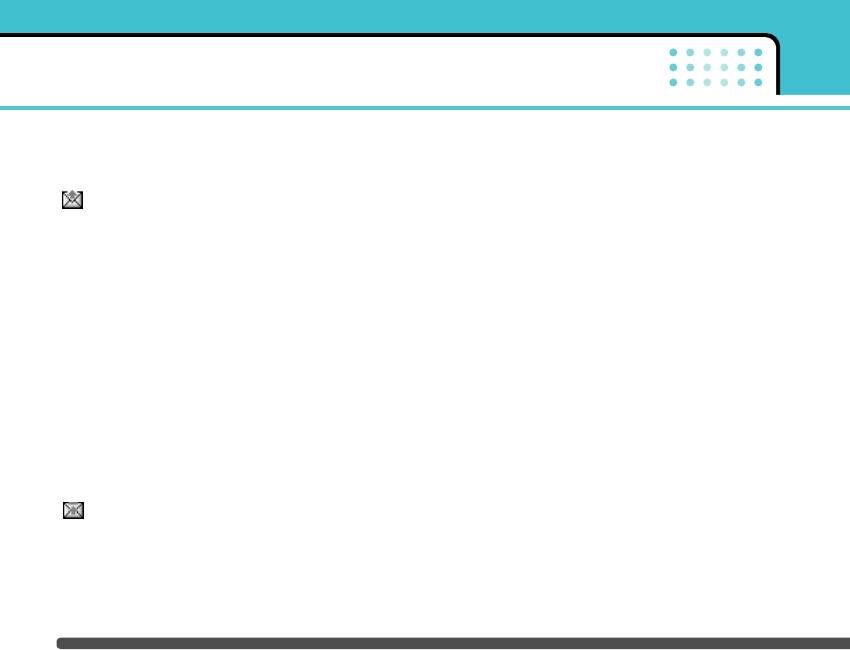
Icon Description
recipients.
MMS sent
• Return call: Calls back to the sender.
MMS unsent
• Delete: Deletes the selected message from the
Inbox.
MMS delivery confirmed
• Extract: Extracts pictures or sounds. They will be
SMS sent
saved in My folder or Contacts.
SMS unsent
• View information: Displays information about
received messages; Sender’s address, Subject (only
SMS delivery confirmed
for Multimedia message), Message date & time,
Message type, Message size.
53
Messages
In each message, the following options are available
] Cancel: Cancels transmitting of the message.
by pressing the left soft key [Options].
] Delete: Cancels transmitting the message and
The messages of which transmission was
deletes the message.
completed has the following options.
] View information: You can view the information of
] View: You can view the selected message.
selected message: subject (only for multimedia
] Forward: You can forward the selected message to
message), the date and time when you sent it,
other recipients.
message type and size, the priority (only for multi-
media message), and recipients.
] Delete: Deletes the selected message from outbox.
] Send all: Sends all the messages of which
] View information: You can view the information of
transmission is in progress again.
selected message: subject (only for multimedia
message), the date and time when you sent it,
] Cancel: Cancels all the message transmission.
message type and size, the priority (only for
] Delete all: Cancels all the message transmission
multimedia message), and recipients.
and deletes all of them.
] Delete all: Deletes all the messages in the outbox
folder.
The messages of which transmission is in
progress has the following options.
] View: You can view the selected message.
] Send: Select this to send it again.
54
Messages
Drafts Menu-5-7
] Delete all: Deletes all the messages from drafts
folder.
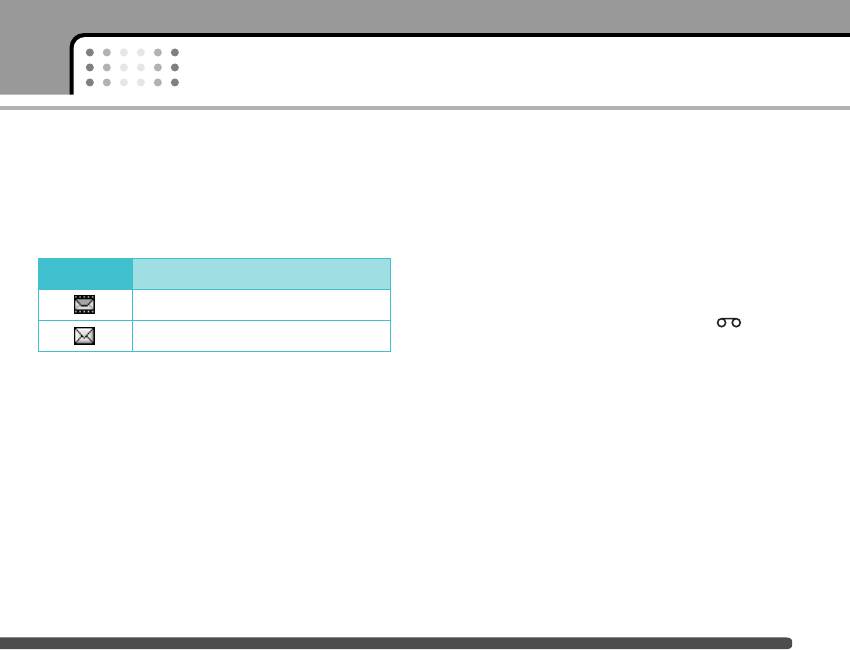
You can view the messages saved as a draft. The draft
messages are listed with the date and time when they
Listen to voice mail Menu-5-8
were saved. Scroll through the list using up/down
navigation keys.
This menu provides you with a quick way of accessing
your voice mailbox (if provided by your network).
Icon Description
Before using this feature, you must enter the voice
server number obtained from your network operator.
Multimedia message
When new voice message is received, the
Text message
symbol will be displayed on the screen. Please check
Each draft has the following options.
with your service operator for details of their service
in order to configure the handset correctly.
Press the left soft key [Options].
] View: You can view the selected message.
] Edit: You can edit the selected message.
] Delete: Deletes the selected message from the
drafts folder.
] View information: You can view the information of
selected message: subject (only for multimedia
message), the date and time when saved, message
type and size and the priority (only for multimedia
message).
55
Messages
Info message Menu-5-9
Templates Menu-5-0
Info service messages are text messages sent by the
After creating some templates (text, multimedia,
network to mobile phone users. They provide general
signature), you can use them by just selecting them
information such as weather reports, traffic news,
when you send messages.
taxis, pharmacies, and stock prices. Each type of
information is associated with a number, which can be
Text templates
Menu-5-0-1
obtained from the network operator. When you
The followings are pre-defined text templates.
receive an info service message, a popup message
will indicate a new message receipt or the info
• Please call me back.
service message will be displayed directly.
• I’m late. I will be there at...
The following options are available when viewing info
• Where are you now?
service messages.
• I’m on the way.
Read
Menu-5-9-1
• Top urgent. Please contact.
When you have received broadcast messages and
• I love you.
select Read to view the message, it will be displayed
on the screen.
The following options are available.
Topics
Menu-5-9-2
] View: Select this to view the selected template.
] Edit: Use this to edit the selected template.
To create new topics, press the left soft key [Option]
then select Add new. If you already have topics, you
can deactivate, edit, or delete them by using the left
soft key [Options].
56
Messages
] Write messages
] Write messages: You can write a multimedia
message with the multimedia template.
- Write text message: Use this to send the selected
template message by SMS.
] Delete: Deletes the selected template message
from the multimedia template list.
- Write multimedia message: Use this to send the
selected template message by MMS.
] Delete all: Clears the multimedia template list.
] Add new: Use this to create a new template.
Signature
Menu-5-0-3
] Delete: Deletes the selected template from the text
1. Press the left soft key [Edit].
template list.
2. After keying in the name, press the left soft key [OK].
] Delete all: Deletes all templates.
3. Key in the mobile phone number, home number,
Multimedia templates
Menu-5-0-2
office number, fax number, and E-mail address.
You can create a multimedia template after pressing
4. Press the left soft key [Save].
the left soft key [Add new]. And the multimedia
After creating the signature template, you can access
templates you saved as a template while creating a
the following menus by pressing the left soft key
multimedia message in the Write multimedia message
[Options].
(See page 49).
] Edit: Use this to edit the signature.
] View: You can view the multimedia template.
] Write messages: You can send your business card
] Edit: You can edit the multimedia template.
via SMS, MMS or Bluetooth.
] Add new: Allows you to add a new multimedia
] Receive: You can receive other business cards via
template.
Bluetooth.
57
Messages
] Exchange: You can exchange your business card
] Reply via same service centre: Allows the recipient
and others' business cards ia Bluetooth.
of your SMS message to send you a reply via your
message centre, if the service is provided by the
] Delete: Use this to delete the signature.
network.
Settings Menu-5-
] SMS centre: Saves or changes the number of your
SMS centre when sending text messages. You must
Text message
Menu-5- -1
obtain this number from your service provider.
This menu lets you set up default SMS information.
Multimedia message
Menu-5- -2
] Message types: Set the default message type (Text,
Voice, Fax, Natl. paging, X.400, E-mail, ERMES). The
Via this menu, you can set up the default multimedia
network can convert the messages into the
message information.
selected format.
The following options are available.
] Validity period: Set the length of time for which
] Priority: Set the priority for the multimedia
your text messages will be saved at the SMS
messages you will send.
center while attempts are made to deliver them to
the recipient. Possible values are 1 hour, 12 hours, 1
] Validity period: Set the length of time for which
day, 1 week and the maximum authorised by your
your multimedia messages will be saved in the
network operator.
network server while attempts are made to deliver
them to the recipient. Possible values are 1 hour, 12
] Delivery report: Select whether to activate or
hours, 1 day, 1 week and the maximum authorised
deactivate the report function. When this function
by your network operator.
is activated, the network informs you whether or
not your message has been delivered.
58
Messages
] Delivery report: Select whether to activate or
Menu-5- -3
deactivate the report function. When this function
This menu allows you to edit, delete or add an email
is activated, the network informs you whether or
account.
not your message has been delivered.
] Account
] Auto download:
You can set up to 3 email accounts by selecting
- On: If you select this, messages are downloaded
Add new.
automatically on receipt.
Using the Edit menu, you can set the following
- Off: Requires you to confirm you want to download
values.
the message.
1. User Name: Key in your user name.
- Home network only: If you select this, messages
2. E-mail Address (mandatory): Enter the e-mail
are downloaded automatically on receipt in your
address given to you by your service provider.
home network area. And outside your home
n Note To enter "@", press and select "@" using
service area, it requires you to confirm you to
the navigation keys.
download the message.
3. Incoming server (mandatory): Enter the POP3
] Network settings: If you select the multimedia
address and Port number of the computer that
message server, you can set the URL for multimedia
receives your email.
message server.
4. Incoming ID/PWD: Enter the ID and password for
] Permitted types: Set the permitted type. Possible
connecting to your inbox.
values are Personal, Advertisements and
Information.
59
Messages
5. Outgoing server (mandatory): Enter the SMTP
Voice mail centre
Menu-5- -4
address and Port number of the computer that
sends your email.
You can receive the voicemail if your network service
provider supports this feature. When a new voicemail
6. Outgoing ID/PWD: Enter the ID and password for
is arrived, the symbol will be displayed on the screen.
connecting to your outbox.
Please check with your network service provider for
7. Access point (mandatory): Select the Access
details of their service in order to configure the phone
point from the list.
accordingly.
n Note An access point is the point where your phone
] Home: You can listen to voice mails by selecting
connects to the mobile Internet by way of a
Home.
data call or packet data connection. It can be
provided by the service provider. Contact your
] Roaming: Even when you are in abroad, you can
service provider for more information.
listen to voice mails if roaming service is supported.
8. Options: You can set the following options.
- Leave msgs on server: Select Yes to leave the
messages on the server.
- Insert signature: Select Yes to attach your
signature to your email messages.
] Access Point
You can edit the access points.
60
Messages
Info message
Menu-5- -5
Push messages
Menu-5- -6
] Receive
You can set the option whether you will receive the
message or not.
Yes: If you select this menu, your phone will
receive Info service messages.
No: If you select this menu, your phone will not
receive Info service messages any more.
] Alert
Yes: Your phone will beep when you have received
Info service message numbers.
No: Your phone will not beep even though you have
received info service messages.
] Languages
You can select the language you want by pressing
[On/Off]. Then, the info service message will be
shown in the language that you selected.
61
Оглавление
- é„·‚ÎÂÌËÂ
- ǂ‰ÂÌËÂ
- îÛÌ͈ËË F2410
- èÓ‰„ÓÚӂ͇ Í Ì‡˜‡ÎÛ ‡·ÓÚ˚
- éÒÌÓ‚Ì˚ ÙÛÌ͈ËË
- ëÚÛÍÚÛ‡ ÏÂÌ˛
- Ç˚·Ó ÙÛÌ͈ËÈ Ë ÓÔˆËÈ
- èÓÙËÎË
- Ç˚ÁÓ‚˚
- ÄÍÒÂÒÒÛ‡˚
- 鄇̇ÈÁÂ
- ëÓÓ·˘ÂÌËfl
- ä‡Ï‡
- ç‡ÒÚÓÈÍË
- ë‚ËÒ
- ᇄÛÁÍË
- ÄÍÒÂÒÒÛ‡˚
- íÂıÌ˘ÂÒÍË ı‡‡ÍÚÂËÒÚËÍË
- Table of Contents
- Introduction
- Guidelines for safe and efficient use
- F2410 features
- Getting started
- General functions
- Menu Tree
- Selecting functions and options
- Profiles
- Call register
- Tools
- Organiser
- Messages
- Camera
- Settings
- Service
- Downloads
- Accessories
- Technical Data


