Apple LED Cinema Display: Setting Up Your Display
Setting Up Your Display: Apple LED Cinema Display
Table of contents
- Getting Started
- Setting Up Your Display
- Setting Up Your Computer with the Lid Closed
- Using Your Display Setting Up Sound Input and Output
- Using the Built-in iSight Setting Up Your Apple LED Cinema Display as an Additional Display
- Adjusting the Color and Brightness
- Using the USB Ports and Security Slot Using a VESA Mounting Solution with Your Display
- Care and Safety
- Ergonomics
- Position the display by tilting it up or down to minimize glare and reflections from overhead lights and nearby windows.
- Troubleshooting Your Display
- More Troubleshooting Information Learning More, Service, and Support To learn about Do this
- Specifications
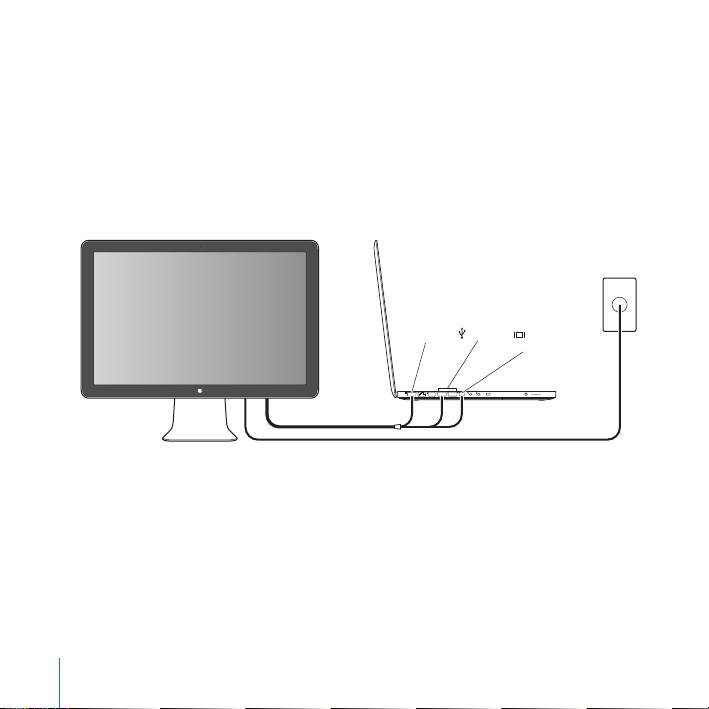
Setting Up Your Display
Follow these steps to set up your Apple LED Cinema Display:
1
Remove the protective film from the display and cables.
2
Insert the power cord into the display, and then insert the AC plug into a grounded
power outlet.
3
Connect the Mini DisplayPort cable to your computer, as shown below.
Apple LED Cinema Display
Mac portable
Power
outlet
MagSafe USB
Mini
DisplayPort
4
Connect the USB cable to your computer to use the display’s built-in iSight camera,
speakers, microphone, and USB ports.
5
Plug the MagSafe connector into the MagSafe power port on your computer to charge
the battery and provide power to your computer.
6
Press the power button on your computer to start it up. The display turns on
automatically when you start up your computer.
8
English
")