Xiaomi Mi Vacuum Cleaner G9: Care & Maintenance
Care & Maintenance: Xiaomi Mi Vacuum Cleaner G9
Care & Maintenance
Maintenance Precautions
Cleaning the Vacuum Cleaner Cleaning the Dust Compartment, Pre-filter, and
Always use genuine parts to keep your warranty from being
Wipe the vacuum cleaner with a soft, dry cloth.
Cyclone Assembly
voided.
If the filter, extension rod, or high torque brush bar becomes
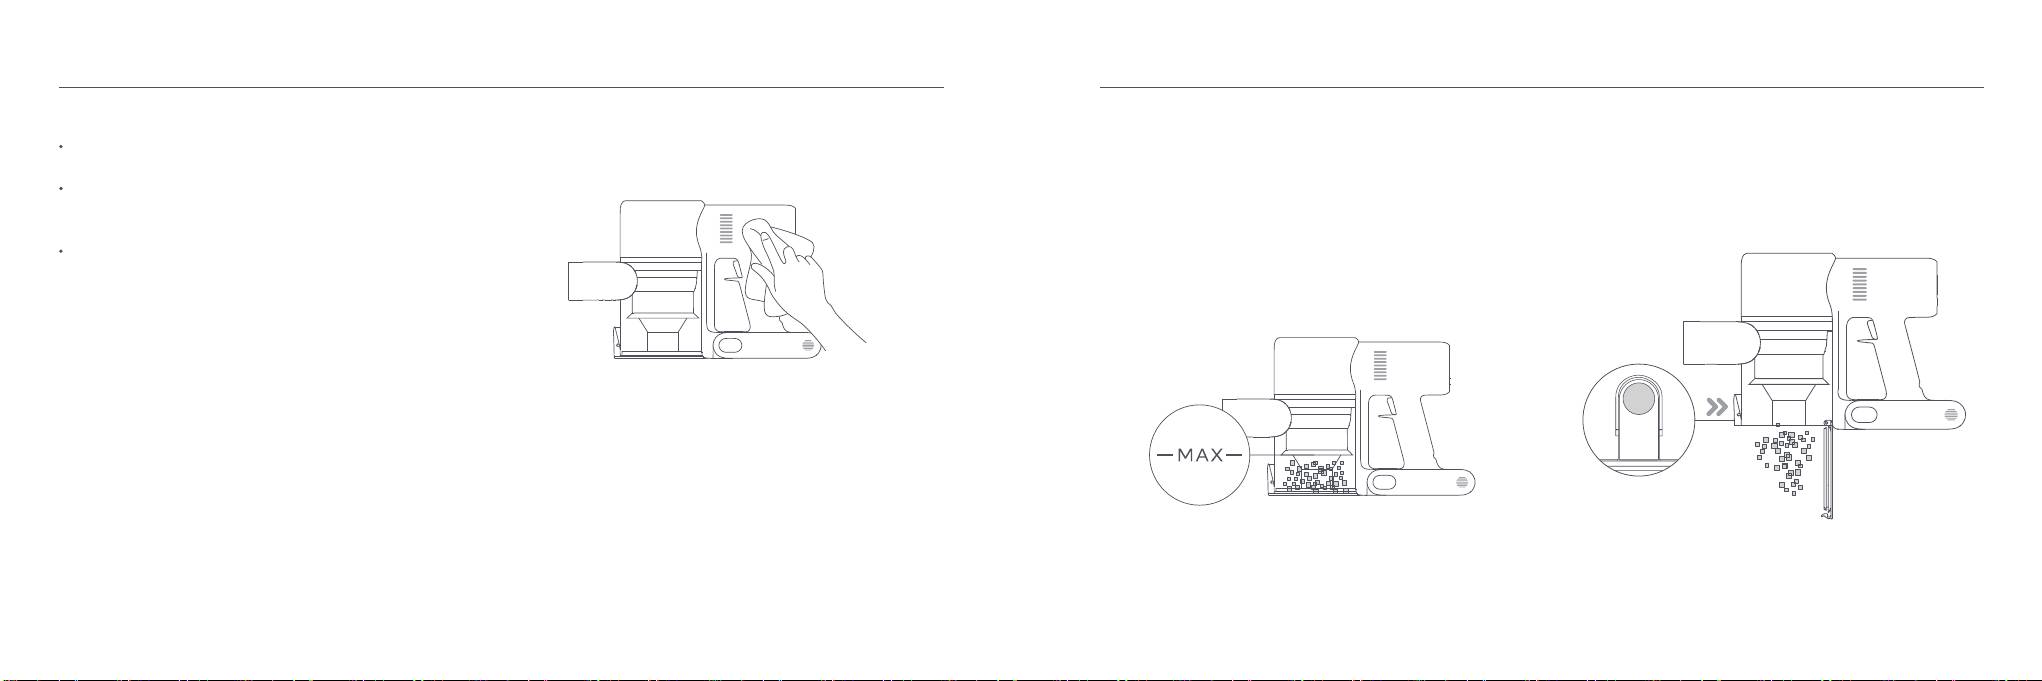
1. The vacuum cleaner's cleaning ability will be reduced if the dust
2. Press the dust compartment bottom cover release button, then
clogged, the vacuum cleaner will stop working shortly. To restore
compartment is filled to the "MAX" mark. To regain performance,
empty the contents.
its functionality, clean the clogged component.
empty the dust compartment in a timely manner. Before emptying
If the vacuum cleaner will not be used for an extended period,
the compartment, make sure the vacuum cleaner is disconnected
fully charge it and disconnect it from the power then store it in
from the power, and do not press its power button.
a cool, low-humidity environment away from direct sunlight. To
avoid over-discharging the battery, recharge the vacuum cleaner
at least once every three months.
10 11
Care & Maintenance
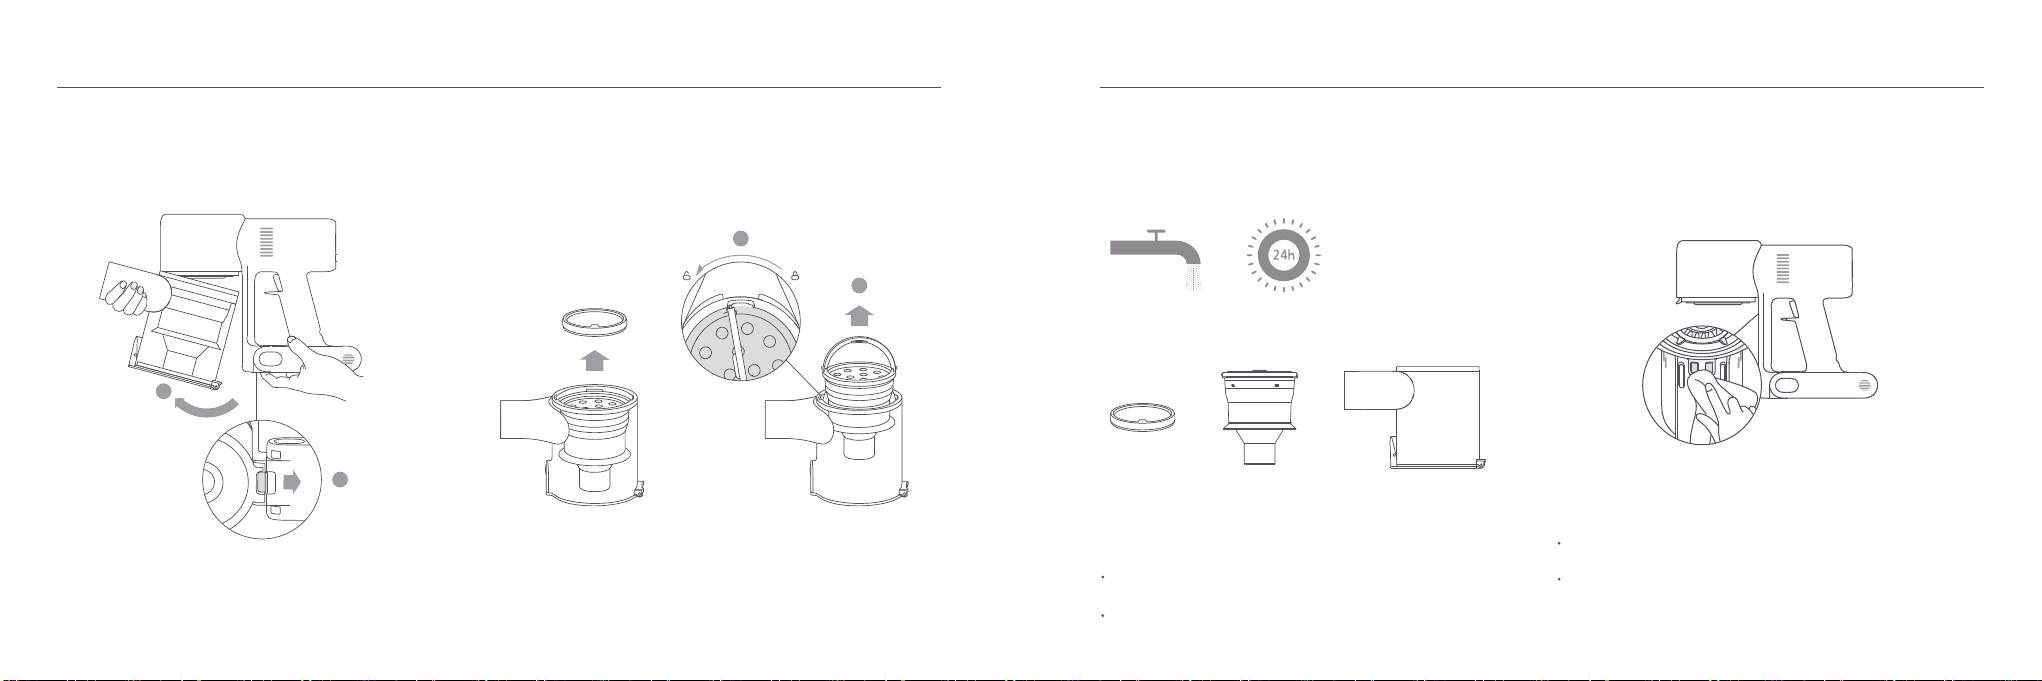
3. Push the dust compartment release switch in the direction
4. Remove the pre-filter first, then lift the handle of the cyclone
5. Rinse the pre-filter, cyclone assembly, and dust compartment
6. Wipe the contact points of the vacuum cleaner with a soft dry
indicated by the arrow, then gently remove the dust compartment
assembly and turn to counterclockwise until it stops, then pull to
with water until they are clean, then set each component aside to
cloth if they are dirty.
from the vacuum cleaner.
lift out the cyclone assembly.
thoroughly dry for at least 24 hours.
1
Pre-filter
2
2
1
Pre-filter Cyclone Assembly Dust Compartment
Notes:
Do not use detergents, polishes, or air fresheners to clean the
Notes:
dust compartment.
Dust Compartment Release Switch
The dust compartment should be rinsed out at least once a
Do not clean the dust compartment, pre-filter, or cyclone
month.
assembly in a dishwasher or washing machine, nor attempt to
The pre-filter and cyclone assembly should be cleaned once
dry any component in a tumble dryer, oven, microwave, or near
every 3 to 4 months.
an open fire.
12 13
Care & Maintenance
Installing the Dust Compartment, Pre-filter, and
Cleaning the HEPA Filter
2. Remove the HEPA filter from the vacuum cleaner by pulling it
Cyclone Assembly
Note: It is recommended to clean the HEPA filter once every 4
down in the direction shown in the figure.
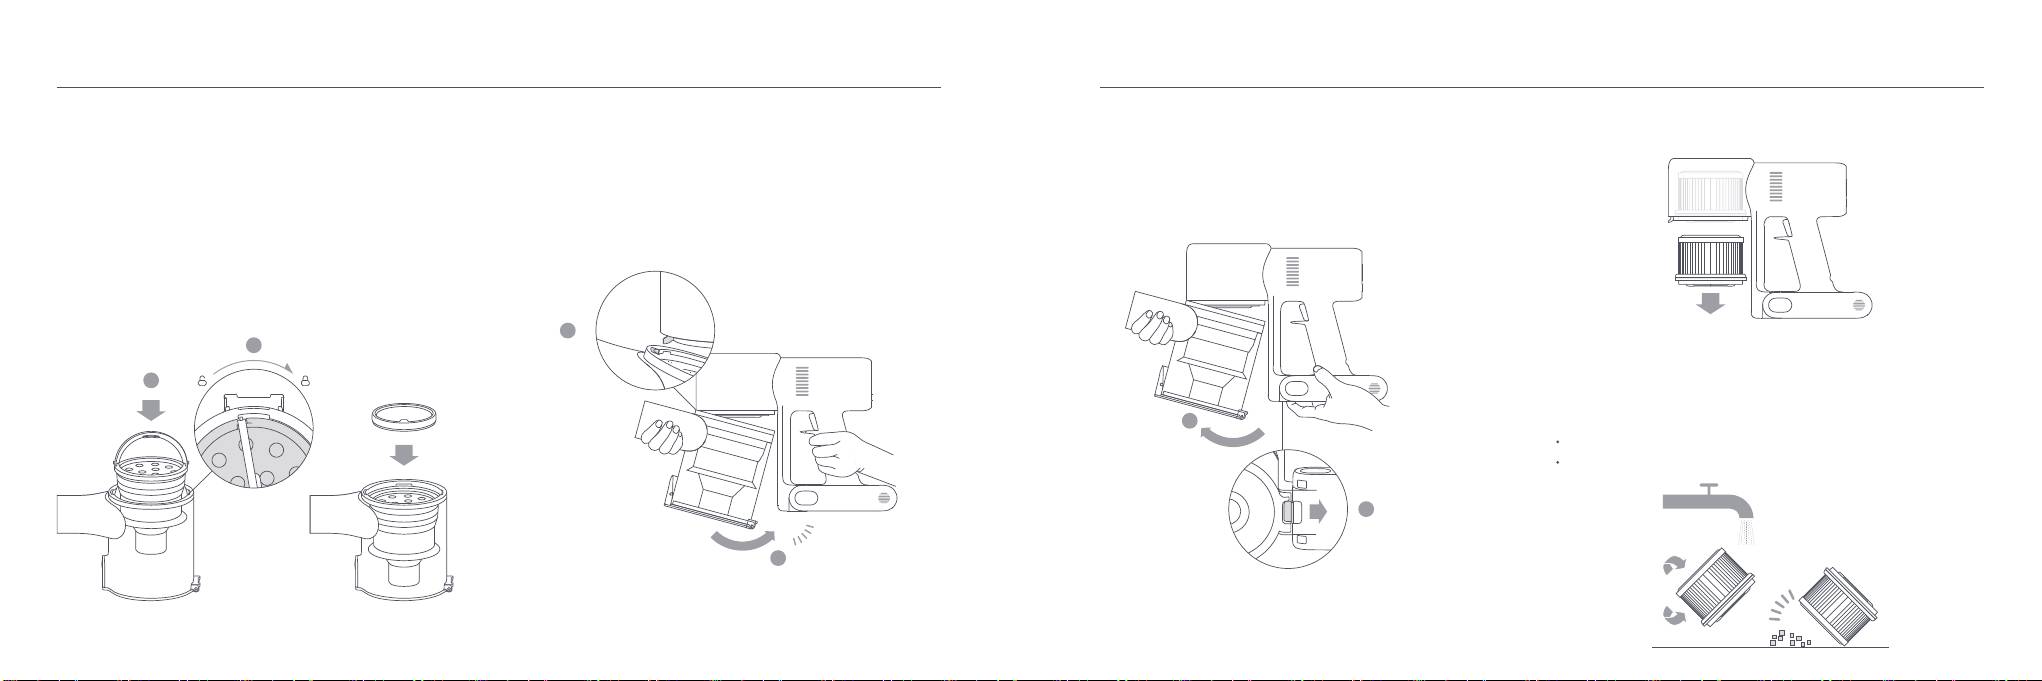
1. Insert the cyclone assembly vertically into the dust
3. Slightly tilt the dust compartment so its slot aligns with the clip
to 6 months.
compartment, and make sure that the handle of the cyclone
on the vacuum cleaner. Then gently push the dust compartment
1. Remove the dust compartment as shown in the figure.
assembly line up with the slot on the left side of the dust
until it clicks into place.
compartment. Turn the handle clockwise until it locks, then flip
the handle down.
2. Place the pre-filter with its front side facing up into the cyclone
assembly.
1
2
3. Clean the HEPA filter with clean water. Make sure you rotate the
HEPA filter 360° to thoroughly remove all dust caught in the filter.
1
Pre-filter
Lightly tap the filter several times to remove any excess dirt.
2
Notes:
Only use clean water to clean the filter. Do not use detergent.
Do not attempt to clean the HEPA filter with a brush or finger.
1
Insert until
2
it clicks into
place
Dust Compartment Release Switch
14 15
Care & Maintenance
4. Allow the HEPA filter to thoroughly dry for at least 24 hours. 2. Reinstall the dust compartment.
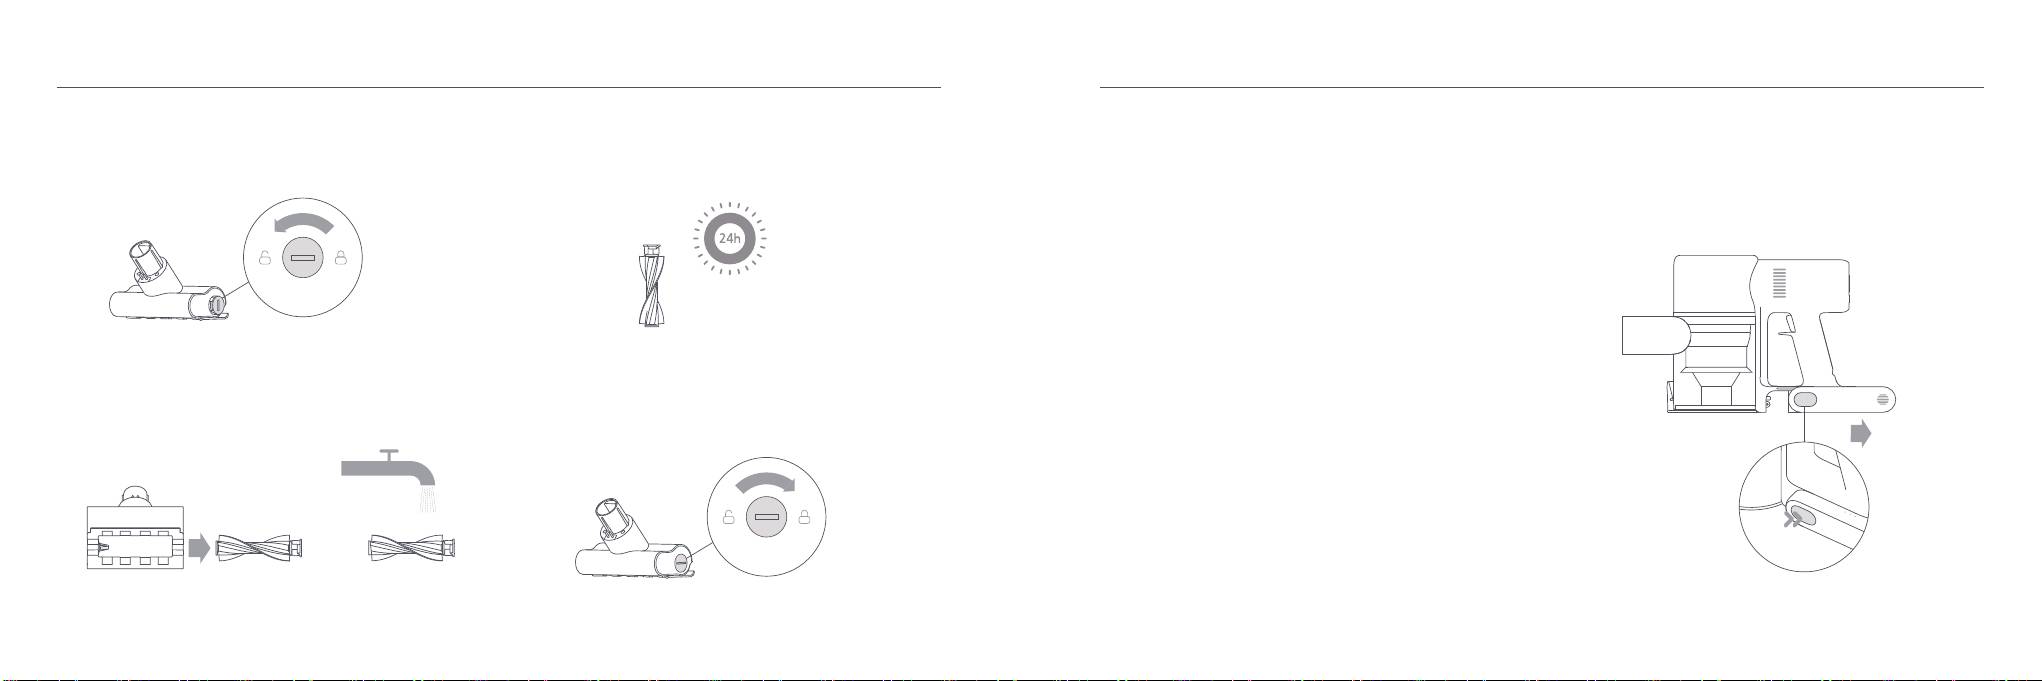
Cleaning the High Torque Brush Bar
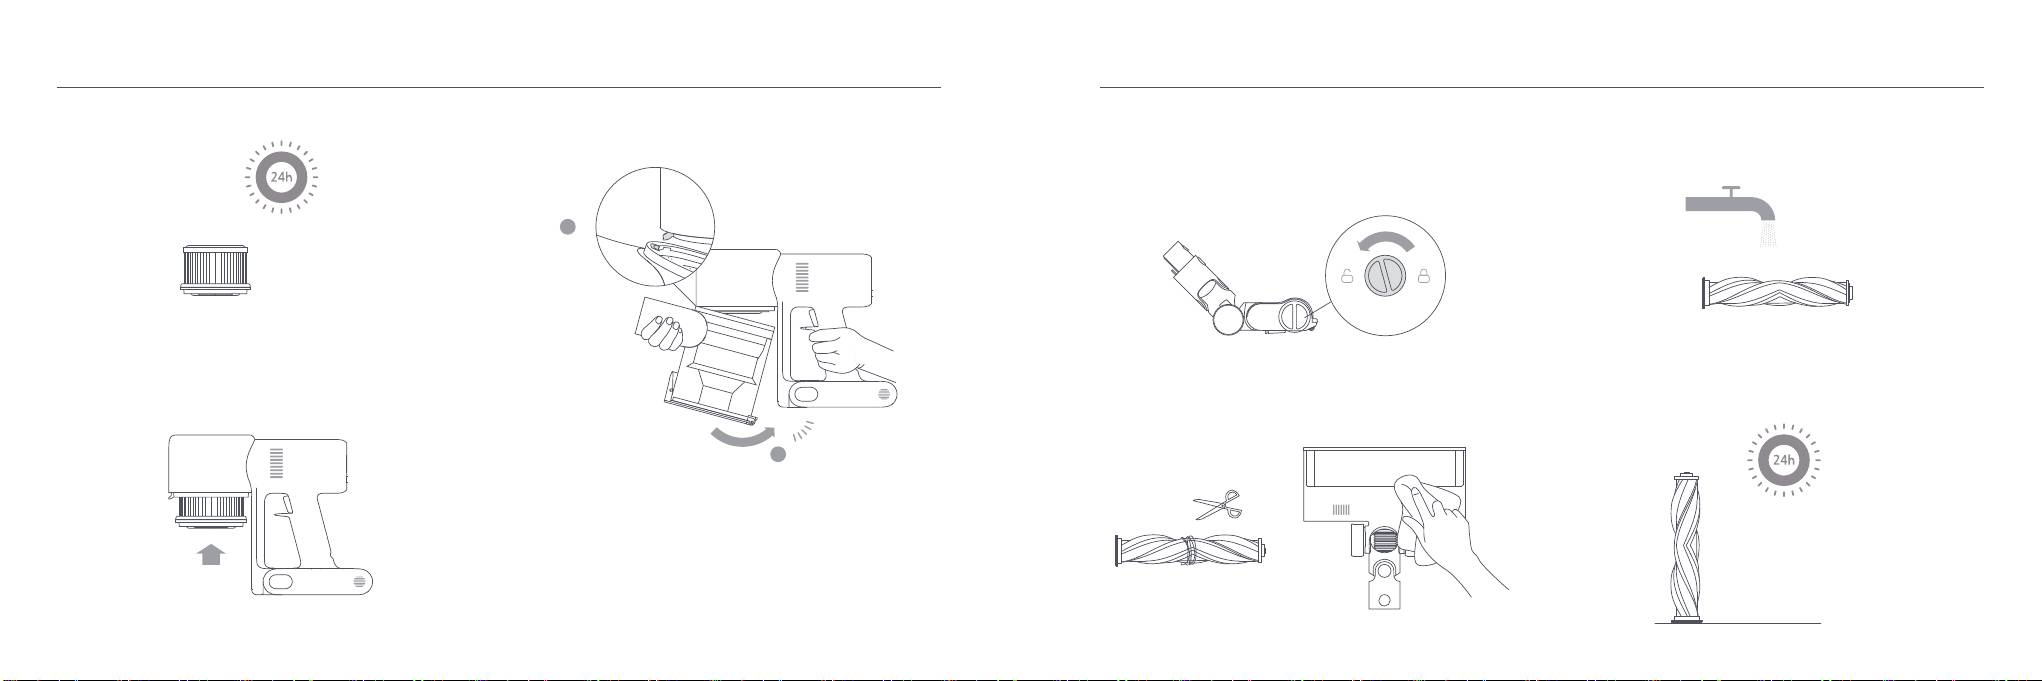
1. Turn the lock counterclockwise until it stops, then remove
3. After extended use, the roller brush may become dirty and
the roller brush from the high torque brush bar.
should be washed.
1
Installing the HEPA Filter
1. Insert the HEPA filter into the vacuum cleaner and gently press
2. Use scissors to cut and pick out any hair or other debris tangled
4. After washing, allow the roller brush to dry thoroughly by
down, as illustrated.
around the roller brush. Wipe away excess dust from the slot and
standing it upright in a well-ventilated area for at least 24 hours.
clear plastic cover using a dry cloth or paper towel.
Insert until it
2
clicks into place
16 17
Care & Maintenance
Cleaning the Mini Electric Brush
Battery Pack
1. Use a coin to turn the lock counterclockwise until you hear a
3. After washing, allow the roller brush to dry thoroughly by
The vacuum cleaner contains a removable rechargeable lithium-
1. Press down the battery pack release button and slide the battery
click.
standing it upright in a well-ventilated area for at least 24 hours.
ion battery pack which has a limited number of recharge cycles.
pack to the right, as illustrated, to remove it.
After extended use, the battery pack may no longer hold a charge.
2. Install the new battery pack.
>90°
If this happens, it means the battery pack has reached the end of
its life cycle and needs to be replaced.
2. After unlocking the roller brush, remove it from the mini
4. Once the roller brush is dry, reinstall it by following the
electric brush, then rinse and clean the roller brush.
disassembly steps in reverse.
18 19
Оглавление
- Safety Instructions
- Product Overview
- How to Install
- Charging How to Use
- Care & Maintenance
- Specifications
- FAQ
- Instrucciones de seguridad
- Descripción del producto
- Cómo instalar
- Carga Modo de uso
- Cuidado y mantenimiento
- Especificaciones
- Preguntas frecuentes
- Preguntas frecuentes Istruzioni di sicurezza
- Istruzioni di sicurezza
- Panoramica del prodotto
- Installazione
- Ricarica Modalità d'utilizzo
- Cura e manutenzione
- Specifiche tecniche
- Domande Frequenti
- Domande Frequenti Consignes relatives à la sécurité
- Consignes relatives à la sécurité
- Présentation du produit
- Procédure d’installation Procédure d’installation
- Recharge Utilisation
- Entretien et maintenance
- Caractéristiques
- FAQ
- FAQ Sicherheitshinweise
- Sicherheitshinweise
- Produktübersicht
- Installation
- Ladevorgang läuft Benutzung
- Pflege und Wartung
- Spezifikationen
- FAQ
- FAQ Инструкция по технике безопасности
- Инструкция по технике безопасности
- Описание изделия
- Инструкции по установке
- Зарядка Инструкция
- Уход и техническое обслуживание
- Технические характеристики
- Вопросы и ответы
