Kiev Camera CT1-7462-000 – страница 4
Инструкция к Kiev Camera CT1-7462-000
61
Â Ø Ê
• Для снижения вероятности появления эффекта «красных глаз» при
съемке в условиях недостаточной освещенности нажмите кнопку
спуска затвора на половину хода. Приблизительно через одну
секунду после того, как загорелся зеленый индикатор, спустите
затвор, полностью нажав на кнопку спуска затвора.
• Um beim Fotografieren von Personen in schwachem Licht zu
verhüten, daß deren Augen als grellrote Punkte abgelichtet werden,
drücken Sie den Auslöser zunächst ungefähr halb an. Etwa eine
Sekunde nach Aufleuchten der grünen Anzeigelampe drücken Sie
den Auslöser dann ganz durch, um die Aufnahme zu machen.
• Per ridurre la probabilità che si verifichi il fenomeno occhi
rossi quando si riprendono persone in condizioni di luce
scarsa, premere il pulsante di scatto a metà. Premere a
fondo il pulsante per far scattare l’otturatore circa un
secondo dopo che si è illuminata l’indicatore verde.
Если полностью нажать кнопку спуска затвора до того, как
загорелся зеленый индикатор, затвор сработает, а функция
уменьшения эффекта «красных глаз» — нет.
Wenn Sie den Auslöser ganz durchdrücken, bevor die grüne
Anzeigelampe leuchtet, wird der Verschluß ohne Funktion
zur Reduzierung des “Rote-Augen” Effekts ausgelöst.
Se si preme a fondo il pulsante di scatto prima che
l’indicatore verde si illumini, la foto viene scattata, ma la
funzione di riduzione del fenomeno occhi rossi non si attiva.
02-K129AmeEuro (p.26~).qxd 01.08.00 15:04 Page 61
62
Ó À Û
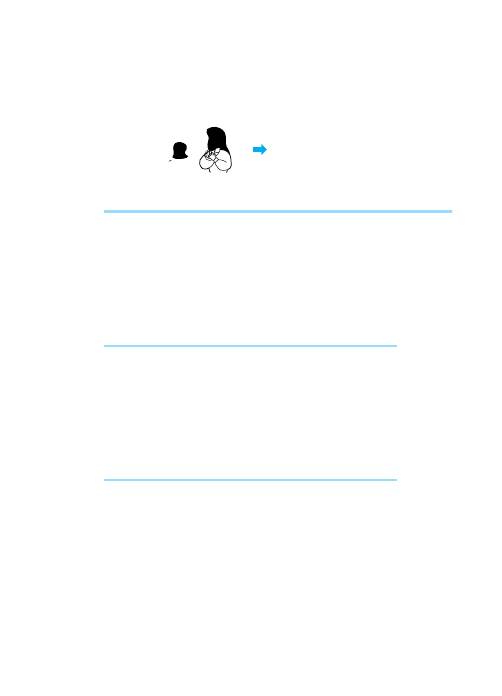
Important guidelines for using the red-eye
reduction function
1. This function is not effective unless the subject looks
directly at the red-eye reduction lamp while it is lit. Be
sure to tell your subject to look straight at the lamp.
2. Stay within 2 m (6.6 ft.) of your subject.
3. The efficacy of the red-eye reduction function varies
from person to person.
4. Try to raise the ambient light level as much as possible.
Sugerencias importantes sobre el uso de la
función de reducción de ojos rojos
1. Esta función no será efectiva a menos que el sujeto
mire directamente hacia la luz de reducción de ojos
rojos mientras se encuentre iluminada. Asegúrese
de decirle al sujeto que mire directamente a la luz.
2. Párese a menos de unos 2 m del sujeto.
3. La eficacia de la función de reducción de ojos rojos
varía de una persona a otra.
4. Trate de aumentar la luz ambiental al máximo.
Principes importants pour utiliser la fonction
atténuateur d’yeux rouges
1. Cette fonction n’est efficace que si le sujet regarde directement
la lampe d’atténuateur d’yeux rouges lorsqu’elle s’allume.
Dites bien à votre sujet de regarder directement la lampe.
2. Restez en deçà de 2 m de votre sujet.
3. L’efficacité de la fonction atténuateur d’yeux rouges varie
d’une personne à l’autre.
4. Autant que possible essayez d’augmenter l’éclairage ambiant.
02-K129AmeEuro (p.26~).qxd 01.08.00 15:04 Page 62
63
Â Ø Ê
Важные рекомендации по использованию функции
уменьшения эффекта «красных глаз».
1. Эта функция эффективна только в том случае, если фото-
графируемый смотрит прямо на горящую лампу уменьшения
эффекта «красных глаз». Обязательно попросите фотографи-
руемого смотреть прямо на лампу.
2. Встаньте не далее 2 м от фотографируемого.
3. Эффективность функции уменьшения эффекта «красных глаз»
зависит от индивидуальных особенностей фотографируемого.
4. Попробуйте максимально увеличить уровень внешнего освещения.
Istruzioni importanti per l’uso della funzione di
riduzione del fenomeno “occhi rossi”
1. Questa funzione non è efficace se il soggetto non guarda direttamente
la spia di riduzione mentre questa è illuminata. Invitare quindi
cortesemente il soggetto ad osservare direttamente la lampadina.
2. Stare ad una distanza di circa 2 m dal soggetto.
3. L’efficacia della funzione di riduzione del fenomeno occhi rossi varia
da persona a persona.
4. Cercare di aumentare, per quanto possibile, il livello di illuminazione
dell’ambiente.
Wichtige Hinweise zum fotografieren mit Funktion zur
Reduzierung des “Rote-Augen” Effekts
1. Diese Funktion liefert nur dann gute Ergebnisse, wenn die
fotografierten Personen in das Licht der leuchtenden
Lampe blicken. Bitten Sie die Personen daher, ihr
Augenmerk direkt auf die Lampe zu richten.
2. Die Aufnahmeentfernung darf höchstens 2 m betragen.
3. Der Wirkungsgrad dieser Funktion ist von Person zu
Person unterschiedlich.
4. Je mehr Umlicht, um so besser ist der Reduzierungseffekt.
02-K129AmeEuro (p.26~).qxd 01.08.00 15:04 Page 63
n
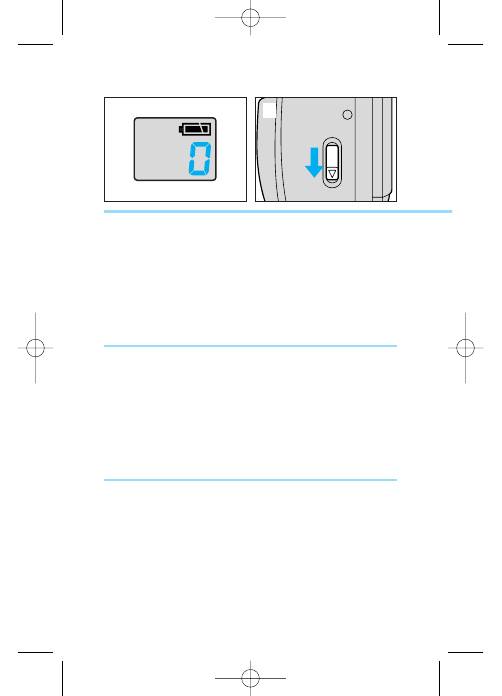
Rembobinage du film
Le film se rembobine automatiquement quand il atteint la fin de la
pellicule. Le compteur de vues compte à rebours pendant que le
film se rembobine et indique “0” quand le film est complètement
rembobiné.
64
Ó À
n
Extracción de la película
La película se rebobina automáticamente al llegar al final. El
contador de exposiciones efectúa la cuenta regresiva, y una
vez que la película se rebobine por completo, aparecerá “0”
en el contador de exposiciones.
Û
n
Removing the Film
The film rewinds automatically when it reaches the end. The
frame counter counts down as the film rewinds and the frame
counter shows “0” when the film is fully rewound.
02-K129AmeEuro (p.26~).qxd 01.08.00 15:04 Page 64
65
n
Estrazione della pellicola
La pellicola viene riavvolta automaticamente quando
raggiunge la fine. Il numero nel contapose retrocede mentre
la pellicola viene riavvolta e il contapose indica “0” quando la
pellicola è stata riavvolta completamente.
Ø
n
Извлечение пленки
Когда пленка заканчивается, она автоматически перематывается
назад. Во время обратной перемотки счетчик кадров производит
обратный отсчет кадров. Когда пленка полностью перемотана,
счетчик кадров показывает «0».
Ê
n
Entnehmen des Films
Der Film wird automatisch zurückgespult, sobald das Ende erreicht
ist. Das Bildzählwerk zählt abwärts, während der Film
zurückgespult wird, und zeigt “0” an, sobald der Film ganz
aufgespult ist.
Â
02-K129AmeEuro (p.26~).qxd 01.08.00 15:04 Page 65
OPEN
66
À
1 2
Û
1. Verifique que el contador de exposiciones haya
regresado a “0”.
2. Abra el respaldo.
3. Extraiga la película.
1. Vérifiez que le compteur de vues est revenu sur “0”.
2. Ouvrez le couvercle arrière.
3. Retirez le film.
Ó
1. Check that the frame counter has returned to “0”.
2. Open the back cover.
3. Remove the film.
02-K129AmeEuro (p.26~).qxd 01.08.00 15:04 Page 66

67
Ø Ê
1. Убедитесь в том, что счетчик кадров показывает «0».
2. Откройте заднюю крышку.
3. Извлеките пленку.
1. Sehen Sie nach, ob das Bildzählwerk “0” anzeigt.
2. Öffnen Sie die Kamerarückwand.
3. Entnehmen Sie den Film.
1. Controllare che il contapose sia tornato ad “0”.
2. Aprire il coperchio posteriore.
3. Estrarre la pellicola.
Â
02-K129AmeEuro (p.26~).qxd 01.08.00 15:04 Page 67
68
Ó À Û
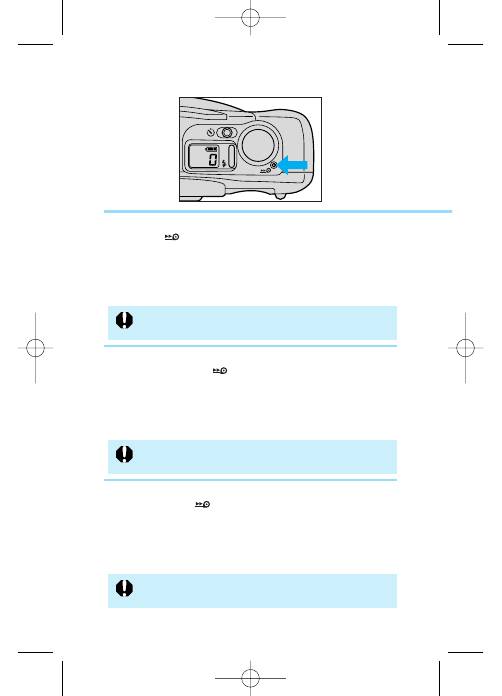
Reverse-winding the film in mid-roll
• Press the button.
Exposures taken after those indicated on the film roll
may be cut off.
Rembobinage du film à mi-course
• Appuyez sur la touche .
Rebobinado de la película a mitad del rollo
• Oprima el botón .
Las exposiciones realizadas excediendo las indicadas
en el rollo de película podrían ser descartadas.
Les vues excédant le nombre de poses du film ne sont pas
toujours imprimées sur la pellicule.
02-K129AmeEuro (p.26~).qxd 01.08.00 15:04 Page 68
69
Ø Ê
Обратная перемотка частично отснятой пленки
• Нажмите кнопку .
Кадры, снятые после указанных на катушке с пленкой, могут
оказаться обрезанными.
Â
Rückspulen des Films vor seinem Ende
• Drücken Sie die -Taste.
Aufnahmen mit einer Bildzahl, die höher ist als die für den
Film angegebene Anzahl an Aufnahmen, werden unter
Umständen nicht entwickelt.
Per riavvolgere la pellicola a metà rullino
• Premere il tasto .
I fotogrammi scattati oltre il numero di pose indicato
sulla pellicola, potrebbero risultare tagliati.
02-K129AmeEuro (p.26~).qxd 01.08.00 15:04 Page 69
70
À Û Ó
• Si vous devez remplacer les piles pendant le rembobinage
du film, appuyez ensuite sur la touche . Le film
recommencera à se rembobiner.
• Utilisez la protubérance de la courroie pour appuyer sur les
touches.
• Si mientras está rebobinando la película se
descargan las pilas y es necesario reemplazarlas,
oprima el botón . La película empieza a
rebobinarse nuevamente.
• Utilice el saliente del enganche de la correa para
oprimir los botones.
• If, while rewinding the film, the batteries run out, and
you must replace them, press the button. The
film will start to rewind again.
• Use the projection on the strap fixture to press the
buttons.
02-K129AmeEuro (p.26~).qxd 01.08.00 15:04 Page 70
71
Ø Ê
• Если во время обратной перемотки пленки закончились
батареи и их пришлось заменить, нажмите кнопку .
Затем обратная перемотка пленки возобновится.
• Для нажатия на кнопки используйте выступ на креплении
ремня.
Â
• Sollten beim Zurückspulen die Batterien leer werden,
drücken Sie nach dem Auswechseln der Batterien die
-Taste. Der Film wird nun wieder zurückgespult.
• Verwenden Sie zum Betätigen der Tasten den Vorsprung an
der Riemenschnalle.
• Se le batterie si scaricano durante il riavvolgimento
della pellicola ed è necessario sostituirle, premere il
tasto . La pellicola riprende il riavvolgimento.
• Usare la sporgenza sulla fibbia della cinghia per
premere i tasti.
02-K129AmeEuro (p.26~).qxd 01.08.00 15:04 Page 71
m
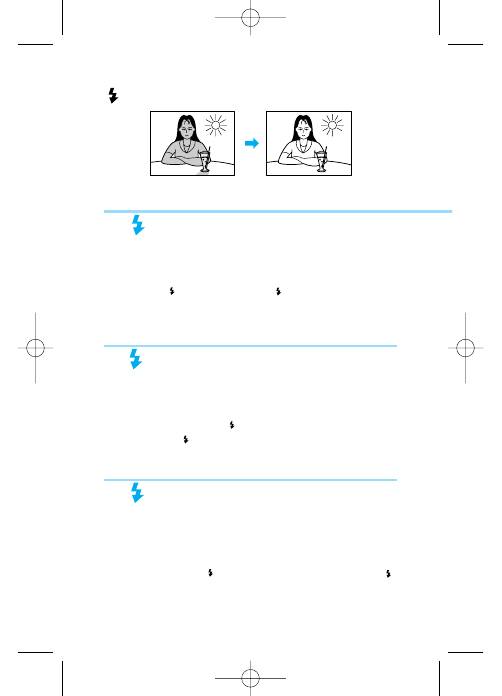
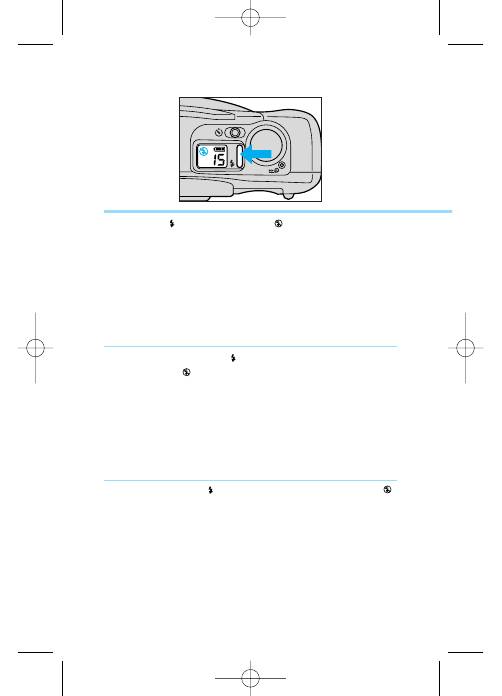
Flash ON (Forced Flash) Mode
In this mode, the flash fires regardless of the light conditions
when the picture is taken. Use this setting for fill-in flash in
daylight or to soften the outline of your subject.
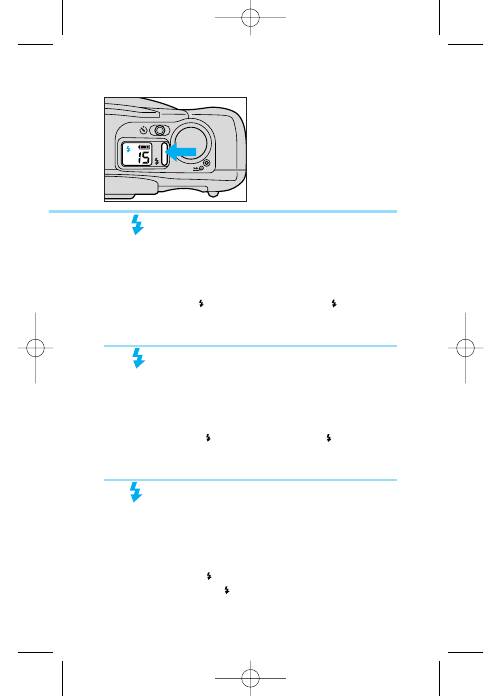
Press the button until the icon appears on
the LCD panel.
m
Mode de flash activé (flash forcé)
Dans ce mode, le flash fonctionne quelles que soient les conditions
d’éclairage. Utilisez ce réglage pour un flash d’appoint en plein jour
ou pour adoucir les contours d’un visage.
Appuyez sur la touche jusqu’à ce que le
pictogramme apparaisse sur le panneau LCD.
72
Ó À
m
Modo de flash activado (flash forzado)
En este modo, el flash se dispara independientemente de las
condiciones de iluminación. Seleccione este ajuste para
proporcionar flash de relleno con la luz del día o para
suavizar el contorno del sujeto.
Oprima el botón hasta que aparezca el icono
en el panel de LCD.
Û
03-K129AmeEuro (p.72~).qxd 01.08.00 15:05 Page 72
73
m
“Blitz EIN” (Blitz bei jeder Aufnahme)
In dieser Betriebsart wird der Blitz ohne Berücksichtigung des
Umlichts bei jeder Aufnahme gezündet. Verwenden Sie diese
Einstellung zum Aufhellen von Motiven bei Tageslicht, oder um die
Konturen des Motivs weicher erscheinen zu lassen.
Drücken Sie die -Taste, bis das Symbol im LCD-
Display erscheint.
m
Modalità flash attivato (flash forzato)
In questo modo il flash si attiva indipendentemente dalle
condizioni di luce quando si scatta la foto. Usare questo
modo per migliorare l’illuminazione durante il giorno o per
ammorbidire i contorni del soggetto.
Premere il tasto fino a che l’icona appare
sul pannello LCD.
Ø
m
Режим включенной вспышки
(принудительная вспышка)
В этом режиме вспышка срабатывает всегда, независимо от условий
освещения. Используйте этот режим для заполняющей вспышки при
съемке днем или для смягчения контуров объекта.
Нажимайте кнопку до тех пор, пока на дисплее не
появится пиктограмма .
Ê Â
03-K129AmeEuro (p.72~).qxd 01.08.00 15:05 Page 73
74
À Û Ó
In conditions where the red-eye effect is likely to occur
(low light conditions etc.), the red-eye reduction
function is activated when the shutter button is
pressed halfway.
En condiciones propensas a ocurrir el efecto de ojos
rojos (condiciones de poca iluminación, etc.), la
función de reducción de ojos rojos se activa al oprimir
el disparador hasta la mitad.
La fonction atténuateur d’yeux rouges est activée lorsque
vous appuyez légèrement sur le déclencheur, dans les
conditions où l’effet des yeux rouges risque de se produire
(éclairement faible, etc.).
03-K129AmeEuro (p.72~).qxd 01.08.00 15:05 Page 74
75
Ø Ê
В условиях, когда вероятно возникновение эффекта «красных
глаз» (низкая освещенность и т.п.), при нажатии кнопки спуска
затвора на половину хода включается функция уменьшения
эффекта «красных глаз».
Â
In Situationen, in denen ein Auftreten des “Rote-Augen”
Effekts wahrscheinlich ist (z.B. bei schwachem Licht), wird
die Funktion zur Reduzierung des “Rote-Augen” Effekts
aktiviert, wenn Sie den Auslöser halb andrücken.
In condizioni in cui è facile che si verifichi il fenomeno
occhi rossi (luce scarsa, ecc.) la funzione di riduzione
occhi rossi si attiva quando si preme a metà il pulsante
di scatto.
03-K129AmeEuro (p.72~).qxd 01.08.00 15:05 Page 75
,
Flash OFF (Suppressed Flash) Mode
In this mode, the flash does not fire regardless of how dark
conditions are when the picture is taken.
Use this mode for sunset shots, for places where flash use is
prohibited, or for available-light photography.
,
Mode de flash débrayé (flash supprimé)
Dans ce mode, le flash ne fonctionne pas quelle que soit la faiblesse
des conditions d’éclairage.
Utilisez ce mode pour les photos de couchers de soleil, ou dans les
endroits où la photo au flash est interdite.
76
Ó À
,
Modo de flash desactivado (sin flash)
En este modo, el flash no se dispara nunca,
independientemente de cuán oscuro esté al tomar la foto.
Utilice este modo para fotografiar puestas de sol, en lugares
donde está prohibido el uso del flash, o para fotografiar sólo
con la luz disponible.
Û
,
“Blitz AUS” (Blitz abgeschaltet)
In dieser Betriebsart wird der Blitz auch bei schwacher Beleuchtung
nicht gezündet.
Verwenden Sie diese Betriebsart für Szenen vor
Sonnenuntergängen, an Orten, wo Blitzaufnahmen verboten sind,
und für Aufnahmen mit dem zur Verfügung stehenden Umlicht.
77
,
Modalità flash disattivato (flash bloccato)
In questo modo il flash non si attiva indipendentemente da
quanto sia scuro quando si scatta la foto.
Usare questo modo per riprendere tramonti, per luoghi dove è
proibito l’uso del flash o per scattare foto con la sola luce
disponibile.
Ø
,
Режим отключенной вспышки
(вспышка не используется)
В этом режиме вспышка не срабатывает независимо от условий
освещения во время съемки. Используйте этот режим при съемке
закатов, в местах, где запрещается использовать вспышку, или для
съемки при имеющемся освещении.
Ê Â
03-K129AmeEuro (p.72~).qxd 01.08.00 15:05 Page 77
78
Press the button until the icon appears on
the LCD panel.
Appuyez sur la touche jusqu’à ce que le
pictogramme apparaisse sur le panneau LCD.
Ó À
Oprima el botón hasta que aparezca el icono
en el panel de LCD.
Û
03-K129AmeEuro (p.72~).qxd 01.08.00 15:05 Page 78
79
Drücken Sie die -Taste, bis das Symbol im LCD-
Display erscheint.
Premere il tasto fino a che l’icona appare
sul pannello LCD.
Ø
Нажимайте кнопку до тех пор, пока на дисплее не
появится пиктограмма .
Ê Â
03-K129AmeEuro (p.72~).qxd 01.08.00 15:05 Page 79
80
Ó À
1
Û
.
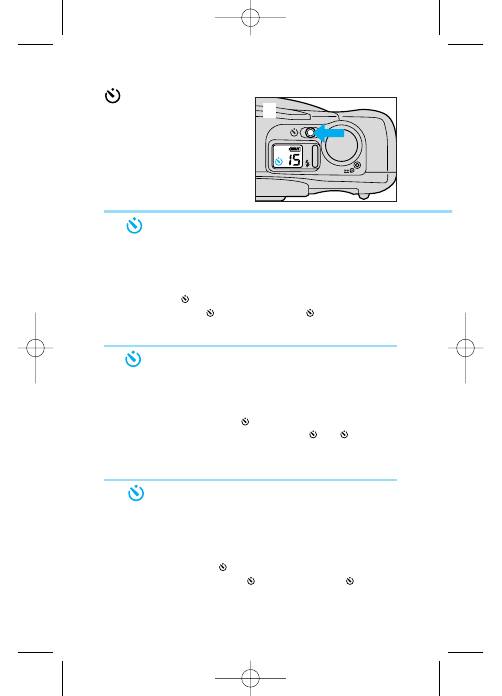
Self-timer Mode
You can use the self-timer mode to include yourself in
pictures by delaying the shutter release. Place the camera on
a steady surface, or mount it in a tripod when using the
self-timer mode.
1. Press the button.
• If you press the button again, the disappears and
self-timer mode is cancelled.
.
Mode de retardateur
Le mode de retardateur vous permet de figurer sur la photo en
différant le déclenchement. Posez l’appareil sur une surface stable
ou montez-le sur un trépied.
1. Appuyez sur la touche .
• Si vous appuyez de nouveau sur la touche , le disparaît
et le mode de retardateur est annulé.
.
Modo de autodisparador
Usando el modo de autodisparador, usted podrá entrar en la
foto haciendo que el obturador se dispare con un retardo.
Coloque la cámara sobre una superficie estable o móntela
sobre un trípode.
1. Oprima el botón .
• Si usted oprime el botón otra vez, el icono
desaparece y se cancela el modo de autodisparador.
03-K129AmeEuro (p.72~).qxd 01.08.00 15:05 Page 80
