Indesit WD 84 T: instruction
Class: Household, kitchen appliances, electronics and equipment
Type: Laundry Machine
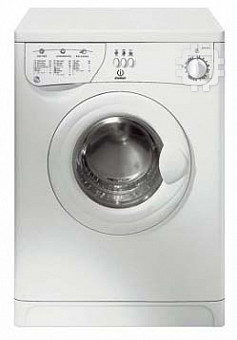
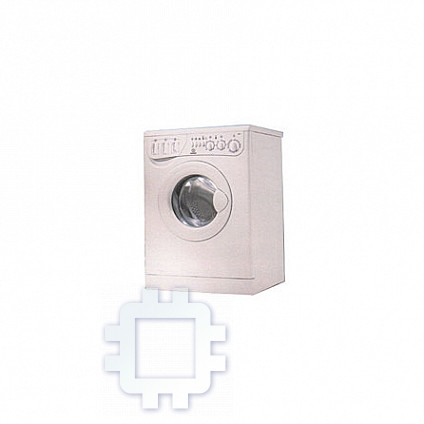
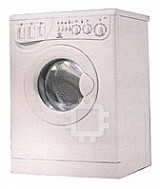

Manual for Indesit WD 84 T

M
Washer-dryer
Instructions for installation and use
Ñòèðàëüíàÿ ìàøèíà ñ ñóøêîé
Ðóêîâîäñòâî ïî óñòàíîâêå è ýêñïëóàòàöèè
Lavante-séchante
Instruction pour l'installation et l'emploi
Ïåðàëíÿ ñúñ ñóøèëíÿ
Èíñòðóêöèÿ çà åêñïëîàòàöèÿ
Mosó-szárítógép
Használati útmutató
Praèka se suièkou
Návod k instalaci a pouití
Práèka so suièkou
Rady na lepie pranie
9,&"6

Washer-dryer
1
Instructions for installation and use
Ñòèðàëüíàÿ ìàøèíà ñ ñóøêîé
15
Ðóêîâîäñòâî ïî óñòàíîâêå è ýêñïëóàòàöèè
Lavante-séchante
29
Instruction pour l'installation et l'emploi
Ïåðàëíÿ ñúñ ñóøèëíÿ
43
Èíñòðóêöèÿ çà åêñïëîàòàöèÿ
Mosó-szárítógép
51
Használati útmutató
Praèka se suièkou
59
Návod k instalaci a pouití
Práèka so suièkou
67
Rady na lepie pranie
CIS
BG
GB
F
HU
CZ
SK
Here are the 12 topics explained in this manual. Read, learn and
have fun: you will discover many secret ways to get a better
wash, more easily and making your washer-dryer last longer.
Quick guide
1.
Installation and removal (p. 11)
Installation, after delivery or transport, is the most important operation
for the correct functioning of your washer-dryer. Always check:
1.
That the electric system conforms to regulations;
2.
That the inlet and draining pipes are connected correctly.
Never use pipes that have already been used.
3.
That the washer-dryer is levelled properly; something
worth checking to aid the performance of your
washer-dryer;
4.
That the drum's fixing screws have been removed from
the back of the washer-dryer;
2.
What goes in your washer-dryer and how
to start it (p. 2)
A correct distribution of your laundry is vital to the successful
outcome of the wash and the life of the washer-dryer. Learn all the
tips and secrets to dividing your linen: colour, type of fabric.
3.
Guide to understanding labels (p. 6)
The symbols on the labels of your garments are easy to understand
and equally important for the success of your wash. The guide
includes simple instructions to help you choose the right tempera-
ture, wash cycles and ironing methods.
4.
Useful tips to avoid mistakes (p. 7)
Years back, our grandmothers were the ones who gave us good
advice - and in those days synthetic fibres did not exist: washing
was easy. Today, your washer-dryer offers you helpful advice
allowing you to wash wool even better than an expert laundress
would by hand.
5.
The detergent dispenser (p. 8)
How to use the detergent dispenser and the bleach compartment.
6.
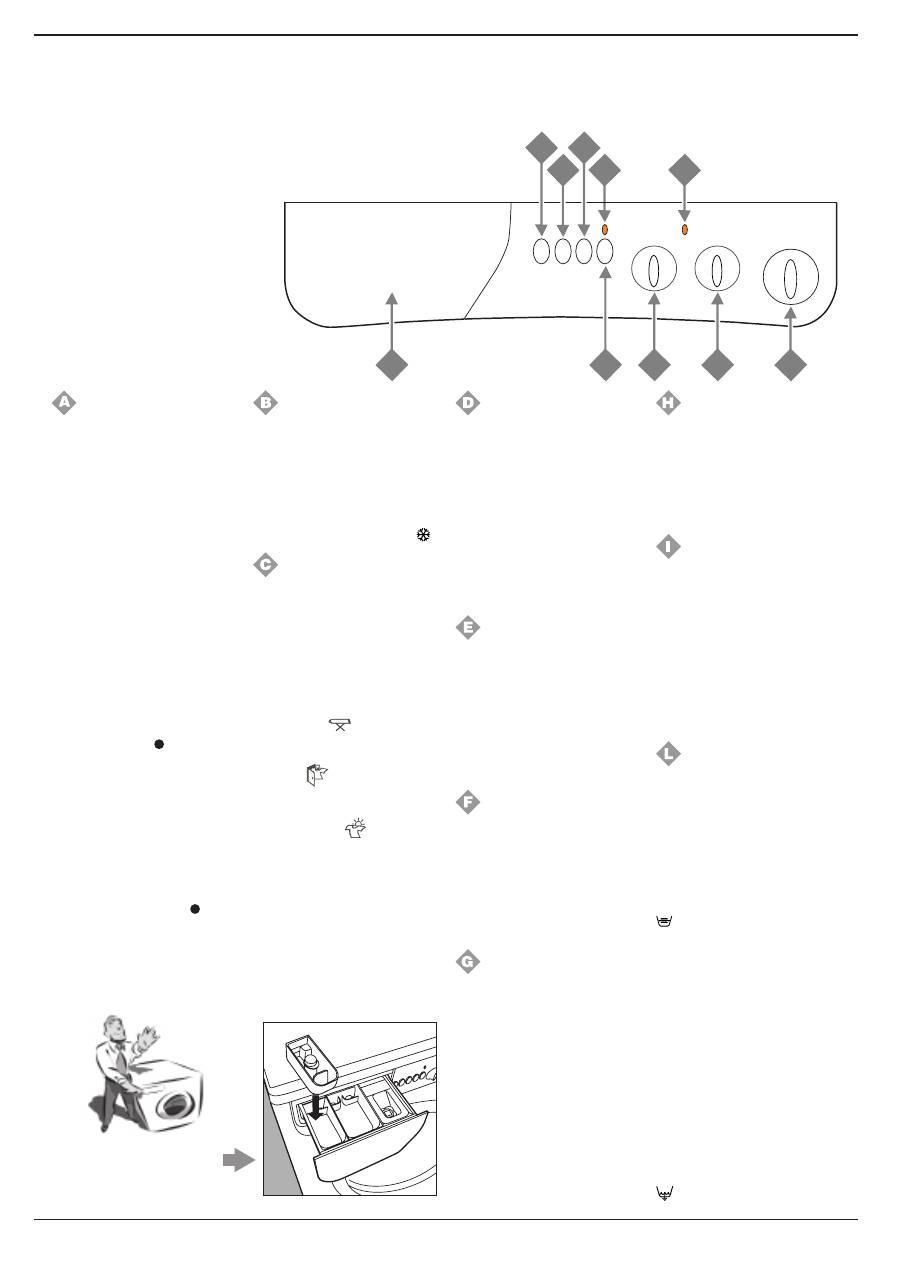
Understanding the control panel (p. 3)
Washer-dryer’s control panel is very simple. It has only a few
essential buttons to help you choose any type of wash cycle,
ranging from the most energetic, capable of cleaning a mechanic’s
overalls, to the most delicate for wool. Familiarising yourself with it
will help you get the best out of your wash while helping your
washer-dryer last longer. It’s easy.
7.
Guide to the wash programmes (p. 4)
Herein is an easy table to help you choose the right programme,
temperature, detergents and possible additives. Choose the right
programme and you will get better results with your wash while
saving time, water and energy, day after day.
1
Instructions for installation and use
8.
How to dry (p. 5)
A few handy tips to get the best drying cycle from your appliance.
9.
Care and maintenance (p. 12)
With just a bit of care, it will repay you with loyalty and devotion.
With the necessary upkeep, it will wash for years and years to
come.
10.
Problems and solutions (p. 9 and 10)
Before calling a technician, read these pages: immediate solutions
may be found for a number of problems. If the problem persists,
call your local Indesit customer services who will be pleased to
help. Any failure will be repaired, as soon as possible.
11.
Technical characteristics (p. 10)
Herein are the technical features of your washer-dryer: model type
number, electric and water specifications, size, capacity, speed of
the spin cycle and compliance with Italian and European regulations.
12.
Safety for you and your family (p. 13)
Here you will find the necessary safety guidelines, and it is
important for you to read this section carefully.

What goes in your washer-dryer?
Before washing, you can do a great deal to ensure better results. Divide your garments
according to fabric and colour. Read the labels, follow their guidelines.
Before washing.
Divide your washing according
to the type of fabric and colour
fastness.
Empty all pockets (coins, paper,
money and small obejects) and
ensure all loose buttons are
repaired or removed prior to
loading.
How to eliminate the most common stains
Ink and biro
Dab with a wad of cotton soaked in methyl alcohol or alcohol at 90°.
Tar
Dab with fresh butter, rub in turpentine then wash immediately.
Wax
Scrape away, then run a hot iron between two sheets of absorbent paper. Then rub in cotton with turpentine or
methyl alcohol.
Chewing gum
Rub in nail polish remover and wipe with a clean rag.
Mold
Cotton and white linen should be placed in a solution of 5 parts water, one bleach and a spoon of vinegar, then
washed immediately. For other white fabrics, use hydrogen peroxide at 10 volumes and wash immediately.
Lipstick
Dab with ether on wool or cotton. Use tricloroetilene for silk.
Nail polish
Place a sheet of absorbent paper on the side of the stain, wet it with nail polish remover, shifting the
garment as the sheet gradually changes colour.
Grass
Dab with a wad of cotton soaked in methyl alcohol.
Starting the washer-dryer
Starting your washer-dryer in
the right way is important for the
quality of your wash, to help
prevent future problems and
enhance life expectancy of your
appliance. Once you have
loaded your washer-dryer and
added the detergent together
with any fabric conditioner,
always check that:
1. The door is closed correctly.
2. The plug is secured in the
socket.
3. The water supply is turned
on.
4. Selector knob
A
is positioned
on one of the symbols (Stop/
Reset).
Choose the desired programme
The programme is selected
according to the type of garments
that need to be washed. To choose
a programme, refer to the table on
page 4. Turn knob
A
until the
selected programme is aligned
with the mark on the knob, turn
knob
B
to the desired temperatu-
re settings,check that knob
C
is
in the desired position, if
necessary use buttons
E, F, G
and lastly, press on/off button
H
(
I
position).
After installing your new washer-dryer, start a wash cycle
by setting programme "1" at 90 degrees.
For more delicate
garments:
protect underwear, tights
and stockings and delicate
items by placing them in a
canvas pouch
Dividing your garments
according to fabric and
colour, is very important
for good results
At the end of the wash cycle...
Lamp
I
will flash quickly for a few
seconds, then it will begin
flashing more slowly.
Then turn the washer-dryer off
by pressing on-off button
H
(
O
position). You can now open
the washer-dryer door safely.
After having removed the
freshly cleaned washing, leave
the door open to allow air
circulation inside the drum.
Always disconnect electricity at
the socket and turn off the water
supply.
Remember that, in the event
of a power failure, or should
the washer-dryer switch itself
off, the programme chosen
will remain in its memory.
The labels say it all.
Always look at the labels: they
tell you everything about your
garment and how to wash it in
the best possible way.
The table on page 6 shows all
meanings behind these
symbols. Their recom-
mendations are important to
achieve better wash results.
Instructions for installation and use
2
M
Big and small happily
together.
This washer-dryer has a special
electronic control device for even
distribution: before the spin cycle
starts, this device allows the
garments to positions
themselves, to minimise noise
and vibrations during the spin
cycle.
I
L
A
B
C
H
D
F
G
E
The washer-dryer is equipped
with an extra compartment
4
(provided as an accessory) for
the bleach, to be inserted in
compartment
1
.
Slow spin
Use this button to reduce the
spinning speed from 800 to 400
rpm for the cotton and linen
programmes and from 700 to
400 rpm for the synthetic
fabrics programmes.
Rapid wash
This button reduces the length
of the wash programme by
about 30%. It cannot be used
with special programmes (see
page 4) or those for wool and
silk.
Stain removal (see page 8)
Thanks to this command, the
washer-dryer will carry out a
more intensive wash that
optimises the effectiveness of the
liquid additives, thus allowing
more resistant stains to be
removed. When you press the
stain removal button, you cannot
activate the pre-wash.
On-off
When button
H
is pressed, the
washer-dryer is switched on,
when it is not the machine is
switched off.
Turning the appliance off
does not cancel the selected
programme.
Here I’m in command
Understanding the control panel
Making the right choice is important. And it’s easy.
Programme selector knob
Use this knob to select the wash
programme.
Turn this knob clockwise only.
To select a programme, you
should turn the knob so that the
symbol/number of the desired
programme is in line with the
pointer on the knob.
Now press on/off button
H
(position
I
), pilot lamp
I
will start
flashing.
After 5", the setting will be
accepted, pilot lamp
I
will stop
flashing (staying lit) and the wash
cycle will begin.
Should you wish to interrupt the
programme in progress or set a
new one, select one of the
symbols
(Stop/Reset) and wait
5" : when the cancellation has
been accepted, pilot lamp
I
flashes, and you can then turn the
appliance off.
After the wash cycle has been set
and accepted by the washer-
dryer, turning the knob will have
no effect (except for when it is on
position Stop/Reset).
Temperature control knob
It is used to set the wash tempe-
rature in the recommended
programme table on pag. 4. It also
allows you to reduce the tempe-
rature recommended for the
selected programme, and even
to set a cold wash cycle (
).
Drying cycle knob
Use this knob to select the
desired dr ying cycle. Two
options are available:
A
- Based on time:
From
40
minutes to
150
.
B
- Based on the damp level of
the dry clothes:
Iron
:slightly damp clothes,
easy to iron.
Wardrobe
: dry clothes to
put away.
Extra dry
: very dry clothes,
recommended for towelling and
bathrobes.
A cooling stage is foreseen at
the end of the drying cycle.
Detergent dispenser
It is divided into 3 compartments:
1. Detergent for pre-wash;
2. Detergent for the main cycle
wash;
3. Fabric conditioner.
3
Instructions for installation and use
On-off lamp / door locked
Lamp
I
flashes slowly when the
appliance is switched on and
awaiting instructions and at the
end of a cycle, indicating that the
door can be opened. It flashes
quickly when the door should
not be opened. A steady light
means the appliance has
accepted the selected
programme.
Drying cycle lamp
When this lamp is on, it means
that knob
C
has been set on a
drying cycle and at the end of the
wash cycle, the appliance will run
the selected tumble drying cycle.
Anti-crease
This function (represented by the
symbol
) interrupts the wash
programme, keeping the washing
soaking in water before draining.
It is only enabled in programmes
for synthetic fabrics, silk and
cur tains. It is ver y useful,
because it prevents delicate and
synthetic fabrics from creasing
(for example, when you cannot
take the washing out at the end
of the wash cycle but only a few
hours later). The programme can
be completed by turning knob
A
one notch. In the case of
synthetic fabrics
, should you
prefer
draining
rather than a
spin
cycle
, turn knob
A
until you have
selected the symbol
(
Drain
).
The detergent dispenser with the
additional bleach compartment
is here.
1
2
3
4
Type of fabric and degree of soil
Programme
knob
Temperature
knob
Detergent
for wash
Fabric
softener
Stain rem.
button/
Bleach
Length of
the cycle
(minutes)
Description of wash cycle
COTTON
Exceptionally soiled whites
(sheets, tablecloths, etc.)
1
90°C
◆
◆
165
Prewash cycle, wash cycle at 90°C, rinse
cycles, intermediate and final spin cycles
Exceptionally soiled whites
(sheets, tablecloths, etc.)
2
90°C
◆
◆
Del./Trad.
145
Wash cycle at 90°C, rinse cycles,
intermediate and final spin cycles
Heavily soiled whites and fast colours
3
60°C
◆
◆
Del./Trad.
130
Wash cycle at 60°C, rinse cycles,
intermediate and final spin cycles
Slightly soiled whites and delicate
colours (shirts, jumpers, etc.)
4
40°C
◆
◆
Del./Trad.
95
Wash cycle at 40°C, rinse cycles,
intermediate and final spin cycles
Rinse cycles/Bleach
◆
Del./Trad.
Rinse cycles, intermediate and final spin cycles
Spin cycle
Draining and final spin cycle
Drying cycle for cotton fabrics
Stop/Reset
Interrupts/Cancels the selected programme
SYNTHETICS
Heavily soiled fast colour synthetics
(baby linen, etc.)
5
60°C
◆
◆
Delicate
100
Wash cycle at 60°C, rinse cycles, anti-
crease or delicate spin cycle
Delicate colour synthetics
(all types of slightly soiled garments)
6
40°C
◆
◆
Delicate
70
Wash cycle at 40°C, rinse cycles, anti-
crease or delicate spin cycle
Delicate colour synthetics (all types of
slightly soiled garments
)
7
30°C
◆
◆
30
Wash cycle at 30°C, rinse cycles and
delicate spin cycle
Rinse cycles/Bleach
◆
Delicate
Rinse cycles, anti-crease or delicate spin
cycel
Fabric softener
◆
Rinse cycles with automatic introduction of
softener, anti-crease or delicate spin cycle
Spin cycle
Draining and delicate spin cycle
Drying cycle for synthetic fabrics
Stop/Reset
Interrupts/Cancels the selected programme
DELICATES
Hand wash
8
40°C
◆
◆
Delicate
45
Wash cycle at 40°C, rinse cycles and
delicate spin cycle
Particularly delicate garments and
fabrics (curtains, silk, viscose, etc.)
9
30°C
◆
◆
50
Wash cycle at 30°C, rinse cycles, anti-
crease or draining
Rinse cycles/Bleach
◆
Rinse cycles, anti-crease or draining
Spin cycle
Draining and delicate spin cycle
Draining
Draining
Drying cycle for wool
Stop/Reset
Interrupts/Cancels the selected programme
A programme for all seasons
What are you washing today?
Instructions for installation and use
4
Daily wash
Your washer-dryer has a programme available for the washing of lightly soiled garments in a short amount of time.
By setting programme
7
at a temperature of
30°C
, you can wash different types of fabrics together (except for wool and silk), with a
maximum load of
3
kg. This programmes allows you to save on both time and energy as it only lasts around
30
minutes.
We recommend the use of liquid detergent.
Important: to cancel the wash programme you have just set, select one of the symbols (Stop/Reset) and wait for at least 5 seconds.
Special programme
The data found in the table is purely indicative, and can vary according to the quantity and type of washing, the water system temperature and
the room temperature.
5
Instructions for installation and use
How to dry
A combined Washing and
Drying Programme
Look at table
A
to the side and
follow the instructions provided
for
MAX
load to have an
automatic
washing and drying
cycle.
Follow the instructions for
wash
only
(see page 2, the paragraph
entitled "Starting the Washer-
Dryer") and use knob
C
to set
the type of drying cycle desired,
then press button
H
(
I
position).
If the laundry load to be washed
and dried exceeds the
maximum load foreseen (see
table
A
), then follow the
instructions provided for
wash
only
(see page 2, the paragraph
entitled "Starting the Washer-
Dryer").
When the wash cycle has
finished, remove your washing,
divide it up and replace part of it
inside the drum.
Now follow the instructions
provided for a
dry only
cycle.
Repeat this procedure for the
remainder of the load.
Dry only
Once you have loaded the
washing that needs drying (
3,5
kg max. for cottons, see table
for other fabrics ), make sure
that:
- the door is shut correctly;
- the plug is inserted in the socket;
- the water tap is turned on;
- button
H
has not been pressed
(
O
position).
And now set the wash cycle
knob
Set knob
A
on the appropriate
drying setting
depending on
the type of fabric, select the type
of drying cycle required using
knob
C
and then press on-off
button
H
(
I
position).
At the end of the drying cycle...
Wait for lamp
I
to flash slowly,
then turn the washer-dryer off by
pressing on-off button
H
(
O
position). Now you can open
the appliance door. Once you
have removed the washing from
the appliance, leave the door
open or ajar to avoid the
formation of bad odours and
turn off the water tap.
A.
- During the drying phase, the door tends to get quite hot.
- Do not use the appliance to dry clothes that have been
washed with flammable solvents (e.g. trichlorethylene).
- Do not use the appliance to dry foam rubber or similar
elastomers.
- Make sure that the water tap is turned on during the drying
cycles.
- This washer-dryer can only be used to dry clothes which
have been pre-washed in water.
WARNING
A spin cycle is carried out during the drying if you have set a
cotton programme
and a
level of dryness
(Extra dry
,
Wardrobe
, Iron
).
IMPORTANT
The woollen garments drying cycle
should only and
exclusively
be run together with the selection of a specific
cycle time (150 - 100 - 60 - 40 minutes).
We recommend a
60
minute drying cycle for a
1 kg
load.
If one of the
three levels
(Extra dry
, Wardrobe
,
Iron
) is selected by mistake, the appliance will run a
drying cycle lasting the
MAX
time foreseen (150 minutes).
WOOL DRYING CYCLE
Fabric
type
Load type
Max. load
(kg)
Extra
dry
Wardrobe
Iron
Cotton,
Linen
Clothing of
different
sizes
3,5
150
144
138
Cotton
Terry
towels
3,5
150
144
138
Terital,
Cotton
Sheets,
Shirts
2,5
98
92
84
Acrylics
Pyjamas,
socks, etc.
1
65
61
59
Nylon
Slips, tights,
stockings,
etc.
1
65
61
59
Drying time (Min.)
The data contained in the table are purely indicative.
For cotton loads of less than 1 Kg, use the drying
programme designed for synthetic fabrics.
Wash
Bleaching
Ironing
Dry cleaning
Drying
Strong
action
Delicate
action
High
Temp.
Low
Temperat.
Wash at
95°C
Bleaching only in
cold water
Hot iron at max
200°C
Dry clean with any
solvent
Machine dryable
Wash at
60°C
Do not bleach
Medium hot
ironing at
max 150°C
Dry clean only with
perchloride, benzine
av., pure alcohol,
R111 and R113
Do not machine
dry
Wash at
40°C
Iron at max
110°C
Dry clean with av.
benzine, pure alcohol
and R113
Spread to dry
Wash at
30°C
Not ironable
Do not dry clean
Hang to dry
without spin
drying
Hand wash
Dry on clothes
hanger
Not
washable in
water
Understanding labels
Learn the meaning of these symbols and you will get better
results, your garments will last longer resulting in an
improved wash.
All over Europe, garment labels
contain messages expressed in
small yet important symbols.
Understanding them is very
important if you want to get
better results and treat your
garments the way they deserve
to be treated.
These symbols are divided in
five different categories and
shapes: washing
, bleaching
, ironing
, dry cleaning
and drying
.
Consult and learn the symbols in this table: they will help you
obtain a better wash, treat your clothes properly, and get a
better performance out of your washer-dryer.
Useful tips
Turn shirts inside out to get better results
and make them last longer.
Always empty pockets of their contents.
Look at the label: it will always give you useful
advice.
When loading your washing, try to have a mixture
of large to small items.
Make sure you select the right
temperature!
Instructions for installation and use
6
l
c
A
P
F
Useful tips
Never use your washer-
dryer to wash...
torn, fraying or
non-hemmed linen. If it is
absolutely neccessary, place it in
a bag for protection. Do not wash
coloured linen with whites.
Watch the weight!
For best results, do not exceed
the weight limits stated below
(figures show weight of dry
garments):
- Resistant fabrics:
5 kg maximum
- Synthetic fabrics:
2.5 kg maximum
- Delicate fabrics:
2 kg maximum
- Pure new wool:
1 kg maximum
How to wash almost anything
Curtains.
Curtains tend to crease a great
deal. A useful tip to reduce
creasing: fold the curtains and
place them in a pillow case or
mesh bag. Do not load anything
else inside the appliance, this
will ensure that the overall
weight does not exceed the half
load. Remember to use the
specific programme
9
which
automatically excludes the spin
cycle.
Trainers.
Once you have removed mud
and dirt from trainers, you can
even wash them with jeans or
any other tough garments. Do
not wash trainers with whites.
Quilted coats and anorak.
You can wash quilted coats and
wind-cheaters, too, if they are
padded with goose or duck
down. Do not load more than
2-3 kg and never load 5 kg.
Repeat rinse once or twice
using the gentle spin.
How much does it weigh?
1 sheet 400-500 gr.
1 pillow case 150-200 gr.
1 tablecloth 400-500 gr.
1 bathrobe 900-1,200 gr.
1 towel 150-250 gr.
Coloured T-shirts
, printed
ones and shirts last longer if turned
inside out before washing.
Printed T-shirts and sweatshirts
should always be ironed inside out.
Dungaree alert.
Very popular “salopette” type
overalls have straps with hooks
that can damage the drum of your
washer-dryer or other garments
during the wash. To minimise the
risk, place hooks in the pocket
and fasten with safety pins.
Holidays: unplug the
appliance.
It is recommended that you
should unplug the machine from
the socket and turn off the water
supply. Leave the door ajar to
allow air circulation to the draw
and the door gasket area. This will
prevent unpleasant odours.
7
Instructions for installation and use
For best results, we
recommend you use a
specific detergent, taking
care not to wash more than
1 kg
of laundry.
WOOL CYCLE
You must follow the dosage
recommendations provided by
the manufacturers when adding
detergent or fabric conditioner.
Doses will vary according to the
wash load, the water hardness
and how soiled the washing is.
Experience will help you select
the right dosage almost
automatically: it will become your
secret.
Before adding detergent for pre-
washing in compar tment
1
,
make sure that the extra
compartment for bleach
4
has
not been inserted.
Ensure no overfilling when
adding fabric conditioner in
compartment
3
.
The washer-dryer automatically
adds the softener to the wash in
each programme.
Liquid detergent is poured into
compar tment
2
just a few
seconds before starting the
wash cycle.
In compartment
1
:
Detergent for pre-washing (powder)
In compartment
2
:
Detergent for washing
(powder or liquid)
In compartment
3
:
Additives (softeners, perfumes, etc.)
In compartment
4
:
Bleach and delicate bleach.
Useful tips about the detergent dispenser
It’s important for a good wash
The first secret is the easiest: the detergent dispenser is
opened by pull it outwards.
Remember that liquid detergent
is only designed for wash
cycles of up to 60 degrees on
non pre-wash items.
Special containers are sold with
liquid or powder detergents for
placing inside the washer-dryer
drum, these are positioned
according to the instructions
found in the detergent box
Never use hand wash
detergent, because it may form
too much foam, which could
damage the washer-dryer.
Detergents that are specifically
formulated for both hand and
machine wash are an
exception.
One last secret: when washing
with cold water, always reduce
the amount of detergent you use:
it dissolves less easily in cold
water than in hot water, so part
of it would be wasted.
Cutting costs efficiently
A guide to environmentally
friendly and economic use
of your appliance.
MAXIMISE THE LOAD SIZE
Achieve the best use of energy, water, detergent and time by using the recommended
maximum load size.
SAVE up to 50% energy by washing a full load instead of 2 half loads.
DO YOU NEED TO PRE-WASH?
For heavily soiled laundry only!
SAVE detergent, time, water and between 5 to 15% energy consumption by NOT
selecting Prewash for slight to normally soiled laundry.
IS A HOT WASH REQUIRED?
Pretreat stains with stain remover or soak dried in stains in water before washing to
reduce the necessity of a hot wash programme.
SAVE up to 50% energy by using a 60°C wash programme.
BEFORE USING A DRYING PROGRAMME ...
SAVE energy and time by selecting the highest suitable spin speed to reduce the water
content in laundry before using a drying programme.
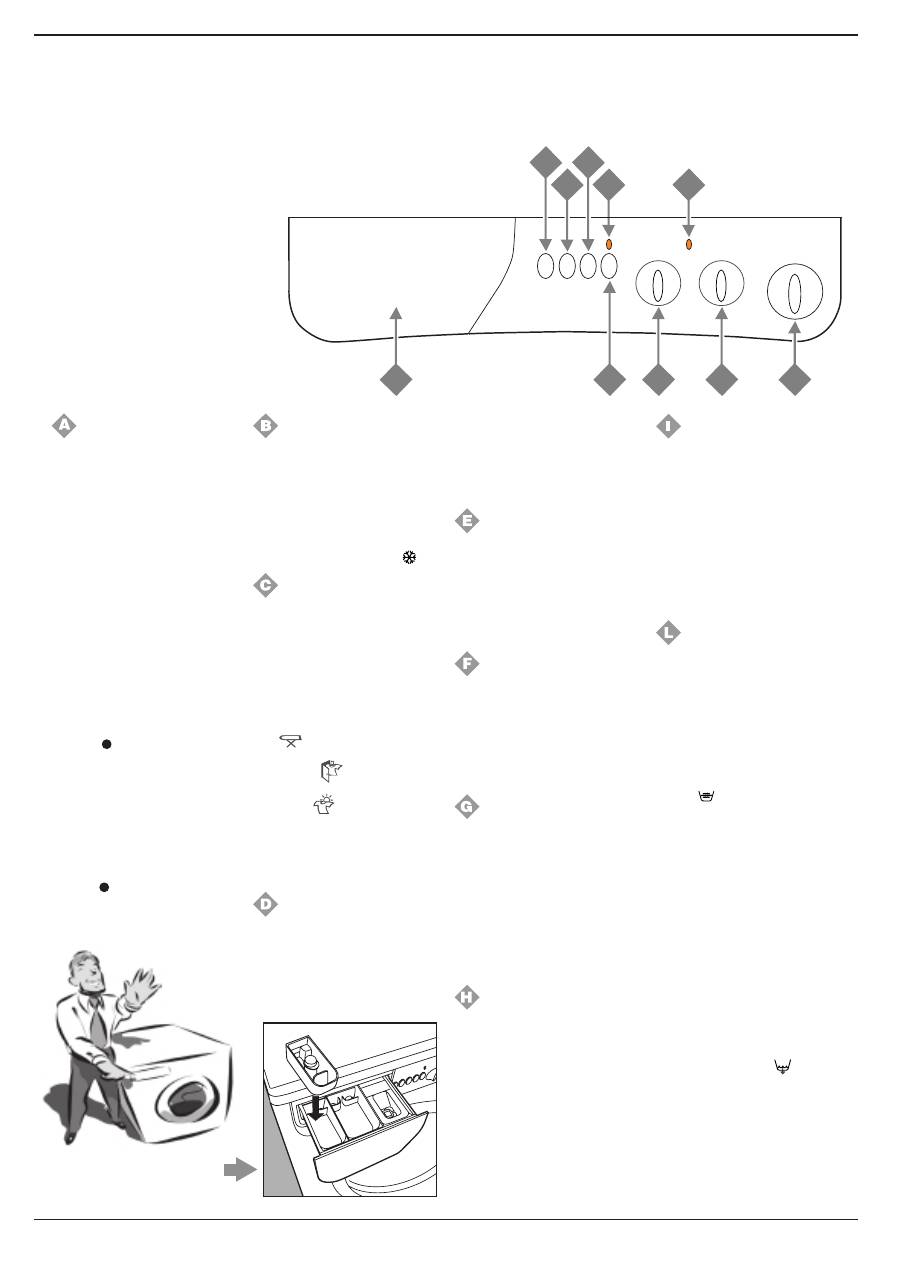
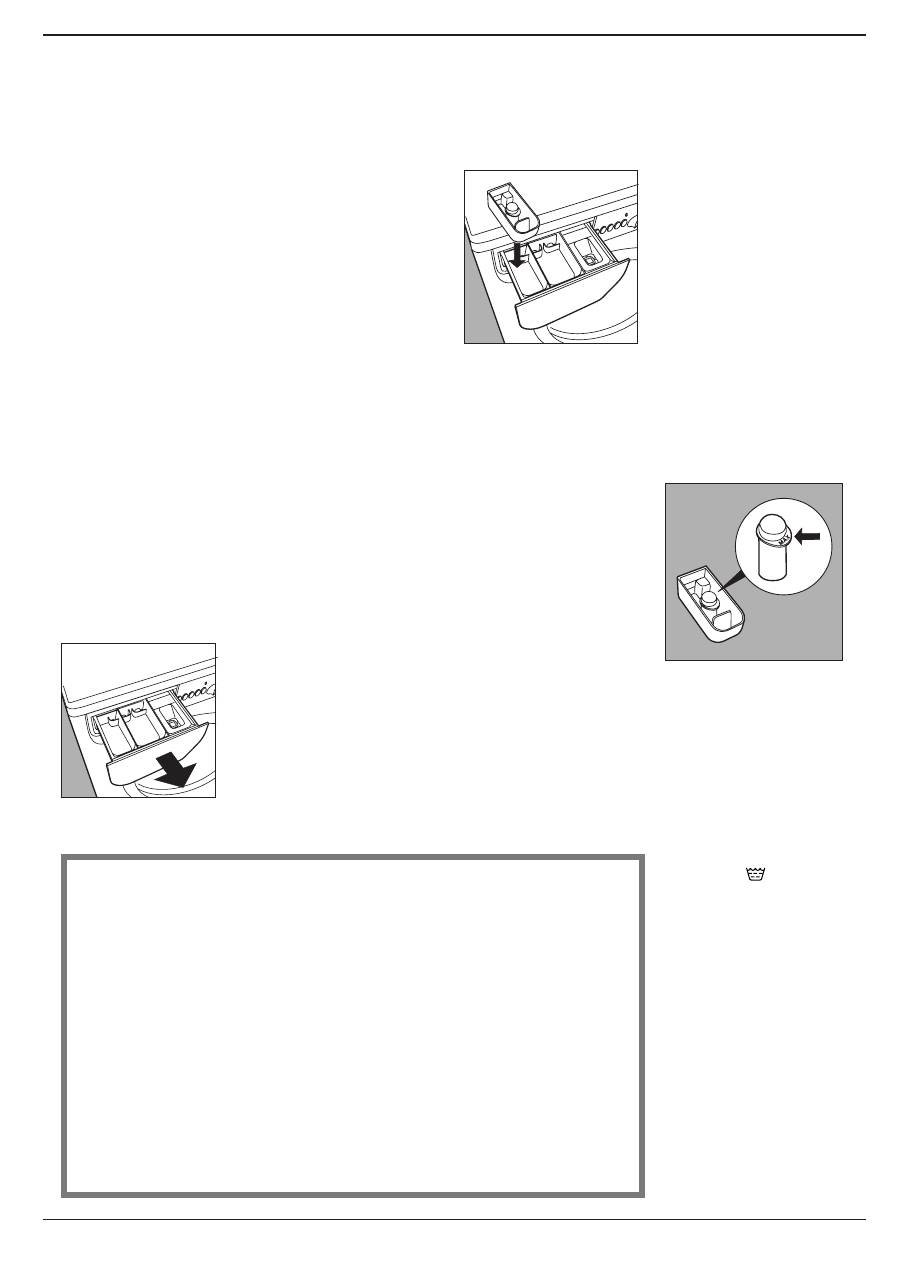
The detergent dispenser can be
removed and cleaned: pull it outwards,
as indicated in the figure. Then leave it
under running water for a few minutes.
Instructions for installation and use
8
1
2
3
4
Bleach cycle and stain removal
button
If bleaching is necessary, the
extra case
4
(provided) must be
inserted into compartment
1
of
the detergent dispenser.
When pouring in the bleach, be
careful not to exceed the
"max"
level indicated on the central
pivot (see illustration).
The use of the additional bleach
container excludes the
possibility of using the pre-wash
cycle.
Traditional bleach can
only be used on sturdy white
fabrics, whereas delicate
bleach can be used for
coloured fabrics, synthetics
and for wool.
You cannot bleach with the
“Silk” programme and with the
“special programmes” (see
page 4).
Use the stain removal button
every time you want to bleach.
Should you want to do it
separately
you must pour the
bleach into the additional
container
4
, press button
G
(stain removal), star t the
washer-dryer, then select one of
the symbols
according to
the type of fabric.
When you bleach
during a
normal wash cycle
, pour the
detergent and any additives in
the special compar tments,
press button
G
(stain removal),
set the programme you desire
and turn the washer-dryer on.
The washer-dryer fails to
fill with water.
Is the hose correctly
connected to the tap?
Is there a water shortage ?
There could be work in
progress in your building or
street.
Is there sufficient water
pressure?
The autoclave
may be malfunctioning.
Is the tap filter clean?
If the
water is very calcareous, or
if work has recently been
carried out on the water
piping, the tap filter could be
clogged with particles and
debris.
Is the rubber hose kinked?
The tract of the rubber hose
bringing water to washer-
dryer must be as straight as
possible. Make sure it is not
squashed or kinked.
The programme selector
knob keeps turning?
Wait a few minutes for the
drain pump to empty the
tub,
switch the washer-dryer
off, select one of the symbols
stop/reset , then switch it
back on. If the knob continues
to turn, call for assistance
because it is showing an
anomaly.
The washer-dryer
continuously fills and
drains water.
Is the drain hose positioned
too low?
It must be installed
at a height ranging from 60 to
100 cm.
Is the end of the hose
immersed in water?
Does the wall drainage
system have a breather
pipe?
If the problem persists
even after these checks, turn
the water supply off the
machine and call for
assistance.
If you live on an upper floor of
your building, there may be a
problem with your drain trap.
To solve this problem, a
special valve must be
installed.
Before calling, read the following
Troubleshooting
In most cases, when your washer-dryer fails to work, the problems arising can
be easily solved without having to call for a technician. Before calling for
assistance, always check these points.
The washer-dryer fails to
start.
Is the plug correctly inserted
into the socket?
It could have
been moved whilst cleaning.
Is there electricity in the
house?
A circuit breaker may have
switched off as a result of too
many electrical appliances
working at the same time. Or
maybe due to a general failure
in your entire area.
Is the washer-dryer door
closed properly?
For safety reasons, the
washer-dryer cannot work if
the door is open or not shut
properly.
Is the On/Off button
pressed?
If it is, then a programmed start
has been set.
Is the programmed start
knob, in the correct position
for those models
concerned?
Is the water supply turned
on?
For safety reasons, if the
washer-dryer does not load
water, it cannot start a wash
cycle.
RIGHT
WRONG
Turn off the water
supply after use.
This will eliminate
the possibility of
leakage.
Always leave the
appliance door ajar
to avoid bad odours.
Clean the
appliance’s
exteriors gently.
To clean the
exteriors and the
rubber parts of the
appliance, always
use a soft cloth
dipped in warm and
soapy water.
Leave the washer-dryer
plugged in while
cleaning.
Even during maintenance,
the appliance should
always be unplugged.
Use solvents and
aggressive abrasives.
Never use solvents or
abrasives to clean the
external and rubber parts
of the washer-dryer.
Neglect the detergent
dispenser.
It is removable and can
easily be cleaned by
leaving it under running
water.
Go on holiday without
thinking about her.
Before leaving, always
make sure that the
washer-dryer is
unplugged and that the
water supply is turned off.
9
Instructions for installation and use
Simple: with the new Indesit technology, you need less than
half of it, to get good results on twice as much!
This is why you cannot see the water through the door:
because there is little, very little of it, to respect the
environment yet without renouncing maximum cleanliness.
And, on top of that, you are also saving electricity.
But where did all the water go?
Too much foam.
Is the detergent appropriate
for machine washing?
Check
whether the definition on its
label reads “for machine wash”
or “hand and machine wash”,
or any other similar wording.
Is the correct amount being
used?
An excessive amount of
detergent, besides producing
too much foam, does not
guarantee a more effective
wash, and causes scaling in the
internal parts of the appliance.
The washer-dryer does
not dry.
Check whether:
the plug has been correctly
inserted into the socket; there
is electricity in your home; the
appliance door has been shut
properly; a delayed start (if
available) has not been
selected; programme knob
A
has been set to position
(Stop/Reset); the drying cycle
knob
C
has been set to
position
0
.
The washer-dryer doesn't
dry properly.
Check whether:
the end of the drain hose is
underwater; the drain pump is
obstructed; the advice given
on the maximum loads has
been taken; the water tap has
been turned on.
If, despite all checks, the washer-
dryer fails to function and the
problem persists, call your
nearest authorised Customer
Service Centre, providing the
following information:
- the nature of malfunction
- the model type no. (Mod. ....)
- the serial number (S/N ....)
This information can be found on
the data plate situated at the back
of the washer-dryer.
Is there space between the
machine and adjacent
units?
If it is not a built-in
model, the washer-dryer will
oscillate a bit during the spin
cycle. A few cm of space
should therefore be left
around it.
The washer-dryer leaks.
Is the metal ring of the inlet
hose properly attached?
Turn off the water supply,
unplug the appliance and try
tightening its attachment
without forcing it.
Is the detergent dispenser
obstructed?
Remove and
wash it under tap water.
Is the drain hose well
attached?
Turn off the water
supply, unplug the appliance
and try tightening its
attachment.
Is the drain hose kinked?
The tract of the drain hose
must be as straight as
possible. Make sure the drain
hose is not squashed or
kinked.
Is the washer-dryer’s drain
duct clogged?
Is there an
extension of the drain hose?
If so, is it positioned
incorrectly, blocking the
water flow?
Excessive vibration
during the spin cycle.
Have all transit screws been
removed durind instal-
lation?
See the following
page on installation
procedures.
Has the washer-dryer been
levelled correctly?
The
levelling of the appliance
should be checked
periodically. Adjust the feet
and check them with a level.
The washer-dryer does
not drain or spin.
Does the selected
programme incorporates
water draining?
Some
programmes stop at the end
of the wash cycles and
draining will have to be
selected manually.
Is the “Anti-crease"
function -where provided -
enabled?
This function
requires manual selection for
draining.
Is the drain pump clogged?
To check it, turn off the water
supply, unplug the washer-
dryer and follow the
instructions on page 12, or
call for technical assistance.
Technical characteristics
Always get
assistance from
authorised
technicians and
always insist on
original spare parts.
Instructions for installation and use
10
Model
WD 84 T
Dimensions
width 59,5 cm
height 85 cm
depth 53,5 cm
Capacity
from 1 to 5 kg for the wash programme; from 1 to 3,5 kg for the drying programme
Electrical
connections
voltage 220/230 Volt 50 Hz
maximum absorbed power 1850 W
Water connections
maximum pressure 1 MPa (10 bar)
minimum pressure 0,05 MPa (0,5 bar)
drum capacity 46 litre
Spinning speed
up to 800 rpm
Control programs
in compliance with
IEC regulation 456
wash: programme 3; temperature 60°C; carried out with 5 kg load.
drying: run with a load of 2.5 kg and knob C et to position .
This appliance conforms with the following E.E.C. directives:
- 73/23/EEC of 19/02/73 (Low Voltage) and subsequent modifications
- 89/336/EEC of 03/05/89 (Electromagnetic Compatibility) and subsequent
modifications
11
Instructions for installation and use
When the new washer-
dryer arrives
Installation and removal
Whether new or just transported to a new house,
installation is extremely important for the correct
functioning of your washer-dryer.
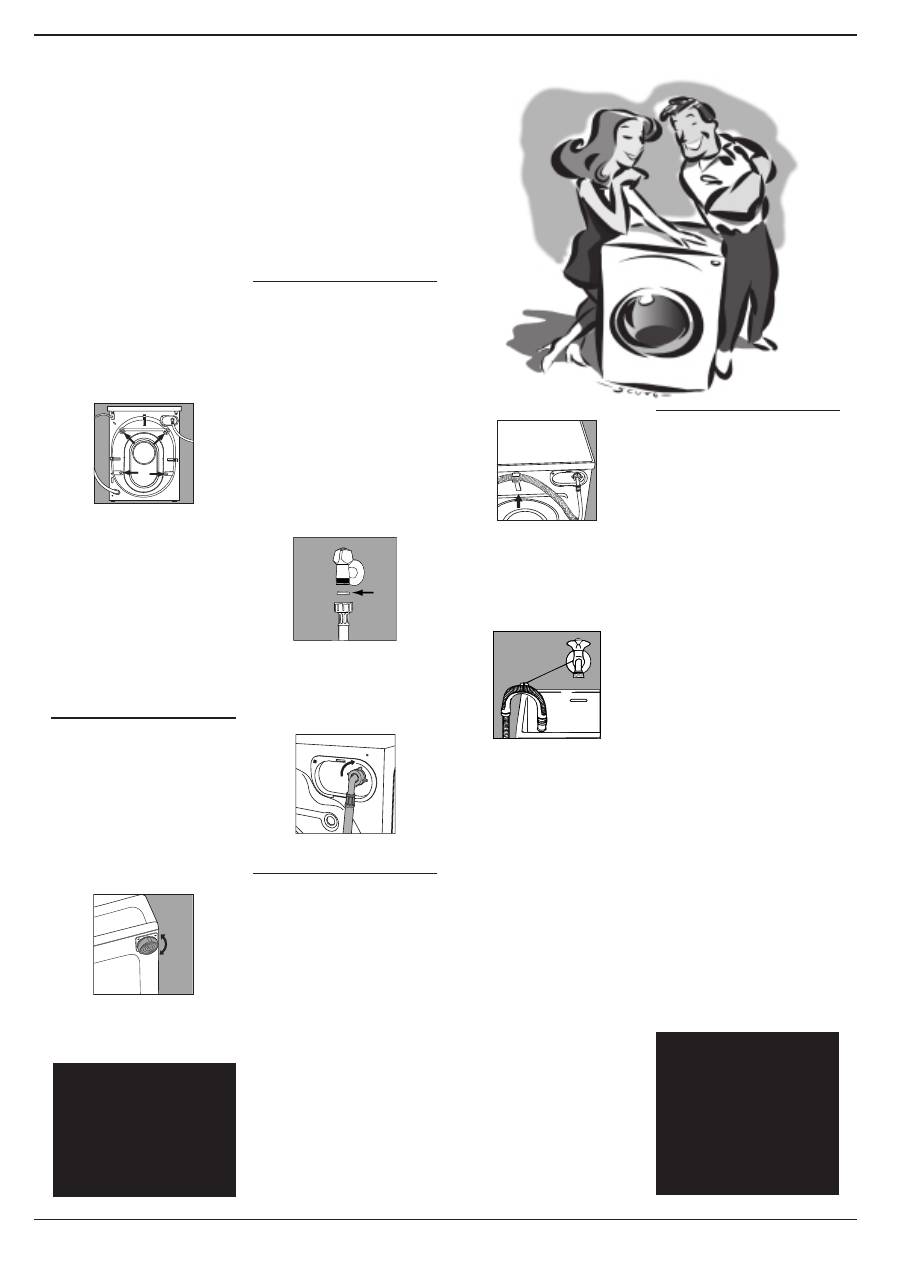
The hook to be used in case the drain
hose ends at a height below 60 cm.
If the drains hose empties into a
tub or sink then fit the plastic gui-
de and secure it to the tap.
The guide for draining into tubs and
sinks.
The end of the drain hose must
be positioned so that it cannot
become submerged.
Extensions are unadvisable. In
case of absolute need, the
extension must have the same
diameter as the original hose and
must not exceed 150 cm. In case
of wall draining pipes, their
efficiency must be checked by
a qualified technician. If the
dwelling is on one of the upper
floors of a building, there may be
drain trap problems causing the
washer-dryer to load and unload
water continuously.
In order to avoid such an
inconvenience, special anti-drain
trap valves are available in
shops.
After removing the appliance from
its packaging, check that it is
intact. If in doubt, contact a
qualified technician immediately.
The inside of the machine is
supported, for transportation, by
four screws on the back panel.
Before using the washer-dryer,
remove the screws
, remove the
spacers together with the rubber
tubes attached to them (keeping
all the parts) and use the plastic
plugs provided to fill in the holes.
Important:
Use the cap (provided)
to close the 3 holes which housed
the stop pin, situated in the right-hand
part of the lower back of the
washer-dryer.
Levelling
The washer-dryer must be levelled
appropriatey in order to guarantee
its correct functioning. To level the
appliance, the front feet must be
adjusted; the angle of inclination,
measured according to the worktop,
must not exceed 2°. When placed
on carpet, make sure the ventilation
is not reduced.
The front feet are adjustable.
Connection to the water
mains
Water pressure must range within
the values indicated on the data
plate on the rear of your washer-
dryer. If the water pipes are new or
left unused, then before connecting
the machine run the water until clear
to remove debris. Connect the inlet
hose to a cold water tap having a
¾ “ BSP thread. Ensure that the
rubber sealing washer-dryers are
fitted at each end of the inlet hose,
with the fitter washer-dryer at the
tap end.
A
The rubber gasket .
Connect the inlet hose to the
threaded connector on the
machine rear.
Water pipe inlet at the top right.
Connecting the drain hose
There are two hooks (right or left)
on the rear of your washer-dryer
to which the drain hose is to be
fixed. Insert the other end in a
stand pipe or place it on the edge
of a sink or tub avoiding excessive
kinks and bending. It should be
placed at a height ranging from 60
to 100 cm. If it is necessary to fix
the end of the hose at a height
below 60 cm from the ground, it
must be fixed in the appropriate
hook placed on the upper part of
the back panel.
Warning!
The company denies all
liability if and when these
norms are not respected.
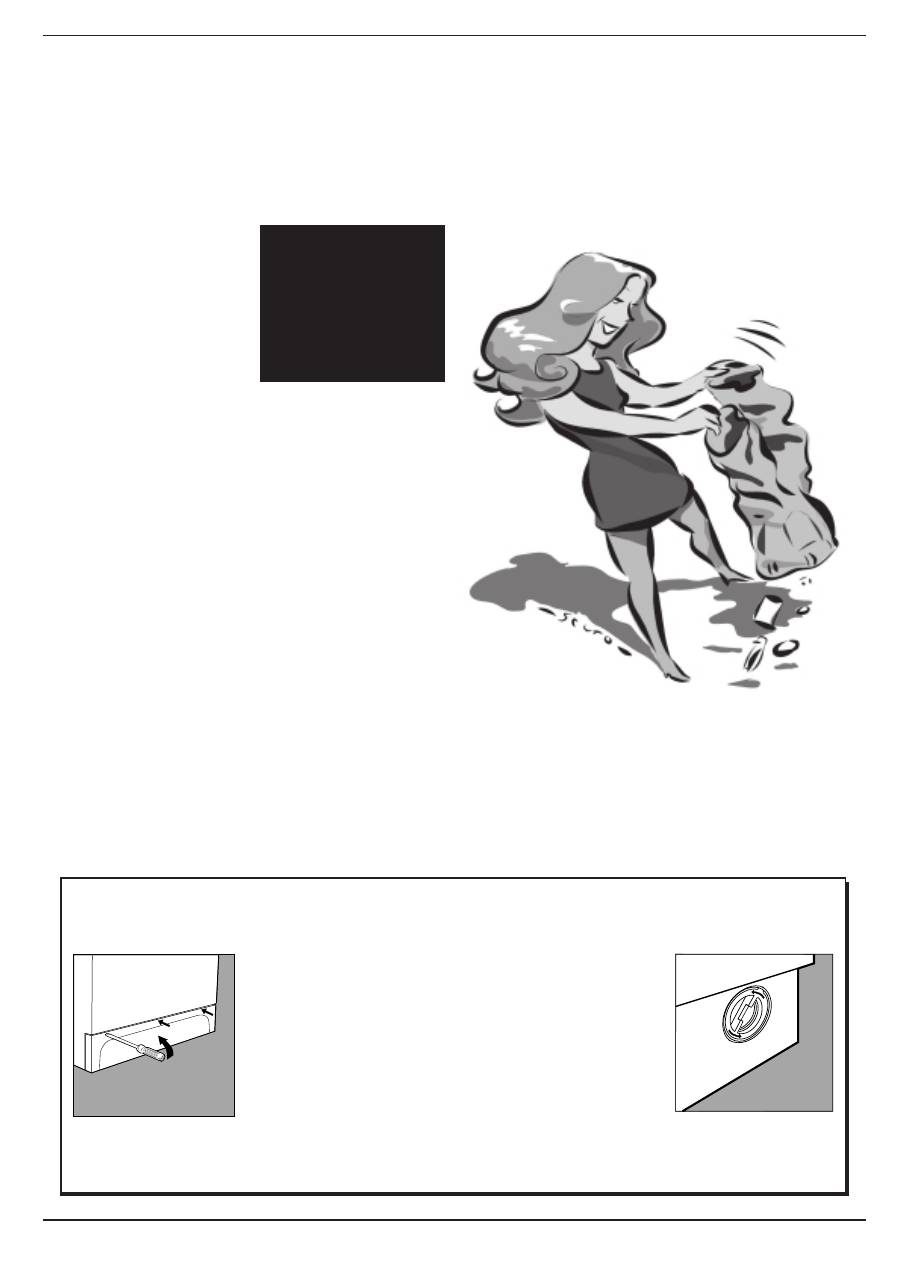
Plastic bags, expanded
styrofoam, nails and other
packaging parts are not
children’s toys, and are
potentially dangerous.
Retain the transit screws,
spacers and washers.
Should you move house
then these should be
replaced to support the
inside of the machine to
prevent damage when
transporting the machine.
Electric connection
Before connecting the appliance
to the electric socket, be sure that:
1) the electric socket is able to
sustain the appliance’s
maximum power load
indicated on the data plate
and in compliance with the
law;
2) the supply voltage is included
within the values indicated on
the data plate;
3) the socket is compatible with
the appliance’s plug. If not, do
not use adapters, but replace
either the socket or the plug;
4) electric household appliances
must be equipped with an
“earthing” system.
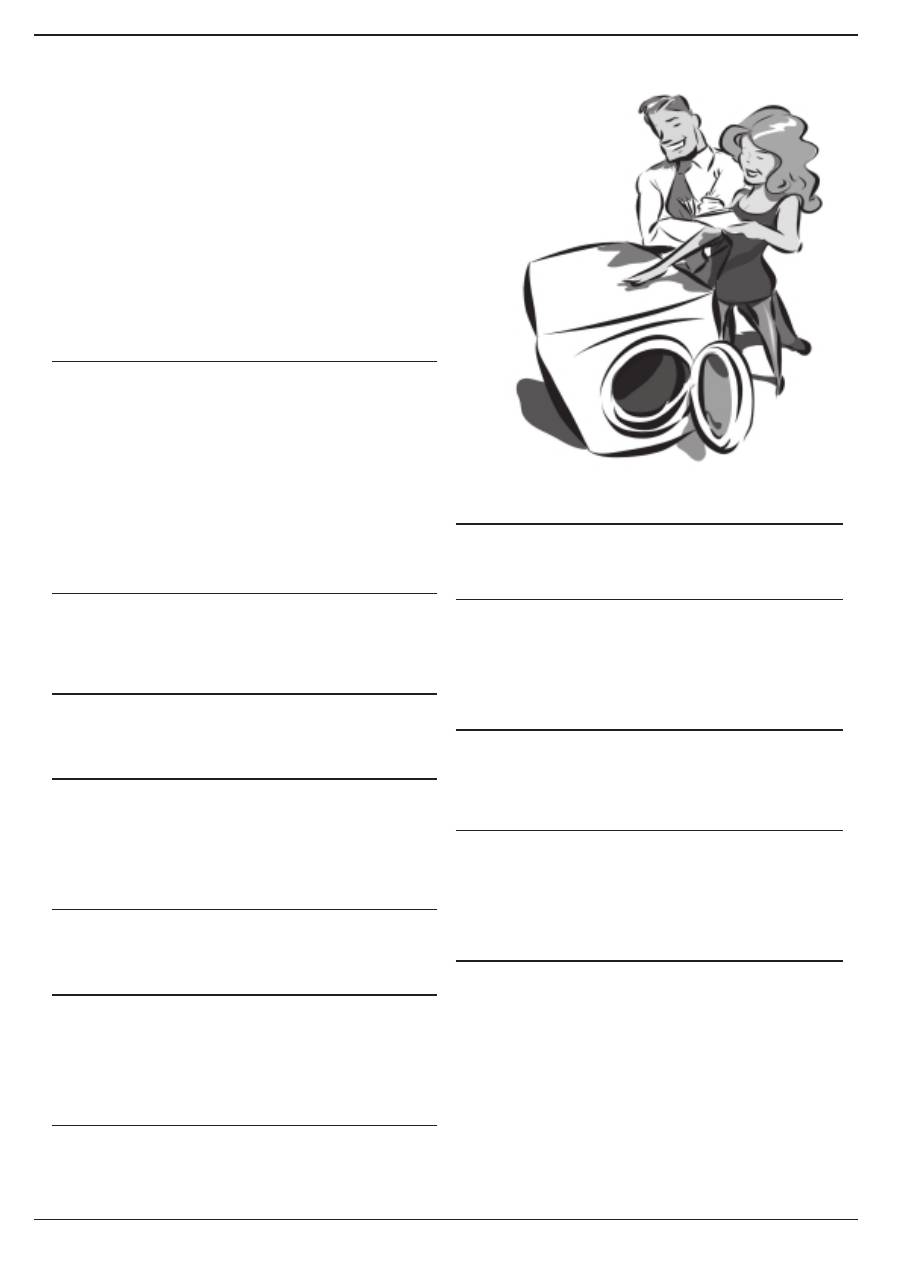
Treat your machine well and it will provide
many years of trouble free service
Easy Care and Maintenance
Your washer-dryer is a reliable companion in life and on the job. It is just as important for you to keep it in
shape.
Your washer-dryer is designed
to provide reliable service over
many years. A few simple steps
will help to prolong its life and
avoid problems. It is advisable,
to turn off water taps when the
machine is not to be used, this
protects the hoses, etc.
If the water in your area is too
hard, use a deliming product
(water is hard if it often leaves
whitish stains around taps or
drains, especially of bath tubs.
For more accurate information as
to the type of water in your
system, call the local water
works or a local plumber).
Pockets must always be
emptied removing even pins,
badges and any other hard
object.
The washer-dryer exterior
should be cleaned with a rag
dipped in lukewarm water and
soap.
Never exaggerate with doses.
Normal detergents already
contain deliming agents. Only if
the water is particularly hard,
that is, rich in lime content, do
we recommend the use of a
specific product at every wash.
A periodical wash cycle with a
dose of a deliming product,
without detergents or washing,
may prove useful.
Never use too much detergent
or additives because this could
cause an excess amount of
foam, scaling and possible
damage to the component parts
of your washer-dryer.
When in need, check the pump and the rubber hose.
The washer-dryer comes equipped with a self-cleaning pump that does not require any cleaning or maintenance.
Small objects may accidentally fall into the pump: coins, hair clips, loose buttons and other small items. To avoid
possible damage, they are withheld in an accessible pre-chamber, situated at the lower end of the pump.
It is important to wash
the detergent dispenser
regularly.
To prevent dried washing
powder from
accumulating, place the
dispenser under running
water for a few minutes.
Do not forget to empty all pockets: small objects can
cause damage to your washer-dryer.
Attention:
Before attempting to examine this pre-chamber, first
ensure that the machine has finished its programme and is empty.
Unplug the machine, as with any maintenance.
To gain access gently ease down the top of the plinth panel situated at
the base of the machine, with a screwdriver etc, to release it. Then
ease the top edge forward to allow it to be lifted clear (Fig. 1). Place
a shallow dish or tray below the cover of the pre-chamber to catch
the small amount of water present. Release the cover by turning anti-
clockwise (Fig. 2). Ensure that the cover is securely replaced.
Re-fit the plinth cover by inserting the hooks on its lower edge into
the slots and ease the top edge back into position.
The water inlet hose
Check the rubber hose at least once a year. If you see any cracks, replace it immediately. When you use your washer-dryer,
water pressure is very strong and a cracked tube could easily split open.
Fig. 1
Fig. 2
Instructions for installation and use
12
13
Instructions for installation and use
Your safety and that of your family
Important for the safe use of your washer-dryer
Your washer-dryer has been built in compliance
with the strictest international safety regulations.
To protect you and all your family.
Read these instructions and all
the information in this manual
carefully: they are an important
source, not only of numerous
useful tips, but also of vital
information on safety, use and
maintenance.
1. the machine should not be
installed in an outdoor
environment,
not even
when a roof shelters the
area, because it may be very
dangerous to leave it
exposed to rain and
thunderstorms.
2. It must only be used by
adults
and exclusively for
washing clothes following
the instructions provided in
this manual.
3.
Should it have to be moved,
proceed with the help of two
or three people and handle
it with the utmost care.
Never try to do this alone,
because
the appliance is
very heavy
.
4.
Before loading the washer-
dryer,
make sure the drum
is empty.
5. Never touch the washer-
dryer when barefoot
or
with wet or damp hands
or feet.
6. Never use extensions or
multiple plugs
, which are
particularly dangerous in
humid environments. The
power supply cable must
never be bent or
dangerously compressed.
7. Never open the detergent
dispenser while the
appliance is functioning;
do not use hand wash
detergent
because the
abundance of foam could
damage its internal parts.
8. Never pull on the supply
cable
or the washer-dryer to
disconnect it from the wall
socket: it is extremely
dangerous.
9.
While the appliance is
functioning,
do not touch
the drain water
as it could
reach very high tempera-
tures.
The appliance door,
during wash cycles, tends
to become hot; ensure
that children do no touch
it.
Never force the washer-
dryer door
because this
could damage the safety
lock which prevents
accidental opening when the
nachine is working. Allow a
few minutes at the end of the
program for the lock to
release.
10. In case of malfunctioning,
first close the water tap
and unplug the appliance
from the wall socket;
do
not under any circum-
stances touch internal parts
in order to attempt repairs.
I only want an authorised
specialised technician with
original Indesit spare parts!
How to change the power supply cable
The washer-dryer power
supply cable is special and
can be purchased exclusively
from authorised Technical
Service Centres.
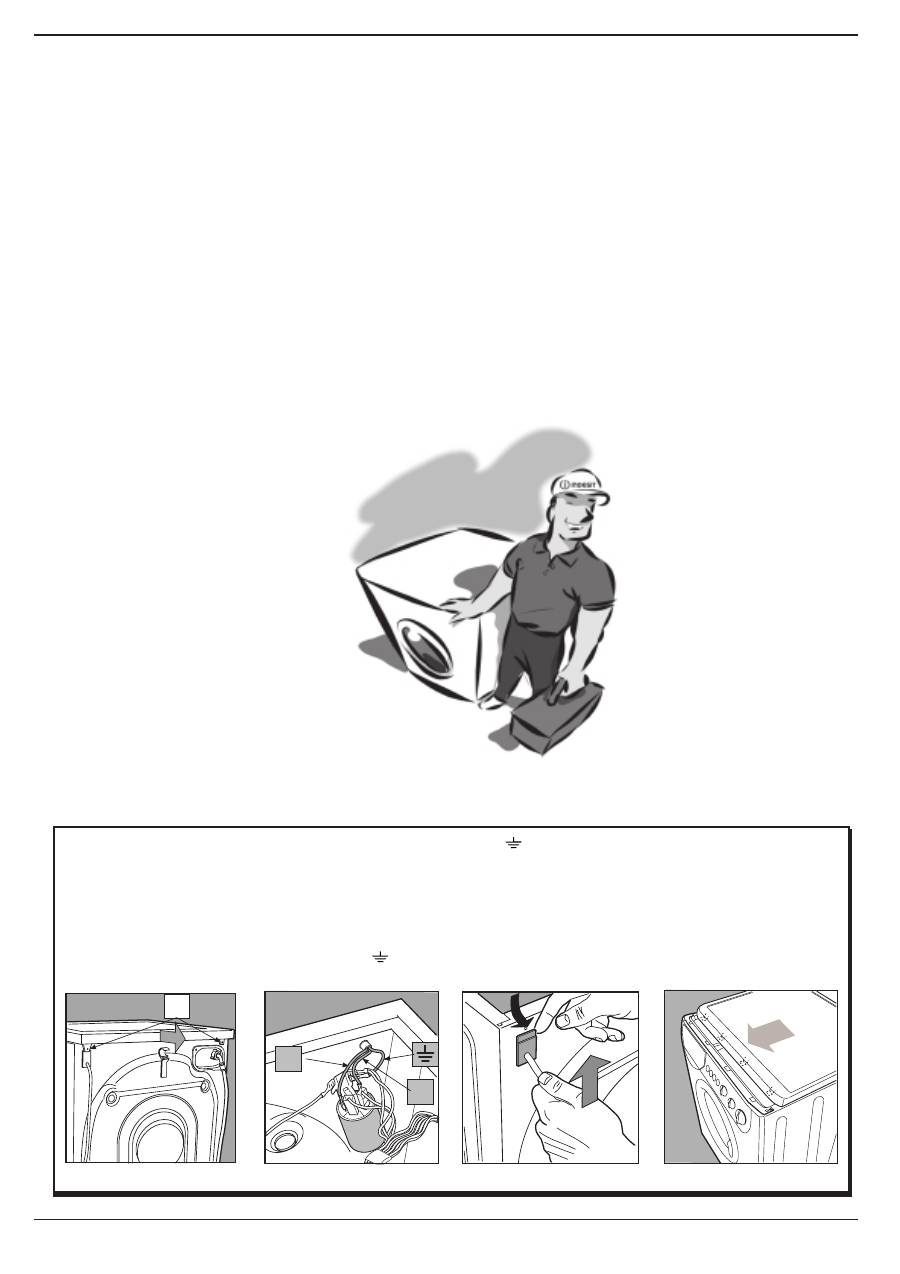
To replace the cable:
1.
Make sure that the machine
is switched off and unplugged.
2.
Remove the covering lid by
unscrewing the two screws
I
, and
then pull it towards you [fig. 3].
3.
Disconnect the wires from
the radio interference
suppressor
F
[fig. 4] noting as
to their position (
Blue=N
wire;
Brown=L
wire) leaving the
earth wire until last
.
N.B.:
letters
L
,
N
and the
symbol
are indicated on the
radio interference suppressor.
4.
Remove the upper part of the
cable slightly from the back
panel of the appliance, pull the
power supply cable upwards and
take it out [fig. 5].
To connect the new power
supply cable, reverse the pro-
cedure.
To put the covering lid back on,
rest it on the washer-dryer
[fig. 6] and let it slide forwards
until the hooks situated on the
front slide into the special slots
formed into the control panel
and tighten the screws back on.
Fig. 3
Fig. 4
Fig. 5
Fig. 6
I
N
L
F

Instructions for installation and use
14
Íàñòîÿùåå Ðóêîâîäñòâî ñîäåðæèò 12 ðàçäåëîâ.
Âíèìàòåëüíî èçó÷èòå èõ. Âû îòêðîåòå äëÿ ñåáÿ
ìíîæåñòâî ñåêðåòîâ ýôôåêòèâíîé ñòèðêè, óçíàå-
òå âîçìîæíîñòè ñâîåé ñòèðàëüíîé ìàøèíû, íàó÷è-
òåñü îáðàùàòüñÿ ñ íåé. Íàñòîÿòåëüíî ðåêîìåíäó-
åì îáðàòèòü îñîáîå âíèìàíèå íà ïðàâèëà òåõíèêè
áåçîïàñíîñòè.
Êðàòêèé ïóòåâîäèòåëü
Ïðî÷èòàéòå, èçó÷èòå è èçâëåêèòå
ìàêñèìàëüíóþ âûãîäó!
1.
Óñòàíîâêà è ïîäêëþ÷åíèå (ñ. 25)
Óñòàíîâêà î÷åíü âàæíàÿ îïåðàöèÿ, îò êîòîðîé âî ìíîãîì çàâèñèò,
êàê áóäåò ðàáîòàòü âàøà Ñòèðàëüíàÿ ìàøèíà ñ ñóøêîé. Îáÿçàòåëüíî
ïðîâåðüòå:
1.
Ñîîòâåòñòâèå õàðàêòåðèñòèê ñòèðàëüíîé ìàøèíû è ýëåêòðè÷åñêîé
ñåòè â âàøåì äîìå.
2.
Ïðàâèëüíîñòü ïîäêëþ÷åíèÿ çàëèâíîãî è ñëèâíîãî øëàíãîâ.
Íå èñïîëüçóéòå øëàíãè ïîâòîðíî.
3.
Ãîðèçîíòàëüíîñòü óñòàíîâêè ýòî âëèÿåò íà ñðîê ñëóæáû
ñòèðàëüíîé ìàøèíû è êà÷åñòâî ñòèðêè.
4.
×òî ôèêñèðóþùèå áàðàáaí áîëòû, êîòîðûå íàõîäÿòñÿ ía çaäíåé ñòîðîíå
ìaøèíû, óäaëåíû.
2.
Ïîäãîòîâêà áåëüÿ è çàïóñê ìàøèíû (ñ. 16)
Ïðàâèëüíûé ïîäáîð ñòèðàåìûõ âåùåé è ðàâíîìåðíîñòü çàãðóçêè
ãàðàíòèðóþò âûñîêîå êà÷åñòâî ñòèðêè è äîëãèé ñðîê ñëóæáû ìàøèíû.
 ýòîì ðàçäåëå âû íàéäåòå ìíîãî ïîëåçíûõ ñîâåòîâ.
3.
×òî íà ýòèêåòêàõ (ñ. 20)
Âû äîëæíû íàó÷èòüñÿ ÷èòàòü ýòèêåòêè, ïðèêðåïëÿìûå ê îäåæäå è áåëüþ,
÷òîáû ïðàâèëüíî âûáèðàòü ðåæèìû ñòèðêè, ñóøêè è ãëàæåíèÿ.
4.
Òèïè÷íûå îøèáêè è êàê èõ èçáåæàòü (ñ. 21)
Ðàíüøå âû îáðàùàëèñü çà ñîâåòàìè ê ñâîèì áàáóøêàì. Íî â èõ âðåìåíà
åùå íå áûëî ñèíòåòè÷åñêèõ òêàíåé è ñòèðêà ñ÷èòàëàñü ïðîñòûì äåëîì.
Ñåãîäíÿ ëó÷øèé êîíñóëüòàíò Ñòèðàëüíàÿ ìàøèíà ñ ñóøêîé.
Áëàãîäàðÿ åé âû ñìîæåòå ñòèðàòü äàæå øåðñòÿíûå èçäåëèÿ, è ðåçóëüòàò
áóäåò ëó÷øå, ÷åì ïðè ðó÷ãîé ñòèðêå.
5.
Ðàñïðåäåëèòåëü ìîþùèõ ñðåäñòâ (ñ. 22)
Ñîâåòû è ðåêîìåíäàöèè ïî èñïîëüçîâàíèþ îòäåëåíèé ðàñïðåäåëèòåëÿ
ìîþùèõ ñðåäñòâ.
6.
Ïàíåëü óïðàâëåíèÿ (ñ. 17)
Êîíñòðóêöèÿ ïàíåëè óïðàâëåíèÿ Ñòèðàëüíàÿ ìàøèíà ñ ñóøêîé ïðîñòà:
âñåãî íåñêîëüêî êíîïîê, ñ ïîìîùüþ êîòîðûõ âû âûáèðàåòå ðåæèì
ñòèðêè (îò èíòåíñèâíîãî äî äåëèêàòíîãî). Ïðè ïðàâèëüíîì âûáîðå
ðåæèìà âûñîêîå êà÷åñòâî ñòèðêè è äîëãîâå÷íîñòü ìàøèíû
ãàðàíòèðîâàíû.
7.
Ïðîãðàììû ñòèðêè (ñ. 18)
Òàáëèöà ïðîãðàìì ïîçâîëèò âàì ïðàâèëüíî âûáðàòü òåìïåðàòóðíûé
ðåæèì, ìîþùèå ñðåäñòâà, îïîëàñêèâàòåëè è ñìÿã÷èòåëè. Ïðàâèëüíûé
âûáîð ïðîãðàììû ýòî íå òîëüêî âûñîêîå êà÷åñòâî ñòèðêè, íî è
ñóùåñòâåííàÿ ýêîíîìèÿ ýëåêòðîýíåðãèè è âîäû.
8.
Ïîëåçíûå ñîâåòû (p. 19)
Êàê âûñóøèòü áåëüå â ñòèðàëüíîé ìàøèíå.
9.
Îáñëóæèâàíèå è óõîä (ñ. 26)
Ñòèðàëüíàÿ ìàøèíà ñ ñóøêîé âàø íàñòîÿùèé äðóã. Ïðîÿâèòå ê íåìó
âíèìàíèå, è îí îòâåòèò âàì ïðåäàííîñòüþ è áëàãîäàðíîñòüþ.
Íå ñëèøêîì îáðåìåíèòåëüíûé óõîä çà ñòèðàëüíîé ìàøèíîé ïðîäëèò
ñðîê åå ñëóæáû íà ìíîãèå ãîäû.
10.
Âîçìîæíûå íåèñïðàâíîñòè è ñïîñîáû
èõ óñòðàíåíèÿ (ñ. 23 è 24)
Ìíîãèå ïðîáëåìû âû ñìîæåòå ðåøèòü ñàìè, åñëè âíèìàòåëüíî èçó÷èòå
ïðèâåäåííûå â ýòîì ðàçäåëå ðåêîìåíäàöèè. Â ñëîæíûõ ñèòóàöèÿõ
íåìåäëåííî âûçûâàéòå òåõíèêîâ ñåðâèñíîãî öåíòðà Indesit.
11.
Òåõíè÷åñêèå õàðàêòåðèñòèêè (ñ. 24)
Êðàòêèå òåõíè÷åñêèå äàííûå, êîòîðûå íåîáõîäèìî çíàòü âëàäåëüöó
ñòèðàëüíîé ìàøèíû: ìîäåëü, ïîòðåáëåíèå ýëåêòðîýíåðãèè, ðàñõîä âîäû,
ãàáàðèòû, ñêîðîñòü âðàùåíèÿ áàðàáàíà â ðàçíûõ ðåæèìàõ, ñîîòâåòñòâèå
èòàëüÿíñêèì è åâðîïåéñêèì íîðìàì è ñòàíäàðòàì è ïð.
12.
Âàøà áåçîïàñíîñòü è áåçîïàñíîñòü
âàøèõ äåòåé (ñ. 27)
Êàê îáåñïå÷èòü áåçîïàñíîñòü äîìà è ñåìüè ýòî ñàìîå ãëàâíîå, ÷òî
âû äîëæíû çíàòü êàê âëàäåëåö è ïîëüçîâàòåëü ñòèðàëüíîé ìàøèíû.
15
Ðóêîâîäñòâî ïî óñòàíîâêå è ýêñïëóàòàöèè

M
Êàê ïîëüçîâàòüñÿ ìàøèíîé
Âû ñäåëàåòå áîëüøîå äåëî, åñëè ïåðåä ñòèðêîé ðàññîðòèðóåòå áåëüå ïî ìàòåðèàëó
è öâåòó, ïðî÷èòàåòå ýòèêåòêè íà îòäåëüíûõ âåùàõ è ñìåøàåòå êðóïíûå âåùè
ñ ìåëêèìè.
Ïîäãîòîâêà áåëüÿ.
Ðàçáåðèòå áåëüå ïî ìàòåðè-
àëó è ïî óñòîé÷èâîñòè îê-
ðàñêè. Áåëîå è öâåòíîå áå-
ëüå ñòèðàéòå îòäåëüíî.
Íå çàáóäüòå âûíóòü âñå èç
êàðìàíîâ, îñîáåííî ìåëêèå
ïðåäìåòû, (ìîíåòû, çíà÷êè,
èãîëêè è äð.), êîòîðûå ìî-
ãóò ïîâðåäèòü ìàøèíó.
Ïðîâåðüòå, õîðîøî ëè äåð-
æàòñÿ ïóãîâèöû è çàñòåãíè-
òå ìîëíèè.
Êàê èçáàâèòüñÿ îò ïÿòåí: îáùèå ðåêîìåíäàöèè
Ïàñòà øàðèêîâûõ ðó÷åê èëè ôëîìàñòåð:
íàíåñèòå ìåòèëîâûé ñïèðò íà êóñî÷åê âàòû è ïðîòðèòå ïÿòíî, çàòåì ñòèðàéòå ïðè 90 °Ñ.
Äåãîòü è ñìàçêà:
ñ÷èñòèòå òîëñòûé ñëîé çàãðÿçíåíèÿ, ðàçìÿã÷èòå îñòàòîê ìàðãàðèíîì èëè ñëèâî÷íûì ìàñîì, îñòàâüòå íà âðåìÿ;
çàòåì ñíèìèòå ñêèïèäàðîì è ñðàçó æå ïðîñòèðàéòå âåùü.
Âîñê:
ñ÷èñòèòå âîñê, ïîëîæèòå òêàíü ìåæäó äâóìÿ ëèñòàìè ðûõëîé áóìàãè è ïðîãëàäüòå ãîðÿ÷èì óòþãîì; ñðàçó æå îáðàáîòàéòå
âàòíûì òàìïîíîì, ñìî÷åííûì ñêèïèäàðîì èëè ìåòèëîâûì ñïèðòîì.
Æåâàòåëüíàÿ ðåçèíêà:
óäàëèòå ñ ïîìîùüþ æèäêîñòüè äëÿ ñíÿòèÿ ëàêà, çàòåì ïðîòðèòå ÷èñòîé òêàíüþ.
Ïëåñåíü:
õëîïêîâûå è ëüíÿíûå òêàíè çàìî÷èòå â ðàñòâîðå 1 ÷àñòè æèäêîãî ìîþùåãî ñðåäñòâà íà 5 ÷àñòåé âîäû è äîáàâüòå ñòîëîâóþ
ëîæêó óêñóñà. Òîò÷àñ ïðîñòèðàéòå. Çàãðÿçíåíèÿ èíûõ áåëûõ òêàíÿõ ñìî÷èòå â 10%-íîì ðàñòâîðå ïåðåêèñè âîäîðîäà è ïðîñòèðàéòå.
Ãóáíàÿ ïîìàäà:
õëîïîê èëè øåðñòü îáðàáîòàéòå æèäêèì ìîþùèì ñðåäñòâîì è ïðîòðèòå; øåëê î÷èùàéòå ïÿòíîâûâîäèòåëåì.
Ëàê äëÿ íîãòåé:
ïîëîæèòå òêàíü ìåæäó äâóìÿ ëèñòàìè ðûõëîé áóìàãè, ñìî÷èòå æèäêîñòüþ äëÿ ñíÿòèÿ ëàêà.
Ïÿòíà îò òðàâû:
èñïîëüçóéòå òàìïîí, ñìî÷åííûé ýòèëîâûì ñïèðòîì.
Çàïóñê ìàøèíû
Ïðàâèëüíûé ïóñê ìàøèíû
î÷åíü âàæåí ñ òî÷êè çðåíèÿ
ïîâûøåíèÿ êà÷åñòâà ñòèð-
êè è óâåëè÷åíèÿ ñðîêà ýêñ-
ïëóàòàöèè îáîðóäîâàíèÿ.
Ïîñëå çàãðóçêè ìàøèíû è
çàïðàâêè ìîþùèõ ñðåäñòâ è
ðàçëè÷íûõ äîáàâîê îáÿçà-
òåëüíî óáåäèòåñü â òîì, ÷òî:
1. Äâåðöà ìàøèíû íàäåæíî
çàêðûòà.
2. Ìàøèíà âêëþ÷åíà â
ýëåêòðè÷åñêóþ ñåòü.
3. Îòêðûò êðàí ïîäà÷è
âîäû.
4. Ðóêîÿòêà
À
íàõîäèòñÿ â
ïîëîæåíèè
l
(Stop/Reset).
Âûáîð ïðîãðàììû
Âûáåðèòå íóæíóþ ïðîãðàììó
ïî òàáëèöå, êîòîðàÿ ïðèâåäåíà
íà ñ. 18. Ïîâåðíèòå ðóêîÿòêó
ïðîãðàììàòîðà
À
òàê, ÷òîáû
âûáðàííàÿ ïðîãðàììà ñîâïàëà
c îòìåòêîé íà ðóêîÿòêå; ïðè
ïîìîùè ðóêîÿòêè òåðìîñòàòà
Â
óñòàíîâèòå íåîáõîäèìóþ
òåìïåðàòóðó; óáåäèòåñü, ÷òî
ðóêîÿòêà âûáîðà ñêîðîñòè
îòæèìà
Ñ
íàõîäèòñÿ â
òðåáóåìîì ïîëîæåíèè, åñëè
íåîáõîäèìî, íàæìèòå êíîïêè
E, F,
G
çàòåì íàæìèòå êíîïêó
Ïîñëå óñòàíîâêè íîâîé ìàøèíû âêëþ÷èòå öèêë ñòèð-
êè ïî ïðîãðàììå 1 ñ òåìïåðàòóðîé 90°Ñ.
Äëÿ ïîëó÷åíèÿ
õîðîøèõ ðåçóëüòàòîâ
î÷åíü âàæíî ðàçîáðàòü
áåëüå ïî òêàíè è öâåòó
âêëþ÷åíèÿ/âûêëþ÷åíèÿ
H
(ïîçèöèÿ
I
).
Ïî îêîí÷àíèè ñòèðêè
Èíäèêàòîð
I
â òå÷åíèå
íåñêîëüêèõ ñåêóíä áóäåò
ìèãàòü ÷àñòî, çàòåì çàìèãàåò
ðåæå.
Âûêëþ÷èòå ñòèðàëüíóþ
ìàøèíó íàæàòèåì êíîïêè
H
(ïîëîæåíèå
O
). Îòêðîéòå
äâåðöó ìàøèíû. Âûíóâ
áåëüå, îñòàâüòå äâåðöó
ìàøèíû ïðèîòêðûòîé, ÷òîáû
äàòü èñïàðèòüñÿ îñòàâøåéñÿ
âëàãå.
Ïåðåêðîéòå êðàí ïîäà÷è
âîäû.
 ñëó÷àå îòêëþ÷åíèÿ ýëåê-
òðîïèòàíèÿ èëè ñàìîïðîèç-
âîëüíîãî âûêëþ÷åíèÿ ìà-
øèíû çàäàííàÿ ïðîãðàììà
ñîõðàíÿåòñÿ â ïàìÿòè.
Ñâåðÿéòåñü
ñ ýòèêåòêàìè.
Íà îäåæäå è áåëüå èìåþò-
ñÿ ýòèêåòêè, ïîêàçûâàþ-
ùèå êàê óõàæèâàòü çà ýòè-
ìè èçäåëèÿìè.
 òàáëèöå (ñì. ñ. 20) ïðèâå-
äåíû ñèìâîëû, ïðîñòàâëÿå-
ìûå íà ýòèêåòêàõ, è ðàñêðû-
òî èõ ñîäåðæàíèå. Ñîáëþäå-
íèå ïðàâèë ñòèðêè íàäîëãî
ñîõðàíèò âàøè âåùè.
Ñìåøèâàéòå êðóïíûå è
ìåëêèå âåùè ïðè
çàãðóçêå ìàøèíû.
Ìàøèíà îáîðóäîâàíà ýëåê-
òðîííûì óñòðîéñòâîì, êîí-
òðîëèðóþùèì çàãðóçêó áà-
ðàáàíà. Ïåðåä âûïîëíåíè-
åì öèêëà îòæèìà ýòî óñò-
ðîéñòâî ñòàðàåòñÿ áîëåå
èëè ìåíåå ðàâíîìåðíî ðàñ-
ïðåäåëèòü íàãðóçêó ïî áà-
ðàáàíó, ÷òî, â ñâîþ î÷å-
ðåäü, çàâèñèò êàê îò òèïà
ñòèðàåìûõ âåùåé, òàê è îò
èõ íà÷àëüíîé çàãðóçêè.
Åñëè íàãðóçêà ðàñïðåäåëå-
íà áîëåå èëè ìåíåå ðàâíî-
ìåðíî, òî ìàøèíà ìîæåò
âûïîëíÿòü îòæèì íà âûñî-
êèõ îáîðîòàõ áåç øóìà è
òðÿñêè.
Äëÿ çàùèòû ïðåäìåòîâ
îäåæäû èç äåëèêàòíûõ
òêàíåé (íèæíåå áåëüå,
÷óëêè) ïîìåñòèòå èõ
â õîëùåâûå ìåøî÷êè
Ðóêîâîäñòâî ïî óñòàíîâêå è ýêñïëóàòàöèè
16
I
L
A
B
C
H
D
F
G
E
Êíîïêà âêëþ÷åíèÿ /
âûêëþ÷åíèÿ
Íàæàòèå íà êíîïêó âêëþ÷àåò
ìàøèíó. Åñëè êíîïêà
íå íàæàòà, òî ìàøèíà âûêëþ÷åíà.
Âûêëþ÷åíèå ìàøèíû íå îòìå-
íÿåò çàäàííóþ ïðîãðàììó
.
Èíäèêàòîð âêëþ÷åíèÿ/
âûêëþ÷åíèÿ è
áëîêèðîâêè äâåðöû
Äâåðöó ìîæíî îòêðûâàòü, åñëè
èíäèêàòîð
I
ìèãàåò ðåäêî (ìàøèíà
âêëþ÷åíà è æäåò ââåäåíèÿ ïðîãðàììû
èëè ïî îêîí÷àíèþ öèêëà ñòèðêè). Åñëè
èíäèêàòîð ìèãàåò ÷àñòî, äâåðöó
îòêðûâàòü íåëüçÿ. Ïîñòîÿííîå
ñâå÷åíèå èíäèêàòîðà îçíà÷àåò, ÷òî
ìàøèíà ïðèíÿëà çàäàííóþ ïðîãðàììó.
Èíäèêàòîð öèêëà ñòèðêè
Ãîðÿùèé èíäèêàòîð îáîçíà÷àåò, ÷òî
ðóêîÿòêîé
Ñ
çàäàí öèêë ñóøêè,
êîòîðûé áóäåò âûïîëíåí ïî
îêîí÷àíèþ öèêëà ñòèðêè.
Êíîïêà îñòàíîâêè ñ âîäîé
â ìàøèíå
Ýòà ôóíêöèÿ (îáîçíà÷åííàÿ ñèìâîëîì
) ïðåðûâàåò ïðîãðàììó ñòèðêè,
îñòàâëÿÿ áåëüå çàìî÷åííûì â âîäå
ïåðåä ñëèâîì. Ôóíêöèÿ ïðèìåíÿåòñÿ
òîëüêî ñ ïðîãðàììàìè ñòèðêè
ñèíòåòè÷åñêèõ òêàíåé, øåëêà è
çàíàâåñåé. Èñïîëüçîâàíèå ôóíêöèè
ïðåäîòâðàùàåò îáðàçîâàíèå ñêëàäîê
íà äåëèêàòíûõ è ñèíòåòè÷åñêèõ òêàíÿõ
(íàïðèìåð, åñëè Âû ñìîæåòå âûíóòü
áåëüå òîëüêî ñïóñòÿ íåñêîëüêî ÷àñîâ
ïîñëå ñòèðêè). Ïðîãðàììà ìîæåò
áûòü çàêîí÷åíà ïîâîðîòîì ðóêîÿòêè
À
íà îäíî äåëåíèå.
 ñëó÷àå ñèíòåòè÷åñêèõ òêàíåé,
ïðåäïî÷òèòåëüíåå èñïîëüçîâàòü ñëèâ,
à íå îòæèì, ïîâåðíèòå ðóêîÿòêó
À
â
ïîçèöèþ, îáîçíà÷åííóþ ñèìâîëîì
(ñëèâ).
Ðàñïðåäåëèòåëü ìîþùèõ
ñðåäñòâ
Ðàñïðåäåëèòåëü ìîþùèõ ñðåäñòâ
èìååò òðè îòäåëåíèÿ:
1
- ìîþùåå ñðåäñòâî äëÿ ïðåäâà-
ðèòåëüíîé ñòèðêè
2
- ìîþùåå ñðåäñòâî äëÿ ñòèðêè
3
- äîáàâêè (ñìÿã÷èòåëè, àðîìàòè-
çàòîðû è ïð.)
Äîïîëíèòåëüíîå îòäåëåíèå
4
,
ïðåäíàçíà÷åííîå äëÿ îòáåëèâàòåëÿ,
ìîæíî âñòàâèòü â îòäåëåíèå
1
.
Êíîïêà ïîíèæåíèÿ
ñêîðîñòè îòæèìà
Èñïîëüçóéòå êíîïêó äëÿ
ïîíèæåíèÿ ñêîðîñòè îòæèìà ñ 800
äî 400 îá/ìèí äëÿ ïðîãðàìì
ñòèðêè õëîï÷àòîáóìàæíûõ è
ëüíÿíûõ òêàíåé è ñ 700 äî 400 îá/
ìèí äëÿ ïðîãðàìì ñòèðêè
ñèíòåòè÷åñêèõ òêàíåé.
Óñêîðåííàÿ ñòèðêà
Ïðè íàæàòèè ýòîé êíîïêè
ïðîäîëæèòåëüíîñòü öèêëà ñòèðêè
ñîêðàùàåòñÿ ïðèáëèçèòåëüíî íà
30%. Êíîïêà íå èñïîëüçóåòñÿ â
ñïåöèàëüíûõ ïðîãðàììàõ (ñì. ñ.
18), à òàêæå â ïðîãðàììàõ ñòèðêè
èçäåëèé èç øåðñòè è øåëêà.
Óäàëåíèå ïÿòåí (ñì. ñ. 22)
Ýòîé êíîïêîé çàäàåòñÿ ðåæèì
óñèëåííîé ñòèðêè. Ýôôåêòèâíîñòü
èñïîëüçîâàíèÿ äîáàâîê ê ìîþùåìó
ñðåäñòâó óâåëè÷èâàåòñÿ, ïðè ýòîì
óäàëÿþòñÿ ñàìûå ñòîéêèå
çàãðÿçíåíèÿ.
Ïàíåëü óïðàâëåíèÿ
Óïðàâëÿÿ ìàøèíîé ãëàâíîå ñäåëàòü
ïðàâèëüíûé âûáîð. È ýòî î÷åíü ïðîñòî!
Ïåðåêëþ÷àòåëü ïðîãðàìì
Èñïîëüçóéòå ýòó ðóêîÿòêó äëÿ
âûáîðà ïðîãðàììû ñòèðêè.
Ïîâîðà÷èâàéòå ðóêîÿòêó
òîëüêî ïî ÷àñîâîé ñòðåëêå.
Äëÿ òîãî, ÷òîáû âûáðàòü
ïðîãðàììó, ïîâåðíèòå ðóêîÿòêó
ïðîãðàììàòîðà òàê, ÷òîáû ñèìâîë/
íîìåð òðåáóåìîé ïðîãðàììû
ñîâïàë ñ îòìåòêîé íà ðóêîÿòêå.
Íàæìèòå êíîïêó âêëþ÷åíèÿ/
âûêëþ÷åíèÿ
H
(ïîçèöèÿ
I
),
èíäèêàòîð Míà÷íåò ìèãàòü.
×åðåç 5 ñåêóíä óñòàíîâêè áóäóò
ïðèíÿòû è ïîäòâåðæäåíû, öèêë
ñòèðêè íà÷íåòñÿ, êîãäà èíäèêàòîð
I
ïåðåñòàíåò ìèãàòü (îñòàíåòñÿ
ãîðåòü). Åñëè Âû õîòèòå ïðåðâàòü
ïðîãðàììó â ïðîöåññå âûïîëíåíèÿ
èëè èçìåíèòü óñòàíîâêè, âûáåðèòå
îäèí èç ñèìâîëîâ
(
Stop/Reset
)
è ïîäîæäèòå 5 ñåêóíä: îòìåíà
ïðîãðàììû áóäåò ïîäòâåðæäåíà
ìåðöàíèåì èíäèêàòîðà
I
, ïîñëå
ýòîãî Âû ìîæåòå âûêëþ÷èòü
ìàøèíó.
Êîãäà ïðîãðàììíûé ïóñê è
ïðîãðàììà óñòàíîâëåíû, âðàùåíèÿ
ïåðåêëþ÷àòåëÿ óæå íå èìåþò íè-
êàêîãî çíà÷åíèÿ, çà èñêëþ÷åíèåì
óñòàíîâêè â ïîëîæåíèå (Stop/
Reset).
Ðóêîÿòêà âûáîðà ïðîãðàìì
Ðóêîÿòêà ïðåäíàçíà÷åíà äëÿ
âûáîðà òåìïåðàòóðû ñòèðêè
ñîãëàñíî òàáëèöå ïðîãðàìì. Êðîìå
òîãî, ñ ïîìîùüþ ýòîé ðóêîÿòêè âû
ìîæåòå óñòàíîâèòü òåìïåðàòóðó
íèæå ðåêîìåíäîâàííîé èëè
âûïîëíèòü õîëîäíóþ ñòèðêó ( ).
Ðóêîÿòêà ñóøêè
Èñïîëüçóéòå ðóêîÿòêó äëÿ âûáîðà
íåîáõîäèìîé ïðîãðàììû ñóøêè:
A
- Óñòàíîâèòå íåîáõîäèìîå
âðåìÿ:
Îò
40
äî
150
ìèíóò.
B
- Âûáåðèòå â çàâèñèìîñòè îò
òèïà áåëüÿ ñòåïåíü ñóøêè:
Ãëàæåíèå
: ðåçóëüòàò -
óâëàæíåííûå òêàíè, âåùè ëåãêî
ãëàäèòü.
Ãàðäåðîá
: ðåçóëüòàò - õîðîøî
âûñóøåííûå òêàíè, âåùè ìîæíî
óáðàòü.
Ýêñòðà-ñóøêà
: ðåçóëüòàò -
î÷åíü ñóõèå òêàíè, ðåêîìåíäóåòñÿ
äëÿ âåùåé, êîòîðûå íå íóæíî
ãëàäèòü (íàïðèìåð, áàííûå õàëàòû,
ïîëîòåíöà).
Ïðîãðàììà ñóøêè çàâåðøàåòñÿ
îõëàæäåíèåì.
Ðàñïðåäåëèòåëü ìîþùèõ
ñðåäñòâ ñ äîïîëíèòåëüíîé
âñòàâêîé äëÿ îòáåëèâàòåëÿ
íàõîäèòñÿ çäåñü .
17
Ðóêîâîäñòâî ïî óñòàíîâêå è ýêñïëóàòàöèè
1
2
3
4


