Edimax Technology AR-7064g+: instruction
Class: Computer Accessories
Type:
Manual for Edimax Technology AR-7064g+

F
F
a
a
s
s
t
t
E
E
t
t
h
h
e
e
r
r
n
n
e
e
t
t
/
/
W
W
i
i
r
r
e
e
l
l
e
e
s
s
s
s
A
A
D
D
S
S
L
L
2
2
+
+
M
M
o
o
d
d
e
e
m
m
R
R
o
o
u
u
t
t
e
e
r
r
S
S
e
e
r
r
i
i
e
e
s
s
Quick Installation Guide
Version 1.0 January, 2006

1
Multi-Languages Content Table
English ..…………………….............…..…..……….02 Č eský ......................................................................08 Deutsch ……………….…....................................... 14 Español ................................................................. 20 Français ................................................................ 26 Italiano …………….................................................32 Magyar ...................................................................38 Nederlands ............................................................44 Português ..............................................................50 Polski .................................................................... 56 P усский ................................................................ 62 Türkçe ....................................................................69
2
English .
Installation & Setup
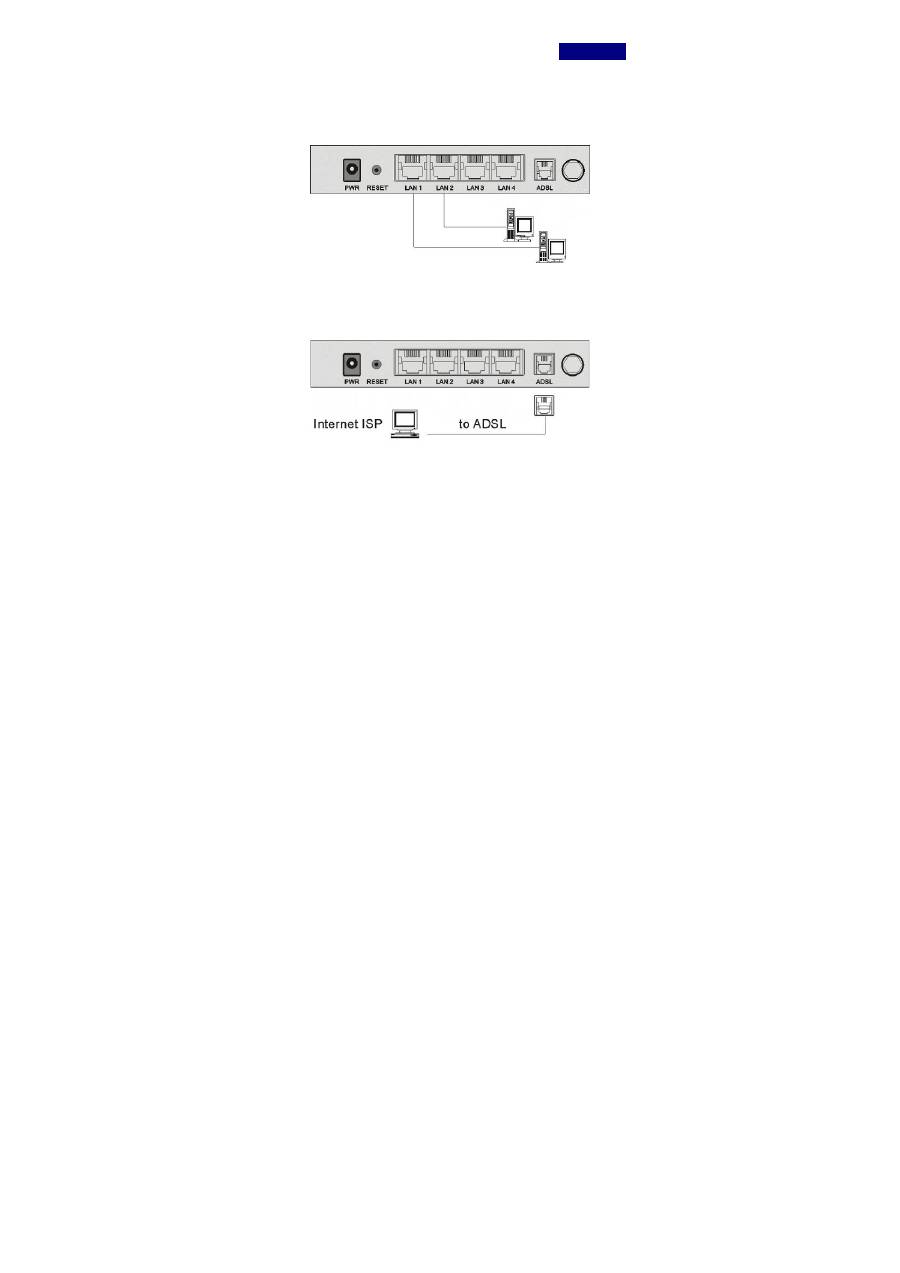
LAN Connection:
Connect an Ethernet cable from your PC's Ethernet port to the
LAN port of the ADSL2+ Router.
WAN Connection:
Connect the telephone cable from your home's telephone jacks to
the ADSL port of the ADSL2+ Router.
Power Adapter Connection:
Connect the power adapter to the power inlet and turn the power
switch on from the front panel of the ADSL2+ Router.

3
Configure your PC to obtain an IP address
By default the ADSL router’s DHCP is on, this means that you can
obtain an IP address automatically once you’ve configured your
PC to obtain an IP address automatically. This section will show
you how to configure your PC to obtain an IP address
automatically for either Windows 95/98/Me, 2000 or NT operating
systems.
For other operating systems (Macintosh, Sun, etc.), follow the
manufacturer’s instructions. The following is a step-by-step
illustration on how to configure your PC to obtain an IP address
automatically for Windows OS.
Windows XP
(the following steps are
similar
in other Windows version)
1
: Click the
Start
button and select
Settings
, then click
Network
Connections
. The Network Connections window will appear.
2
: Double-click
Local Area Connection
icon. The Local Area
Connection window will appear.
3
: Check your list of
Network Components
. You should see
Internet Protocol [TCP/IP] on your list. Select it and click the
Properties
button.
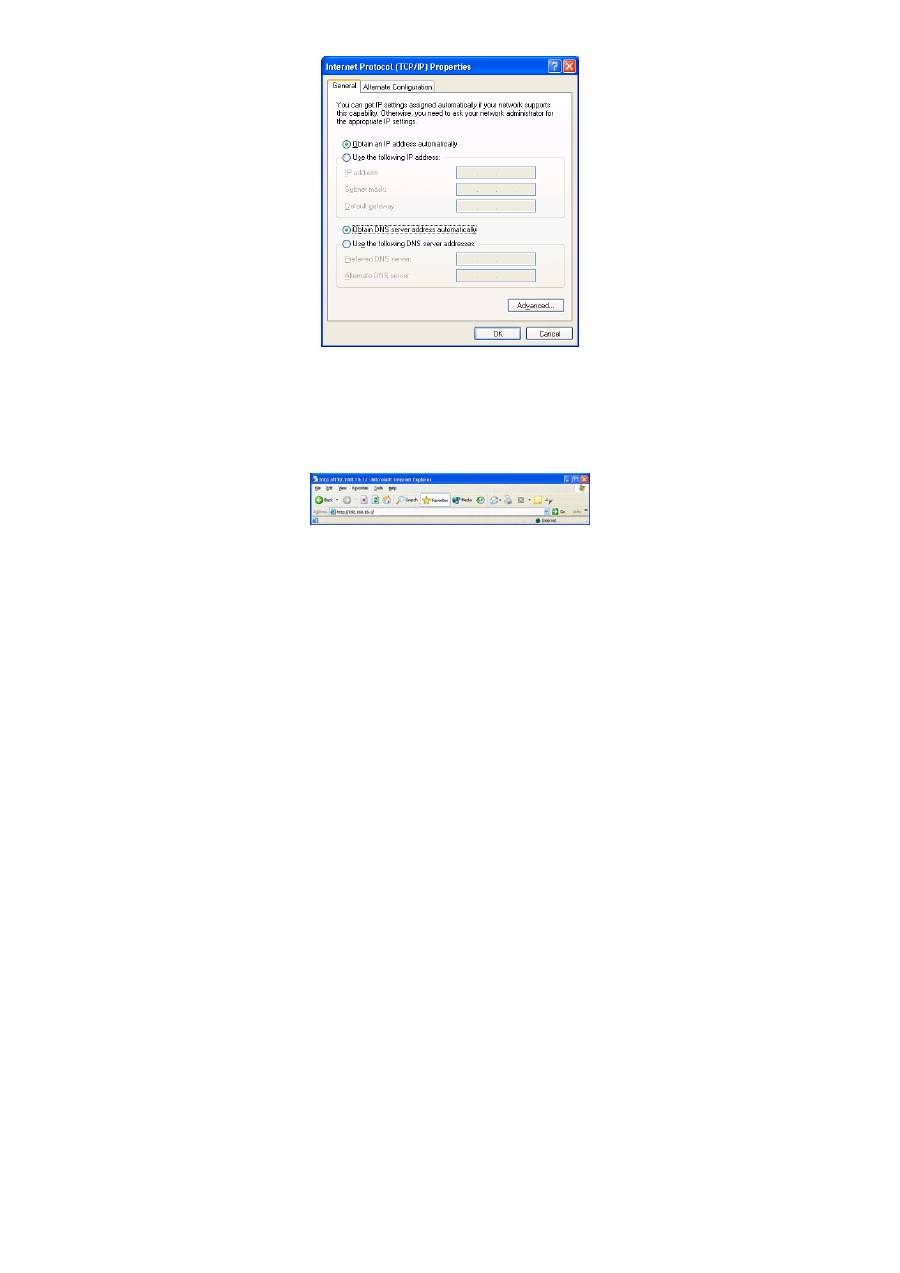
4
: In the Internet Protocol (TCP/IP) Properties window, select
Obtain an IP address automatically and Obtain DNS server
address automatically as shown on the following screen.
5
: Click
OK
to confirm the setting, your PC will now obtain an IP
address automatically from your ADSL Router’s DHCP server.
Note
: Please make sure that the ADSL router’s DHCP server is
the only DHCP server available on your LAN. Once you’ve
configured your PC to obtain an IP address automatically,
please proceed to next step.
4
Configuring with Web Browser
1.
Open web browser and type
http://192.168.16.1
in the
browser's address box. This number is the default IP address
for this device. Press Enter.
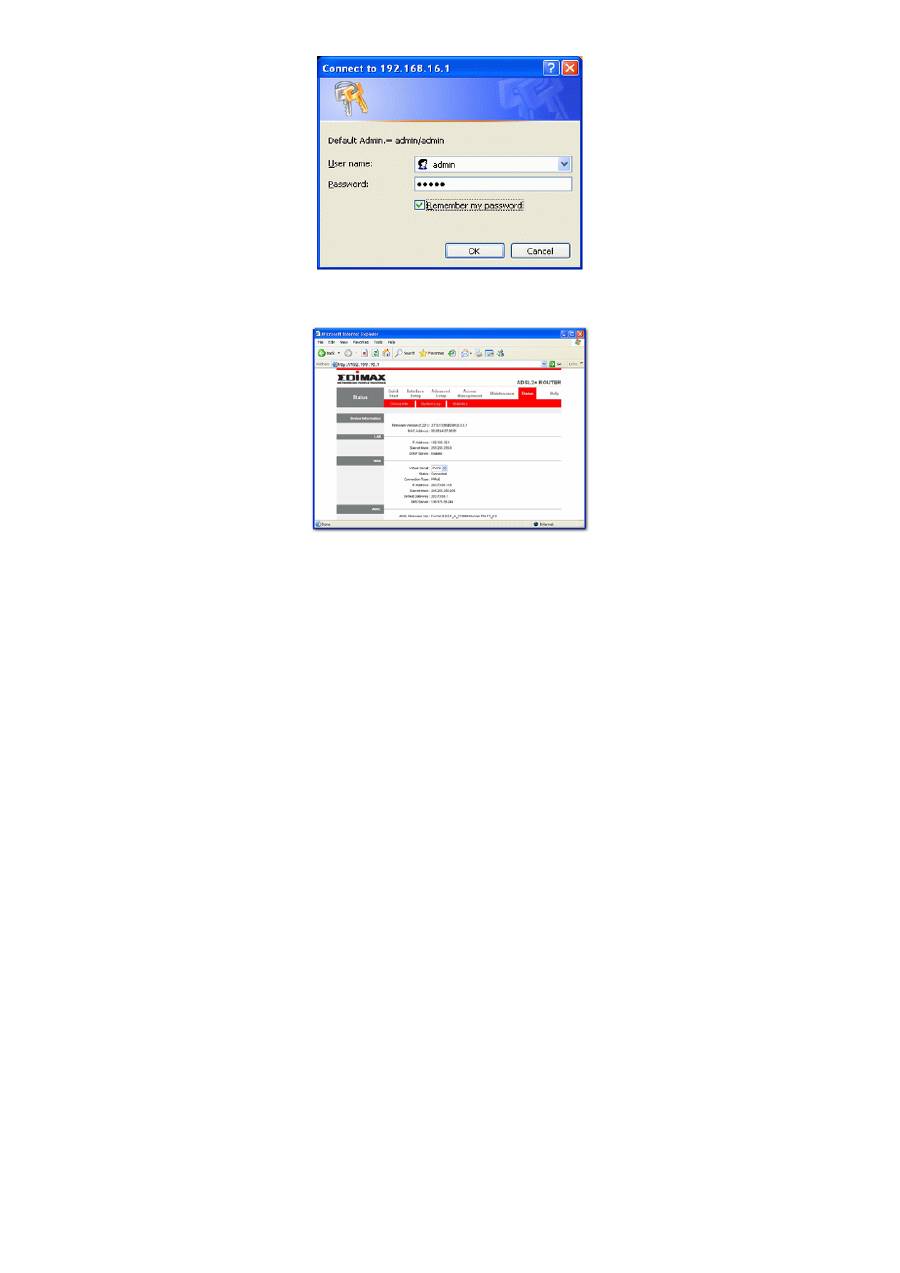
2.
A user name and password prompt will appear.
The username is
'admin'
and password is
'admin'
.
5
3.
The Quick Setup facility enables you to enter the Username
and Password provided by your ISP.
4.
To check VPI, VCI and encapsulation with your ISP such as
following table:

6
Countries
ISP
VPI
VCI
Australia All
Internet
providers
8
35
Canada Telus
0
35
Czech Telecom
Czech
Telenor Network
8 35
Denmark Cybercity
/
Tiscali
8
35
France
Tiscali / Wannadoo
8
35
1 & 1 Internet DSL
AOL DSL / Freenet DSL
Anderer Anbieter
Fireline networks
GMX Internet
Snafu ADS / Tiscali / T-online
1 32
Schlund 1
35
Arcor DSL / Hansenet
Deutschland
Netcologne
8 35
Israel
KPN PPPoE LLC
8
48
Telecom Italia
Italian
Rest oil presente
8 35
Morocco IAM,
Wanadoo
8
35
KPN PPPoA VC-MuX
8
48
BBeyond Bridge LLC
0
33
Netherlands
BBeyond PPPoA VC-MuX
0
35
New Zealand
New Zealand Telecom
0
100
Portugal
Todos os apresentador
0
35
Stream 1
50
Russia
WebPlus 1
32
Eresmas / Retevision
0
35
Albura / Tiscali
1
32
Uni2 1
33
Colt Teeccom
1
35
Telefornica / Wanadoo
Ya.com / Earth / Terra
8 32
Span
Jazztel / Ola Internet / Telepac
8
35
Sri Lanka
Sri Lanka Telecom
8
35
Switserland Alle
anbieter 1
32
Turkey All
Internet
providers
8
35
United Kingdom
British Telecom
0
38
7
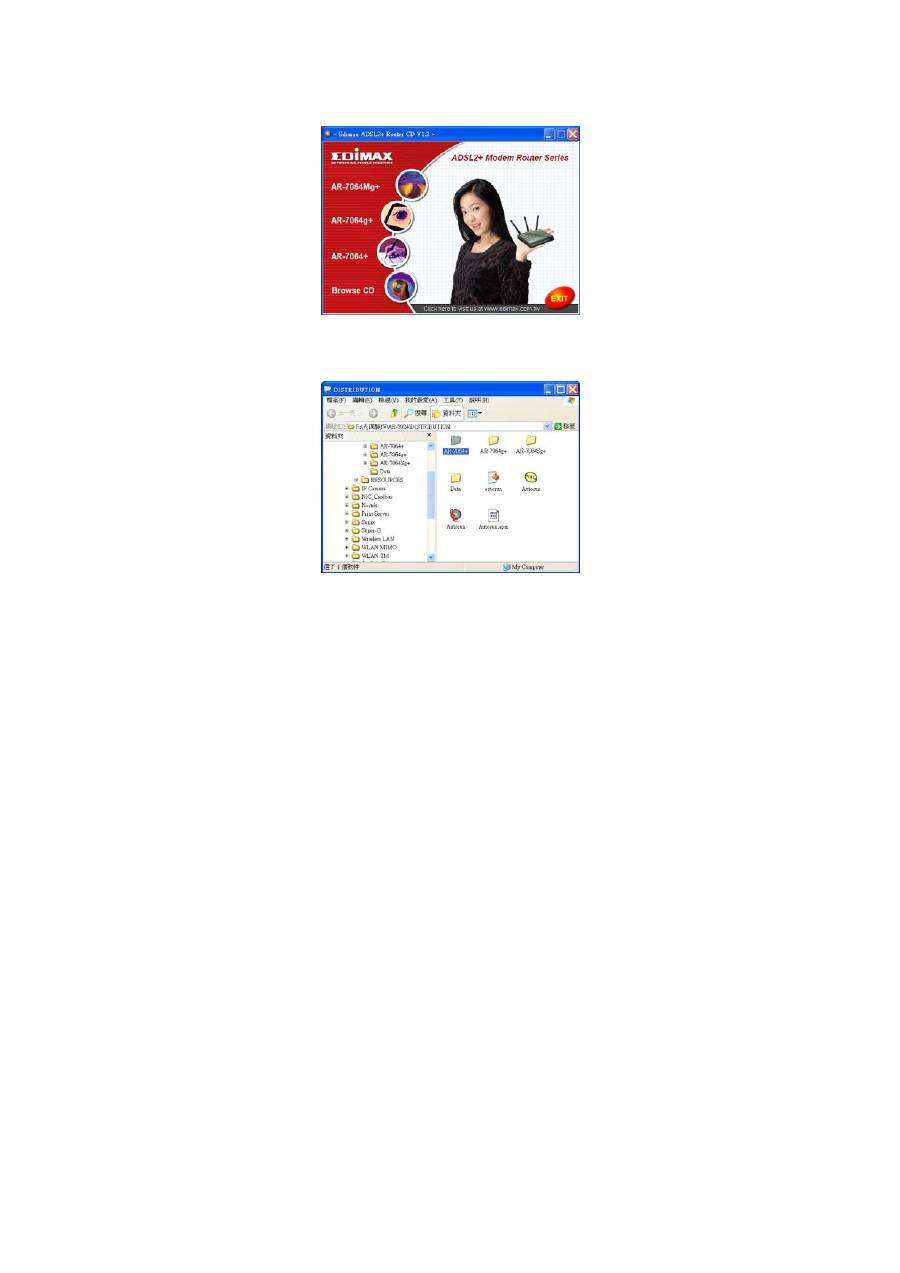
Browse the User's Manual:
1.
Insert the Manual CD into your CD-ROM, and the CD will be
display with Auto-Run.
2.
Click Browse CD, the file explorer will list the CD contents,
open the folder as same as with your model, then you will see
one file names index.htm, double-click for display the manual.