Kiev Camera CT1-7462-000 – страница 5
Инструкция к Kiev Camera CT1-7462-000
81
Ø Ê
.
Режим автоспуска
Режим автоспуска (задержка срабатывания затвора) можно
использовать, если требуется включить в кадр самого себя. При
использовании режима автоспуска установите фотокамеру на
устойчивую поверхность или на штатив.
1.Нажмите кнопку .
• При повторном нажатии кнопки символ гаснет, и режим
автоспуска отменяется.
Â
.
Selbstauslöser-Betriebsart
Mit dem Selbstauslöser können Sie die Verschlußauslösung
verzögern, um auch selbst mit ins Bild zu kommen. Stellen Sie die
Kamera hierzu auf eine stabile Unterlage oder ein Stativ.
1. Drücken Sie die -Taste.
• Falls Sie die -Taste noch einmal drücken, verschwindet das
, und sie Selbstauslöser-Betriebsart wird aufgehoben.
.
Modalità autoscatto
È possibile usare l’autoscatto per rientrare personalmente
nelle foto ritardando l’attivazione dell’otturatore. Collocare la
fotocamera su una superficie stabile o montarla su un
treppiede.
1. Premere il tasto .
• Se si preme di nuovo il tasto l’icona scompare e la
modalità di autoscatto viene disattivata.
03-K129AmeEuro (p.72~).qxd 01.08.00 15:05 Page 81
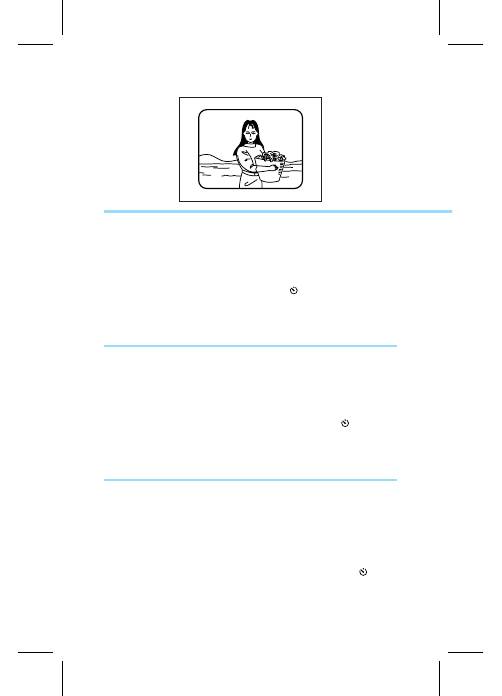
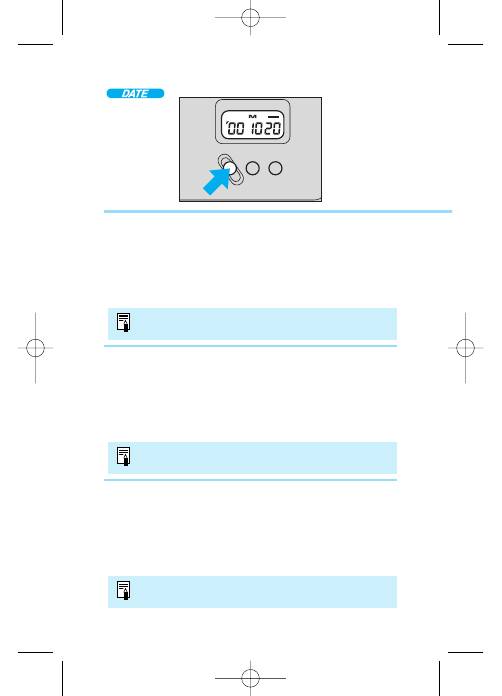
2. Look in the viewfinder to compose your picture.
3. The green indicator lights up when the shutter
button is pressed and the self-timer starts.
• The red-eye reduction lamp starts flashing and the
shutter is released after approximately 10 seconds.
• To cancel the self-timer, press the button.
2. Regardez dans le viseur pour composer votre photo.
3. Le témoin vert s’allume lorsque vous appuyez sur le
déclencheur et la fonction de retardateur est activée.
• La lampe d’atténuateur d’yeux rouges clignote et l’obturateur
se déclenche après 10 secondes environ.
• Pour annuler le retardateur, appuyez sur la touche .
82
À
2. Mire el visor para componer su imagen.
3. El indicador verde se enciende cuando se
oprime el disparador y se activa el
autodisparador.
• La luz de reducción de ojos rojos comienza a destellar y
el obturador se dispara en unos 10 segundos.
• Para cancelar el autodisparador, oprima el bóton .
Û Ó
2
03-K129AmeEuro (p.72~).qxd 01.08.00 15:05 Page 82
83
2. Blicken Sie in den Sucher und wählen Sie den
gewünschten Bildausschnitt.
3. Wenn Sie nun den Auslöser drücken, leuchtet die
grüne Anzeigelampe, und der Selbstauslöser läuft an.
• Die Lampe für “Rote-Augen” Effektreduzierung beginnt zu
blinken, und der Verschluß wird 10 Sekunden später ausgelöst.
• Drücken Sie die -Taste wieder, um den Selbstauslöserbetrieb
aufzuheben.
2. Guardare nel mirino per inquadrare l’immagine.
3. L’indicatore verde si illumina quando si preme il
pulsante di scatto e il conto alla rovescia inizia.
• La spia di riduzione del fenomeno occhi rossi inizia a
lampeggiare e l'otturatore scatta dopo circa 10 secondi.
• Per disattivare l’autoscatto, premere il tasto .
Ø
2.Посмотрите в видоискатель и выберите композицию
кадра.
3.При нажатии кнопки спуска затвора и запуске
автоспуска загорается зеленый индикатор.
• Начинает мигать лампа уменьшения эффекта «красных глаз»,
и затвор срабатывает приблизительно через 10 секунд.
• Для отключения режима автоспуска нажмите кнопку .
Ê Â
3
03-K129AmeEuro (p.72~).qxd 01.08.00 15:05 Page 83
84
À Û Ó
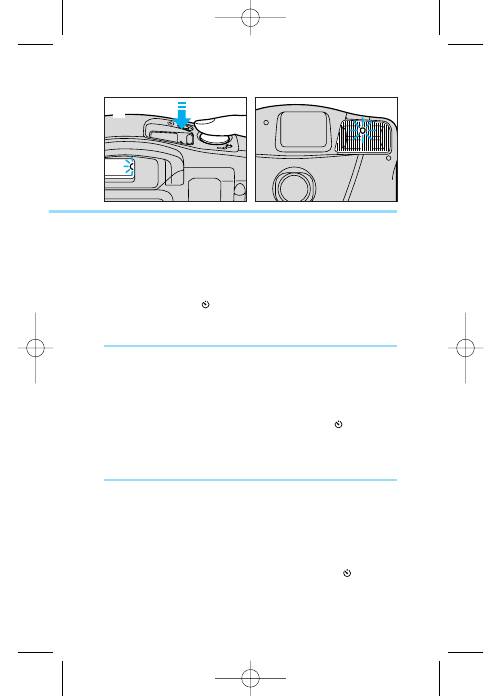
For the last 2 seconds before the picture is taken, the
red-eye reduction lamp blinks rapidly. When the flash
fires (when it is dark), it lights continuously for the last
2 seconds before the picture is taken.
Pendant les deux dernières secondes avant le
déclenchement, la lampe d’atténuateur d’yeux rouges
clignote rapidement. Lorsque le flash se déclenche
(environnement sombre), la lampe reste allumée pendant les
deux dernières secondes avant le déclenchement.
Durante los 2 últimos segundos antes de tomar la foto,
la luz de reducción de ojos rojos destella rápidamente.
Cuando se dispara el flash (cuando está oscuro), la
luz se ilumina de forma estable durante los 2 últimos
segundos antes de tomar la foto.
03-K129AmeEuro (p.72~).qxd 01.08.00 15:05 Page 84
85
Ø Ê
В течение последних 2 секунд перед срабатыванием затвора
частота мигания лампы уменьшения эффекта «красных глаз»
увеличивается. При срабатывании вспышки (в темноте) она
постоянно горит в течение последних 2 секунд перед съемкой.
Â
Die letzten 2 Sekunden vor Auslösen des Verschlusses blinkt
die Lampe für “Rote-Augen” Effektreduzierung. Wenn der
Blitz zündet (wenn es dunkel ist), leuchtet die Lampe die
letzten 2 sekunden vor Auslösen des Verschlusses
kontinuierlich.
Negli ultimi 2 secondi prima che sia scattata la foto, la
spia di riduzione del fenomeno occhi rossi lampeggia
rapidamente. Quando il flash si attiva (quando è buio),
la spia si illumina stabilmente negli ultimi 2 secondi
prima che sia scattata la foto.
03-K129AmeEuro (p.72~).qxd 01.08.00 15:05 Page 85
86
Ó À Û
É0
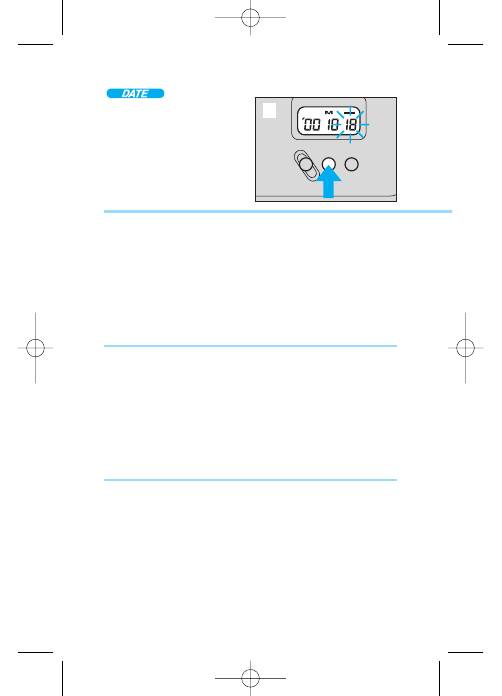
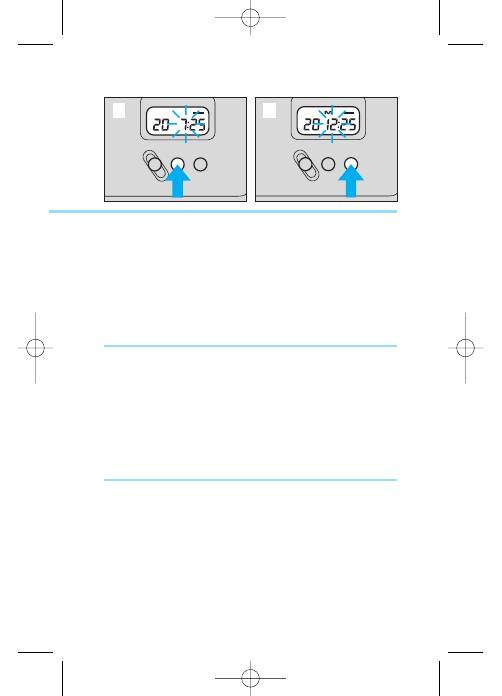
Impresión de la fecha y hora
Oprima el botón
MODE
para seleccionar la fecha y hora para
ser impresos sobre la fotografía. Cada vez que oprime el
botón, la selección cambia como se muestra arriba.
La pantalla de fecha y hora seleccionada será impresa al
tomar la foto.
MODE
SELECT SET
REC
É0
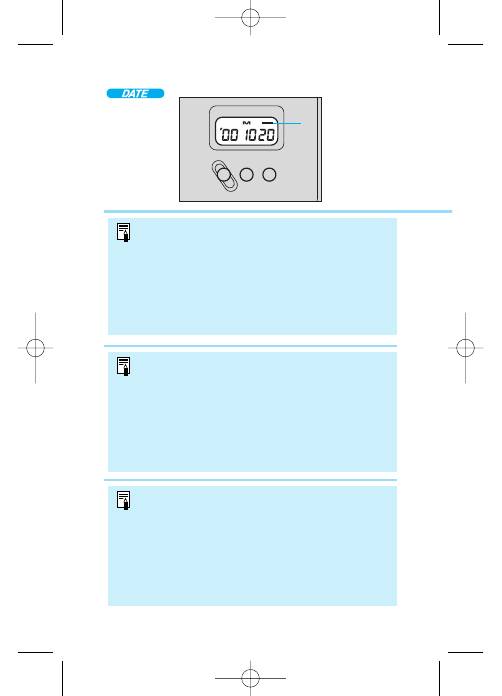
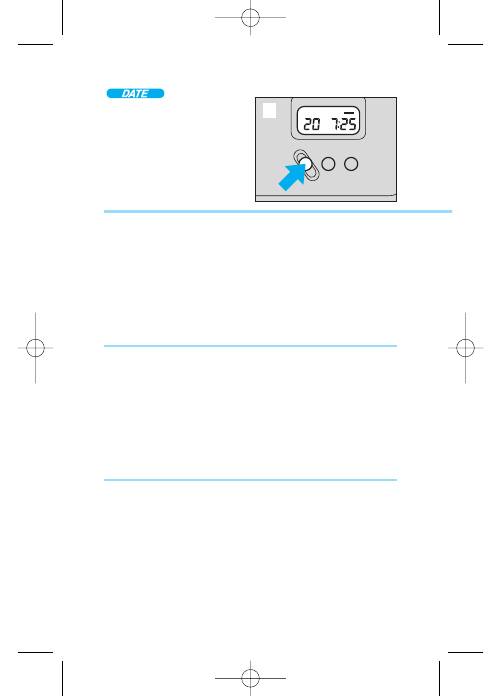
Imprinting the Date and Time
Press the
MODE
button to select the date and time to be
imprinted on the photograph. Each time the button is pressed,
the selection changes as shown above.
The selected date and time display is imprinted when taking a
photograph.
É0
Impression de la date et l’heure
Appuyez sur la touche
MODE
pour sélectionner la date et l’heure à
imprimer sur la photo. Chaque fois que la touche est pressée, la
sélection change comme indiqué ci-dessus.
La date et l’heure sélectionnées telles qu’apparaissant sur l’affichage
sont imprimées sur la photographie lors de la prise de vue.
The “00” in the year display indicates the last two
digits in the year 2000.
“00” pour l’année désigne les deux derniers chiffres de
l’année 2000.
El “00” en le indicación del año representa los dos
últimos dígitos del año 2000.
03-K129AmeEuro (p.72~).qxd 01.08.00 15:05 Page 86

87
Ø Ê
É0
Впечатывание даты и времени
Для выбора даты и времени, впечатываемых на фотографии,
нажимайте кнопку
MODE
(Режим). При каждом нажатии кнопки
выбранный режим изменяется в показанной выше последовательности.
Во время съемки на фотографии печатается дата и время в выбранном
формате.
Â
É0
Datum/Uhrzeit-Einblendung
Wählen Sie mit der
MODE
-Taste das Datum/Uhrzeit-Format, das in
die Aufnahme eingeblendet werden soll. Das Format wechselt bei
wiederholtem Drücken der Taste nach dem oben dargestellten Schema.
Datum und Uhrzeit werden danach beim Fotografieren im gewählten
Format in die Aufnahmen eingeblendet.
É0
Sovrimpressione della data e dell’ora
Premere il tasto
MODE
per selezionare la data e l’ora da
sovrimporre alla fotografia. Ogni volta che si preme il tasto,
l’elemento per la selezione cambia come mostrato sopra.
L’indicazione di data e ora selezionata vine sovrimpressa
quando si scatta una foto.
88
À Û Ó
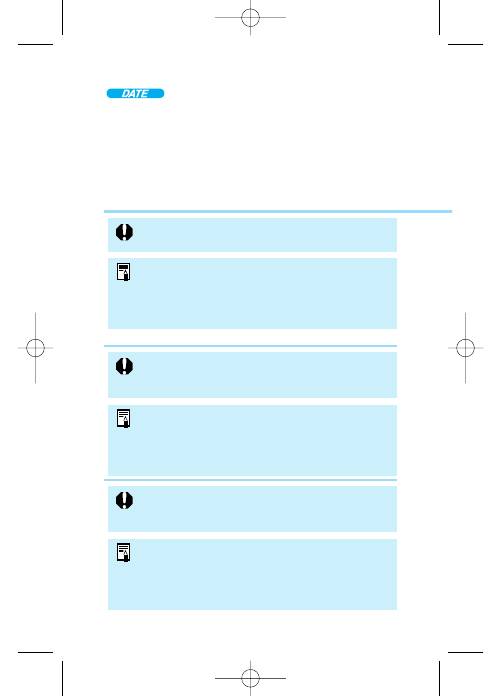
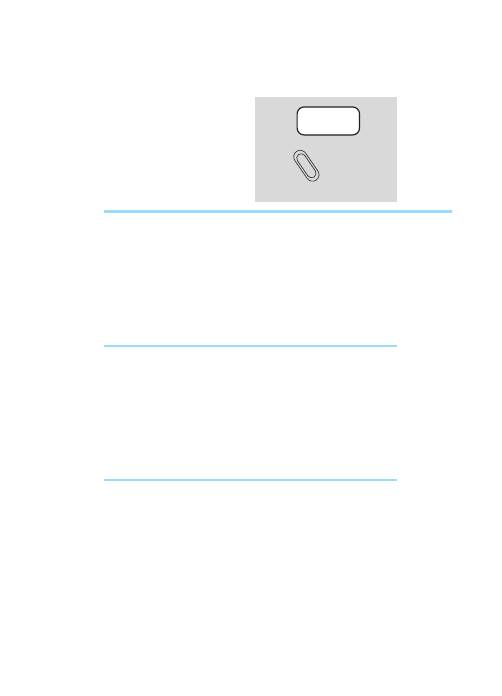
• Use the projection on the strap fixture to press the
buttons.
• When the shutter is released, the imprinting
confirmation mark
E
flashes to indicate that the date
or time has been imprinted.
• If the background of the imprinting position is bright
or includes an orange or white subject, the figures
imprinted may be difficult to see. Positioning the
imprinting over dark or black areas will make the
figures easier to see.
• Utilisez la protubérance de la courroie pour appuyer sur les
touches.
• Après le déclenchement, le repère de confirmation
d’impression
E
clignote pour indiquer que la date ou
l’heure a bien été imprimée.
• Si l’arrière-plan de la zone d’impression des chiffres est
lumineux ou comprend un objet blanc ou orange, les
chiffres imprimés peuvent être difficiles à voir. Situez les
impressions sur des zones noires ou sombres pour rendre
les chiffres plus lisibles.
• Utilice el saliente del enganche de la correa para
oprimir los botones.
• Al liberarse el obturador, destella la marca de
confirmación de impresión
E
indicando que ha
quedado impresa la fecha o la hora.
• Si el fondo de la posición de impresión es brillante o
incluye un sujeto anaranjado o blanco, las cifras
impresas pueden ser difíciles de verse. Colocando la
impresión sobre áreas oscuras o negras hará que las
cifras sean más fáciles de verse.
MODE
SELECT SET
REC
E
03-K129AmeEuro (p.72~).qxd 01.08.00 15:05 Page 88
89
Ø Ê
• Для нажатия на кнопки используйте выступ на креплении
ремня.
• При срабатывании затвора мигает метка подтверждения
впечатывания
E
, которая указывает, что дата и время были
впечатаны.
• Если на месте впечатывания даты на фотографии располо-
жен светлый фон или оранжевый либо белый объект, то
впечатанные символы будут трудноразличимы. Чтобы цифры
были хорошо различимы, размещайте место впечатывания
даты в темных или черных областях.
Â
• Usare la sporgenza sulla fibbia della cinghia per
premere i tasti.
• Quando la foto viene scattata, il simbolo di conferma
della sovrimpressione
E
almepggia per indicare che la
data o l’orario sono stati sovrimpressi.
• Se lo sfondo del punto scelto per la sovrimpressione è
luminoso o include un soggetto arancione o bianco, le
cifre sovrimpresse possono essere difficilmente visibili.
La collocazione della sovrimpressione su zone scure o
nere rende le cifre più facilmente visibili.
• Verwenden Sie zum Betätigen der Tasten den Vorsprung an der
Riemenschnalle.
• Bei der Verschlußauslösung blinkt das Einblendzeichen
E
zur
Bestätigung, daß die Aufnahme mit Datum/Uhrzeit-
Einblendung gemacht wurde.
• Wenn an der Einblendstelle im Bild ein orangefarbener oder
weißer Gegenstand abgelichtet wurde, sind die Zeichen auf
dem Bild unter Umständen nur schwer zu erkennen. Es
empfiehlt sich daher, den Bildausschnitt so zu wählen, daß sich
ein dunkler Gegenstand an der Einblendstelle befindet.
03-K129AmeEuro (p.72~).qxd 01.08.00 15:05 Page 89
MODE
SELECT SET

91
Ø Ê
É1
Установка даты
Фотокамера оснащена встроенным автоматическим календарем
до 2049 года, поэтому не требуется устанавливать дату при каждой
съемке. Однако ниже приводится процедура изменения даты при
поездках с изменением часовых поясов или после замены батарейки
системы впечатывания даты.
1.Нажмите кнопку
MODE
(Режим).
• Установите на дисплее требуемый формат даты.
Â
É1
Einstellen von Datum
Die Kamera ist mit einer eingebauten automatischen
Kalenderfunktion versehen, die bis zum Jahr 2049 vorprogrammiert
ist. Das Datum braucht daher vor Gebrauch nicht jedesmal wieder
neu eingestellt zu werden. Dieser Abschnitt beschreibt, wie Sie das
Datum neu einstellen, wenn Sie ins Ausland reisen oder die Datum/
Uhrzeit-Batterie ausgewechselt haben.
1. Drücken Sie die
MODE
-Taste.
• Rufen Sie das zu korrigierende Datum-Format auf.
É1
Impostazione della data
La macchina fotografica ha un calendario automatico
incorporato programmato per segnare la data fino all’anno
2049, pertanto non è necessario impostare la data ogni volta
che si scatta una fotografia. Tuttavia, il procedimento descritto
qui sotto serve per la correzione della data nel caso in cui si
viaggia all’estero o dopo aver sostituito la pila per il datario.
1. Premere il tasto
MODE
.
• Visualizzare il formato della data che si vuole modificare.
03-K129AmeEuro (p.72~).qxd 01.08.00 15:05 Page 91
MODE
SELECT SET
REC
92
À
2
Û Ó
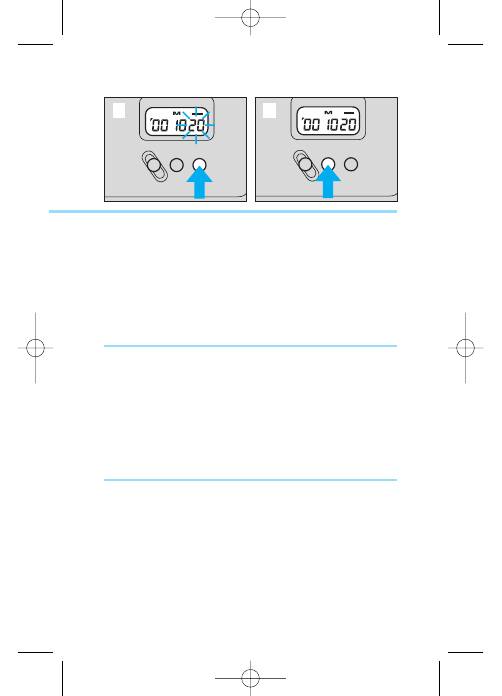
2. Oprima el botón
SELECT
.
• Oprima hasta que parpadee el dígito a corregir.
3. Oprima el botón
SET
.
• Corrija el dígito.
4. Oprima el botón
SELECT
hasta que dejen de
parpadear todos los dígitos.
• Cuando dejen de destellar y se iluminen todos los dígitos,
significa que ha finalizado el ajuste.
2. Appuyez sur la touche
SELECT
.
• Appuyez sur jusqu’à ce que le chiffre à corriger clignote.
3. Appuyez sur la touche
SET
.
• Corrige le chiffre.
4. Appuyez sur la touche
SELECT
jusqu’à ce que tous les
chiffres cessent de clignoter.
• Le réglage est terminé lorsque tous les chiffres sont allumés et
ne clignotent plus.
2. Press the
SELECT
button.
• Press until the digit to be corrected blinks.
3. Press the
SET
button.
• Correct the digit.
4. Press the
SELECT
button until all digits stop
blinking.
•
When all the digits are lit, no longer blinking, the setting is
complete.
2
03-K129AmeEuro (p.72~).qxd 01.08.00 15:05 Page 92
93
Ø Ê
2.Нажмите кнопку
SELECT
(Выбор).
• Нажимайте кнопку до тех пор, пока не будет мигать цифра,
которую требуется изменить.
3.Нажмите кнопку
SET
(Установка).
• Исправьте цифру.
4.Нажимайте кнопку
SELECT
до тех пор, пока все цифры
не перестанут мигать.
• Когда все цифры горят, не мигая, установка завершена.
Â
2. Drücken Sie die
SELECT
-Taste.
• Drücken Sie die Taste, bis die zu korrigierenden Anzeigestellen
auf dem Display blinken.
3. Drücken Sie die
SET
-Taste.
• Stellen Sie den richtigen Wert ein.
4. Drücken Sie abschließend die
SELECT
-Taste, bis keine
der Anzeigestellen mehr blinkt.
• Sobald alle Stellen kontinuierlich und ohne Blinken angezeigt
werden, ist die Einstellung beendet.
2. Premere il tasto
SELECT
.
• Premere il tasto sino a quando si mette a lampeggiare la
cifra che si vuole modificare.
3. Premere il tasto
SET
.
• Procedere alla correzione della cifra.
4. Premere il tasto
SELECT
sino a quando tutte le
cifre smettono di lampeggiare.
• Quando tutte le cifre rimangono illuminate stabilmente
senza lampeggiare, l’impostazione è completa.
MODE
SELECT SET
REC
3
MODE
SELECT SET
REC
4
03-K129AmeEuro (p.72~).qxd 01.08.00 15:05 Page 93
94
Ó À Û
The automatic calendar will not work correctly if only
the date has been set. Always set the time as well.
El calendario automático no funcionará correctamente
si se ha ajustado solamente la fecha. Siempre ajuste
también la hora.
Le calendrier automatique ne fonctionnera pas
correctement si la date seule a été réglée. Réglez toujours
l’heure en même temps.
• Pressing the
SET
button once moves to the next digit.
Hold the
SET
button down to move through the digits
in succession.
• Use the projection on the strap fixture to press the
buttons.
• Une seule pression sur la touche
SET
déplace le réglage au
chiffre suivant. Maintenez-la pressée pour déplacer sur les
chiffres successivement.
• Utilisez la protubérance de la courroie pour appuyer sur les
touches.
• Oprimiendo el botón
SET
una vez cambia al dígito
siguiente. Mantenga oprimido el botón
SET
para
cambiar los dígitos en sucesión.
• Utilice el saliente del enganche de la correa para
oprimir los botones.
03-K129AmeEuro (p.72~).qxd 01.08.00 15:05 Page 94
95
Ø Ê
Автоматический календарь будет неправильно работать, если
установлена только дата. Обязательно установите также и
время.
Â
Il calendario automatico non funziona correttamente
se è stata impostata solo la data. Impostare sempre
anche l’orario.
Wenn Sie lediglich das Datum einstellen, kann die
automatische Kalenderfunktion nicht einwandfrei arbeiten.
Stellen Sie daher unbedingt auch die aktuelle Uhrzeit ein.
• При каждом нажатии кнопки
SET
производится переход на
следующую цифру. Для последовательного перемещения
между цифрами нажмите и удерживайте кнопку
SET
.
• Для нажатия на кнопки используйте выступ на креплении
ремня.
• Kurzes Antippen der
SET
-Taste bewirkt Weiterschaltung
um “1”. Zum übergangslosen Weiterschalten können Sie
die Taste auch gedrückt halten.
• Verwenden Sie zum Betätigen der Tasten den Vorsprung an
der Riemenschnalle.
• Premere una volta il tasto
SET
per spostarsi alla cifra
successiva. Tenere premuto il tasto
SET
per spostarsi
fra le cifre in successione.
• Usare la sporgenza sulla fibbia della cinghia per
premere i tasti.
03-K129AmeEuro (p.72~).qxd 01.08.00 15:05 Page 95
96
Ó À Û
É2
Ajuste de la hora
La cámara tiene un calendario automático incorporado que
funciona hasta el año 2049 de manera que no hay necesidad
de ajustar la hora cada vez que se toman fotografías. Sin
embargo, el procedimiento que se describe a continuación
indica cómo corregir la hora cuando está viajando al
extranjero o ha cambiado la pila de la fecha.
É2
Réglage de l’heure
L’appareil a un calendrier automatique intégré qui va jusqu’à
l’année 2049, il n’est donc pas nécessaire de régler l’heure à chaque
photo. Cependant, la procédure ci-dessous décrit la correction de
l’heure quand vous voyagez dans un autre pays ou quand vous
remplacez la pile du dateur.
É2
Setting the Time
The camera has a built-in automatic calendar that runs until
the year 2049, so there is no need to set the time each time
pictures are taken. However, the procedure below describes
how to correct the time when you are traveling overseas or
have replaced the date battery.
03-K129AmeEuro (p.72~).qxd 01.08.00 15:05 Page 96
97
Ø Ê
É2
Установка времени
Фотокамера оснащена встроенным автоматическим календарем до
2049 года, поэтому не требуется устанавливать время при каждой
съемке. Однако ниже приводится процедура изменения времени при
поездках с изменением часовых поясов или после замены батарейки
системы впечатывания даты.
Â
É2
Einstellen von Uhrzeit
Die Kamera ist mit einer eingebauten automatischen
Kalenderfunktion versehen, die bis zum Jahr 2049 vorprogrammiert
ist. Die Uhrzeit braucht daher vor Gebrauch nicht jedesmal wieder
neu eingestellt zu werden. Dieser Abschnitt beschreibt, wie Sie die
Uhrzeit neu einstellen, wenn Sie ins Ausland reisen oder die Datum/
Uhrzeit-Batterie ausgewechselt haben.
É2
Impostazione dell’ora
La macchina fotografica ha un calendario automatico
incorporato programmato per segnare la data fino all’anno
2049, pertanto non è necessario impostare la data ogni volta
che si scatta una fotografia. Tuttavia, il procedimento descritto
qui sotto serve per la correzione dell’ora nel caso in cui si
viaggia all’estero o dopo aver sostituito la pila per il datario.
03-K129AmeEuro (p.72~).qxd 01.08.00 15:05 Page 97
98
À Û Ó
1. Oprima el botón
MODE
para que se visualicen la
fecha y la hora.
• Visualice el formato de hora que se va a corregir.
2. Oprima el botón
SELECT
.
• Oprima hasta que parpadee el dígito a corregir.
3. Oprima el botón
SET
.
• Corrija el dígito.
1. Appuyez sur la touche
MODE
pour afficher la date et
l’heure.
• Le format de heure à corriger est affiché.
2. Appuyez sur la touche
SELECT
.
• Appuyez sur jusqu’à ce que le chiffre à corriger clignote.
3. Appuyez sur la touche
SET
.
• Corrige le chiffre.
1. Press the
MODE
button to display the date and
time.
• Display the time format to be corrected.
2. Press the
SELECT
button.
• Press until the digit to be corrected blinks.
3. Press the
SET
button.
• Correct the digit.
MODE
SELECT SET
REC
1
03-K129AmeEuro (p.72~).qxd 01.08.00 15:05 Page 98
99
Ø Ê
1.Нажимая кнопку
MODE
, выведите на дисплей дату
и время.
• Установите на дисплее требуемый формат времени.
2.Нажмите кнопку
SELECT
(Выбор).
• Нажимайте кнопку до тех пор, пока не будет мигать цифра,
которую требуется изменить.
3.Нажмите кнопку
SET
(Установка).
• Исправьте цифру.
Â
1. Drücken Sie die
MODE
-Taste, bis eine Datum/
Uhrzeit-Anzeige auf dem Display erscheint.
• Rufen Sie das zu korrigierende Uhrzeit-Format auf.
2. Drücken Sie die
SELECT
-Taste.
• Drücken Sie die Taste, bis die zu korrigierenden Anzeigestellen
auf dem Display blinken.
3. Drücken Sie die
SET
-Taste.
• Stellen Sie den richtigen Wert ein.
1. Premere il tasto
MODE
per visualizzare il giorno
e l’ora.
• Visualizzare il formato dell’ora che si vuole modificare.
2. Premere il tasto
SELECT
.
• Premere il tasto sino a quando si mette a lampeggiare la
cifra che si vuole modificare.
3. Premere il tasto
SET
.
• Procedere alla correzione della cifra.
MODE
SELECT SET
REC
2
MODE
SELECT SET
REC
3
03-K129AmeEuro (p.72~).qxd 01.08.00 15:05 Page 99
100
Ó À Û
4. Oprima el botón
SELECT
hasta que dejen de
parpadear todos los dígitos.
• Cuando dejen de destellar y se iluminen todos los dígitos,
significa que ha finalizado el ajuste.
