Saturn ST-HT7267: CLEANING THE HEATER STORING THE HEATER Specification WALL- MOUNTING THE HEATER
CLEANING THE HEATER STORING THE HEATER Specification WALL- MOUNTING THE HEATER: Saturn ST-HT7267
Table of contents
- ASSEMBLY OF THE HEATER OPERATION OF THE HEATER SAFETY INSTRUCTIONS (to be read before operating the heater)
- CLEANING THE HEATER STORING THE HEATER Specification WALL- MOUNTING THE HEATER
Choose a suitable location for the
4. Attach the appliance on the wall. To
heater, taking into account the safety
do so, hold it in such way that the
Wall-mounting
instructions above.
slots are facing the brackets; insert
Insert the plug of the heater into a
the appliance halfway onto the
suitable socket.
brackets until the appliance can go
Turn the thermostat knob fully in a
down into the grooves of the
A
B
clockwise direction to the maximum
brackets.
setting.
5. As soon as the appliance is
Turn on the heating elements by means
positioned correctly, take a pencil
of the rocker switches on the side panel.
and mark a dot in the hole of each
When the heating elements are on the
bracket situated underneath the
switches will illuminate. For maximum
appliance.
heat output both switches should be on.
6. Then take off the appliance by
When the desired room temperature has
proceeding the other way around
417
been reached, the thermostat knob
compared to point 4 above.
X 2
should be turned slowly anti-clockwise
7. Drill a hole in the wall on each dot
until the thermostat is heard to click off
you just marked and insert a plug
and the lights on the element switches
in each hole.
are seen to go out. After this the heater
8. Attach the appliance back on the
will keep the air temperature in the
wall as indicated in point 4, insert
room at the set temperature by
screws through the brackets
switching on and off automatically.
underneath the appliance and
C
CLEANING THE HEATER
Always un-plug the heater from the
wall socket and allow it to cool down
before cleaning.
Clean the outside of the heater by
wiping with a damp cloth and buff
with a dry cloth.
Do not use any detergents or
abrasives and do not allow any water
to enter the heater.
STORING THE HEATER
tighten without forcing.
When the heater is not used for long
periods of time it should be protected
A. Handle
Specification
from dust and stored in a clean dry
B. Control panel
Rated power: 2000W
place.
1. Power selector
Working voltage: 220-230 V
2. Thermostat knob
Working frequency: 50 Hz
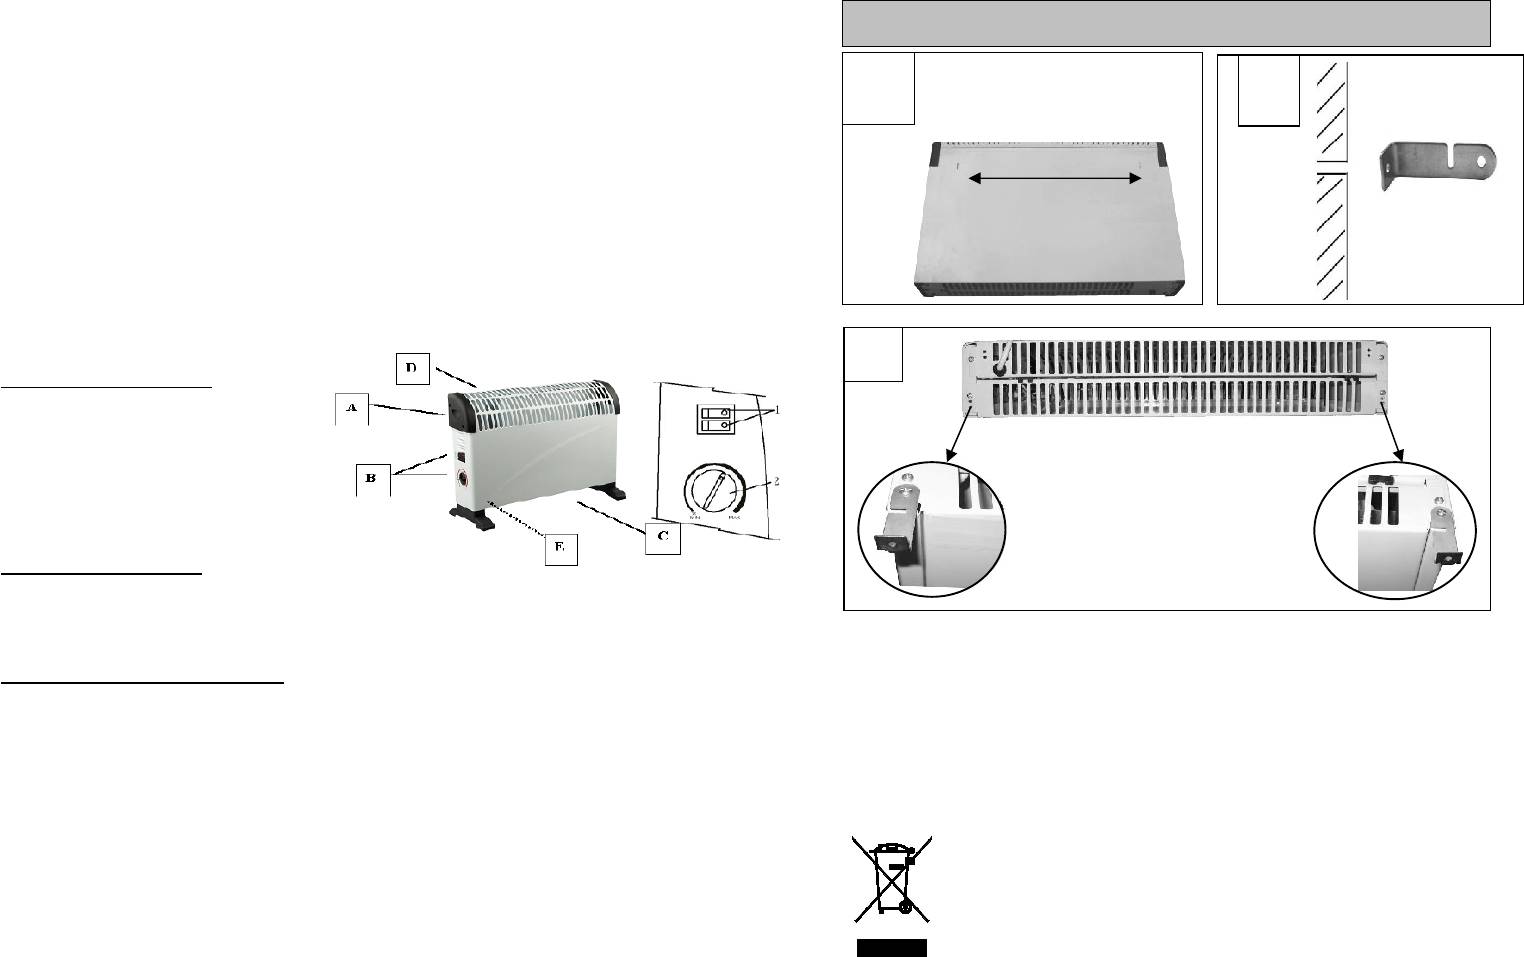
WALL- MOUNTING THE HEATER
C. Feet
Rated current: 9 A
D. Air inlet grid
Set
Caution: - there should be a distance of
E. Air outlet grid
Body of convector. .......1pc
at least 40 cm between the lower part
Feet. ..........................1set
of the appliance and the floor.
Self-tapping screws . ....4pc
- the feet must be removed before
Instruction manual with
mounting the appliance on the wall
warranty book . ...........1pc
Package . ...................1pc
1. Measure the distance between the
two slots situated at the back of the
Environment friendly
appliance (see picture A)
disposal
2. Drill two holes at the same distance
in the wall and insert a plug in each
You can help protect the
hole you just drilled. Place the
environment!
brackets facing the holes as
Please remember to
indicated on picture B and attach
respect the local
them in this position with the
regulations: hand in the
screws supplied.
non-working electrical
3. Before attaching the appliance on
equipments to an
the brackets, attach the two other
appropriate waste disposal centre.
brackets underneath the appliance
as indicated on picture C.
The manufacturer reserves the right to
change the specification and design of
goods.
4
5


