Motorola XPR 7350 – page 2
Manual for Motorola XPR 7350
NKP_EMEA.book Page 13 Monday, July 2, 2012 3:50 PM
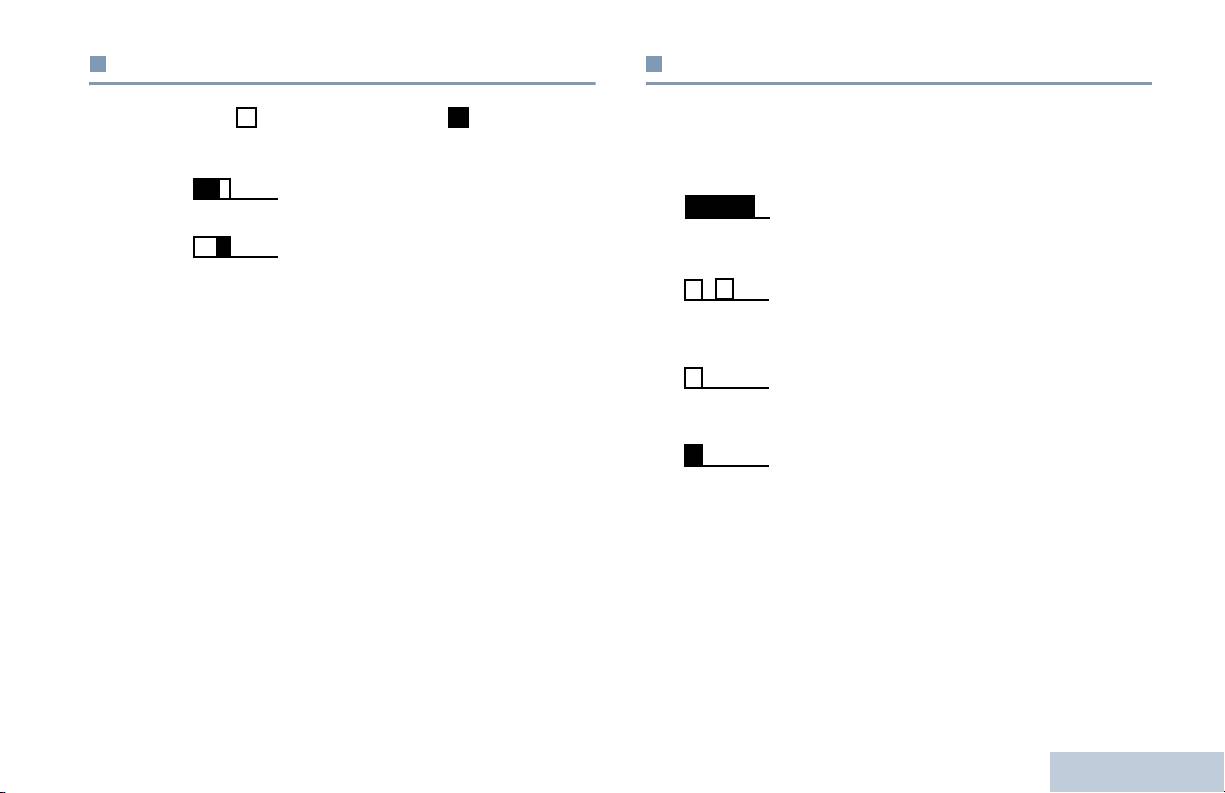
Indicator Tones
Audio Tones
Identifying Status Indicators
Alert tones provide you with audible indications of the radio’s
High pitched tone Low pitched tone
status or the radio’s response to data received.
Positive Indicator Tone
Continuous Tone A monotone sound. Sounds
continuously until termination.
Negative Indicator Tone
Periodic Tone Sounds periodically depending on the
duration set by the radio. Tone starts,
stops, and repeats itself.
Repetitive Tone A single tone that repeats itself until it is
terminated by the user.
Momentary Tone Sounds only once for a short period of
time defined by the radio.
13
English
NKP_EMEA.book Page 14 Monday, July 2, 2012 3:50 PM
You hear a negative indicator tone, indicating the radio has
Receiving and Making Calls
switched from Zone 2 to Zone 1.
Once you understand how your MOTOTRBO Portable is
configured, you are ready to use your radio.
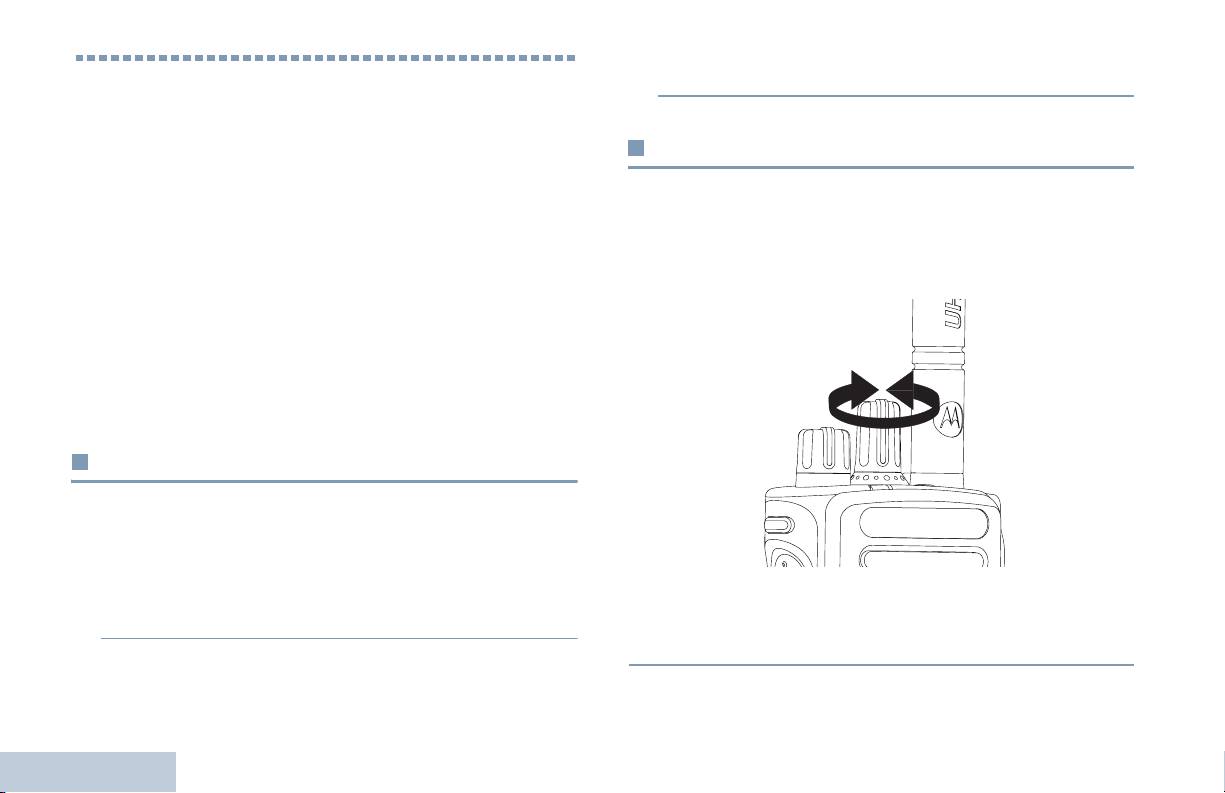
Selecting a Channel
Use this navigation guide to familiarize yourself with the basic
Transmissions are sent and received on a channel. Depending
Call features:
on your radio's configuration, each channel may have been
Selecting a Zone . . . . . . . . . . . . . . . . . . . . . . . . . . . . . page 14
programmed differently to support different groups of users or
Selecting a Radio Channel, Subscriber ID,
supplied with different features. After selecting the required
or Group ID . . . . . . . . . . . . . . . . . . . . . . . . . . . . . . . page 14
zone, select the channel you require to transmit or receive on.
Receiving and Responding to a Radio Call. . . . . . . . . page 15
Making a Radio Call . . . . . . . . . . . . . . . . . . . . . . . . . . page 18
Stopping a Radio Call . . . . . . . . . . . . . . . . . . . . . . . . . page 21
Talkaround . . . . . . . . . . . . . . . . . . . . . . . . . . . . . . . . . page 21
Monitoring Features . . . . . . . . . . . . . . . . . . . . . . . . . . page 22
Selecting a Zone
A zone is a group of channels. Your radio supports up to 32
channels and 2 zones, with a maximum of 16 channels per
zone.
Procedure:
Procedure:
1 Press the programmed Zone button.
Turn the Channel Selector Knob to select the channel with
Receiving and Making Calls
the active group alias or ID.
2 You hear a positive indicator tone, indicating the radio has
switched from Zone 1 to Zone 2.
OR
14
English
NKP_EMEA.book Page 15 Monday, July 2, 2012 3:50 PM
Receiving and Responding to a Radio Call
Receiving and Responding to a Group Call
To receive a call made to a group of users, your radio must be
Receiving and Making Calls
Once the channel, subscriber ID, or group ID is set, you can
configured as part of that group.
proceed to receive and respond to calls.
Procedure:
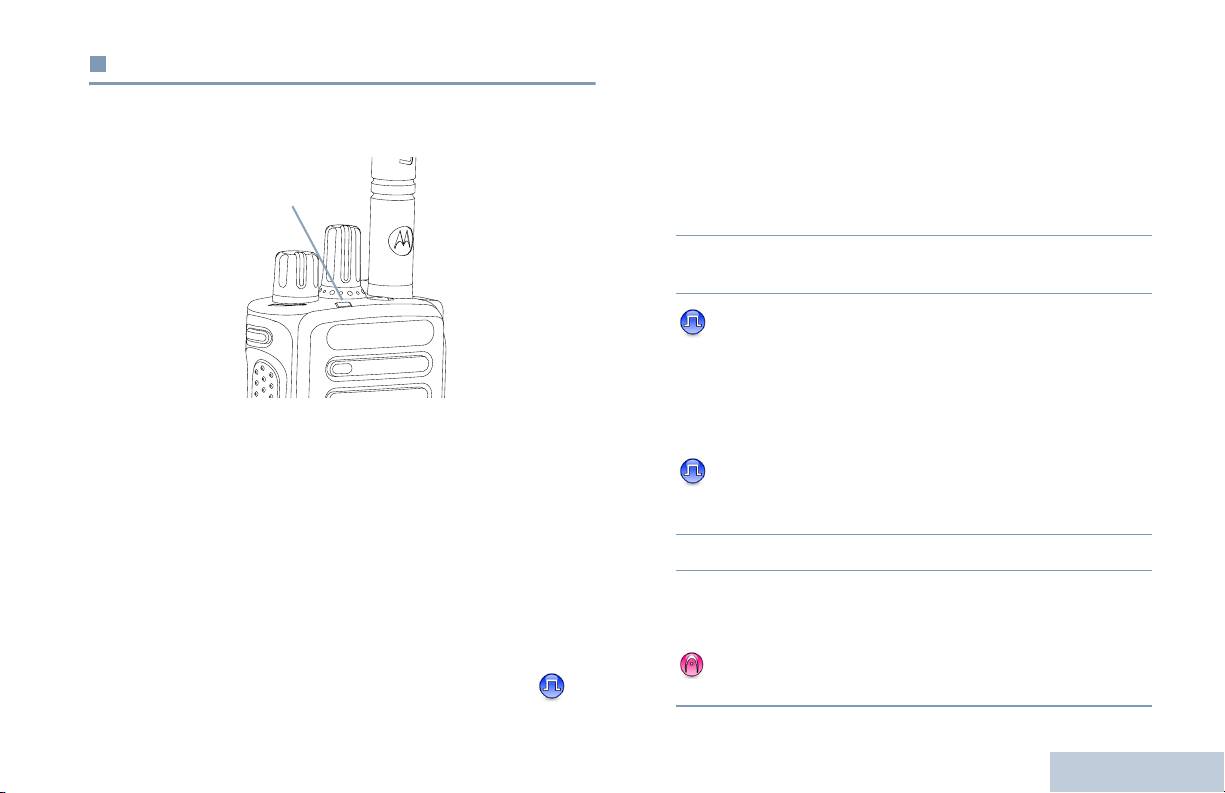
LED Indicator
1 The LED blinks green. Your radio unmutes and the incoming
call sounds through the radio's speaker.
2 To respond, hold the radio vertically 1 to 2 inches (2.5 to 5.0
cm) from your mouth.
3 If the Channel Free Indication feature is enabled, you
hear a short alert tone the moment the transmitting radio
releases the PTT button, indicating the channel is free for
you to respond.
The LED lights up solid green while the radio is transmitting and
Press the PTT button to respond to the call.
OR
blinks when the radio is receiving.
NOTE: The LED lights up solid green while the radio is
If the Voice Interrupt feature is enabled, press the PTT
transmitting and double blinks green when the radio is
button to stop the current call from the transmitting radio and
receiving a privacy-enabled call.
free the channel for you to talk/respond.
4 The LED lights up solid green.
To unscramble a privacy-enabled call, your radio
must have the same Privacy Key, OR the same Key
5 Wait for the Talk Permit Tone to finish (if enabled) and speak
Value and Key ID (programmed by your dealer) as
clearly into the microphone.
the transmitting radio (the radio you are receiving
OR
the call from).
Wait for the PTT Sidetone to finish (if enabled) and
See Privacy on page 31 for more information.
speak clearly into the microphone.
15
English

NKP_EMEA.book Page 16 Monday, July 2, 2012 3:50 PM
6 Release the PTT button to listen.
4 Press the PTT button to respond to the call. The LED lights
up solid green.
7 If there is no voice activity for a predetermined period of
time, the call ends.
5 Wait for the Talk Permit Tone to finish (if enabled) and speak
clearly into the microphone.
See Making a Group Call on page 18 for details on making a
6 Release the PTT button to listen.
Group Call.
7 If there is no voice activity for a predetermined period of
Receiving and Responding to a Private Call
time, the call ends.
A Private Call is a call from an individual radio to another
8 You hear a short tone.
individual radio.
See Making a Private Call on page 19 for details on making a
Procedure:
Private Call.
When you receive a Private Call:
1 The LED blinks green. Your radio unmutes and the incoming
call sounds through the radio's speaker.
2 To respond, hold the radio vertically 1 to 2 inches (2.5 to 5.0
cm) from your mouth.
3 If the Channel Free Indication feature is enabled, you hear a
short alert tone the moment the transmitting radio releases
the PTT button, indicating the channel is free for you to
respond.
OR
If the Voice Interrupt feature is enabled, press the PTT
Receiving and Making Calls
button to stop the current call from the transmitting radio and
free the channel for you to talk/respond.
16
English

NKP_EMEA.book Page 17 Monday, July 2, 2012 3:50 PM
See Making a Selective Call on page 19 for details on making
Receiving and Responding to a Selective Call
a Selective Call.
A Selective Call is a call from an individual radio to another
Receiving and Making Calls
individual radio. It is a Private Call on an analog system.
Receiving an All Call
Procedure:
An All Call is a call from an individual radio to every radio on the
channel. It is used to make important announcements requiring
When you receive a Selective Call:
the user’s full attention.
1 The LED blinks green.
Procedure:
2 Hold the radio vertically 1 to 2 inches (2.5 to 5.0 cm) from
When you receive an All Call:
your mouth. Your radio unmutes and the incoming call
1 A tone sounds and the LED blinks green. Your radio
sounds through the radio's speaker.
unmutes and the incoming call sounds through the radio's
3 If the Channel Free Indication feature is enabled, you hear a
speaker.
short alert tone the moment the transmitting radio releases
2 If there is no voice activity for a predetermined period of
the PTT button, indicating the channel is free for you to
time, the All Call ends. An All Call does not wait for a
respond.
predetermined period of time before ending.
4 Press the PTT button to respond to the call. The LED lights
If the Channel Free Indication feature is enabled, you
up solid green.
hear a short alert tone the moment the transmitting radio
5 Wait for the Talk Permit Tone to finish (if enabled) and speak
releases the PTT button, indicating the channel is now
clearly into the microphone.
available for use.
6 Release the PTT button to listen.
You cannot respond to an All Call.
7 If there is no voice activity for a predetermined period of
NOTE: The radio stops receiving the All Call if you switch to a
time, the call ends.
different channel while receiving the call.
During an All Call, you are not able to use any
8 You hear a short tone.
programmed button functions until the call ends.
17
English

NKP_EMEA.book Page 18 Monday, July 2, 2012 3:50 PM
Procedure:
Making a Radio Call
1 Select the channel with the active group alias or ID. See
After selecting your channel, you can select a subscriber alias
Selecting a Channel on page 14.
or ID, or group alias or ID by using:
OR
Press the programmed One Touch Access button.
• The Channel Selector Knob
2 Hold the radio vertically 1 to 2 inches (2.5 to 5.0 cm) from
• A programmed One Touch Access button
your mouth.
3 Press the PTT button to make the call. The LED lights up
NOTE: Your radio must have the Privacy feature enabled on
solid green.
the channel to send a privacy-enabled transmission.
Only target radios with the same Privacy Key OR the
4 Wait for the Talk Permit Tone to finish (if enabled) and speak
same Key Value and Key ID as your radio are able to
clearly into the microphone.
unscramble the transmission.
OR
See Privacy on page 31 for more information.
Wait for the PTT Sidetone to finish (if enabled) and
speak clearly into the microphone.
The One Touch Access feature allows you to make a
5 Release the PTT button to listen. When the target radio
Group or Private Call to a predefined ID easily. This
feature can be assigned to a short or long
responds, the LED blinks green.
programmable button press.You can ONLY have one
6 If the Channel Free Indication feature is enabled, you hear a
ID assigned to a One Touch Access button. Your
short alert tone the moment the target radio releases the
radio can have multiple One Touch Access buttons
PTT button, indicating the channel is free for you to respond.
programmed.
Press the PTT button to respond.
OR
Making a Call with the Channel Selector Knob
If there is no voice activity for a predetermined period of
Receiving and Making Calls
Making a Group Call
time, the call ends.
To make a call to a group of users, your radio must be
configured as part of that group.
18
English

NKP_EMEA.book Page 19 Monday, July 2, 2012 3:50 PM
4 Wait for the Talk Permit Tone to finish (if enabled) and speak
Making a Private Call
clearly into the microphone.
Receiving and Making Calls
While you can receive and/or respond to a Private Call initiated
5 Release the PTT button to listen. When the target radio
by an authorized individual radio, your radio
responds, the LED blinks green.
must be programmed for you to initiate a Private Call.
6 If the Channel Free Indication feature is enabled, you hear a
There are two types of Private Calls. The first type, where a
short alert tone the moment the target radio releases the
radio presence check is performed prior to setting up the call,
PTT button, indicating the channel is free for you to respond.
while the other sets up the call immediately.
Press the PTT button to respond.
Only one of these call types can be programmed to your radio
OR
by your dealer.
If there is no voice activity for a predetermined period of
time, the call ends.
You hear a negative indicator tone, when you make a Private
Call via the One Touch Access button or the Channel
7 You hear a short tone.
Selector Knob, if this feature is not enabled.
Use the Quick Text Message or Call Alert features to contact an
Making a Selective Call
individual radio. See Text Messaging Features on page 30 or
Just like a Private Call, while you can receive and/or respond to
Call Alert Operation on page 26 for more information.
a Selective Call initiated by an authorized individual radio, your
Procedure:
radio must be programmed for you to initiate a Selective Call.
1 Select the channel with the active group alias or ID. See
Procedure:
Selecting a Channel on page 14.
1 Select the channel with the active group alias or ID. See
OR
Selecting a Channel on page 14.
Press the programmed One Touch Access button.
2 Hold the radio vertically 1 to 2 inches (2.5 to 5.0 cm) from
2 Hold the radio vertically 1 to 2 inches (2.5 to 5.0 cm) from
your mouth.
your mouth.
3 Press the PTT button to make the call. The LED lights up
3 Press the PTT button to make the call. The LED lights up
solid green.
solid green.
19
English

NKP_EMEA.book Page 20 Monday, July 2, 2012 3:50 PM
4 Wait for the Talk Permit Tone to finish (if enabled) and speak
4 Wait for the Talk Permit Tone to finish (if enabled) and speak
clearly into the microphone.
clearly into the microphone.
OR
5 Release the PTT button to listen. When the target radio
responds, the LED blinks green.
Wait for the PTT Sidetone to finish (if enabled) and
speak clearly into the microphone.
6 If the Channel Free Indication feature is enabled, you hear a
short alert tone the moment the target radio releases the
Users on the channel cannot respond to an All Call.
PTT button, indicating the channel is free for you to respond.
Press the PTT button to respond.
OR
If there is no voice activity for a predetermined period of
time, the call ends.
7 You hear a short tone.
Making an All Call
This feature allows you to transmit to all users on the channel.
Your radio must be programmed to allow you to use this feature.
Procedure:
1 Select the channel with the active group alias or ID. See
Selecting a Channel on page 14.
2 Hold the radio vertically 1 to 2 inches (2.5 to 5.0 cm) from
your mouth.
3 Press the PTT button to make the call. The LED lights up
Receiving and Making Calls
solid green.
20
English

NKP_EMEA.book Page 21 Monday, July 2, 2012 3:50 PM
Talkaround
Stopping a Radio Call
Receiving and Making Calls
You can continue to communicate when your repeater is not
This feature allows you to stop an ongoing Group or Private Call
operating, or when your radio is out of the repeater’s range but
to free the channel for transmission. For example, when a radio
within talking range of other radios. This is called “talkaround”.
experiences a “stuck microphone” condition where the PTT
button is inadvertently pressed by the user.
NOTE: This feature is not applicable in Capacity Plus and
Linked Capacity Plus.
Your radio must be programmed to allow you to use this feature.
Procedure:
Procedure:
While on the required channel:
1 Press the programmed Repeater/Talkaround button.
1 Press the programmed Transmit Interrupt Remote Dekey
2 You hear a positive indicator tone, indicating the radio is in
button.
Talkaround mode.
2 Wait for acknowledgment.
OR
You hear a negative indicator tone, indicating the radio is in
3 The radio sounds a positive indicator tone, indicating that
Repeater mode.
the channel is now free.
OR
The Talkaround setting is retained even after powering down.
The radio sounds a negative indicator tone, indicating that
the radio is unable to free the channel.
Your radio sounds a negative indicator tone until you release
the PTT button, if it is transmitting an interruptible call that is
stopped via this feature. On an interrupted radio with a display,
the display shows
Call Interrupted
.
21
English

NKP_EMEA.book Page 22 Monday, July 2, 2012 3:50 PM
Monitoring Features
Permanent Monitor
Use the Permanent Monitor feature to continuously monitor a
Monitoring a Channel
selected channel for activity.
Use the Monitor feature to make sure a channel is free before
NOTE: This feature is not applicable in Capacity Plus and
transmitting.
Linked Capacity Plus.
NOTE: This feature is not applicable in Capacity Plus and
Procedure:
Linked Capacity Plus.
1 Press the programmed Permanent Monitor button.
Procedure:
2 Radio sounds alert tone, and the LED lights up solid yellow.
1 Press and hold the programmed Monitor button and listen
3 Press the programmed Permanent Monitor button to
for activity.
remove the radio from permanent monitor mode.
2 You hear radio activity or total silence, depending on how
4 Radio sounds an alert tone and the LED turns off.
your radio is programmed.
3 When you hear “white noise” (that is, the channel is free),
press the PTT button to talk and release it to listen. The LED
lights up solid yellow.
Receiving and Making Calls
22
English

NKP_EMEA.book Page 23 Monday, July 2, 2012 3:50 PM
Scan Lists
Advanced Features
Advanced Features
Scan lists are created and assigned to individual channels/
Use this navigation guide to learn more about advanced
groups. Your radio scans for voice activity by cycling through the
features available with your radio:
channel/group sequence specified in the scan list for the current
Scan Lists . . . . . . . . . . . . . . . . . . . . . . . . . . . . . . . . . . page 23
channel.
Scan . . . . . . . . . . . . . . . . . . . . . . . . . . . . . . . . . . . . . . page 24
Your radio supports up to 250 scan lists, with a maximum of 16
Call Indicator Settings . . . . . . . . . . . . . . . . . . . . . . . . . page 26
members in a list. Each scan list shall support a mixture of both
Call Alert Operation . . . . . . . . . . . . . . . . . . . . . . . . . . . page 26
analog and digital entries.
Emergency Operation . . . . . . . . . . . . . . . . . . . . . . . . . page 27
NOTE: This feature is not applicable in Capacity Plus and
Text Messaging Features . . . . . . . . . . . . . . . . . . . . . . page 30
Linked Capacity Plus.
Privacy. . . . . . . . . . . . . . . . . . . . . . . . . . . . . . . . . . . . . page 31
Multi-Site Controls . . . . . . . . . . . . . . . . . . . . . . . . . . . . page 32
Lone Worker . . . . . . . . . . . . . . . . . . . . . . . . . . . . . . . . page 33
Password Lock Features. . . . . . . . . . . . . . . . . . . . . . . page 33
Bluetooth . . . . . . . . . . . . . . . . . . . . . . . . . . . . . . . . . . . page 34
Utilities. . . . . . . . . . . . . . . . . . . . . . . . . . . . . . . . . . . . . page 36
23
English

NKP_EMEA.book Page 24 Monday, July 2, 2012 3:50 PM
Scan
Starting and Stopping Scan
Procedure:
When you start a scan, your radio cycles through the
programmed scan list for the current channel looking for voice
1 Press the programmed Scan button.
activity.
OR
Use the Channel Selector Knob to select a channel with
The LED blinks yellow.
Auto Scan enabled.
During a dual mode scan, if you are on a digital channel, and
2 When Scan is enabled, the LED blinks yellow and you hear
your radio locks onto an analog channel, it automatically
a positive indicator tone.
switches from digital mode to analog mode for the duration of
OR
the call. This is also true for the reverse.
When Scan is disabled, the LED turns off and you hear a
There are two types of scans:
negative indicator tone.
• Main Channel Scan (Manual): Your radio scans all the
channels/groups in your scan list. On entering scan, your
Responding to a Transmission During a Scan
radio may – depending on the settings – automatically start
During scanning, your radio stops on a channel/group where
on the last scanned “active” channel/group or on the channel
activity is detected. The radio stays on that channel for a
where scan was initiated.
programmed time period known as “hang time”.
• Auto Scan (Automatic): Your radio automatically starts
Procedure:
scanning when you select a channel/group that has Auto
Scan enabled.
1 Hold the radio vertically 1 to 2 inches (2.5 to 5.0 cm) from
NOTE: This feature is not applicable in Capacity Plus and
your mouth.
Linked Capacity Plus.
If the Channel Free Indication feature is enabled, you
hear a short alert tone the moment the transmitting radio
releases the PTT button, indicating the channel is free for
Advanced Features
you to respond.
24
English

NKP_EMEA.book Page 25 Monday, July 2, 2012 3:50 PM
2 Press the PTT button during hang time. The LED lights up
Restoring a Nuisance Channel
solid green.
Procedure:
Advanced Features
3 Wait for the Talk Permit Tone to finish (if enabled) and speak
To restore the deleted nuisance channel, do one of the
clearly into the microphone.
following:
OR
• Turn the radio off and power it on again, OR
Wait for the PTT Sidetone to finish (if enabled) and
• Stop and restart a scan via the programmed Scan button, OR
speak clearly into the microphone.
• Change the channel via the Channel Selector Knob.
4 Release the PTT button to listen.
5 If you do not respond within the hang time, the radio returns
to scanning other channels/groups.
Vote Scan
Vote Scan provides you with wide area coverage in areas where
Deleting a Nuisance Channel
there are multiple base stations transmitting identical
If a channel continually generates unwanted calls or noise
information on different analog channels.
(termed a “nuisance” channel), you can temporarily remove the
Your radio scans analog channels of multiple base stations and
unwanted channel from the scan list.
performs a voting process to select the strongest received
This capability does not apply to the channel designated as the
signal. Once that is established, your radio unmutes to
Selected Channel.
transmissions from that base station.
Procedure:
The LED blinks yellow during the Vote Scan operation.
1 When your radio “locks on to” an unwanted or nuisance
To respond to a transmission during a Vote Scan, follow the
channel, press the programmed Nuisance Channel Delete
same procedures as Responding to a Transmission During a
button until you hear a tone.
Scan on page 24.
2 Release the Nuisance Channel Delete button. The
nuisance channel is deleted.
25
English

NKP_EMEA.book Page 26 Monday, July 2, 2012 3:50 PM
Call Indicator Settings
Making a Call Alert with the One Touch Access
Button
You can turn on or off the ringing tones for a received Private
Call (see Turning Radio Tones/Alerts On or Off on page 37).
Procedure:
1 Press the programmed One Touch Access button to make
Escalating Alarm Tone Volume
a Call Alert to the predefined ID.
Your radio can be programmed by your dealer to continually
2 The LED lights up solid green when your radio is sending
alert you when a radio call remains unanswered. This is done
the Call Alert.
by automatically increasing the alarm tone volume over time.
3 If the Call Alert acknowledgement is received, two chirps
This feature is known as Escalert.
sound.
OR
Call Alert Operation
If the Call Alert acknowledgement is not received, a
low-pitched tone sounds.
Call Alert paging enables you to alert a specific radio user to call
you back when they are able to do so. This feature is accessible
via a programmed One Touch Access button.
Receiving and Responding to a Call Alert
Procedure:
When you receive a Call Alert page:
1 You hear a repetitive tone. The LED blinks yellow.
2 Press the PTT button within four (4) seconds of receiving a
Advanced Features
Call Alert page to respond to the Private Call.
26
English

NKP_EMEA.book Page 27 Monday, July 2, 2012 3:50 PM
In addition, each alarm has the following types:
Emergency Operation
• Regular – Radio transmits an alarm signal and shows audio
Advanced Features
An Emergency Alarm is used to indicate a critical situation. You
and/or visual indicators.
are able to initiate an Emergency at any time, in any state, even
• Silent – Radio transmits an alarm signal without any audio or
when there is activity on the current channel.
visual indicators. Radio receives calls without any sound
Your dealer can set the duration of a button press for the
through the radio’s speaker, until you press the PTT button to
programmed Emergency button, except for long press, which is
initiate the call.
similar with all other buttons:
• Silent with Voice – Radio transmits an alarm signal without
• Short press – Between 0.05 seconds and 0.75 seconds
any audio or visual indicators, but allow incoming calls to
sound through the radio’s speaker.
• Long press – Between 1.00 second and 3.75 seconds
Only one of the Emergency Alarms above can be assigned to
The Emergency button is assigned with the Emergency On/Off
the programmed Emergency button.
feature. Check with your dealer for the assigned operation of
the Emergency button.
Sending an Emergency Alarm
If short press the Emergency button is assigned to turn on the
This feature allows you to send an Emergency Alarm, a non-
Emergency mode, then long press the Emergency button is
voice signal, which triggers an alert indication on a group of
assigned to exit the Emergency mode.
radios.
If long press the Emergency button is assigned to turn on the
Procedure:
Emergency mode, then short press the Emergency button is
1 Press the programmed Emergency On button.
assigned to exit the Emergency mode.
2 The LED lights up solid green.
Your radio supports three Emergency Alarms:
3 When an Emergency Alarm acknowledgment is received,
• Emergency Alarm
the Emergency tone sounds. The LED blinks green.
OR
• Emergency Alarm with Call
If your radio does not receive an Emergency Alarm
• Emergency Alarm with Voice to Follow
27
English

NKP_EMEA.book Page 28 Monday, July 2, 2012 3:50 PM
acknowledgement, and after all retries have been
Wait for the PTT Sidetone to finish (if enabled) and
exhausted, a low-pitched tone sounds.
speak clearly into the microphone.
4 Radio exits the Emergency Alarm mode.
7 Release the PTT button to listen.
If your radio is set to Silent, it does not display any audio or
8 When the channel is free for you to respond, a short alert
visual indicators during Emergency mode.
tone sounds ( if the Channel Free Indication feature is
Sending an Emergency Alarm with Call
enabled). Press the PTT button to respond.
OR
This feature allows you to send an Emergency Alarm to a group
Once your call ends, press Emergency Off button to exit
of radios. Upon acknowledgement by a radio within the group,
the Emergency mode.
the group of radios can communicate over a programmed
Emergency channel.
If your radio is set to Silent, it does not display any audio or
visual indicators during Emergency mode, or allow any received
Procedure:
calls to sound through the radio’s speaker, until you press the
1 Press the programmed Emergency On button.
PTT button to initiate the call.
2 The LED lights up solid green.
If your radio is set to Silent with Voice, it does not display any
audio or visual indicators during Emergency mode, but allow
3 When an Emergency Alarm acknowledgment is received,
incoming calls to sound through the radio’s speaker. The
the Emergency tone sounds. The LED blinks green.
indicators only appear once you press the PTT button to initiate,
4 Hold the radio vertically 1 to 2 inches (2.5 to 5.0 cm) from
or respond to, the call.
your mouth.
Sending an Emergency Alarm with Voice to
5 Press the PTT button to make the call. The LED lights up
solid green.
Follow
Advanced Features
6 Wait for the Talk Permit Tone to finish (if enabled) and speak
This feature allows you to send an Emergency Alarm to a group
clearly into the microphone.
of radios. Your radio’s microphone is automatically activated,
OR
28
English

NKP_EMEA.book Page 29 Monday, July 2, 2012 3:50 PM
allowing you to communicate with the group of radios without
4 The radio automatically stops transmitting when:
pressing the PTT button.
Once the cycling duration between hot mic and receiving
Advanced Features
calls expires, if Emergency Cycle Mode is enabled.
This activated microphone state is also known as “hot mic”.
OR
If your radio has Emergency Cycle Mode enabled, repetitions of
Once the hot mic duration expires, if Emergency Cycle
hot mic and receiving period are made for a programmed
Mode is disabled.
duration.
5 To transmit again, press the PTT button.
NOTE: During Emergency Cycle Mode, received calls sound
OR
through the radio’s speaker.
Press the programmed Emergency Off button to exit the
Emergency mode.
If you press the PTT button during the programmed receiving
period, you will hear a prohibit tone, indicating that you should
If your radio is set to Silent, it does not display any audio or
release the PTT button. The radio ignores the PTT press and
visual indicators during Emergency mode, or allow any received
remains in Emergency mode.
calls to sound through the radio’s speaker, until the
NOTE: If you press the PTT button during hot mic, and
programmed hot mic transmission period is over, and you press
continue to press it after the hot mic duration expires,
the PTT button.
the radio continues to transmit until you release the
If your radio is set to Silent with Voice, it does not display any
PTT button.
audio or visual indicators during Emergency mode when you
Procedure:
are making the call with hot mic, but allow sound through the
radio’s speaker when the target radio responds after the
1 Press the programmed Emergency On button.
programmed hot mic transmission period is over. The indicators
2 The LED lights up solid green.
only appear when you press the PTT button.
3 Once a tone sounds, speak clearly into the microphone.
NOTE: If the Emergency Alarm request fails, the radio does
not retry to send the request, and enters the hot mic
When hot mic has been enabled, the radio automatically
state directly.
transmits without a PTT press until the hot mic duration
expires.
While transmitting, the LED lights up solid green.
29
English

NKP_EMEA.book Page 30 Monday, July 2, 2012 3:50 PM
Reinitiating an Emergency Mode
Text Messaging Features
NOTE: This feature is only applicable to the radio sending the
Emergency Alarm.
Sending a Quick Text Message
There are two instances where this can happen:
You can send Quick Text messages, programmed by your
• You change the channel while the radio is in Emergency
dealer, via the programmable button.
mode. This exits the Emergency mode. If Emergency Alarm is
enabled on this new channel, the radio reinitiates Emergency.
Procedure:
• You press the programmed Emergency On button during an
1 Press the programmed One Touch Access button to send
Emergency initiation/transmission state. This causes the
a predefined Quick Text message to a predefined ID.
radio to exit this state, and to reinitiate Emergency.
2 The LED lights up solid green.
Exiting an Emergency Mode
3 Two chirps indicate that the message is sent successfully.
NOTE: This feature is only applicable to the radio sending the
OR
Emergency Alarm.
A low-pitched tone indicates that the message cannot be
sent.
Your radio exits Emergency mode when one of the following
occurs:
• Emergency Alarm acknowledgement is received (for
Emergency Alarm only), OR
• An Emergency Exit Telegram is received, OR
• All retries to send the alarm have been exhausted, OR
• The Emergency Off button is pressed.
Advanced Features
NOTE: If your radio is powered off, it exits the Emergency
mode. The radio does not reinitiate the Emergency
mode automatically when it is turned on again.
30
English

NKP_EMEA.book Page 31 Monday, July 2, 2012 3:50 PM
The LED lights up solid green while the radio is transmitting and
Privacy
blinks green rapidly when the radio is receiving an ongoing
privacy-enabled transmission.
Advanced Features
If enabled, this feature helps to prevent eavesdropping by
unauthorized users on a channel by the use of a software-
NOTE: Some radio models may not offer this Privacy feature.
Check with your dealer or system administrator for
based scrambling solution. The signaling and user identification
more information.
portions of a transmission are not scrambled.
Procedure:
Your radio must have privacy enabled on the channel to send a
Press the programmed Privacy button to toggle privacy on or
privacy-enabled transmission, although this is not a necessary
off.
requirement for receiving a transmission. While on a privacy-
enabled channel, the radio is still able to receive clear
(unscrambled) transmissions.
Your radio supports two types of privacy:
• Basic Privacy
• Enhanced Privacy
Only ONE of the privacy types above can be assigned to the
radio.
To unscramble a privacy-enabled call or data transmission, your
radio must be programmed to have the same Privacy Key (for
Basic Privacy), OR the same Key Value and Key ID (for
Enhanced Privacy) as the transmitting radio.
If your radio receives a scrambled call that is of a different
Privacy Key, OR a different Key Value and Key ID, you will
either hear a garbled transmission (Basic Privacy) or nothing at
all (Enhanced Privacy).
31
English

NKP_EMEA.book Page 32 Monday, July 2, 2012 3:50 PM
Stopping an Automatic Site Search
Multi-Site Controls
When the radio is actively searching for a new site:
These features are applicable when your current radio channel
Procedure:
is part of an IP Site Connect or Linked Capacity Plus
configuration.
1 Press the programmed Site Lock On/Off button.
See IP Site Connect on page 10 and Linked Capacity Plus on
2 A tone sounds and the LED turns off.
page 11 for more details about these configurations.
Starting a Manual Site Search
Starting an Automatic Site Search
Procedure:
NOTE: The radio only scans for a new site if the current signal
is weak or when the radio is unable to detect any signal
1 Press the programmed Manual Site Roam button.
from the current site. If the RSSI value is strong, the
2 A tone sounds and the LED blinks green.
radio remains on the current site.
3 You hear a positive indicator tone and the LED turns off,
Procedure:
indicating the radio is locked on to a site.
1 Press the programmed Site Lock On/Off button.
OR
You hear a negative indicator tone and the LED turns off,
2 A tone sounds.
indicating the radio is unable to lock on to a site.
3 The LED blinks yellow rapidly when the radio is actively
searching for a new site, and turns off once the radio locks
on to a site.
The radio also performs an automatic site search (site is
unlocked) during a PTT button press or data transmission if
Advanced Features
the current channel, multi-site channel with an attached roam
list, is out of range.
32
English
