YUKON PHOTON: BATTERY INSTALLATION MOUNTING THE RIFLESCOPE EXTERNAL POWER SUPPLY STARTING THE SCOPE AND IMAGE SETUP
BATTERY INSTALLATION MOUNTING THE RIFLESCOPE EXTERNAL POWER SUPPLY STARTING THE SCOPE AND IMAGE SETUP: YUKON PHOTON
Table of contents
- SKU 26321 PACKAGE CONTENTS DESCRIPTION FEATURES
- COMPONENTS AND CONTROL ELEMENTS
- BATTERY INSTALLATION MOUNTING THE RIFLESCOPE EXTERNAL POWER SUPPLY STARTING THE SCOPE AND IMAGE SETUP
- ZEROING
- VIDEO OUT JACK TROUBLESHOOTING ACCESSORIES MAINTENANCE AND STORAGE
BATTERY INSTALLATION
-
+
MOUNTING THE RIFLESCOPE
Turn the knob (2) of the battery compartment
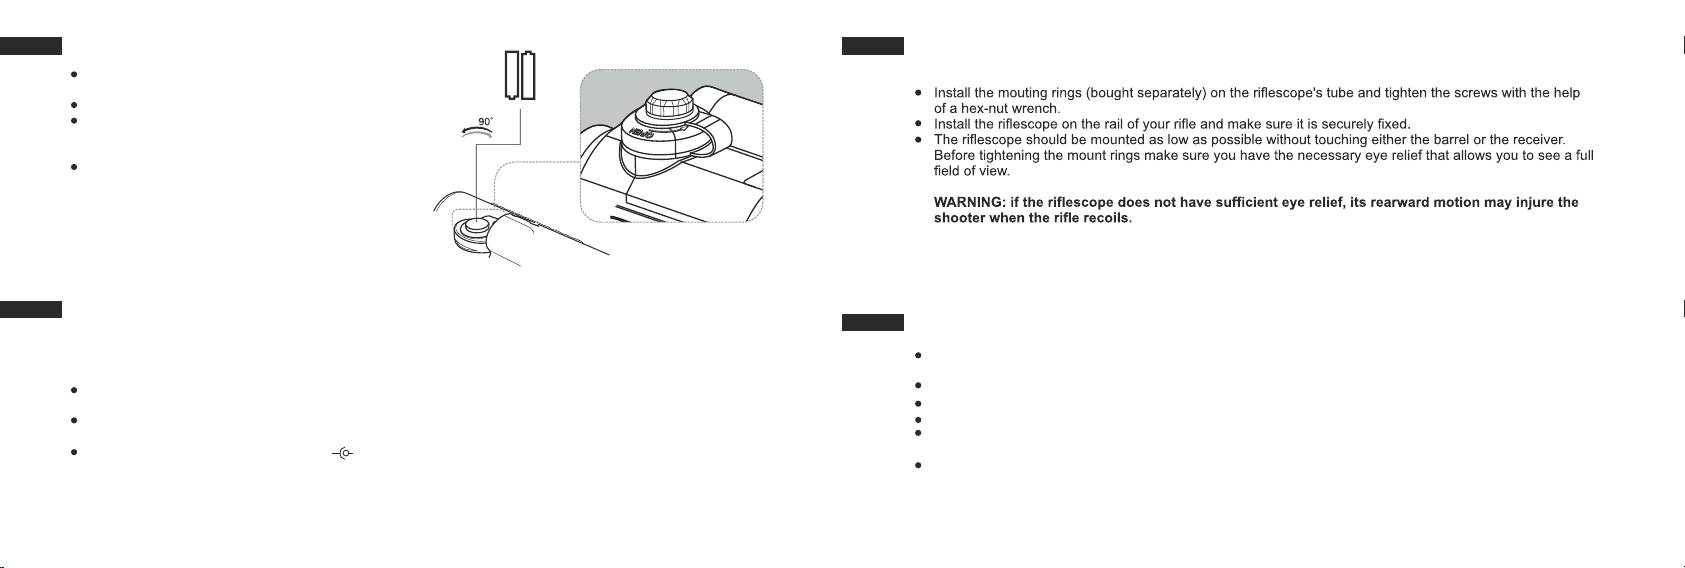
To ensure precise shooting the sight should be correctly mounted on a rifle. Please follow these steps:
cover 90° counterclockwise.
AA / 1.5 V
AA / 1.5 V
Remove the cover by raising it by its lug.
+
-
Slide in two АА batteries so that the “+” and “-”
match the polarity on the inner side of the cover;
rechargeable AA batteries may be used.
Close the cover of the battery compartment cover
and turn the knob (2) of the cover 90° clockwise.
Note: to ensure long and reliable operation it is
recommended that you use quality rechargeable
batteries with a capacity of at least 2500 mAh.
Please do not use batteries of different types or
batteries with various charge levels.
EXTERNAL POWER SUPPLY
STARTING THE SCOPE AND IMAGE SETUP
The riflescope can be powered with an external DC power supply (2.1mm pin) with stabilised voltage ranging
from 8.4V to 15V or a 12V vehicle socket.
Remove the cap (16) from the lens (14). The cap is outfitted with a light filter which reduces image brightness
in the daylight.
External power supply (AC/DC) is to be connected to “Power” (8) jack located on the right side of the
Turn on the riflescope by turning the wheel (9) clockwise until it clicks. A green LED indicator (3) will light up.
device.
Important! When the indicator changes its colour to red, please replace the batteries.
Note: the central pin of the power supply that you connect to the “power” jack of the riflescope, must have
Rotate the eyepiece adjustment ring (5) to see on the display a sharp image of the reticle.
marking “+”.
Rotate the wheel (9) to adjust brightness: clockwise – to increase brightness; counterclockwise – to decrease
The power supply may have marking -
+
brightness.
To switch on the illuminated reticle, set the knob (7) against corresponding mark on the housing showing one
Connection of an external power supply automatically cuts off power supply from batteries.
of the illumination levels (there are 11 levels). Reticle illumination is powered by a single CR2032 Lithium
External power supply DOES NOT charge the batteries in the riflescope!
battery. To replace the battery, unscrew the cover (6) of the knob counterclockwise and insert a new battery
Attention! We suggest that you use battery packs EPS3 or EPS5 ensuring up to 40 hours of continuous
with “+” facing upwards. Screw the cover.
operation.
5
6
