Pyramida N 60: INSTALLATION OF EXTRACTOR FAN TO THE WALL
INSTALLATION OF EXTRACTOR FAN TO THE WALL: Pyramida N 60
Table of contents
INSTALLATION OF EXTRACTOR FAN TO THE WALL
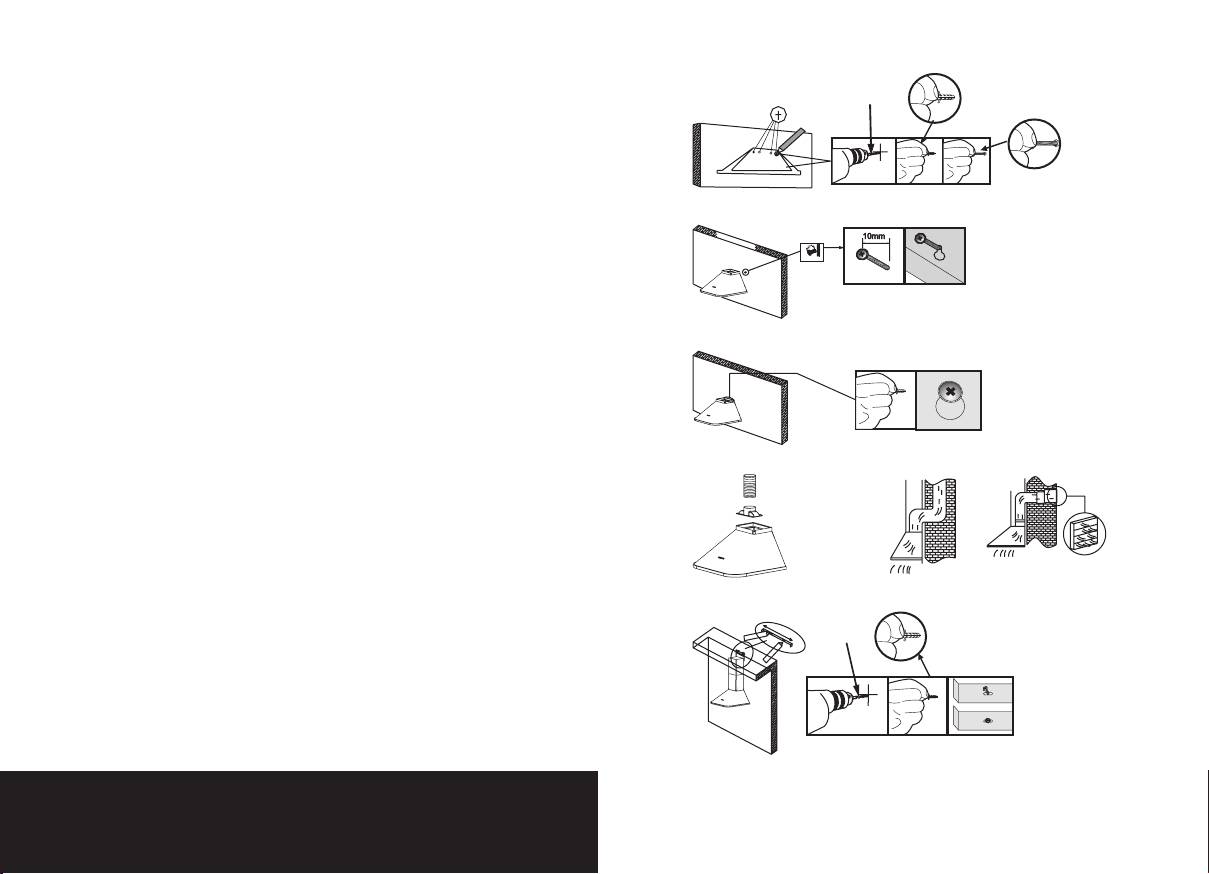
1. Prepare place on the wall for installation the extractor
Ø8 мм
fan, mark with the help of template that is available with.
According to the marking, prepare 4 openings in the wall
with the diameter of 8 mm. (Img. 1)
Img. 1
2. Put 4 self-drilling screws into the openings. Make sure that
visible part of screws, to which the extractor fan will be
hung, is not less than 10 mm. (Img. 2)
3. Install the fan in such a way that all 4 mounting holes
Img. 2
match 4 screws mounted into the wall. Attach the extractor
fan with its back surface to the wall, driving in first 2 upper
screws, then 2 lower. (Img. 3)
4. For outside air tapping it is easier to install flexible
Img. 3
corrugated air duct. Connect air duct and venting hole of
the fan with the help of adapter. Make sure that corrugated
pipe does not have nonstretched corrugations, as they
increase noise while fan running, cut off redundant part of
the duct. (Img. 4)
Img. 4 Рис. 5
5. Lead the other part of air duct to airshaft or outdoors
through exterior wall. Make sure there are no gaps in
Ø8 мм
junction. (Img. 5)
6. Install upper decorative box and fix it to the wall with the
keeper strip. (Img. 6)
Img. 6
EN
32
